How to Landscape a Yard: A Start-to-Finish Guide
Learn how to landscape a yard from scratch. Our guide covers everything from site analysis and AI design with OutdoorBrite to installation and maintenance.
It's a common starting point. Standing in the yard, one notices the patchy grass, the awkward slope, the muddy corner, the patio they meant to build last year, and then freezes because every decision seems connected to five others.
That feeling is normal. A good yard project has moving parts: drainage, layout, materials, plant choice, maintenance, and budget. The mistake isn't being unsure. The mistake is starting with plants or decor before the yard has a clear plan.
Experts in outdoor design don't guess their way through this. They use a sequence. That matters because yard design is no longer a niche side service. U.S. outdoor design services revenue is estimated at about $184.1 billion in 2025, with roughly 6.0% CAGR over the prior five years, showing how professionalized the work has become around design, irrigation, and maintenance methods that homeowners can borrow for DIY projects, as noted in this landscaping industry breakdown.
Your Guide to a Landscape You Love
You walk outside planning to fix one thing. Then the chain reaction starts. Shift the patio and water runs somewhere new. Add a tree and the seating area loses evening sun. Widen a bed and mowing gets slower every week.
That is why good yard work starts with order.
Break the project into phases you can control: vision, site prep, hardscape, planting, then care. That sequence saves money, cuts rework, and keeps you from making a nice-looking choice that causes a drainage or maintenance problem later.
Think in systems, not isolated upgrades
Every major change affects something else. A retaining wall changes runoff. New edging changes how you mow. Fresh turf changes irrigation needs and foot traffic patterns. Even a small fire pit can affect circulation, furniture placement, and how the space feels at night.
Start with function. Ask one clear question: how should this yard serve the people who use it?
Use that answer to set a few priorities:
- Daily use: sitting, grilling, play space, gardening, pets, or a cleaner path from the driveway to the door
- Style: modern, natural, cottage-inspired, low-water, or resort-like
- Maintenance: hands-on weekend work or a setup that stays presentable with basic upkeep
If you want more ideas on how seating, shade, materials, and comfort shape a finished backyard, this guide to premium outdoor living is worth a look.
Practical rule: Build the yard you will maintain in August, not the one that looks good on install day.
Use modern tools before you buy materials
Years ago, homeowners had rough sketches, magazine clippings, and a lot of guessing. I have seen where that leads. People order pavers that look too busy against the house, place beds where they block movement, or buy plants before they know how the whole yard fits together.
Tools like Outdoorbrite fix a big part of that problem. You can test ideas early, compare directions fast, and see the overall yard before you commit to stone, soil, lighting, or plant orders.
Old-school design principles still apply. Grade first. Respect sun and water. Match materials to the house. The difference now is speed and clarity. You no longer need design software or a paid mockup just to see whether an idea works.
That changes the job in a real way. Instead of hoping your choices come together, you can make decisions with a preview in hand and adjust before the expensive part starts.
Start with a Smart Vision Not Just a Sketch
The fastest way to waste money is to design from memory. Walk the yard with a notebook, your phone camera, stakes, and marking paint. Look for what the yard already tells you. Where water sits, where sun hits hardest, where you naturally enter and exit, and which views you'd rather hide.
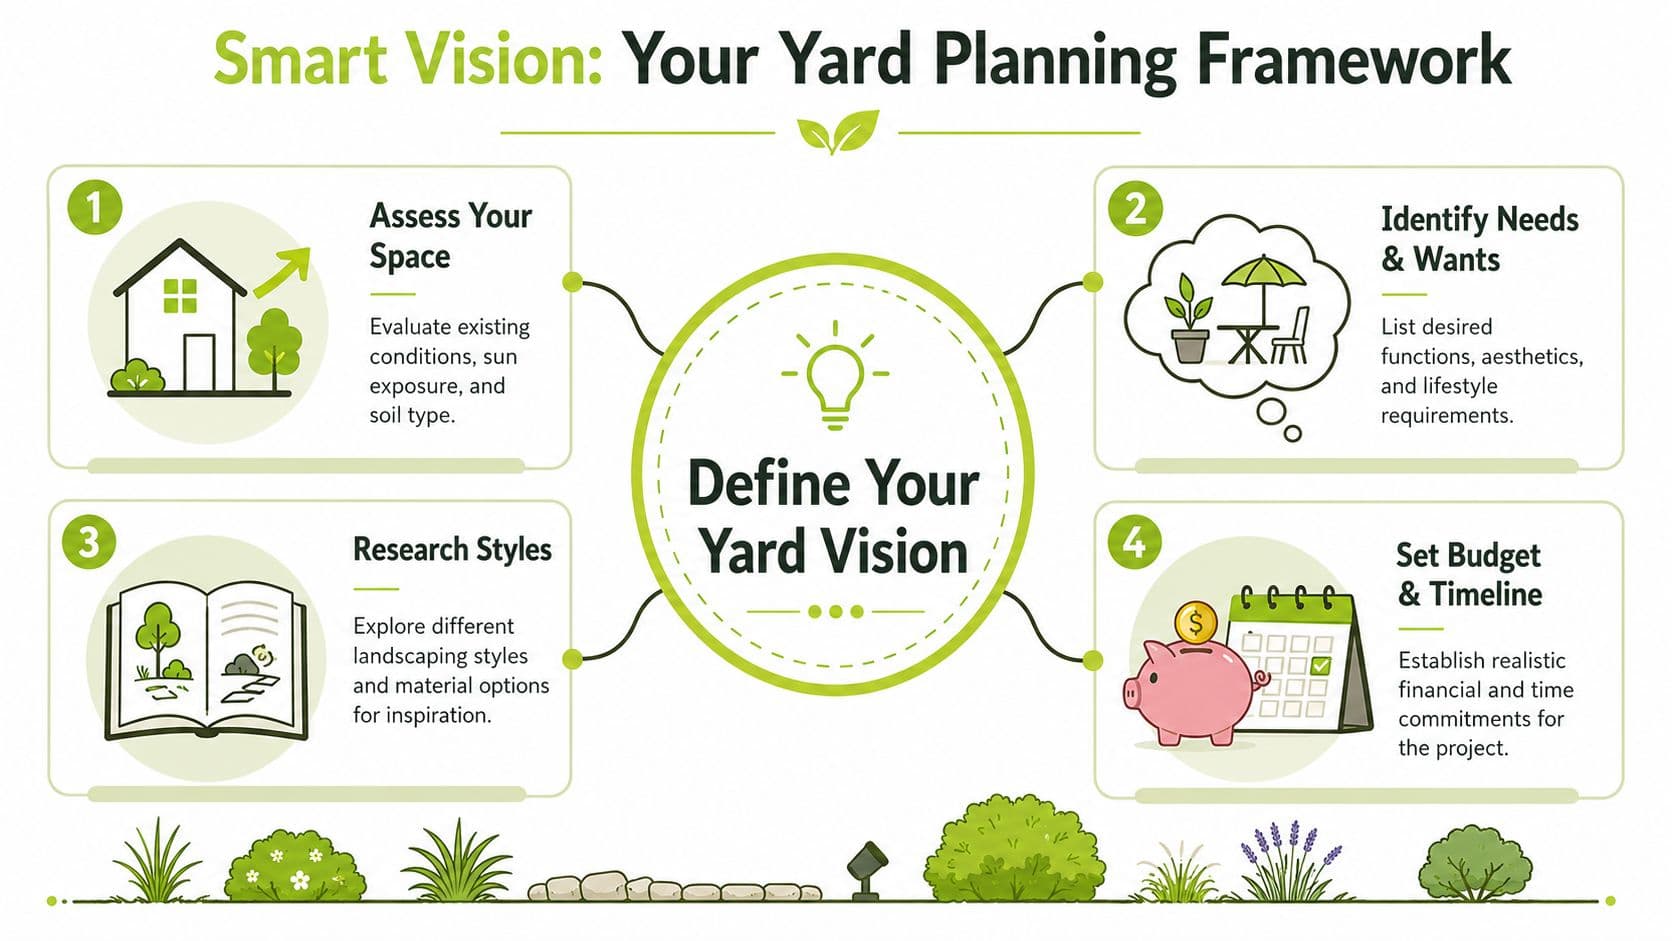
Build a simple site inventory
You don't need a formal survey for an early plan. You need a usable record of conditions.
Start with these:
- Sun and shade: Check the yard in the morning, midday, and late afternoon. A rough sun map is enough.
- Soil behavior: Notice whether water drains quickly, puddles, or leaves the soil sticky.
- Traffic paths: Watch where people already walk. Those desire lines usually belong in the final layout.
- Problem spots: Fence lines, exposed roots, low areas, harsh reflected heat near walls, and narrow side yards all affect design choices.
A yard usually has microclimates. The back corner that stays damp behaves differently than the strip against a hot patio. Treating them as one condition is how homeowners end up replacing the same plants every season.
Turn preferences into use zones
Once you've mapped conditions, assign jobs to parts of the yard. Here, abstract ideas become a plan.
A few common zones work well:
| Zone | Best use | What matters most |
|---|---|---|
| Near the house | Dining, lounging, grilling | Easy access, lighting, durable surface |
| Open central area | Lawn, play, flexible use | Drainage, clear circulation, visibility |
| Side yard or edges | Storage, utility, screening | Narrow planting, access, low mess |
| Back corners | Privacy seating, garden beds, compost | Sun exposure, maintenance tolerance |
This is also the point where style research becomes useful. If you want examples of how professionals think through layout and material choices in real residential projects, this Austin landscape design guide gives a helpful reference point.
A strong yard plan doesn't start with decoration. It starts with use, then solves for beauty inside that structure.
Handle slopes before they become expensive mistakes
Sloped and awkward yards frustrate people because generic advice rarely tells them what's realistic. In practice, the right move depends on the grade. On this sloped yard design guide, slopes under 15 degrees may be reshaped with earthwork, while slopes between 15 and 25 degrees often need terracing with retaining walls to create stable, usable flat space.
That changes the DIY decision.
- Mild slope: You may be able to regrade, soften transitions, and use planting to stabilize the area.
- Middle-range slope: Terracing often becomes a functional choice, not just a design preference.
- Awkward narrow yard: Keep circulation simple. Fewer curves usually build better and maintain better.
- Irregular shape: Use one clear focal area and let secondary spaces stay quiet.
Write a short design brief
Before you sketch anything, write one page that answers:
- What the yard needs to do.
- What problems must be fixed first.
- What you're willing to maintain.
- Which areas are DIY-friendly and which may need a pro.
That page is your filter. Every later decision should match it.
Visualize Your Future Yard Instantly with AI
Sketches are useful for layout. They're weak at answering the question homeowners always ask: what will this look like from my back door?
That gap is where AI design tools changed the process. Instead of trying to imagine mature planting, patio materials, or a different layout from a flat drawing, you can work from a real photo of your yard.
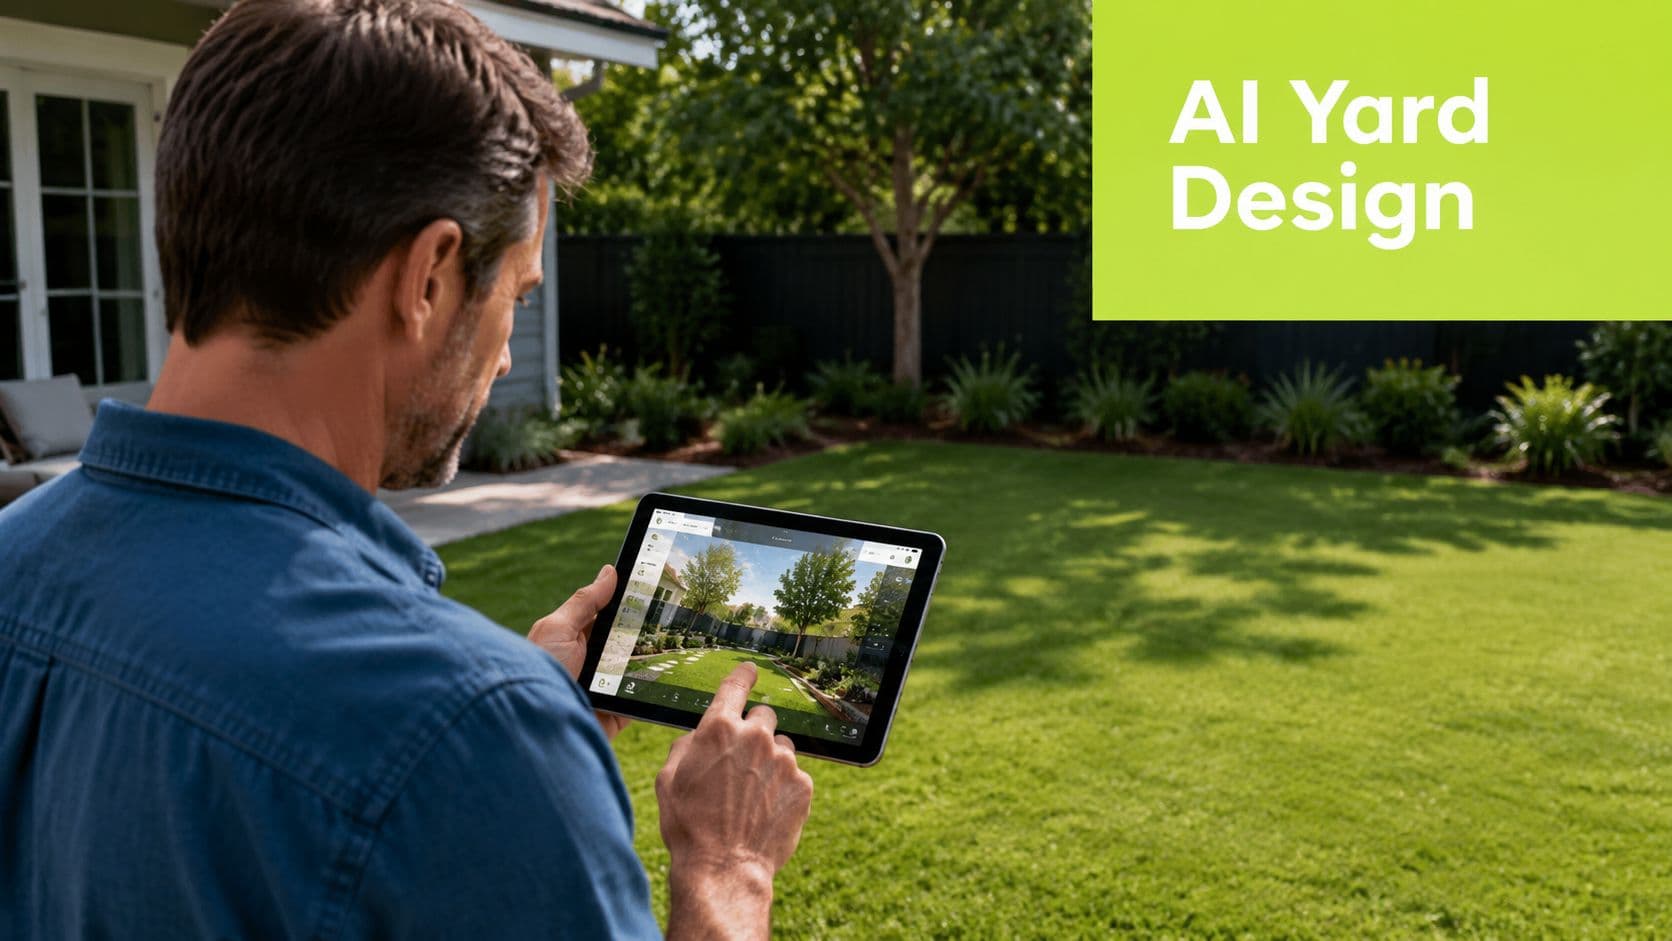
Use photos to test decisions before you build
The practical workflow is simple. Take a clear image of the space, choose a design direction, then compare outputs against your site notes. A modern layout may sharpen a small yard. A softer garden style may suit an older home. A more restrained palette may reduce maintenance.
One tool built for that is an ai landscape design generator. It lets you upload a yard photo, generate photorealistic concepts in different styles, and explore how patios, planting masses, furniture, and layout changes might look before any physical work starts.
That matters because most expensive yard mistakes happen before installation, not during it. People choose the wrong patio scale, place beds too close to circulation, overload a small space, or commit to a style that clashes with the house.
What AI is actually good for
Used well, AI isn't replacing judgment. It's speeding up the feedback loop.
It helps with:
- Style comparison: Clean modern versus lush layered planting.
- Material testing: Pavers, gravel, edging, mulch color, and furniture placement.
- Plant grouping: Seeing whether a massed look feels calm or crowded.
- Confidence: Narrowing options so you can move into pricing and construction with less second-guessing.
What it doesn't do is solve drainage, code issues, or exact construction detailing by itself. You still need real measurements and site logic.
Worth remembering: If a concept looks great on screen but fights your drainage, access, or maintenance reality, the yard will punish that decision later.
Use iteration, not inspiration alone
The best way to design a yard with AI is to generate several directions, then edit with discipline. Compare them against your written brief. Eliminate anything that adds needless complexity. Keep the version that fits both the yard and your habits.
A few things to watch for when reviewing concepts:
- Circulation pinch points: Paths should feel obvious, not squeezed.
- Overplanting: If every edge is packed, maintenance will rise fast.
- Scale mismatch: Large features can make a modest yard feel smaller.
- Missing utility space: Trash access, mower routes, hose paths, and gates still matter.
I'd rather see a homeowner test five ideas digitally than tear out one badly placed bed later. Visualization doesn't remove all risk, but it catches the kind of mistakes that are hard to spot on paper.
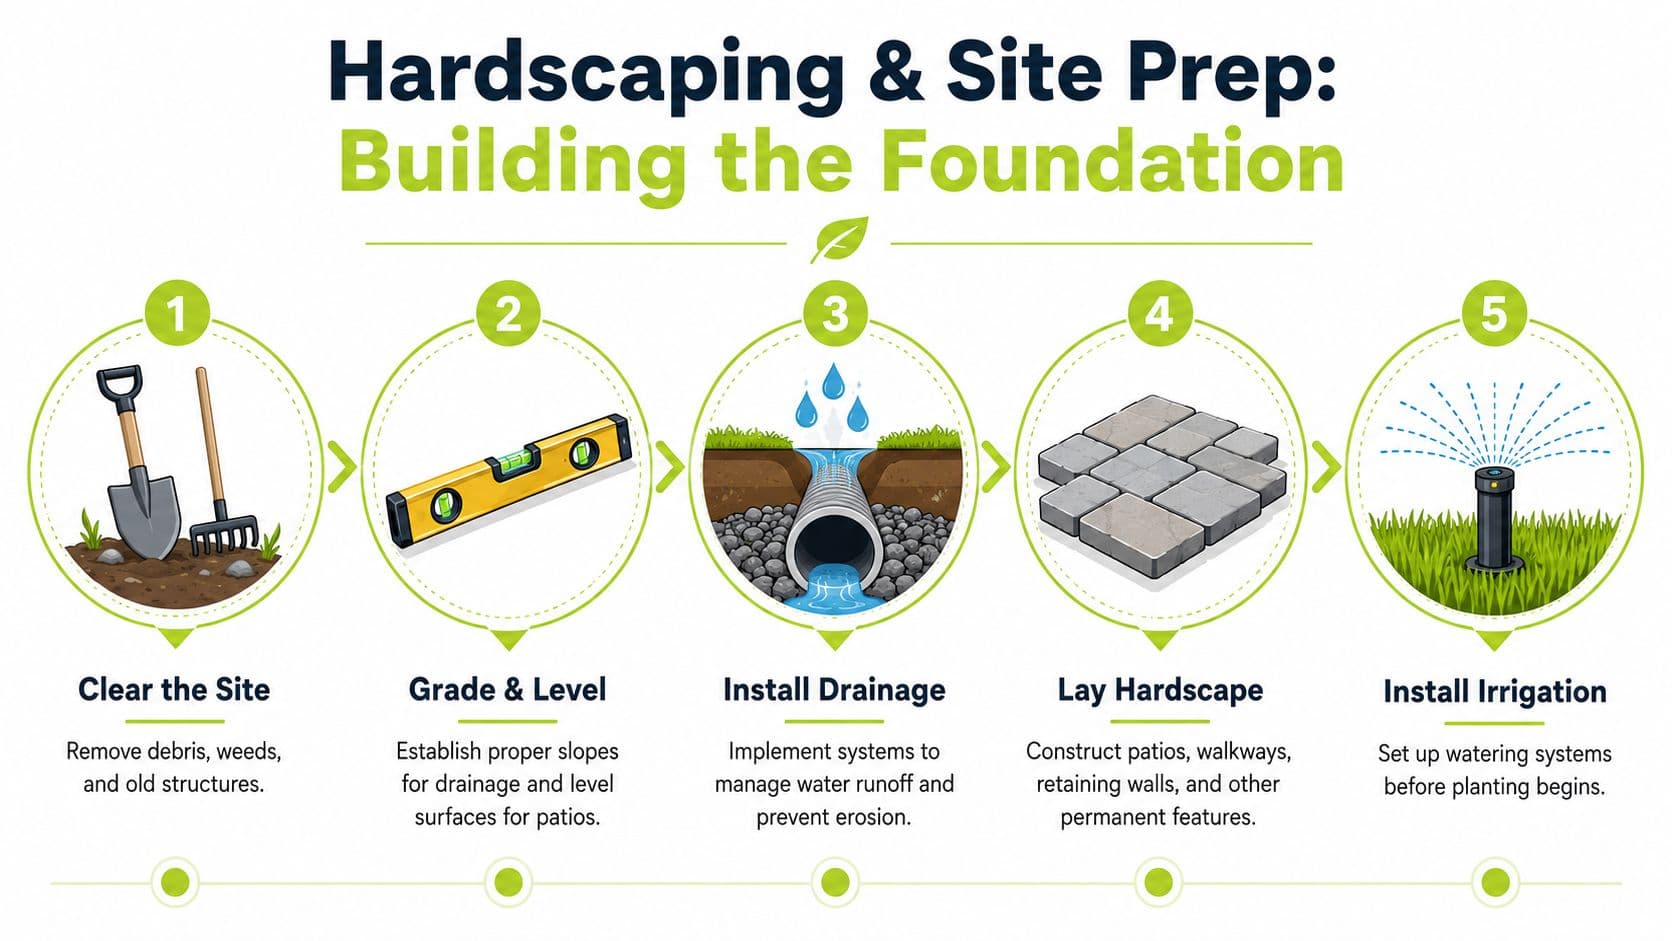
Building the Bones Hardscaping and Site Prep
Once the layout is settled, do the dirty work first. Many DIY projects go sideways at this stage. People plant early because it feels productive, then run wheelbarrows through fresh beds while fixing grade or hauling base material for a path.
Hardscape and site prep come first because everything else depends on them.
Start with grading and drainage
If the yard doesn't drain properly, the rest of the project won't perform. A practical leveling method starts by identifying high and low points with stakes, a tight string line, and a level or laser level. For drainage, the target is a gentle slope of about 1/4 inch per foot away from the house, which equals roughly 2 to 3 inches over 10 feet, as outlined in this yard leveling guide.
Use that rule at the planning stage and again after moving soil. If water still sits or runs back toward the house, the grade isn't finished yet.
For the actual correction:
- Minor unevenness: Small shallow imperfections can often be improved with topdressing.
- Bigger dips or rises: Lift sod or remove turf, regrade the soil, compact it, then check again.
- Persistent water issues: A swale or French drain may be needed when grading alone won't solve runoff.
Build the permanent surfaces next
Patios, paths, stepping stone routes, and retaining features should be installed before planting. They define circulation and save you from rework.
A simple sequence works well:
- Mark the footprint with paint or stakes.
- Excavate to the required depth for the chosen material system.
- Compact the subgrade.
- Add and compact the base.
- Screed the bedding layer if the system requires one.
- Install the surface material and edge restraint.
If you're mapping out a paver area or a garden path, this guide to building patios and paths is a practical companion for the construction side.
For a quick visual walkthrough, this installation video is useful:
Sequence matters more than speed
Here's the order I trust on real jobs:
| Phase | What happens | Why it happens here |
|---|---|---|
| Cleanup | Remove debris, weeds, old edging, junk | Gives you a readable site |
| Grade work | Fix slope, low spots, drainage movement | Prevents future water problems |
| Hardscape | Patio, paths, retaining features | Sets structure and access |
| Utilities | Irrigation sleeves, lighting routes, drains | Avoids trenching through finished beds |
| Soil finish | Final raking and prep for planting areas | Prepares for softscape installation |
If you skip compaction after adding fill, the yard usually tells on you later. Settling shows up as birdbaths, tilted pavers, and edges that never look straight again.
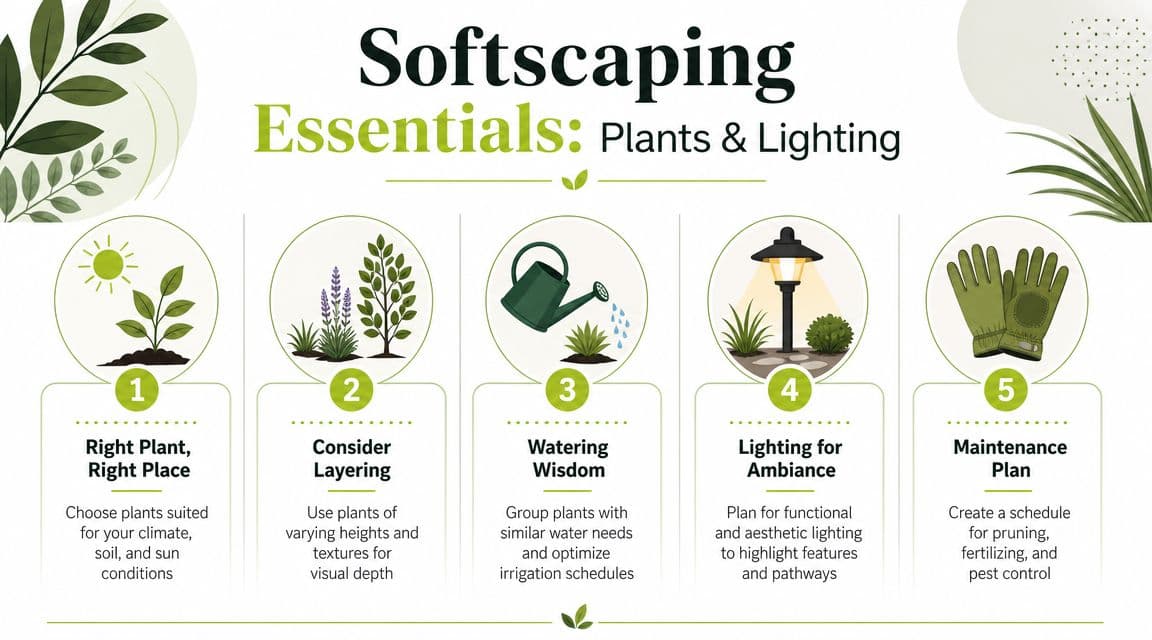
Bringing Your Landscape to Life with Plants and Light
A yard changes character once the stonework is in place and the planting starts to do its job. Good plant choices soften the hard lines, guide movement, and keep the space from feeling flat. Lighting extends that work into the evening, but only if it is planned with the same discipline as the planting.
Plant for the yard you actually have
Start with the conditions on site, not the bench tags at the nursery. The dry strip by the driveway, the damp corner near the fence, and the part-shade area off the house each want different plants. If you ignore that, you usually end up replacing stressed material by midsummer.
OutdoorBrite helps here because you can test combinations before you buy anything. I use it to mock up bed depth, repeat plant groupings, and check whether a plan reads clearly from the patio, the street, or the kitchen window. That takes a lot of risk out of first-time decisions.
The planting plans that hold up best are usually simpler than beginners expect. Repetition does more work than variety.
A reliable layout looks like this:
- Background structure: Shrubs or upright forms that give the bed shape year-round.
- Mid-layer massing: Repeated drifts that carry most of the color, foliage contrast, and seasonal interest.
- Edge plants: Lower growers that clean up bed lines and soften paths without spilling everywhere.
That structure gives you order without making the yard feel stiff.
Design around maintenance tolerance
Good-looking plans often fail in real life. A bed can look full and polished on install day, then turn into a pruning and cleanup problem by the second season.
The professional maintenance-focused advice makes the point clearly. The design has to match the owner's willingness and ability to maintain it. That lines up with what I see on jobs. Clients who want low effort do better with fewer species, bigger repeated groupings, and plants that hold their form without constant cutting back.
If you enjoy gardening and want to spend time in the beds, use a wider mix and build in more seasonal change. If you want the yard to look tidy with occasional weekend attention, keep the palette tight and give plants enough room to mature.
A planting plan succeeds when it still looks intentional after a year of watering, trimming, and normal neglect.
Add light with restraint
Outdoor lighting should solve practical problems first. After that, it can add mood.
Start with the places people use at night. Steps, path turns, door approaches, and seating areas matter more than washing every bed with light. I would rather see six well-placed fixtures than twenty scattered ones that create glare and make the yard feel overdone.
Focus on:
- Path safety: Light steps, edges, and changes in level.
- Entry clarity: Make doors and approach routes easy to read after dark.
- Feature emphasis: Pick one or two focal points, such as a small tree, textured wall, or specimen shrub.
- Seating comfort: Keep dining or gathering areas usable without blasting them with light.
The same restraint applies to watering. Group plants with similar moisture needs so irrigation matches the bed instead of soaking everything evenly. Simple zones are easier to manage, and they usually perform better over time.
The Final Installation and Your Long-Term Care Plan
The end of a yard build is where small mistakes either get cleaned up or get baked in for the next three years.
I've seen solid projects look rough a month later because the finish work was rushed. I've also seen modest yards hold up well because the owner took one extra day to tune irrigation, fix a low spot, and clean every edge before calling it done. That last pass matters.
Finish clean so upkeep stays simple
A good final install should look settled, not hurried. Mulch belongs over soil, not packed against trunks. Bed lines should read clearly from the patio or street. Pavers should be swept clean, and planting scraps, empty pots, and tags should be gone.
Before you call the project complete, walk it like a contractor doing a punch list:
- Test drainage: Run water from a hose or check after rain. Look for puddles near the house, patio, and path edges.
- Check grades: Watch for dips where lawn meets hardscape or where beds taper into walkways.
- Adjust irrigation: Make sure new plantings get water where they need it, without overspraying paths or fences.
- Clean every surface: Soil stains, loose mulch, and leftover debris make even a good build feel unfinished.
That cleanup sets the tone for everything that follows. A tidy start is easier to keep tidy.
Fix small settling before it becomes a bigger repair
New soil moves. So do paver edges, turf seams, and freshly shaped beds.
For minor lawn unevenness, topdressing is one of the simplest fixes. Apply a thin 1/4- to 1/2-inch layer of a soil blend, then rake it into the grass so low areas fill gradually without burying the blades, as outlined in these lawn topdressing best practices.
Keep it light. Thin passes work better than one heavy correction.
The same principle applies across the whole yard. If a stepping stone rocks, reset it now. If a bed edge has softened, recut it now. Quick corrections are cheap at the end of a project and annoying six months later.
Run the first year on a simple schedule
You do not need a complicated care binder. You need a routine you will follow.
| Season | Main focus | Typical tasks |
|---|---|---|
| Spring | Reset the yard | Cleanup, redefine bed edges, top up mulch where needed, inspect irrigation, remove winter damage |
| Summer | Support new growth | Water deeply, mow for the turf type, pull weeds early, watch for heat stress in recent plantings |
| Fall | Prepare for the next cycle | Clear leaves, cut back selectively, plant or move items if weather suits, tidy joints and edges |
| Winter | Prevent damage | Protect tender plants if needed, keep drainage paths open, note changes you want to make later |
If you want a practical shortcut, take photos from the same three or four spots every month. OutdoorBrite can help you compare ideas before you make changes, but those real progress photos help just as much once the work is in the ground. You will spot crowding, bare patches, and drainage issues faster from a repeat angle than from memory.
Improve what is not working. Keep what is.
Good yards are edited, not constantly rebuilt.
A shrub may block a walk sooner than expected. A seating area may get used every weekend while another corner sits empty. A dark section of path may need one more fixture. Those are normal adjustments, not signs that the original plan failed.
The owners who get the best long-term results usually do two things well. They notice problems early, and they resist the urge to tear everything out at once. Move one plant group. Widen one turn in the path. Simplify one overcrowded bed. That is how a project matures without turning into a yearly do-over.
See your yard reimagined
Start creating