
Taylor Juniper Tree Care Guide for Planting and Design
Learn to identify, plant, and care for the Taylor Juniper Tree with expert tips on site selection, watering, pruning, pest control, and AI design previews.
You're probably looking at a narrow strip of yard, a front walk that needs privacy, or a driveway edge that keeps begging for a clean evergreen line. The hard part isn't wanting a tall screen, it's finding one that stays narrow, handles real-world stress, and doesn't turn into a maintenance headache. The Taylor juniper tree has earned its place in that conversation because it gives vertical structure without the broad footprint that breaks small-space plans.
Table of Contents
- Introduction to Taylor Juniper Care
- Identifying Taylor Juniper and Choosing a Site
- Planting Preparation and Establishment
- Ongoing Care Watering Fertilizing and Pruning
- Managing Pests Diseases and Seasonal Care
- Incorporating Taylor Juniper into Landscape Designs
- Conclusion and Expert Tips
Introduction to Taylor Juniper Care
A Taylor juniper earns its place when you need evergreen privacy in a tight footprint. It was first identified in 1978 as a sport on an eastern red-cedar in Taylor, Nebraska, then later introduced by the Nebraska Statewide Arboretum. One major reference lists it as a 1992 introduction, which shows how a local find became a named cultivated variety. That background matters because this plant was selected for a practical shape, not for novelty (Conifer Society).
The advantage is the columnar habit. After 10 years, it is expected to reach about 20 feet tall while staying around 3 feet wide, with an average annual growth rate near 2 feet under the right conditions. In the field, that narrow form gives you screening where broader evergreens would crowd a fence, shade a path, or press into hardscape.
Care still comes down to the basics. Low pruning does not remove the need for planning, and drought tolerance does not mean you can be casual with watering. The tree does best when the site and root zone are right from the start, and that is where many plantings run into trouble. Root-zone water management during establishment matters more than often realized, because a young juniper that stays too wet or dries out too sharply will never settle in the way it should. For early design decisions, tools like OutdoorBrite can also help you preview how the tree will read in the finished setting before you commit space, spacing, or screening layout.
Identifying Taylor Juniper and Choosing a Site
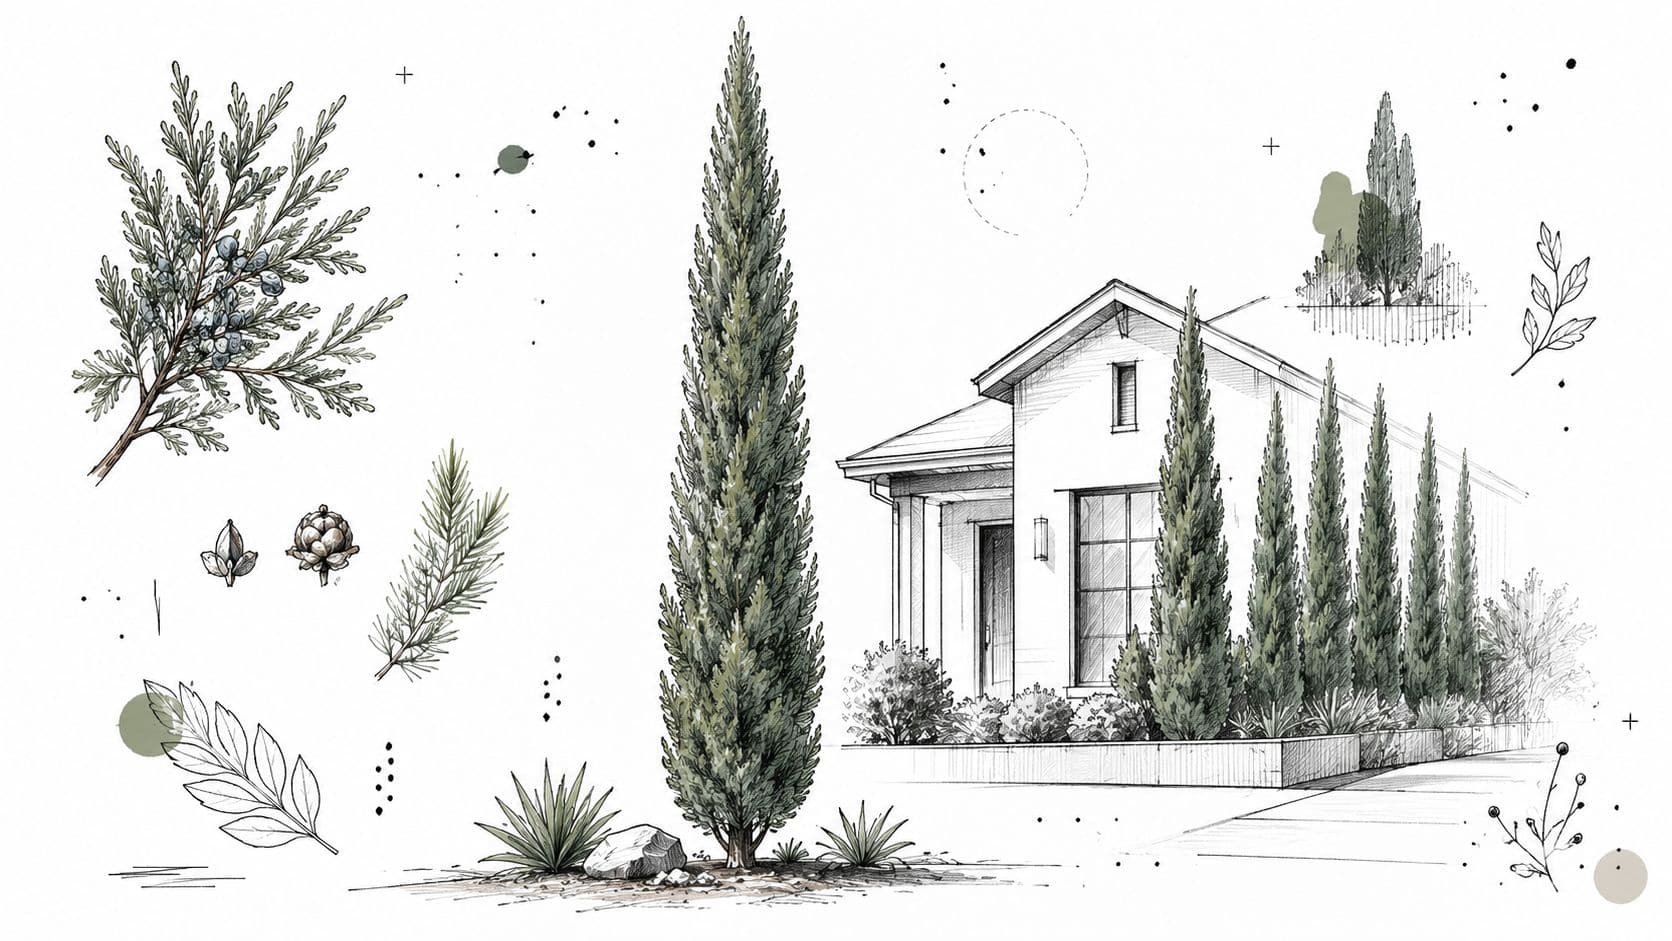
A Taylor juniper tree stands out fast once you know its shape. It is a narrow, upright eastern red-cedar cultivar with a strong vertical line, built for tight screening and accent planting rather than a loose, spreading habit that needs constant correction. Mature plants are commonly described as reaching 20–25 feet tall and 3–4 feet wide, which explains why the tree fits places where width is limited and height is welcome (NC State Extension).
What to look for before you buy
A good nursery plant already shows the columnar habit you want later. If the lower branches are reaching wide or the trunk is crooked, do not assume pruning will straighten it out. The plant's strength is genetic form, not rescue pruning.
Healthy stock should also look balanced from top to bottom. I look for a straight leader, even branching, and foliage that fills the plant without bare gaps near the base. A weak start often means you will spend the next few seasons correcting a tree that never quite fits the job.
Practical rule: buy the narrowest, straightest young plant you can find. If the trunk is already wandering, that habit usually gets more obvious with age.
How to choose the right site
This cultivar wants full sun and well-drained soil. Wet soil is the main failure point, and both NC State Extension and Buchanan's Plants warn against standing water and poorly drained sites (NC State Extension, Buchanan's Plants). In the field, I treat it first as a siting decision and second as a care decision.
Root-zone water control matters here more than a lot of buyers expect. A young juniper that sits wet after irrigation, or swings too hard between soaked and dry, has a harder time settling in. Before planting, use getting your soil ready for planting to check drainage, texture, and how water moves through the bed, then place the tree where runoff will not collect around the root ball.
The hardiness range also gives you some flexibility. One source places it in USDA zones 4 through 9, which is a wide practical range for a narrow evergreen like this (NC State Extension). That does not mean every site in those zones is suitable, only that the cultivar can perform well when light and drainage are handled correctly.
Placement still needs measurement. Leave room for the mature width, keep clearance from eaves and walkways, and do not squeeze a “narrow” tree beside a driveway just because it looks slim in the nursery. For a fast reality check, OutdoorBrite can help preview how the tree will read beside a house, fence, or screening line before you commit to the layout.
Planting Preparation and Establishment
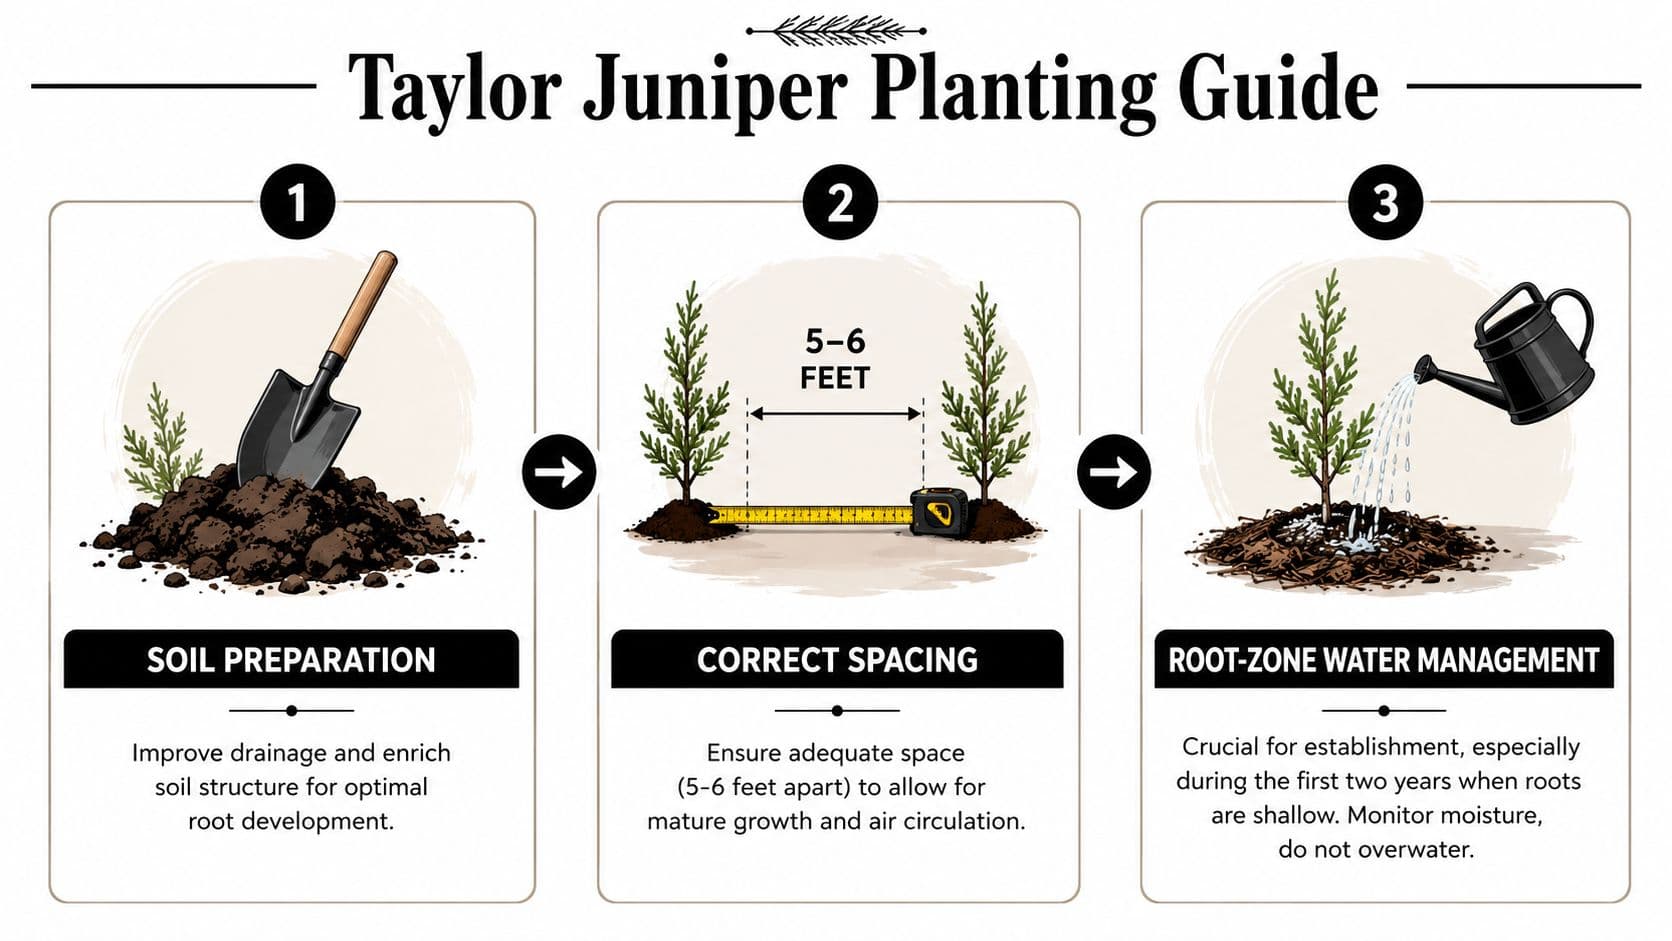
A Taylor juniper often succeeds or struggles in the first season because of what happens around the root ball, not just above it. The roots stay shallow while the tree settles in, so the biggest mistake is usually overwatering. Deep, infrequent watering helps roots move downward and lowers the chance of the saturation damage that leads to decline (The Spruce).
Site prep comes first. Before the tree goes in, check that the soil drains well enough to dry between irrigations. If water lingers after rain, that is a warning sign. A juniper planted into a wet pocket will not be rescued later by careful watering alone.
Planting steps that actually work
Set the root ball so it sits level with, or slightly above, the surrounding grade. Keep the trunk flare visible and do not bury it. Backfill with the soil that came out of the hole unless you are correcting a known drainage problem, then improve the bed itself instead of loading the planting hole with rich amendments that can trap water around the roots.
Spacing needs to be planned before the first shovel enters the ground. For a tight screening row, nursery guidance points to roughly 3–4 feet between plants, and also notes a mature size near 20 feet tall by 5 feet wide with annual growth of 6–12 inches in some conditions (Zollinger Farm). That spacing gives the row room to fill in without forcing constant correction later.
Keep mulch thin and pulled back from the trunk. Mulch helps hold moisture in the root zone, but a mulch volcano does the opposite of what people expect. It traps wet material against bark and creates avoidable trouble.
For a practical pre-plant check, use getting your soil ready for planting as a final checklist before the tree goes in.
Watering during establishment
Water slowly and let the root zone soak, rather than flooding the surface in a hurry. A soaker hose or drip line is usually the cleanest way to do that. Once the top layer starts drying, deep irrigation is safer than automatic daily watering, especially in clay or compacted soil.
Watch the planting area after each irrigation. If the soil stays wet for too long, cut back and let it breathe. If it dries too fast, the water is not reaching enough of the root zone, so adjust the pattern instead of adding more frequent cycles.
Ongoing Care Watering Fertilizing and Pruning
A mature Taylor juniper does not need babying, but it does need a routine. Once the tree is established, care becomes lighter and more seasonal, with most decisions coming from what the plant and soil are doing rather than from a fixed calendar. That suits homeowners who want a clean, intentional look without turning maintenance into a weekly task.
Watering and feeding
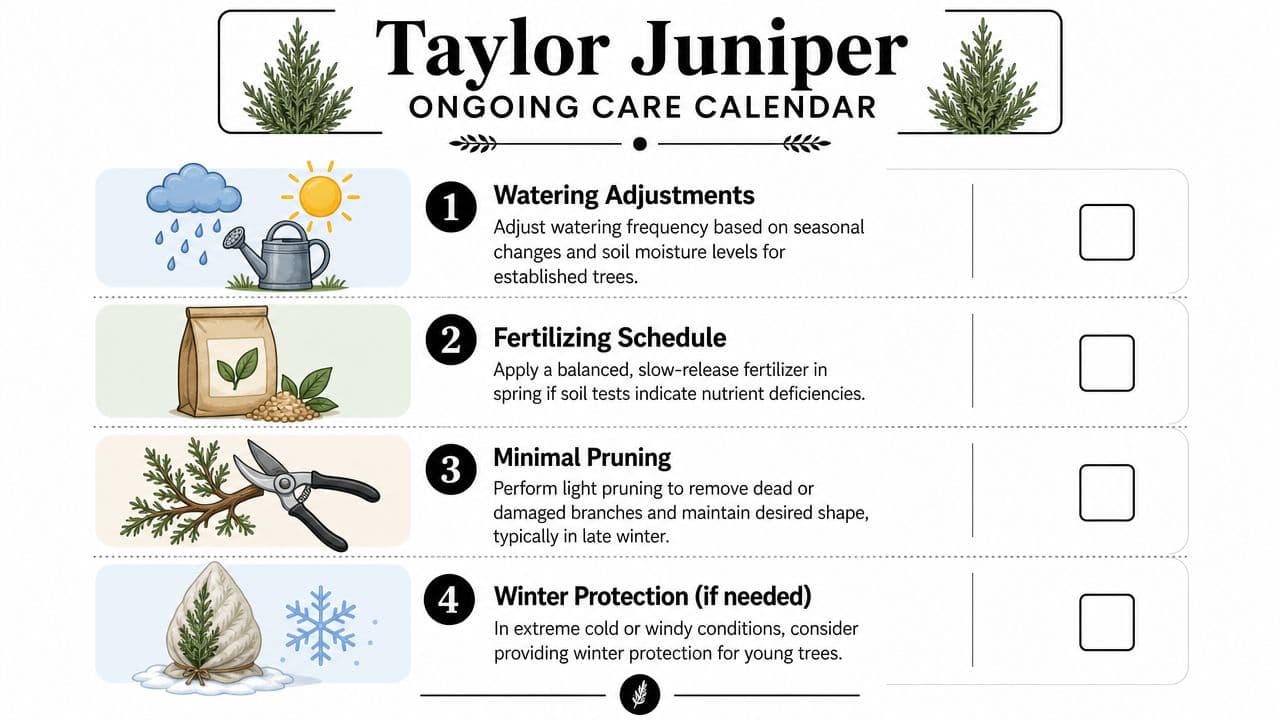
Established trees still deserve attention during dry stretches, especially where pavement, walls, or other hard surfaces throw heat back at the planting area. Keep the root zone evenly moist, then let it drain and breathe before the next irrigation. If the needles begin to brown, do not jump straight to more water, because the same symptom can also show up with excess moisture or root stress. Root-zone water management matters most during establishment, and it stays important afterward because shallow, frequent watering trains weak roots.
Water deeply enough to wet the root zone, then let the site breathe before the next irrigation.
Fertilizer should follow the soil, not the calendar. If a soil test shows a shortage, a balanced slow-release product in spring is the cleanest choice. Skip routine heavy feeding. Taylor juniper is valued for its shape and durability, and pushing soft growth usually creates more cleanup than benefit.
Pruning without ruining the shape
This tree usually needs very little pruning to keep its narrow habit, which is one reason it is so popular. If you do prune, stay focused on dead wood, damaged tips, or branches that rub. Keep cuts small and deliberate so the framework stays tight instead of open and uneven. Structural pruning every 5–10 years can help preserve the narrow form and improve airflow.
For broader plant-selection planning, selecting water-wise plants for 2026 is a useful companion read if you are building a low-input garden around this juniper. AI-powered design previews can also help you compare spacing, massing, and visual weight before you plant, which is useful when you want the tree to carry the design without overpowering it.
Managing Pests Diseases and Seasonal Care
Taylor juniper earns its reputation for toughness, but toughness does not mean immunity. In the field, I still see it hold up better than many evergreens when the site is right, yet stress can still trigger trouble fast. That is why I pay close attention to seasonal changes, branch color, and the condition of the inner canopy.
What to inspect and when
Walk the plant often and inspect the whole framework, not just the outer skirt of foliage. Browning can point to disease, insects, drought, overwatering, or root stress, so the first job is figuring out which one fits the pattern. Juniper decline often starts subtly on inner growth or at the tips of branches, and by the time the outside looks rough, the problem has usually been building for a while.
Bagworms, spruce spider mites, and juniper scale are the pests I keep in mind. Their symptoms can look similar from a distance, so do not spray first and ask questions later. Check for feeding marks, fine webbing, stippling, scorch, and the moisture history around the root zone before deciding on treatment. Cool, dry weather can favor mite activity, while stressed plants usually show the strongest damage.
Seasonal habits that reduce risk
Spring is the best time for a careful inspection, especially after wet weather and as new growth starts. Summer calls for steady moisture checks and a close look at drainage around the base. Winter brings its own pressure, especially wind exposure and browning on younger trees that have not fully settled in.
Good habit: inspect the inside of the plant, not just the outer shell. That is where stress and early decline usually show up first.
For general planning help before anything is planted for good, landscape design software can keep spacing, exposure, and plant placement organized. If you want a faster visual check of how the tree fits with other choices, AI yard design can help you preview the composition before you commit.
Incorporating Taylor Juniper into Landscape Designs
The strongest use case for Taylor juniper is simple, it solves a space problem without looking like a compromise. It works as a driveway flank, a property-line screen, a foundation vertical, or a modern accent where broader evergreens would feel clumsy. The tree's narrow profile is useful, but the mature height means it still needs honest planning around sightlines and utility clearance.
A lot of buyers hear “low-maintenance” and assume they can plant anywhere. That's where mistakes happen. Taylor juniper can reach 20–25 feet tall and 3–4 feet wide, so it can still interfere with driveways or utilities if the plan ignores eventual size (Trees.com). The smarter mindset is low-prune, not no-design.
Companion plants that work
| Companion Plant | Feature | Ideal Use |
|---|---|---|
| Ornamental grasses | Soft texture | At the base of vertical evergreens |
| Compact perennials | Seasonal color | Front of foundation plantings |
| Rounded shrubs | Contrast in form | Balancing the juniper's columnar shape |
| Low groundcovers | Visual continuity | Edges, borders, and transitions |
The point of companions is contrast. Taylor juniper brings structure, so the best partners soften the line or add seasonal change without fighting for attention. If you want to test a full composition before buying anything, AI yard design is a smart way to preview how the plant reads against paths, walls, and neighboring shrubs.
A quick visual workflow helps here. Take a clear photo of the yard, try a Mediterranean or Japanese Zen style, and compare a few layout options before you commit to a row or specimen placement. That's especially valuable when the mature width is tight and every foot matters.
Conclusion and Expert Tips
Taylor juniper works best when you respect three things, drainage, space, and early watering. If the site drains well, the plant has room to mature, and the roots are watered thoroughly rather than constantly, the tree usually does the rest on its own. Keep these quick rules in your pocket:
- Choose the site first. Full sun and well-drained soil come before anything else.
- Water thoroughly in establishment. Shallow roots hate saturation, especially in the first two years.
- Prune lightly. Remove dead wood, then leave the columnar habit alone.
- Inspect seasonally. Check for pests, browning, and drainage problems before they spread.
- Preview the layout before planting. A visual mockup prevents spacing mistakes.
If you're planning a privacy screen, foundation accent, or narrow evergreen line, use OutdoorBrite Money to test the layout before you buy a single tree. A realistic preview can save you from planting the right tree in the wrong place.
See your yard reimagined
Start creating




