
9 Backyard Makeover Ideas DIY: Transform Your Space 2026
Discover 9 creative backyard makeover ideas DIY to transform your outdoor space in 2026. Get inspired with budget-friendly projects & stunning results!
How do you turn a backyard into a space you use, instead of a string of projects that look good in photos but create new problems on site?
Good backyard planning starts with function. Seating needs clear walkways. Patios need base prep and drainage. Sloped yards need a grading plan before you order pavers, lumber, or gravel. Those decisions shape the budget, the build time, and how much upkeep the space will need by midsummer and again after fall leaves start dropping.
These 9 backyard makeover ideas diy focus on projects that hold up in real use. Each one breaks down cost, time, difficulty, key materials, styling options, seasonal upkeep, and where beginners usually get into trouble. You will also get mini budget plans and practical before-and-after guidance, so it is easier to picture what changes the space and what just adds clutter.
The goal is not to chase a perfect reveal photo. The goal is to choose projects that fit your yard, your schedule, and your skill level.
If you are working with a compact yard, an awkward side lot, or a layout that needs better circulation, it helps to study the footprint before building. A simple sketch or a digital planning tool like garden ai design can help you test bed placement, patio size, and sightlines before you spend money on materials. This expert guide on tiny home properties is also useful for thinking through privacy, open space, and how structures affect the rest of the yard.
A good DIY makeover solves more than one problem at a time. The strongest projects create usable space, reduce maintenance, or make the yard easier to enjoy across more of the year.
1. Raised Garden Beds and Vegetable Gardens
Raised beds are one of the safest first projects because they solve several problems at once. They define space, improve drainage, and let you bypass poor native soil without reworking the entire yard.
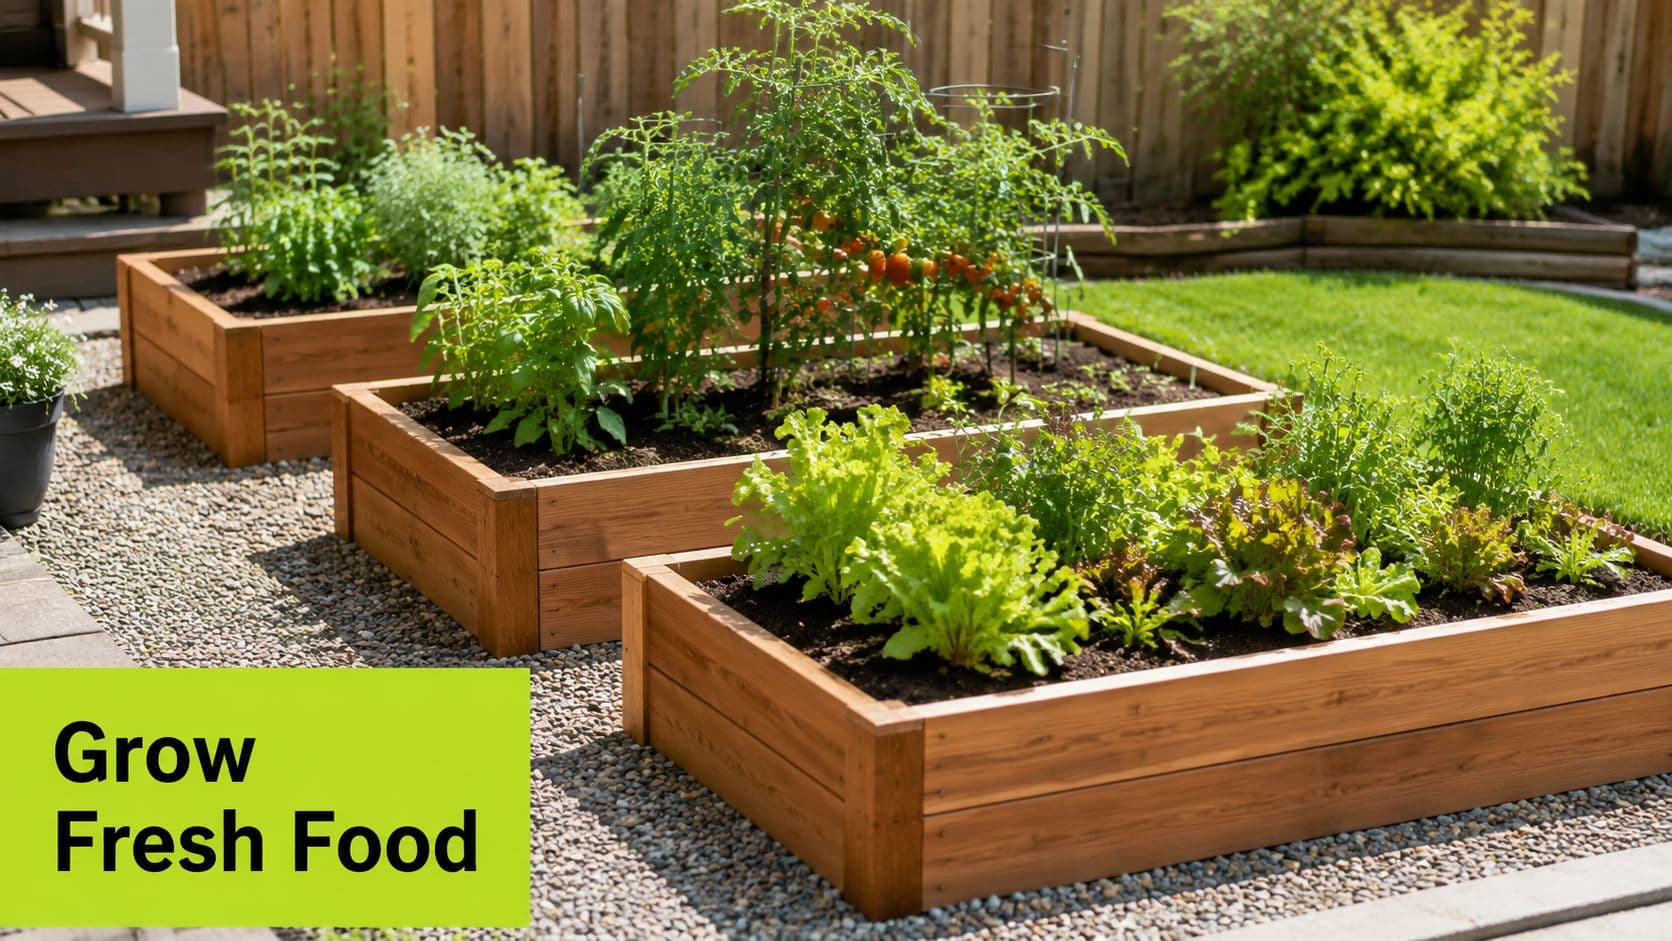
For a real-world setup, think of two or three cedar beds near the kitchen door with a mulch path between them. That arrangement usually works better than scattering single beds across the yard, because watering, harvesting, and cleanup stay concentrated in one zone.
What works and what doesn't
Use untreated cedar or composite boards, quality soil mix, compost, and a simple drip line if you can. Keep bed widths reachable from both sides so you're not stepping into the soil and compacting it.
What doesn't work is starting too big. A sprawling first-season vegetable garden sounds ambitious, but it often turns into weeding, inconsistent watering, and wasted soil.
Practical rule: Build fewer beds than you think you need. Expand after one growing season, not before it.
Mini budget plan and planning notes:
- Lean budget: One or two beds, hand watering, basic soil and mulch.
- Midrange budget: Multiple matching beds, drip irrigation, trellis supports, edging around the garden zone.
- Time and difficulty: Usually a weekend build. Beginner-friendly if you can cut boards square and level the site.
Styling matters here too. Beds look best when they feel intentional, not dropped into leftover lawn. Add a gravel or mulch walking surface, repeat one planter color, and keep the layout symmetrical unless your yard shape forces a looser pattern. For before-and-after planning, a garden ai design mockup helps you test bed placement before buying soil in bulk.
Seasonal upkeep is straightforward. Refresh mulch, top-dress with compost, inspect irrigation lines, and rotate crops so one bed doesn't become the permanent tomato patch.
2. DIY Patio and Hardscape Installation
If you want one project that changes how the yard gets used, build a patio. A deck or patio is also one of the easiest hardscaping tasks for DIYers when using concrete pavers or brick, especially if you stick to a simple shape and pattern, according to this budget backyard makeover guide.
The best DIY patios are boring underneath. That's a compliment. The base, compaction, and drainage matter more than the paver color.
Base prep decides the result
Use a compacted gravel base, keep the site flat but not level if drainage requires a slight fall away from the house, and lock the pavers with edging and joint material. Furniture hides a lot, but it won't hide a spongy base or low spots that collect water.
Here's a useful build visual before you start laying anything:
A simple example is a square paver patio with a dining set on one side and two lounge chairs on the other. That split works because it gives each function a clear footprint. The common mistake is undersizing the hardscape so chair legs sit half on, half off the edge.
- Key materials: Pavers, base gravel, bedding sand, edge restraint, compactor rental, level, tamper.
- Time and difficulty: Moderate. Small patios can fit into a long weekend, but excavation and leveling take longer than commonly anticipated.
- Mini budget plan: Start with a compact seating pad, then extend later with matching pavers if the first phase proves useful.
For styling, choose one dominant geometry. Modern yards look cleaner with large-format pavers and straight edges. Cottage-style yards can handle mixed textures and softer planting around the perimeter. Test layout, furniture spacing, and material proportions with an ai outdoor patio design preview before ordering pallets of pavers.
If your patio sits near siding, masonry, or fencing that looks dingy, cleaning those surfaces first can make the whole build look more finished. This guide to soft washing for Flagstaff homes shows the kind of exterior refresh that pairs well with a new patio.
3. Vertical Gardens and Living Walls
Vertical gardens earn their keep in small yards, side returns, and rental-friendly spaces where ground area is limited. They also help when the fence line feels blank or harsh.
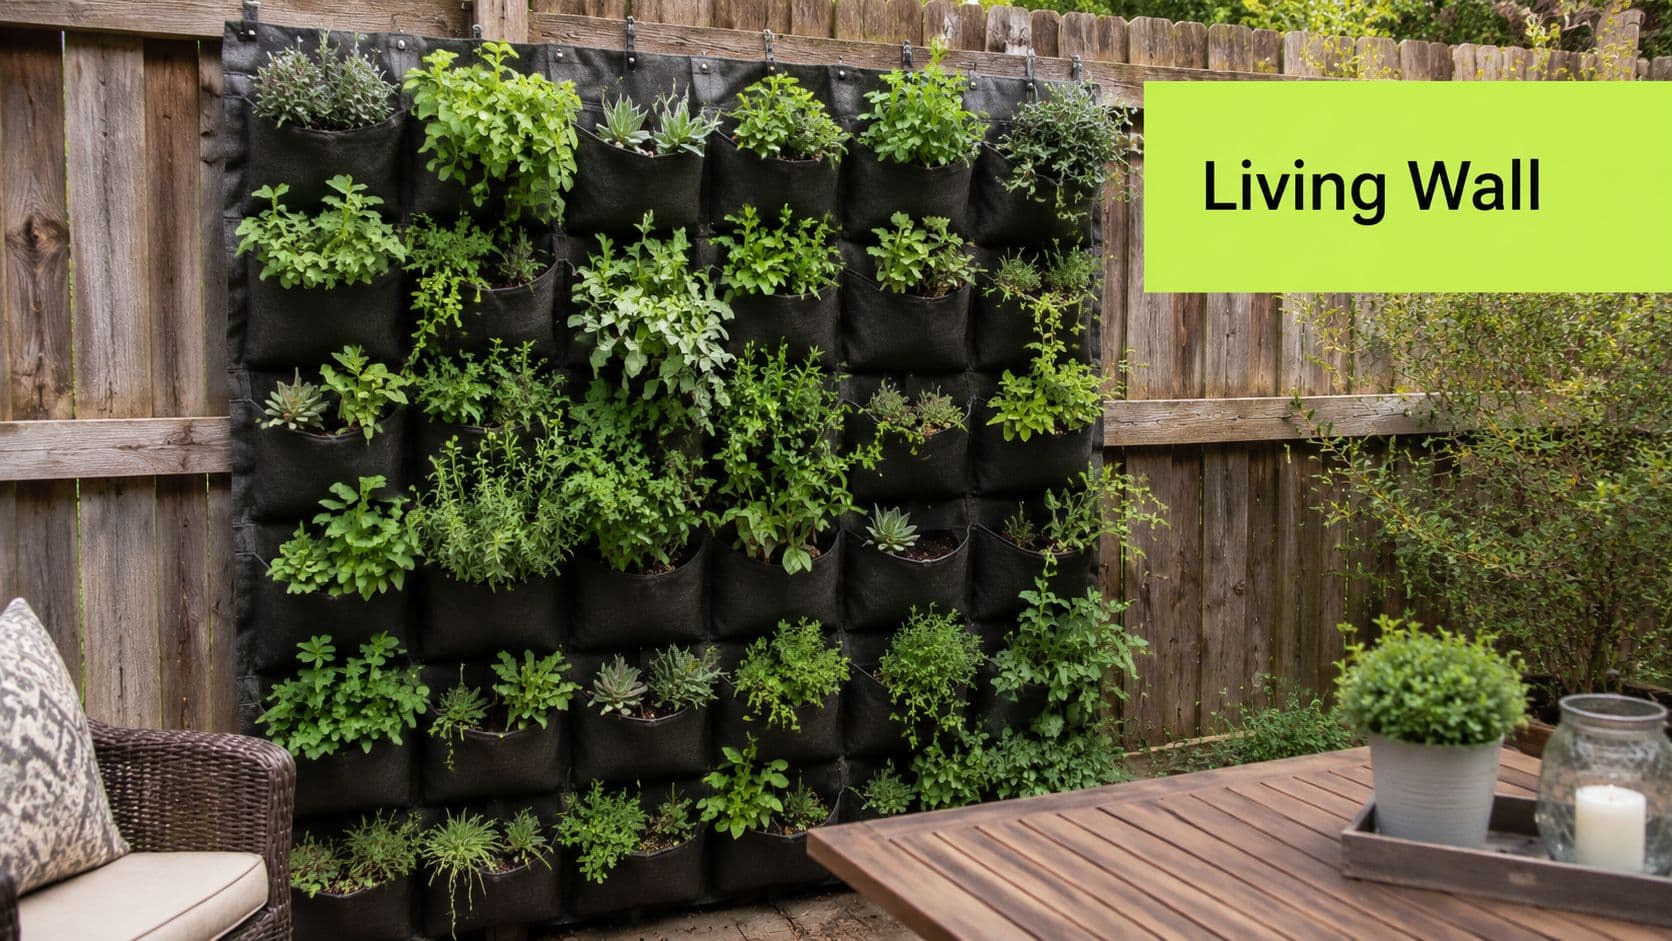
A practical version isn't a giant high-maintenance living wall. It's usually a mounted system of planters, shelves, or trellises that grows herbs, trailing plants, or compact ornamentals.
Best uses for tight spaces
Fence-mounted herb planters near a grill area work well. So do vertical pockets on a sunny wall where you'd otherwise struggle to fit a bed. Keep the plant palette tight. Too many varieties make the wall look messy fast.
What works:
- Lightweight containers: Easier on fences and simpler to rearrange.
- Consistent irrigation: Drip lines or self-watering planters reduce dry pockets.
- Repeating plants: Repetition looks cleaner than a random mix of one-offs.
What doesn't work is installing a huge wall and assuming hand watering will stay manageable in midsummer. It won't.
Style-wise, vertical gardens look best when they echo something else in the yard. Match planter finishes to the patio furniture, fence stain, or raised bed material. For upkeep, trim aggressively, replace stragglers quickly, and check fasteners after storms. This is one of the most visually effective backyard makeover ideas diy for renters because much of it can be removed or reconfigured later.
4. Fire Pit and Outdoor Seating Arrangements
What makes a backyard fire pit worth building instead of turning into a feature people use twice a year? The answer is layout. A good setup makes conversation easy, keeps smoke and traffic under control, and gives the yard a place to gather after dark.
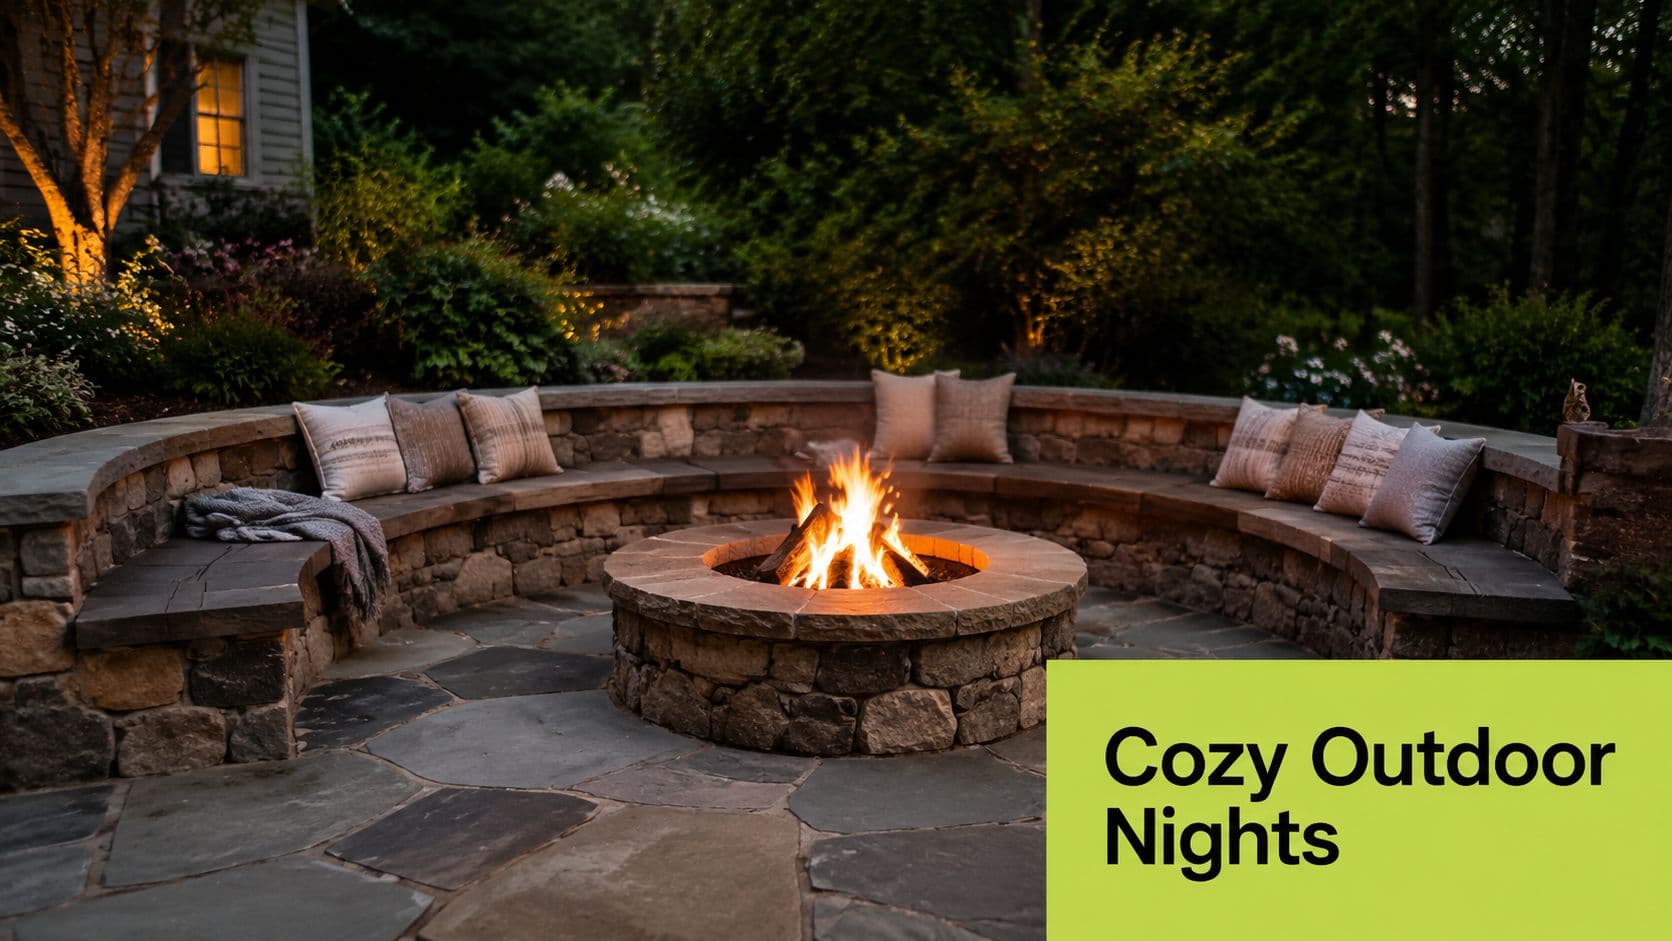
Start by staking out the seating area before you buy block, stone, or a metal insert. I use actual chairs for this step, even cheap folding ones, because spacing that looks fine on paper often feels tight once people are carrying drinks, shifting seats, or walking through the area. A semicircle usually works better than a full ring. It leaves a clean entry point and makes the zone feel less crowded.
The fire pit itself needs a stable, nonflammable base. Gravel, pavers, or a compacted pad all work if the site drains well. Local setback rules matter here, especially near fences, trees, covered patios, and low roofs. Check those first, then choose the build style.
Choose the build that fits your budget and maintenance tolerance
A portable metal pit is the fastest option. It is usually a half-day project with a gravel base, and the cost stays low. A block or stone fire pit takes longer, often a full weekend once you include digging, leveling, and hauling material, but it looks more permanent and usually anchors the space better.
Mini budget plan:
- Low spend: Portable metal pit, pea gravel or crushed stone base, four movable chairs.
- Medium spend: Steel ring with block surround, compacted pad, edging, and a short path connection.
- Higher spend: Masonry pit, built-in seat wall, low-voltage lighting, and cushions or lounge seating.
Difficulty also changes fast. Setting a portable pit on a prepared gravel pad is beginner-friendly. Building a circular stone surround with even joints and a level top course is more demanding. If you want a polished result without much masonry learning curve, use a metal insert with a simple block kit.
Styling matters, but restraint helps. Match the fire pit materials to something already in the yard, such as patio pavers, retaining wall block, or fence stain. If you mix rough stone, bright metal, synthetic wicker, and modern concrete all in one small zone, the area starts to feel pieced together instead of planned. To test the layout before hauling heavy material, a backyard ai design mockup can help you compare seating arcs, clearances, and sightlines.
For seating, comfort beats quantity. Four good chairs around a small pit get used more than eight cramped chairs packed too close to the flame. If you want a lighter look than a built-in bench, you can explore outdoor seating for your home and use movable lounge chairs that can shift with the season or with guest count.
Before and after usually comes down to one change. Before, the yard has scattered chairs on grass or a lonely fire bowl with no defined place to sit. After, the pit sits on its own surface, the chairs face each other comfortably, and the zone reads as a destination instead of leftover open space.
Seasonal upkeep is simple if the design is simple. Clear out ash, keep a cover on the pit during wet stretches, and store cushions somewhere dry. In fall, blow leaves out of the gravel or joints so the area does not hold moisture. If you burn wood, store it off to the side rather than stacked against the seating area, which keeps the space safer and less cluttered.
5. Garden Pathways and Stepping Stones
Paths do more than connect one feature to another. They make the yard feel designed. Even a basic stepping-stone route can turn a loose collection of projects into a plan.
A common example is a curved gravel or stone path linking the back door, patio, and garden beds. That route prevents muddy shortcuts and gives visitors an obvious way to move through the space without trampling planting areas.
Keep paths purposeful
A pathway should lead somewhere worth reaching. If it ends at a decorative corner no one uses, it becomes maintenance with no payoff.
- Best materials for beginners: Gravel, mulch, and spaced stepping stones.
- Best styling move: Repeat the path material in at least one other place, such as a seating nook or garden border.
- Seasonal upkeep: Top up gravel or mulch, reset shifted stones, and edge the sides before weeds creep inward.
For oddly shaped yards, curves can help, but don't assume every irregular site is a simple design problem. Houzz's oddly shaped backyard article highlights layout approaches like curves and terraces. The bigger issue is that sloped or awkward sites often introduce hidden grading and drainage work that many DIY plans underestimate. If your path crosses a slope, build it like a drainage-aware project, not just a decorative one.
Outdoor seating nearby makes paths feel more useful. If you're refining that combination, this page lets you explore outdoor seating for your home and think about clearances before you set stone.
6. Outdoor Shade Structures and Pergolas
Pergolas are worth the effort when the yard has no vertical anchor and no relief from sun. They frame space, support vines, and make a patio feel finished.
A good DIY pergola usually starts as a dining-area project. Four posts, strong footings, and a simple rectangular top can transform a plain slab into a room-like outdoor zone.
Build for structure first
Use pressure-treated lumber or cedar, and anchor the posts properly. Decorative brackets and stain colors are the easy part. A pergola that racks out of square or settles unevenly will always look homemade in the wrong way.
The trade-off is maintenance. Wood pergolas need inspection, sealing or staining depending on the species, and occasional tightening of hardware. Vines add softness and shade, but they also add pruning and can trap moisture if you let growth get too dense.
A pergola shouldn't try to solve every problem. If you need full weather protection, build for that. If you need filtered shade and definition, a pergola is the right tool.
Styling tip: match the structure to the house lines when possible. A modern home usually wants cleaner beams and fewer decorative cuts. A cottage yard can handle softer planting and more visible climbing blooms. For seasonal use, add shade cloth in the hottest months and remove debris from the top before wet weather settles in.
7. Native Plant Landscaping and Pollinator Gardens
Want a yard that looks fuller each year instead of turning into a weekend chore list? Native planting is one of the few DIY upgrades that can cut maintenance after the establishment phase while still giving the yard real visual structure.
The key is honesty about the site. Sun exposure, drainage, soil type, deer pressure, and summer heat matter more than whatever looked good on a nursery bench. A pollinator bed succeeds when the plants belong there.
A practical before-and-after shift looks like this: a sparse strip of lawn or a tired foundation bed becomes a layered planting with low growers at the edge, midsize flowering perennials through the center, and a few grasses or shrubs to hold the shape in winter. That kind of bed reads intentional from the street and does not collapse once the first flush of blooms passes.
Build the planting plan before you buy plants
Start with a simple sketch and divide the area into three layers: groundcovers, seasonal bloomers, and structural plants. Then group by water needs. That one step prevents a common beginner mistake, mixing drought-tolerant natives with plants that want regular irrigation.
For a small pollinator bed, expect a budget of about $100 to $300 if you buy young plants, compost, and mulch. A larger border can land in the $300 to $800 range depending on shrub count and plant size. Time is usually one weekend for bed prep and planting, plus a few short watering sessions each week during the first stretch of establishment. Difficulty is moderate. The work is straightforward, but plant selection takes more judgment than people expect.
Key materials:
- Native perennials suited to your region
- One to three anchor shrubs or ornamental grasses
- Compost
- Natural mulch
- Hose or drip irrigation
- Edging spade or garden hose for laying out curves
The best results usually come from restraint. Fewer plant varieties, repeated in groups, look calmer and are easier to maintain than a collector-style bed with one of everything. I have seen plenty of DIY pollinator gardens improve just by editing them down to larger drifts of the same plant.
Keep these design rules in play:
- Plant in groups. Pollinators find clustered flowers more easily, and the bed looks stronger.
- Stagger bloom times. Aim for spring, summer, and fall interest instead of one big peak.
- Leave room for mature size. Crowded first-year beds often become a tangle by year two.
- Include structure. Grasses, seed heads, and evergreen or woody forms keep the area from looking empty in the off-season.
There is a trade-off. Native beds are lower maintenance once established, not no-maintenance from day one. The first season usually means regular watering, weeding, and watching which plants like the site. Some self-seeding is helpful. Too much can make the bed look messy fast, so seasonal editing matters.
For upkeep, cut back selectively in late winter or early spring instead of scalping everything in fall. Leave some seed heads and hollow stems for habitat if appearance allows. Refresh mulch lightly, not heavily, because thick mulch can suppress the natural spread that makes native beds fill in well over time.
For styling, match the bed to the house and the yard size. Cleaner masses and repeated shapes suit modern homes. Looser mixes with softer edges fit cottage and informal yards. If the space feels bare before planting, mark out the future bed with a hose, then set pots in place before digging. That gives you a real before-and-after preview and helps avoid buying too many plants for the footprint.
8. Low-Maintenance Container and Succulent Gardens
Container gardens are flexible, forgiving, and ideal for patios, rentals, or bare corners that need life fast. Succulents make the category even easier because they tolerate neglect better than most showy annual arrangements.
A practical setup might use a cluster of pots in three heights near a seating area, with one larger anchor planter and smaller companions. That creates presence without digging anything into the ground.
Fast makeover, low commitment
Use containers with drainage holes and a gritty mix that won't stay soggy. Terracotta looks great but dries quickly. Resin and glazed pots hold moisture longer and weigh less, which helps on decks and balconies.
The trade-off is scale. Small pots can disappear in a large yard, so group them. Repetition also helps. Three matching containers often look better than five unrelated ones, even if the plants are beautiful.
For upkeep, water thoroughly but infrequently, rotate containers if one side gets leggy, and bring tender plants under cover when temperatures turn. In styling terms, this is one of the easiest backyard makeover ideas diy projects to update seasonally. Swap a few plants, change pot placement, and the space feels refreshed without demolition or heavy hauling.
9. Outdoor Lighting and Water Features
Want your yard to feel finished after sunset, not just look decent at 2 p.m.? Start with lighting. Add water only after the lighting plan works, because better visibility and usable seating usually deliver more value than a fountain on its own.
For a typical DIY setup, expect basic lighting to cost about as much as a few large planters if you use solar path lights, outdoor string lights, and one or two low-voltage spotlights. Installation can take an afternoon for solar and a weekend for low-voltage wiring. Difficulty is low to moderate, depending on whether you need to hide cable under mulch, gravel, or along a fence line.
A good layout uses three layers. First, light the route people walk, such as steps, gate access, and the path to seating. Second, add overhead or perimeter glow with string lights on posts, a pergola, or a fence. Third, aim a couple of accent lights at one focal point, such as a small tree, fountain, or textured wall. That sequence keeps the yard readable at night without turning it harsh.
Warm bulbs usually look better in outdoor spaces than cool white ones. Cool light can make a patio feel flat and a water feature look sterile. I also avoid trying to light every bed edge or corner. The trade-off is simple. More fixtures give you more brightness, but they also raise cost, increase maintenance, and can make the space feel busy.
For before-and-after planning, stand in the house at dusk and note what disappears first. Usually it is the path, the seating edge, and any change in level. Sketch those problem areas first, then mark one feature worth highlighting. That gives you a mini budget plan you can build in phases instead of buying a box of lights and scattering them everywhere.
Water features need the same restraint. A recirculating fountain is usually the smarter DIY choice than a pond because it takes less excavation, uses fewer materials, and is easier to clean. Tabletop fountains work for tiny patios, while basin or urn fountains suit larger yards that need a stronger visual anchor.
Plan on regular upkeep. Pumps need cleaning, basins need topping off in hot weather, and fallen leaves can clog the intake fast. In cooler seasons, some units need to be drained or covered to prevent freeze damage. If you want the sound of water without weekly attention, choose a simple self-contained kit with easy pump access.
Styling matters here too. Lighting and water look best when they share a purpose. For example, a small fountain near a seating corner, lit by one warm spotlight and softened by nearby pots, reads as intentional. Before, that corner can feel like unused square footage. After, it becomes the place people gravitate to in the evening.
9-Point DIY Backyard Makeover Comparison
Use this table to match the project to your yard, budget, and tolerance for upkeep. A patio can add the most daily function, but it also brings the highest labor and base-prep demands. Containers and pathways usually give quicker visual change for less money, though the long-term impact is smaller.
| Project | DIY Difficulty | Typical Cost and Time | Key Materials | What You Get | Best Fit | Main Trade-Offs |
|---|---|---|---|---|---|---|
| Raised Garden Beds and Vegetable Gardens | Moderate | $150 to $500 per bed. Weekend build plus seasonal planting time | Lumber or blocks, screws, hardware cloth, soil, compost, mulch | Better soil control, cleaner layout, easier harvesting, strong food-growing potential | Poor native soil, small yards, edible gardens, beginner growers who want structure | Productive and tidy, but soil, irrigation, and seasonal replanting add ongoing cost |
| DIY Patio and Hardscape Installation | High | $800 to $3,000. Several days to a full week depending on size and base work | Pavers or gravel, edging, base gravel, sand, tamper, level | More usable square footage, cleaner outdoor dining zone, stronger visual structure | Entertaining areas, grill stations, furniture zones, high-traffic backyards | Excellent function and durability, but mistakes in slope or compaction are hard to fix later |
| Vertical Gardens and Living Walls | Moderate to High | $200 to $1,500. One to three days plus setup for watering | Wall panels or trellis, anchors, pots or pockets, potting mix, irrigation parts | Strong visual impact, more planting area, better screening in tight spaces | Small yards, courtyards, privacy edges, decorative focal walls | Saves floor space, but watering and plant replacement can be more demanding than expected |
| Fire Pit and Outdoor Seating Arrangements | Low to Moderate | $300 to $2,000. One day for simple setups, longer for built-in versions | Fire ring or kit, gravel or pavers, chairs, base material, safety clearance | Warmer gathering spot, longer outdoor season, clear social focal point | Cool evenings, family seating areas, backyards that need one obvious destination | High atmosphere for the effort, but smoke, local rules, and safety spacing matter |
| Garden Pathways and Stepping Stones | Low to Moderate | $100 to $800. One weekend for short runs | Gravel, stone, mulch, pavers, edging, landscape fabric | Cleaner circulation, less mud, better connection between yard zones | Linking patio to beds, side-yard access, protecting planting areas from foot traffic | Lower cost and high visual payoff, but loose materials need occasional touch-up |
| Outdoor Shade Structures and Pergolas | Moderate to High | $500 to $3,000. Weekend to multi-day build | Posts, beams, fasteners, concrete, anchors, shade fabric or slats | Cooler seating area, stronger room-like definition, support for vines or curtains | Dining areas, lounges, sunny yards with limited tree cover | Big comfort upgrade, but anchoring, wind load, and lumber cost can change the plan fast |
| Native Plant Landscaping and Pollinator Gardens | Moderate | $300 to $1,500. Initial planting weekend plus establishment period | Native plants, compost, mulch, edging, drip irrigation | Lower long-term watering, seasonal habitat, more natural look, better resilience once established | Low-water yards, informal gardens, wildlife-friendly planting plans | Lower maintenance later, but plant research and first-year watering take patience |
| Low-Maintenance Container and Succulent Gardens | Low | $100 to $600. One afternoon to a weekend | Pots, cactus or succulent mix, gravel, drought-tolerant plants | Fast color and texture, portable layout, simple upkeep | Renters, patios, balconies, bare corners, drought-prone spaces | Easy to start and rearrange, but cheap pots and poor drainage cause failures quickly |
| Outdoor Lighting and Water Features | Moderate | $200 to $2,500. One day for simple lighting, longer for fountains or wiring | Path lights, spotlights, transformer or solar units, fountain kit, pump, basin | Better evening use, safer walking routes, stronger mood, one defined focal feature | Nighttime entertaining, entry paths, seating corners that disappear after dark | Strong finish for a makeover, but wiring, pump cleaning, and seasonal maintenance add work |
A simple way to use the table is to sort projects by what your yard lacks most. If the yard feels exposed, start with shade. If it feels muddy or disconnected, a path or patio usually does more than extra planting. If it looks flat and forgettable from the house, raised beds, vertical planting, or lighting will change the view faster.
For a mini budget plan, many DIY homeowners do well with a phased approach. Phase one covers function, such as a path, patio base, or bed layout. Phase two adds comfort and style, such as seating, lighting, containers, or a trellis. That sequence keeps you from spending the whole budget on decorative pieces before the yard functions better.
Before-and-after planning also gets easier when you assign one job to each upgrade. A fire pit creates a gathering point. A pergola defines a room. Native planting softens edges that look harsh or empty. That kind of comparison prevents overlap and helps the finished yard look intentional instead of pieced together.
Get Started on Your DIY Makeover
What do you want your backyard to do first. Feed you, seat people, block sun, or cut weekend maintenance?
Start there. A good DIY makeover gets easier when each project has one clear job. Raised beds should make food growing simpler. A patio should give you a dry, stable place to eat and move furniture. A pergola should solve exposure and define a usable zone. That filter keeps the plan practical and makes the before-and-after easier to picture before you spend money.
I usually tell DIYers to choose based on friction, not inspiration photos. If muddy shoes are the daily problem, a path or patio base will improve the yard faster than another planting bed. If the yard looks bare from the kitchen window, vertical planting, containers, or a small focal feature can change the view without a full rebuild. If summer heat drives everyone indoors, shade and seating belong ahead of decorative upgrades.
Budget planning works better in phases. Phase one handles structure and use, such as drainage fixes, layout, base prep, bed placement, or circulation. Phase two adds comfort and style, such as lighting, furniture, containers, or a fire pit surround. That order avoids a common DIY mistake. Buying attractive finishes first, then tearing part of them back out to solve grading, spacing, or access problems.
Cost also needs a reality check against the house and neighborhood. In Southern California, professional hardscaping is cited as delivering 100 to 200% ROI, with pools and outdoor kitchens also returning value. The same source recommends keeping spending in proportion to the property so the yard feels like an improvement, not an overbuilt outlier. Even for a long-term home, that is a useful rule. Match the project scope to the lot size, climate, and how you use the space.
Planning on paper is good. Planning on a photo is better.
A lot of DIY layouts go wrong because the pieces make sense individually but fight each other once they share the same yard. A fire pit steals space from circulation. A dining set looks smaller in the store than it does on a patio. Raised beds cast more shade than expected. Before you buy pavers, lumber, soil, or lighting, it helps to test a few versions and compare them side by side for scale, sightlines, and access.
If you want to move faster with fewer expensive corrections, upload a photo of your yard and test ideas before buying materials. OutdoorBrite is one option for generating photorealistic outdoor concepts, comparing styles, and pressure-testing layout choices before you dig in.
If you want to explore your own yard before committing to materials, OutdoorBrite lets you upload a photo, try different backyard styles, and preview layout ideas for patios, planting, seating, and other DIY upgrades.
See your yard reimagined
Start creating




