Landscape Design Software for Beginners: 2026 Guide
Explore easy landscape design software for beginners with our 2026 guide. Learn key features, pricing, and avoid common mistakes.
You're standing in the yard with your phone out, trying to answer questions that sound simple until you start pricing lumber, pavers, and plants. Will the patio feel too tight? Will that tree shade the seating area all afternoon? Will the layout still look good once the shrubs grow in? Outdoor design software for beginners exists for that exact moment, when a rough sketch on paper is not enough and hiring a designer for the first pass feels like more than you need.
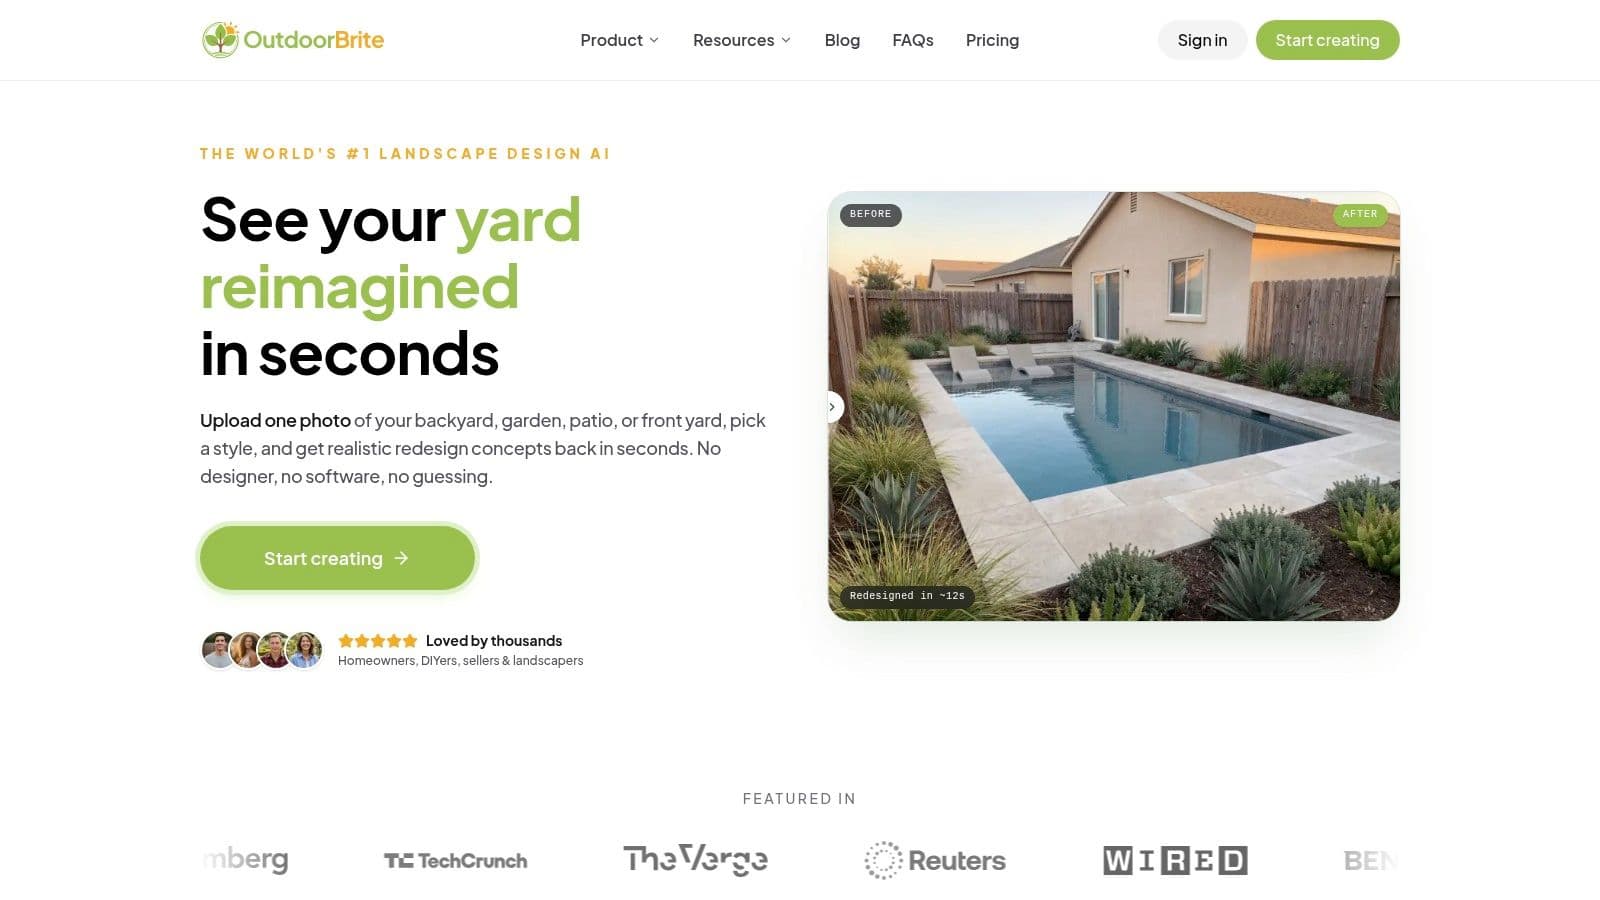
These tools help you test ideas before you spend money, and they have become much easier for homeowners and DIY renovators to use. The shift is not just prettier screens, it is matching the tool to the job you need to do. If you want a fast concept, an ai landscape design software tool such as OutdoorBrite can turn a photo into a visual starting point without asking you to learn drafting terms first. If you need a contractor-ready plan, a more detailed design program gives you measurements, layers, and a clearer path from idea to build.
That is the key question for beginners. You are not trying to master every feature, you are trying to choose the right kind of help for the first decision in front of you.
Table of Contents
- Why Beginners Are Reaching for Landscape Design Software
- What Landscape Design Software Does
- Key Features Beginners Should Look For
- Choosing a Workflow That Matches Your Project
- Your First Project Step by Step
- Pricing, Platforms, and Free Trials Explained
- Common Beginner Mistakes and How to Avoid Them
- Where to Start and What Comes Next
Why Beginners Are Reaching for Landscape Design Software
A homeowner stands in the yard, looks at a bare corner near the fence, and realizes the problem is not inspiration, it is confidence. The patio might fit, but maybe it will crowd the lawn. The new tree might look perfect on screen, but maybe it will block the afternoon sun. Beginner-friendly software fills that gap by turning “I think” into something you can see, move, and compare.
These tools are not only for trained designers. DIY renovators use them to test layout ideas, real estate agents use them to show curb-appeal upgrades, contractors use them to speed up client conversations, and homeowners use them to make planting and hardscape decisions without guessing. The practical value is simple, the software helps with layout, plant placement, material quantities, and the overall balance of a space before anyone breaks ground.
Why These Tools Became Popular
The category grew because the software stopped acting like specialist CAD and started acting like a visual planning tool. Consumer-friendly platforms added drag-and-drop editing, libraries of plants and hardscapes, and previews that make the result easier for a first-time user to understand. That shift matters because beginners rarely need construction-grade complexity on day one, they need a way to see whether the idea makes sense.
Practical rule: if your main question is “Will this look right in my yard?”, you need visualization first, not technical depth first.
The same shift also explains why newer roundups now sort tools by ease of use, visualization quality, and workflow simplicity, not just by feature count. That is a useful clue for beginners, because the market is finally organizing around the actual job, fast concepting, realistic planning, or contractor hand-off. If you want a quick first pass, start with an AI photo-to-render tool like OutdoorBrite, then compare it with the broader field in Best landscape design apps. If you need to study how visual software is being used in other buying decisions, the patterns in 2026 furniture selling strategies show the same move toward clearer previews and faster decisions.
What Landscape Design Software Does
Design software for this topic usually serves one of three jobs. Some tools work like a digital sketchbook for early ideas. Others act like a simplified CAD studio for measured planning. A newer group starts with a real yard photo and uses an AI photo editor to reimagine plants, materials, and layouts, which is the first step in tools like ai landscape design software.
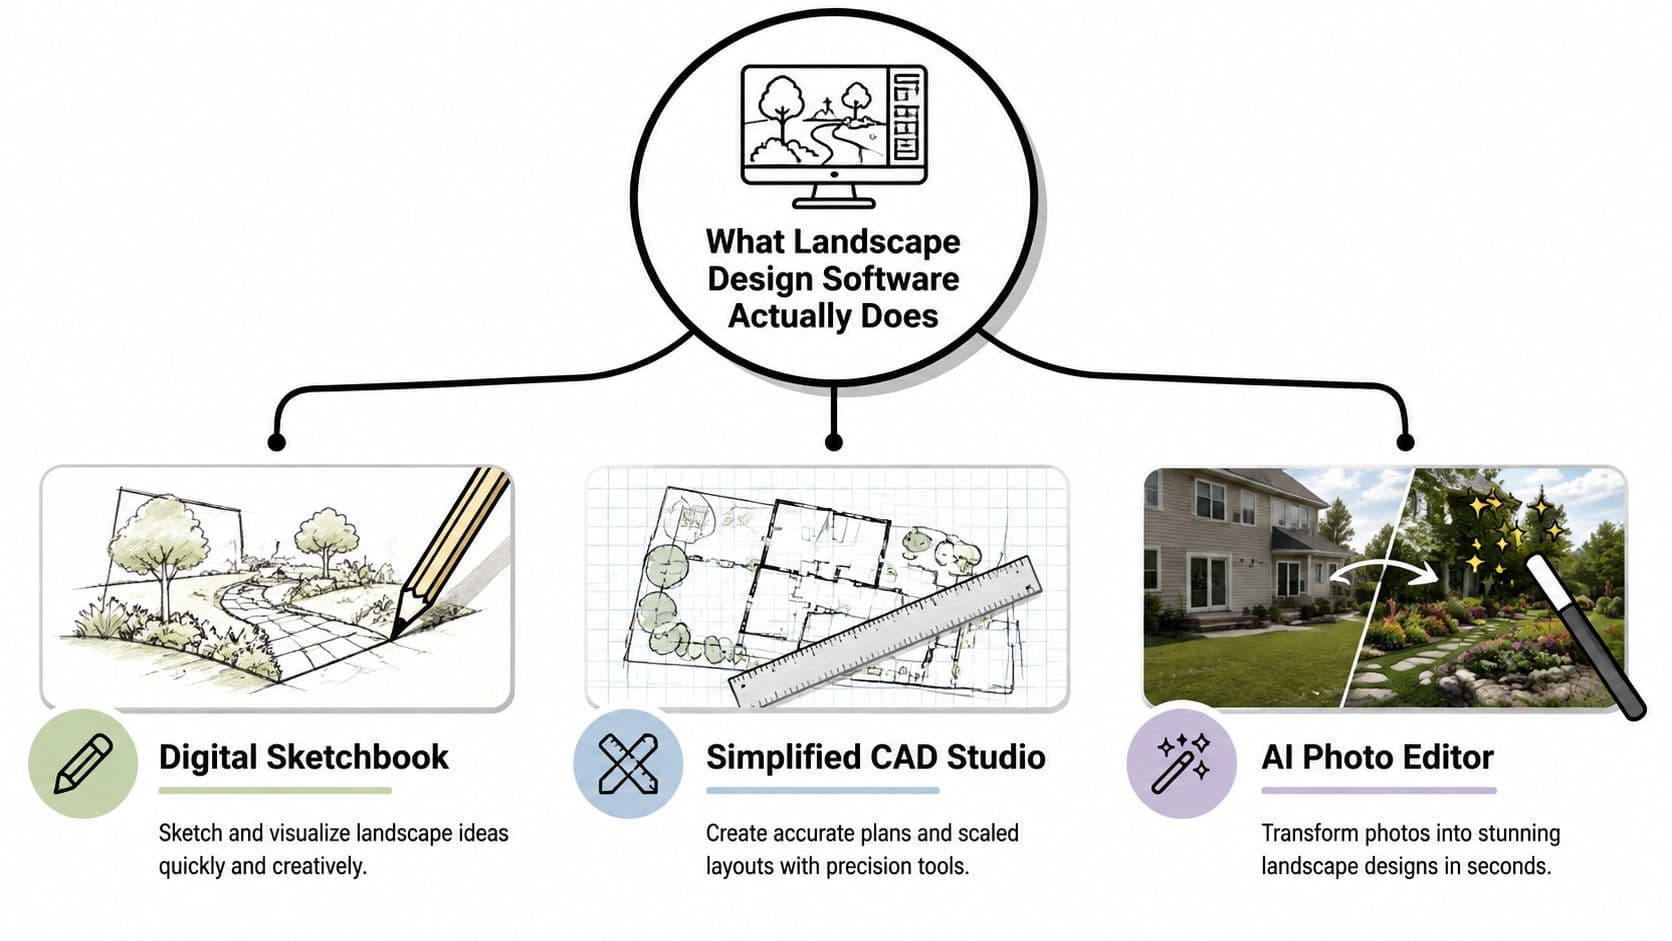
The basic workflow is the same across these tools. You begin with a base map, which is the yard shape inside the program. Then you place plants, paths, patios, walls, and other hardscape elements from a library. After that, you preview the result in 2D or 3D so you can check proportion and style before anything is built.
The beginner workflow in plain English
UF/IFAS describes a useful beginner process as a structured 2D workflow. You start with a base map, then use drag-and-drop plant and hardscape symbols, which lowers the drawing skill needed while still supporting labels, resizing, copying, saving, and printing UF/IFAS PDF. It also points to raster image import and tracing over a site photo or survey, which ties the plan to real geometry instead of a rough guess. That helps beginners who do not want to measure everything twice.
The category also shifted away from formal drafting first. Many beginner-friendly tools now use drag-and-drop interfaces, photo overlays, and template-driven workflows, so the first pass is closer to arranging pieces on a board than drafting from scratch TopTenReviews. In newer buying guides, products are often discussed in terms of ease of use and realism, which shows how the field has moved toward quick visual planning WorldMetrics.
A strong beginner tool does more than let you draw. It helps you think in scale, compare options, and catch design mistakes before they turn into expensive fixes.
If you see render, it usually means a visual preview of the finished space. If you see site plan, think bird's-eye layout. If you see softscape, that refers to the living parts, plants, grass, and trees. Knowing those terms makes marketing pages easier to read.
Key Features Beginners Should Look For
Start with the features that keep the plan grounded in reality. A beginner does not need every advanced add-on, but they do need enough structure to avoid guessing. If a tool cannot show scale, place objects cleanly, or export a plan you can share, it is harder to trust the result.
The five checks that matter most
A good first pass starts with a base map or photo import. That matters because a plan tied to your real yard is easier to judge than a blank canvas. From there, look for a plant and hardscape library that includes the kinds of objects you plan to use, not just decorative filler.
You also want real 2D and 3D preview modes. 2D helps with layout and spacing, while 3D helps you judge the feel of the finished space. Scale tools matter too, because drawing “close enough” can distort material counts and lead to under-ordering or over-ordering.
Scale fidelity is not a nice extra, it is the difference between a plan and a guess.
Beginners who want a quick visual concept should start with photo-first tools such as OutdoorBrite, where the first step is turning an existing yard photo into a new idea instead of building the whole drawing from scratch. If you are still comparing starting points, the Best free landscape design software guide is a useful place to sort low-risk options from heavier planning tools. For a separate early-stage route, the Starter App option gives another example of a simple first pass built around fast visualization.
Some products also show how the plan can move beyond a sketch. SmartDraw notes support for common scales, custom scale changes at any time, layers, scale-independent annotation, and export to PDF, PNG, and SVG. Realtime Landscaping Architect also auto-updates 2D plan and 3D perspective views and can generate an automatic Project Material List SmartDraw. Those are the kinds of details that matter once a concept needs to become something you can practically use.
Here is a quick checklist you can apply to any product page.
| Feature | What It Does | Why a Beginner Needs It |
|---|---|---|
| Base map or photo import | Anchors the design to your real yard | Prevents freehand guesswork |
| Plant and hardscape library | Lets you place trees, paths, patios, and more | Makes planning faster and more concrete |
| 2D preview | Shows layout from above | Helps with spacing and arrangement |
| 3D preview | Shows depth and visual feel | Helps you judge how the space will look |
| Scale tools | Keeps measurements accurate | Reduces material and sizing mistakes |
| Export options | Saves PDF, image, or plan files | Makes sharing with others easier |
Beginners can usually ignore BIM integration, irrigation layouts, and heavy CAD export on day one unless the project is already contractor-led. The better question is, “Can I use this to make one good decision today?” If the answer is yes, the tool is doing its job.
Choosing a Workflow That Matches Your Project
The first mistake many beginners make is shopping for features before naming the job. A quick concept sketch, a layout plan, and a contractor hand-off each ask for a different kind of tool. If you mix those goals together, you end up paying for complexity you do not need, or buying software that cannot finish the work you want done.
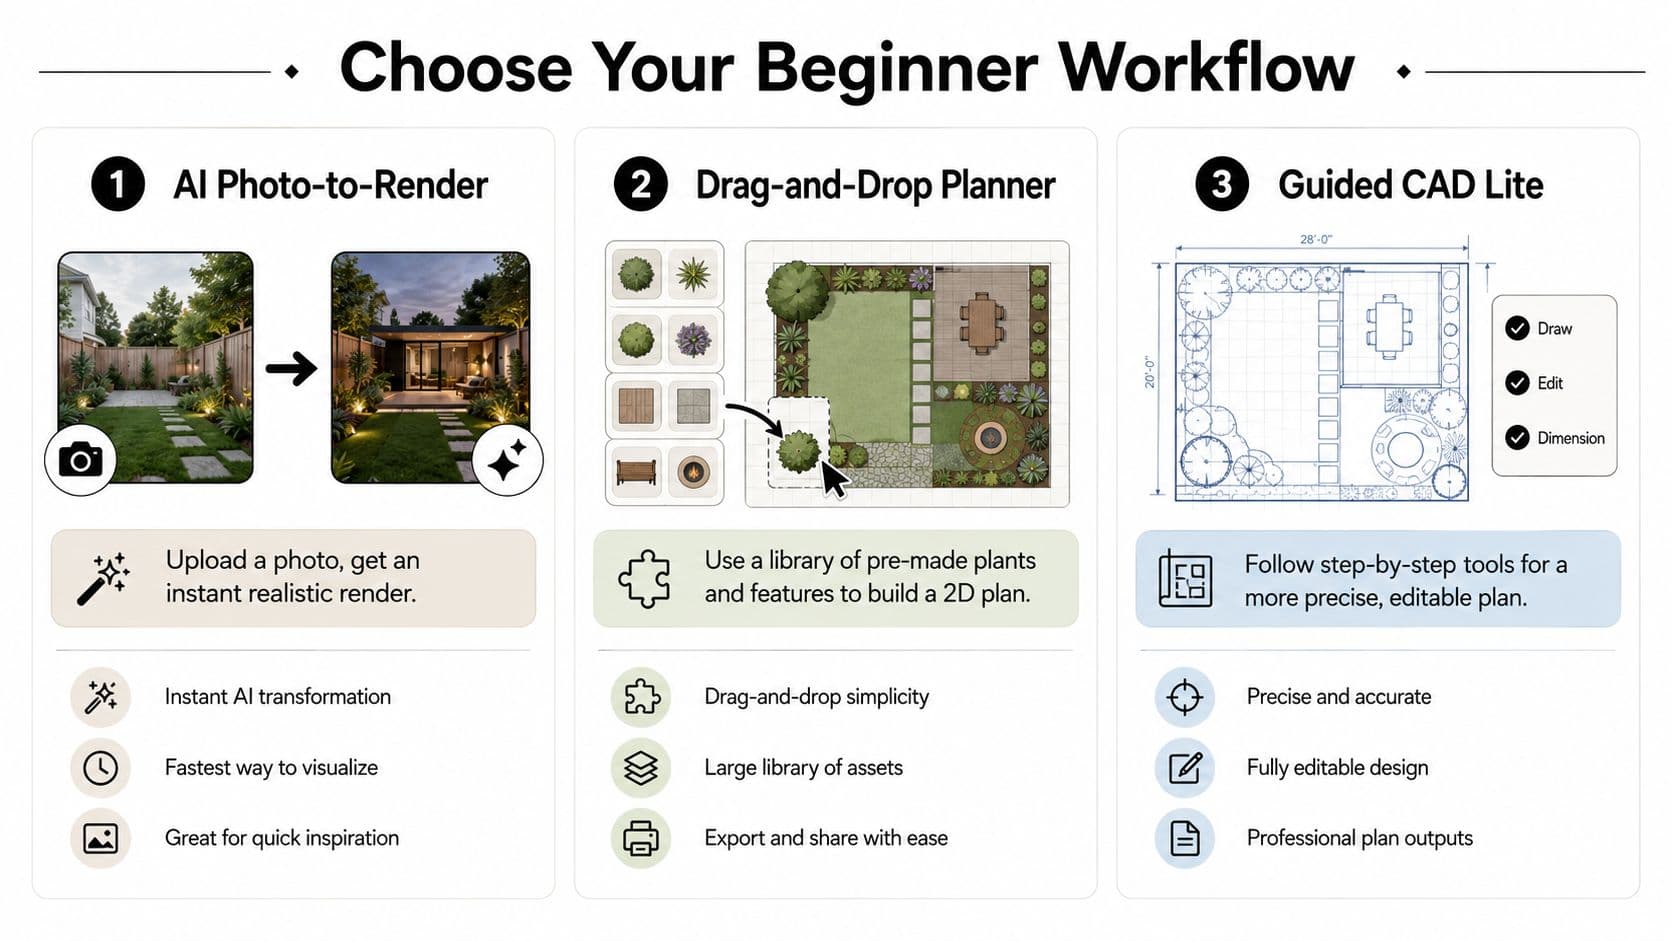
Three lanes, three different goals
AI photo-to-render tools are the fastest lane. They work best when you already have a yard photo and want instant visual ideas with little setup. Tools like OutdoorBrite fit this model because they start with an upload, a style choice, and a fast visual result, instead of asking you to build every line on a blank canvas. If you want a quick before-and-after concept, this is the cleanest first step. You can also see a similar beginner-friendly approach in the Best landscape design apps, especially if your goal is quick experimentation rather than formal planning.
Drag-and-drop 2D/3D planners fit the person who wants control over layout. These tools take more input, but they help when you care about exact placement, paths, patio edges, planting zones, and how each feature relates to the others. They are a strong fit for homeowners who want to shape the plan themselves before talking to a contractor.
Guided CAD-lite or contractor-ready drafting tools make sense when the output needs to be more precise, shared, or handed off. These tools focus on scale, exports, and material outputs rather than just visuals, which is why they matter once a project starts moving toward bids, estimates, or permits. If the plan needs to survive contact with a builder, this is the lane that does that job.
The same pattern shows up in other design fields. The 2026 furniture selling strategies discussion at MerchLoom points to a similar shift, faster photo-based visualization helps people decide sooner. That idea carries over to outdoor space planning, where AI tools often work best as the first step, not as a side feature buried inside a traditional planner.
Your First Project Step by Step
Start with your yard, not the software. Grab a tape measure or a site sketch, note the rough dimensions, and pay attention to where the sun falls during the day. That one habit keeps you from designing a shaded seating area where you wanted morning light or placing a tree where it will create more cover than you expected.
A workable first pass
Upload a photo or sketch a base map. If the tool allows photo import, use the actual yard image so the proportions feel real. If it's a plan-based planner, trace the site lines carefully and don't rush this part. The more accurate the base, the easier every later decision becomes.
Choose a style or preset next. In AI tools, that means picking a visual direction first, then letting the software generate concepts you can compare. In drag-and-drop tools, it means deciding whether the space leans modern, natural, formal, or relaxed before you place a single patio edge. That keeps the project from drifting into random choices.
Place the anchor elements before plants. Start with the patio, lawn, pathways, or any fixed hardscape, then fill in trees, shrubs, and accents around those larger forms. Preview the result in 3D so you can check how tall objects feel in relation to doors, windows, and seating areas. If the render suddenly looks cramped, the layout is telling you something useful.
If you keep tweaking a design for style alone, stop and ask whether you're still solving the yard problem or just decorating the screen.
When you're happy, export an image or PDF and share it. That's the point where a contractor can tell you if drainage, slope, or load-bearing details need a different approach. AI tools like OutdoorBrite make the loop especially fast, upload photo, choose style, review render, adjust, and re-render, so you can iterate without losing momentum.
Pricing, Platforms, and Free Trials Explained
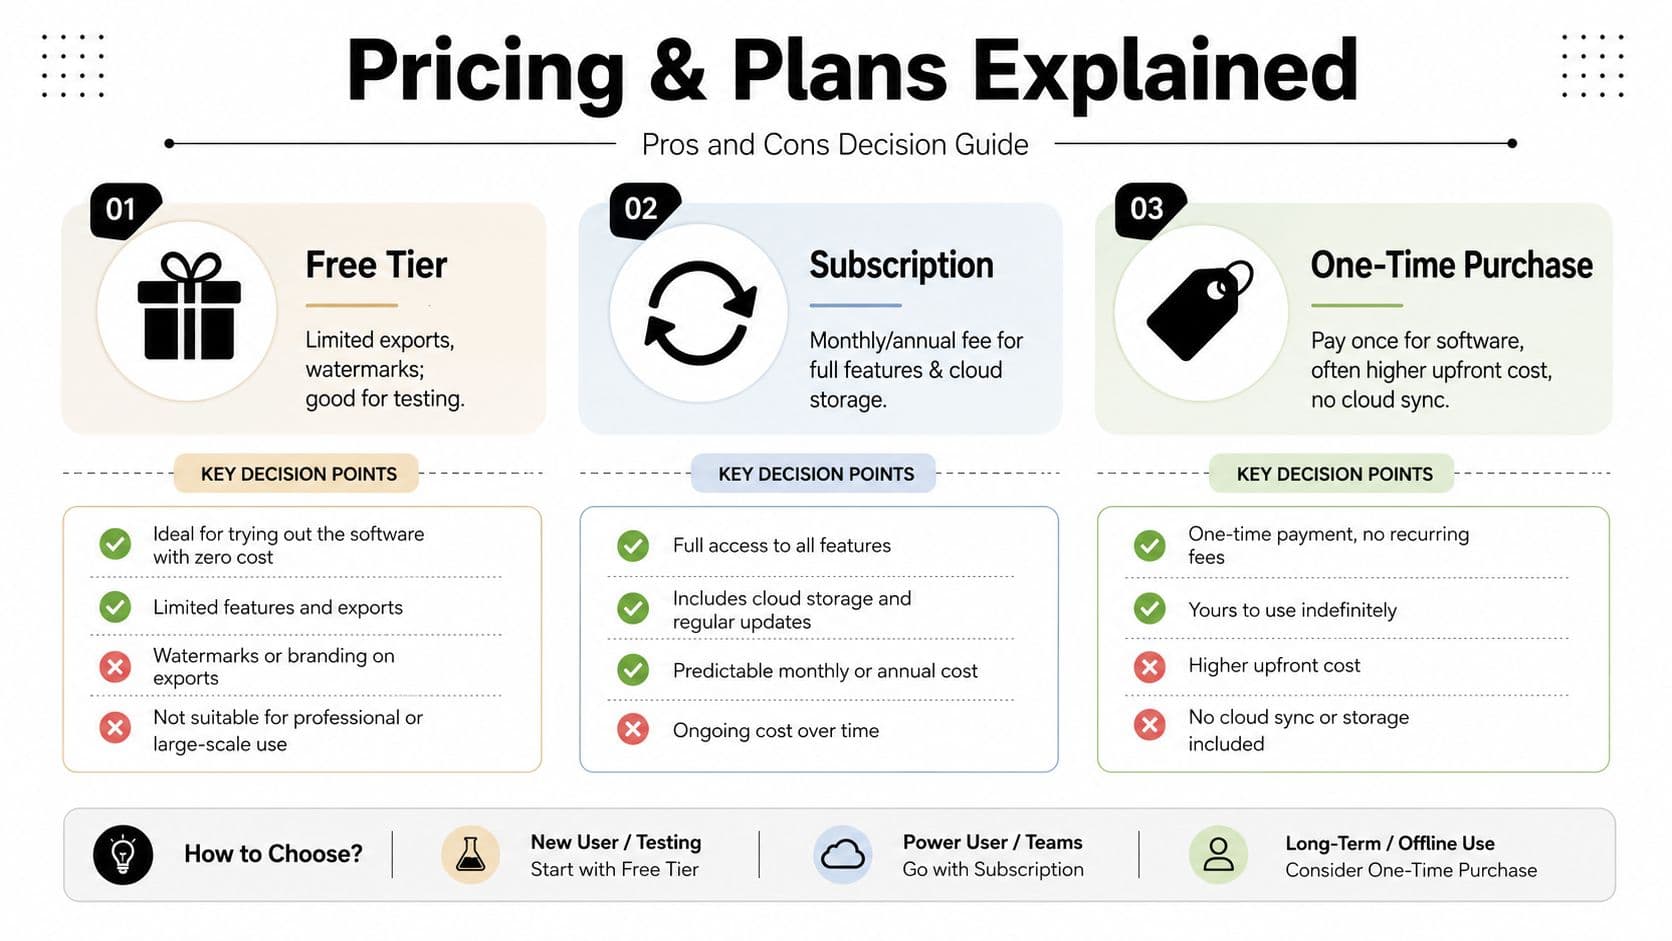
The pricing question gets easier once you stop comparing brand names and start comparing jobs. Beginner tools usually fall into three buckets, free tiers, subscriptions, and one-time purchases. Which one fits depends on whether you need a quick concept, a few rounds of edits, or a setup you expect to keep using after the first project is done.
How to think about the options
Free tiers are good for learning the interface and testing whether the workflow makes sense. They often limit exports or add watermarks, which is fine if you are only checking fit and ease of use. It is not enough if you need a file you can send to a contractor. You can find a detailed comparison in our guide to the Best free landscape design software.
Subscriptions fit AI-driven tools and cloud-based planners, especially if you want ongoing updates, current style libraries, and access from more than one device. They often make the first project easier because you can open the same file at home, in the yard, or on another computer. If you want a lower-friction starting point, the Starter App option from LunaBloom AI shows how many platforms package the first step for beginners.
One-time purchases still matter for desktop software, especially if you prefer a local install and do not want recurring billing. The tradeoff is usually a higher upfront cost and less cloud convenience, so this route makes more sense when you already know you want the software for repeated use.
Before you pay, export one real project, not a sample layout. A trial should show that your own yard can be planned clearly, shared easily, and saved in the format you need.
Platform choice matters too. Browser-based tools usually only need a phone or laptop. Desktop apps require installation and may need a stronger machine. Mobile apps are often better as companions than as full design studios. The practical test is simple, if you cannot finish your real project on the device you already own, the software will feel harder than it looked in the demo.
Common Beginner Mistakes and How to Avoid Them
The fastest way to waste time is to treat software like the decision instead of the tool. Beginners usually don't fail because they picked the wrong icon set. They fail because the plan was built on guesses.
Skipping measurements is the first problem. Fix it by measuring the yard before you open the app, then write down widths, lengths, and obvious obstacles.
Ignoring scale is the second. Fix it by checking whether the tool lets you set and preserve a real scale, especially in 2D.
Choosing plants that outgrow the space is another common miss. Fix it by checking mature size, not just how the plant looks in the catalog.
Forgetting shade is a quiet one, and it's easy to avoid. Fix it by noting where trees, fences, or buildings block light at different times.
Treating a render like a construction document is a bigger mistake. Fix it by using the render to decide on style and layout, then bringing in a contractor for drainage, slope, and structural questions.
Finally, don't overbuy complexity. Fix it by matching the tool to the job, inspiration, layout, or hand-off, instead of trying to learn a heavy system for a one-weekend project.
AI photo workflows help here because the image forces proportion into the process from the start. That's a lot safer than drawing a beautiful plan that never matched the yard in the first place.
Where to Start and What Comes Next
Pick the job first. If you want fast inspiration, start with an AI photo-to-render tool. If you want to shape the layout, use a drag-and-drop planner. If you need something a contractor can work from, choose a tool that respects scale and exports clearly.
Run one project trial, not ten comparisons. Judge the result by one question, can you see the change clearly enough to make a decision? If yes, the tool is doing its job.
AI yard design in 2026 is moving toward faster renders, more style presets, smarter plant suggestions, and tighter links to quoting and revisions. Beginners don't need to master the underlying tech to benefit from that shift, they just need a tool that turns uncertainty into a plan they can trust.
If you want a faster way to test a yard idea without learning CAD, take a look at OutdoorBrite Money. It turns a photo into a visual concept quickly, which makes it easier to compare layouts before you spend on materials or labor.
See your yard reimagined
Start creating