Outdoor Home Renovation Ideas: Boost Value in 2026
Outdoor home renovation ideas - Transform your outdoor space with 10 top home renovation ideas for 2026. Boost value with patios, smart tech, and
Your dream yard is closer than you think. If your backyard feels unfinished, your patio sits empty most evenings, or your side yard has become a holding area for hoses, bins, and half-finished plans, you're in a very common spot. Outdoor upgrades are exciting, but they also create decision fatigue fast. One wrong material choice, one poorly placed feature, or one rushed install can turn a good idea into a maintenance problem.
That's why the best outdoor home renovation ideas start with two questions. How will you use the space, and what should happen first so you don't pay to redo finished work later? I've seen homeowners buy furniture before fixing drainage, install a fire feature before planning wind direction, and build a patio that looked great on paper but felt too tight once chairs were in place.
The timing is right for careful planning. Outdoor home projects increased by 6% during the pandemic and reached 57% of all home renovation projects as homeowners put more attention on exterior living areas, according to Houzz renovation trend reporting summarized by Azenco Outdoor. That shift didn't disappear. People now expect outdoor areas to work like real living space.
Use this guide as a practical field manual, not just inspiration. You'll get 10 upgrades that hold up in real yards, plus a simple Visualize and Decide approach for each one so you can test the concept before spending money. If you want a broader planning reference too, this practical outdoor living space guide is a useful companion.
Table of Contents
- 1. Composite Decking Installation
- 2. Outdoor Kitchen and Patio Addition
- 3. Landscape Lighting Design
- 4. Water Features and Pond Installation
- 5. Hardscape Patio and Stonework
- 6. Pergola and Shade Structure Installation
- 7. Sustainable Landscaping and Raised Garden Beds
- 8. Fire Pit and Outdoor Fireplace Features
- 9. Outdoor Living Room with Furniture and Textiles
- 10. Smart Outdoor Technology Integration
- Top 10 Outdoor Home Renovation Ideas, Comparison
- From Vision to Reality Start Your Outdoor Transformation
1. Composite Decking Installation
A common starting point is a backyard with a tired wood platform, loose railings, and a finish that looked good for one season. The homeowner wants a deck they can use for dinner, bare feet, and wet traffic from the yard or pool without planning a sanding and staining weekend every year. Composite earns its keep in that situation.
I recommend it most often where moisture is part of normal use. Shade slows drying. Irrigation overspray keeps boards damp. Pool water, leaf litter, and freeze-thaw cycles all expose the weak points in lower-grade wood decks. Composite costs more up front, but it usually cuts maintenance and gives a more consistent finish over time. Heat retention can be the trade-off, especially with darker colors in full sun, so board choice matters.
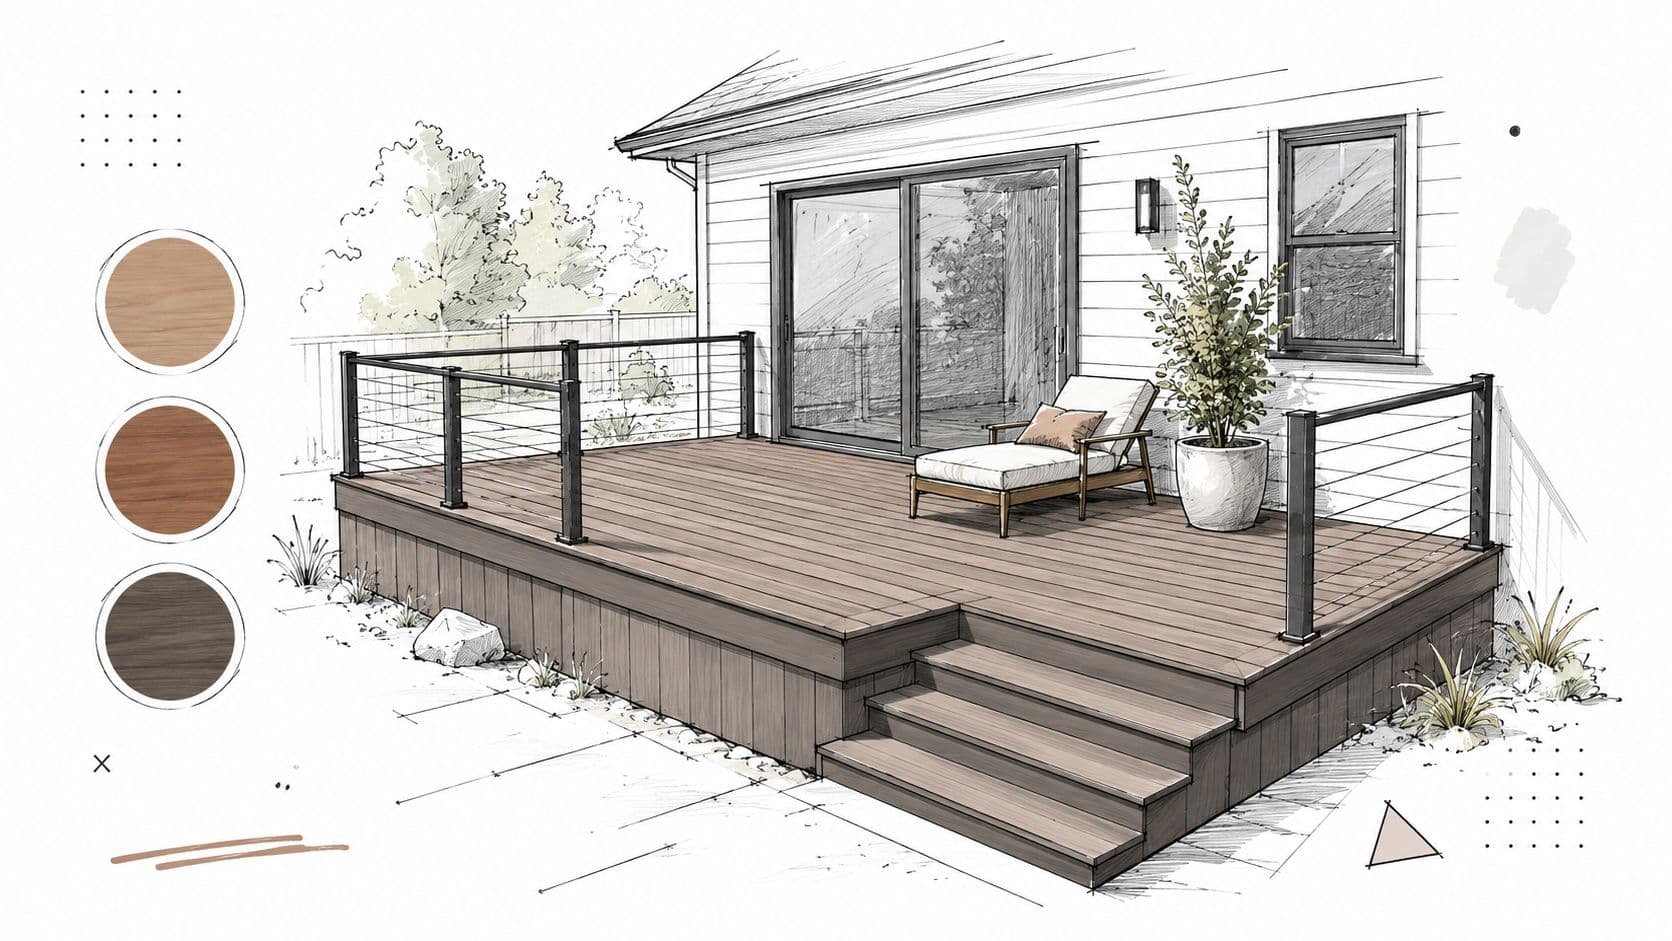
A practical upgrade might replace a small pressure-treated landing with a composite deck sized for a table, grill, and clear stair run. Add cable railing if the view matters. Add step lights if the family uses the space after dusk. On site, those details change how the deck performs far more than a sample board on a showroom wall.
Visualize and Decide
Before you order materials, test the deck in your actual yard. Use a mockup tool like OutdoorBrite's best free patio design app to compare board color, stair placement, railing style, and furniture layout against your house and grade. That step saves expensive change orders later.
Use this checklist before you commit:
- Set the finished height first: Flush transitions from the back door look clean, but they can create drainage and flashing problems if the threshold is too low.
- Check stair direction and landing space: Stairs should lead people where they naturally want to walk, not dump them into planting beds or tight corners.
- Review framing and ventilation: Composite boards last better when the structure below stays dry and gets airflow.
- Compare color in sun and shade: Mid-tone boards usually hide dirt and foot traffic better. Dark boards often read richer, but they run hotter.
- Plan lighting before installation: Step lights, post caps, and under-rail lighting need wiring routes before the surface boards go down.
- Draw furniture to scale: Dining chairs, grill clearances, and traffic paths consume more square footage than homeowners expect.
A good decision prompt is simple. Will this deck handle daily circulation, one real furniture layout, and safe stair access without feeling cramped? If the answer is unclear on the mockup, revise the plan before a contractor prices it.
For material trade-offs between composite and timber, TimberSol Ltd's decking insights offer a useful side-by-side reference.
2. Outdoor Kitchen and Patio Addition
An outdoor kitchen works when it shortens the distance between cooking, serving, and gathering. It fails when it becomes a showcase that's too far from the house, too exposed to wind, or too cramped for prep. The smartest versions start small. Grill, landing space, storage, and shade. Then add appliances only if you'll use them.
The spending environment supports selective upgrades, but not careless ones. In 2024, homeowners spent $463 billion on home renovations in the first quarter alone, with median renovation spend reaching $24,000, according to South Alabama's summary of renovation statistics. That tells me homeowners are willing to invest. It doesn't mean every yard needs a full chef's line.
A practical suburban setup might include a built-in Traeger grill zone, a weather-resistant counter, undercounter storage, and a dining patio directly off the back door. That's often more useful than a sprawling kitchen with refrigeration, sink, bar seating, and a pizza oven squeezed into one corner.
What works in the field
Smoke path matters. So does service access. If the grill throws smoke back toward the house or your neighbor's seating area, the kitchen will get used less than you expect.
Use a mockup tool before you call a mason or cabinet fabricator. OutdoorBrite's best free patio design app is helpful for testing layout, orientation, and how the kitchen connects to the house.
- Keep a landing zone on both sides of the grill: Hot trays need somewhere to go immediately.
- Plan utilities first: Gas, electric, and water runs decide placement more than aesthetics do.
- Add weather cover: A pergola, roof extension, or large umbrella can make the space usable through more of the year.
- Protect the traffic lane: Don't force guests to walk through the cook zone to get to seating.
A good test question is simple. Can one person cook while two others move around behind them without collision? If not, shrink the appliance list and improve the layout.
3. Landscape Lighting Design
Lighting changes how a yard feels more than almost any single upgrade. The mistake is treating it like decoration only. Good outdoor lighting handles safety first, then mood, then emphasis. You need people to see steps, path edges, and grade changes without turning the yard into a parking lot.
I usually start with three layers. Ambient light for overall visibility, task light near cooking or entry points, and accent light on trees, stonework, or architectural edges. That structure keeps the system calm instead of chaotic.
The strongest recent exterior packages often pair physical upgrades with lighting and controls. Product and project guidance gathered in these outdoor lighting installation tips aligns with that approach, especially when homeowners want a yard that works after sunset without harsh glare.
Visualize after dark
Night rendering is where most homeowners finally see scale correctly. A tree that looks dramatic in daylight may throw awkward shadows at night. A path that seemed obvious can disappear visually if fixtures are too sparse or too bright.
OutdoorBrite's landscape design software for homeowners is useful here because lighting needs to be judged in context, not as isolated fixtures.
- Warm the seating zone: Warm white light tends to flatter faces and make dining areas feel comfortable.
- Aim uplights carefully: Too steep and they flatten the feature. Too low and they create glare.
- Space path lights by effect, not habit: Even spacing looks tidy on paper, but curves and grade changes usually need adjustment.
- Put key zones on separate controls: Entry, dining, path, and feature lighting shouldn't always run at the same intensity.
Light the edge you need people to understand. Not every plant needs a spotlight.
A real-world example is a front-to-back lighting plan that keeps the entry and path on an automatic schedule while dining and garden accents stay dimmable for evening use. That split gives you function on weekdays and atmosphere on weekends.
4. Water Features and Pond Installation
A water feature can calm a yard or overwhelm it. The difference usually comes down to scale, sound, and maintenance tolerance. A small fountain near a seating area gives immediate effect with limited upkeep. A pond or waterfall can be beautiful, but it needs filtration, edging detail, and a plan for leaves, algae, and overflow.
Place the feature where people will experience it, not where there happened to be an empty corner. Morning light on moving water can be excellent. So can a pondless waterfall heard from a patio without the open-water maintenance of a full pond.
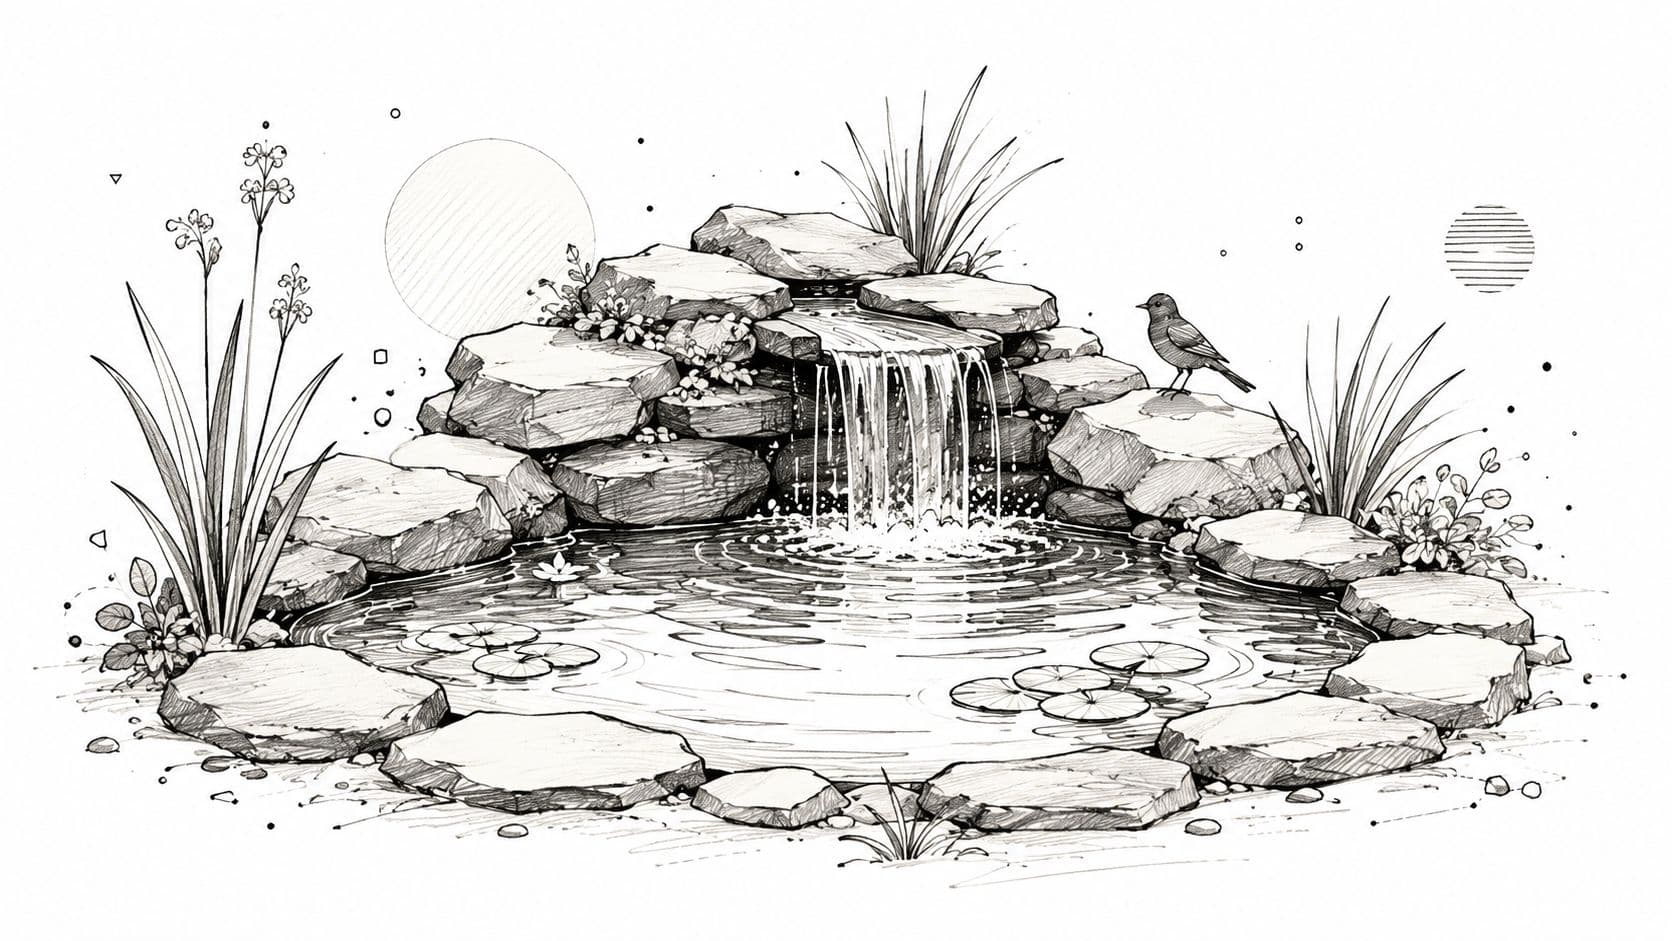
A compact courtyard fountain is one of my favorite fixes for a flat, quiet yard. It creates motion, softens traffic noise, and gives the eye a focal point when plantings are still young.
Placement matters more than size
If the base area stays wet, if runoff drains into the basin, or if the feature sits under a tree that drops debris year-round, upkeep will wear you out. This is one renovation where the hidden work matters as much as the visible finish.
- Check drainage around the feature: Water should move away from foundations and circulation paths.
- Use recirculating systems when possible: They're simpler to manage than wasteful overflow setups.
- Match sound to the space: Gentle movement fits a small yard. Loud cascades can dominate a quiet patio.
- Coordinate edging with nearby hardscape: Random rock piles rarely look intentional.
This walkthrough offers a useful visual reference before you commit to form and scale:
If you're using a visualization tool, test the feature from the kitchen window, the main sitting area, and the primary path. A water feature that looks good from only one angle is usually in the wrong place.
5. Hardscape Patio and Stonework
A family usually notices patio mistakes on the first weekend after installation. The table feels cramped. Chair legs catch in joints. Water sits near the back step after a storm. Stonework is expensive to revise, so this is one area where decisions need testing before materials are ordered.
Patios and stonework set the layout for nearly everything that follows. They determine how people move, where furniture fits, how cleanly the yard connects to the house, and whether future additions like a fire feature or pergola will feel planned or forced. I treat this phase as foundation work in finished form.
Start with shape, drainage, and use
Homeowners often choose pavers by color first. That is backwards. Start with the footprint, the finished height, and water movement. If the door threshold is awkward, the grade pitches toward the house, or the stair landing is too small, surface materials will not fix the problem.
A practical example is a rear yard with a new sliding door, a narrow concrete pad, and plans for a dining area. On paper, a 12-by-16 patio sounds adequate. In use, it may feel tight once you place a six-seat table, allow space to pull chairs out, and keep a clear walking path to the yard. That is why I mark patios full-scale before final approval.
- Pitch the surface correctly: Water should move away from the house and away from major walking routes.
- Size for real furniture: Set out the dining set, lounge chairs, or grill footprint before locking in the shape.
- Match the stone to the site: Concrete pavers are usually more budget-friendly and consistent. Natural stone gives richer variation but can cost more in both material and labor.
- Detail the edges early: Soldier courses, metal edging, and stone borders each change the look and the long-term stability of the install.
Costs vary by region and access, but homeowners should expect labor, base prep, and edge restraint to make up a large share of the budget. Tight side-yard access, demolition of an old slab, and retaining work can push pricing up fast. Timelines also stretch when drainage correction or step reconstruction is part of the scope.
Visualize and decide before you build
Stonework looks simple in a sample board and very different at full scale. Use an AI design tool such as OutdoorBrite to test paver pattern, color temperature, border style, and patio shape on your own home before you commit. Review the concept from the back door, the kitchen window, and the main seating position.
Use this quick decision checklist:
- Does the patio align with door locations and natural walking paths?
- Is there enough room for furniture plus circulation?
- Will the material look too bright, too busy, or too dark against the house exterior?
- Do steps, seat walls, or planters need to be built now instead of added later?
- Will gravel, permeable pavers, or wider joints help with runoff in this spot?
If easy-care garden design is part of the goal, permeable surfaces and gravel zones can reduce runoff and cut back on thirsty planted areas. They are not right for every use case, though. Gravel migrates, furniture can wobble, and snow removal is harder in colder climates.
Finish grading, drainage, and door transitions before decorative stone goes in. A patio should solve circulation and water problems, not cover them up.
6. Pergola and Shade Structure Installation
Pergolas are easy to love in photos and easy to place badly in real life. If the structure doesn't cast shade where people sit during the hottest hours, it becomes a decorative frame instead of a useful upgrade. Orientation matters more than ornament.
The most practical outdoor home renovation ideas extend seasonal use. Verified industry guidance points to strong homeowner interest in covered pergolas with integrated lighting and ceiling fans, along with retractable screens and infrared patio heaters. That combination makes a seating area functional beyond fair-weather afternoons, especially when the yard gets direct western sun.
A straightforward example is a rear patio that becomes unusable after lunch because the sun hits head-on. A pergola with a fan, lighting, and optional screen can turn that same slab into a workable evening room.
Shade only works when it lands in the right place
Visual testing is critical here because shadows move. Don't choose the pergola size based only on the patio outline. Choose it based on where the shade falls when you use the space.
- Align to sun exposure: South and west edges usually need the most protection.
- Keep enough overhead clearance: Too low feels oppressive. Too high can weaken the sense of enclosure.
- Decide if vines help or hurt: They can soften the frame beautifully, but they add pruning, debris, and seasonal variability.
- Coordinate power before framing closes: Fans, lights, heaters, and speakers are easier to wire early.
A clean aluminum pergola often makes more sense than a wood one for homeowners who don't want refinishing in the years ahead. On the other hand, painted or stained wood can better suit a traditional house. Both can work. The right answer depends on maintenance appetite and architectural fit.
7. Sustainable Landscaping and Raised Garden Beds
Many homeowners get conflicting advice. One camp says go drought-tolerant and low maintenance. Another says layer seasonal color for year-round interest. In practice, the best exterior arrangements combine both.
There's a real gap in guidance here. A 2025 survey of 1,200 homeowners in major markets found that 68% struggle to choose between flowering seasonal plantings and succulent or rock-focused designs, while 52% say their yard requires more maintenance than planned. In drought-prone regions, 71% now prioritize zero-scape over seasonal variety, but 45% still want year-round greenery. Those figures come from the verified data you provided, and they reflect what I see on jobs. People don't want a lifeless yard, but they also don't want a weekly chore list.
Balance beauty with maintenance
Raised beds help because they create order fast. They define a productive area for herbs, vegetables, or cut flowers while keeping the broader outdoor area simpler and easier to irrigate. Around them, sustainable planting works best when you group by water need and use durable hardscape to reduce fussy edge maintenance.
If you want to test that balance visually, OutdoorBrite's best free garden design software is useful for trying native-heavy layouts, gravel zones, raised bed placement, and bloom color mixes before you plant.
- Use hydrozoning: Group plants with similar water demand together.
- Reserve high-maintenance color for small areas: Put the seasonal show near the entry or main seating zone.
- Rely on structure elsewhere: Evergreen forms, mulch, gravel, and permeable paths keep the yard legible year-round.
- Place raised beds in full sun when possible: Edible gardens won't perform in deep shade.
One layout I often recommend is simple. Productive raised beds near the kitchen, durable native or adapted shrubs at the perimeter, and one focused seasonal planting strip where you'll see the color daily. That gives you visual change without turning the whole property into a maintenance cycle.
8. Fire Pit and Outdoor Fireplace Features
A fire feature should gather people, not smoke them out. That sounds obvious, but many installs ignore wind direction, seating distance, and the route people take through the yard. The result is a feature that photographs well and gets used rarely.
Gas and wood each have a place. Gas is cleaner, easier to start, and simpler for quick weeknight use. Wood brings sound, smell, and ritual, but it also brings ash, storage, and more code considerations. In tight suburban lots, gas often wins on convenience and neighbor relations.
Comfort depends on layout, not just flame
Start with the sitting pattern. If chairs are too far away, the feature loses warmth and intimacy. Too close, and the space becomes uncomfortable or unsafe. The paved or gravel surround matters too because sparks, chair legs, and foot traffic all need a stable surface.
- Respect clearances and local rules: Codes, HOA standards, and utility setbacks need checking before you buy anything.
- Consider prevailing wind: Smoke path or heat direction can make or break the experience.
- Use angled seating: Slightly angled chairs tend to improve conversation and sightlines.
- Match the scale to the patio: A massive fireplace can dominate a compact yard.
A useful visualization exercise is to place the feature in three possible spots and compare what the fire looks like from the house, the dining area, and the property line. The prettiest location in isolation isn't always the most comfortable one in use.
A fire pit belongs where people naturally pause. If you have to force the furniture around it, move the fire feature.
9. Outdoor Living Room with Furniture and Textiles
A lot of outdoor rooms fail at the last 20 percent. The patio is finished, the structure looks good, and then the furniture arrives oversized, under-scaled, or made from materials that cannot handle the site. I usually start the furniture plan before the hardscape layout is final, because seating depth, table size, and walking clearance tell you quickly whether the room will work.
Buy for the weather your yard gets. Full sun, reflected heat off pavers, wind exposure, and pool splash all change what will hold up. Teak ages well but needs periodic care if you want to keep the original color. Powder-coated aluminum stays light and low-maintenance, but very cheap frames can wobble within a season or two. Performance fabrics have improved a lot, though even good ones need storage or covers if you want them to last.
Build the room around use, not just style
Start with one decision. Is this space for conversation, napping, family hangouts, or overflow dining? That choice changes everything from seat height to table count.
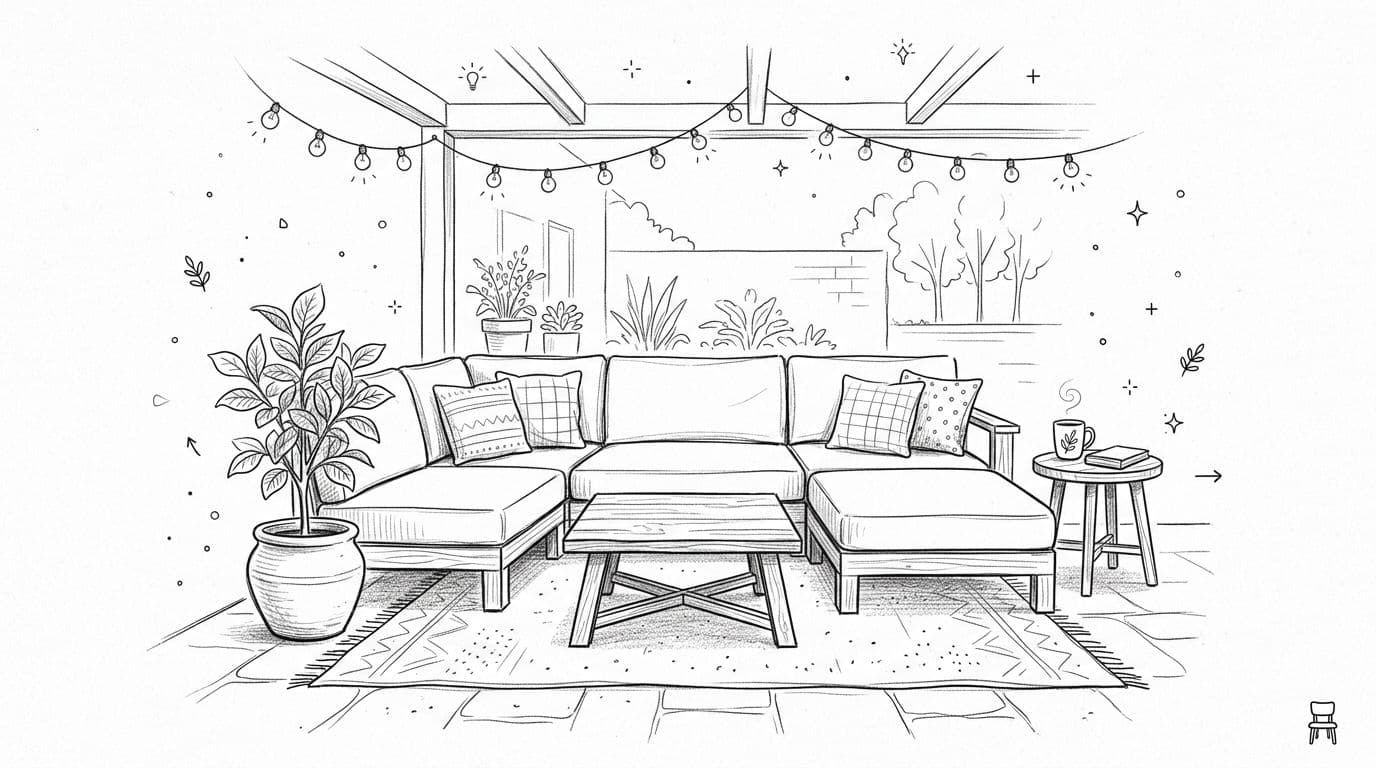
A conversation layout often works best with a sofa or sectional, two movable chairs, side tables within reach, and a rug large enough to keep at least the front legs of every seat on it. For mixed-use patios, I prefer modular pieces that can break apart when you need extra circulation. Homeowners often buy too many pieces, then realize no one can move through the space without turning sideways.
Useful targets are simple. Keep enough clearance for people to pass behind chairs without brushing cushions. Leave room for doors to swing, grill lids to open, and planters to stay out of traffic paths. If the only way to make the layout fit is to choose undersized tables or push seating against every edge, the patio is telling you it wants fewer pieces.
- Choose a focal point: It may be the yard view, a coffee table, or the house, not always a TV.
- Size the rug correctly: A small rug makes expensive furniture look temporary.
- Plan textile storage: A deck box, bench storage, or nearby mudroom saves cushions from mildew.
- Keep large pieces neutral: Pillows and throws are cheaper to replace when tastes change or fabrics fade.
Visualize and decide before you buy
This is one of the easiest ideas to test with an AI tool such as OutdoorBrite. Upload a photo of the yard, try two or three furniture layouts, and compare them at realistic scale before you order anything. I recommend testing a lounge-only version, a mixed lounge and dining version, and a pared-back layout with more open floor area.
Use this quick checklist while reviewing the mockups:
- Can someone carry food or drinks through the space without weaving around furniture?
- Do seat backs face the best view, or a wall, fence, or glare from windows?
- Is there a shaded seat available at the time of day you will use the space most?
- Where will cushions go during heavy rain or off-season months?
- Does the layout still work if six people show up instead of two?
For budgeting, a good outdoor living room can range from a modest refresh with new textiles and a few quality pieces to a full furniture package that costs as much as an interior room. The expensive mistakes are predictable. Wrong scale, weak materials, and no storage. Get the footprint right first, test it visually, then spend money on the pieces that take the most wear.
10. Smart Outdoor Technology Integration
You get home after dark, the side path lights come on at the right level, the irrigation skips a rainy day without anyone touching an app, and a leak alert reaches your phone before a buried line turns one wet spot into a repair bill. That is the standard smart tech should meet outdoors. If a device does not save time, reduce waste, or prevent damage, it usually becomes one more thing to troubleshoot.
Outdoor systems fail for boring reasons. Weak Wi-Fi near the gate. A transformer buried behind shrubs. Too many brands that do not talk to each other. I treat smart upgrades as infrastructure first and gadgets second.
Start with controls tied to water, power, and safety. In most yards, that means irrigation, lighting, and monitoring. Audio, screens, and decorative add-ons come later, once the backbone is reliable.
A practical rollout looks like this:
- Audit the site. Mark valve boxes, existing low-voltage runs, GFCI outlets, and weak signal areas.
- Set one platform. Keep irrigation, lighting, and alerts on a system you can manage without jumping between five apps.
- Add weather-based irrigation control. This is often the fastest way to cut waste and avoid plant stress.
- Automate key lighting zones. Put paths, entries, and steps on schedules or motion settings.
- Install monitoring where failure costs money. Leak sensors, camera coverage at access points, and power monitoring near pumps or outdoor kitchens all earn their keep.
- Leave service access visible. Hubs, valves, and transformers need to be reached without disturbing the surrounding outdoor features.
Costs vary with wiring and device count, but a focused package with a smart irrigation controller, lighting controls, and a few sensors can stay in the low thousands. A larger setup with cameras, gate hardware, outdoor-rated speakers, and electrical upgrades climbs quickly. The hidden cost is labor. Trenching, outlet additions, and Wi-Fi improvement often matter more than the price of the device itself.
Visualize and decide before you install
Smart tech is easy to overspec on paper. It is harder to judge in a real yard where doors swing, trees block signal, and fixtures compete with planting beds. Upload a photo to an AI tool such as OutdoorBrite and test where key devices would sit before you buy anything. I like to compare a basic plan, a safety-first plan, and a fully connected plan. That makes trade-offs obvious before the electrician and irrigation contractor are on site.
Use this checklist while reviewing the mockups:
- Where will the controller, hub, or transformer live, and can it be serviced easily?
- Do cameras cover entries without pointing straight into a neighbor's yard?
- Are path lights placed for steps and grade changes, not just decoration?
- Is there reliable power where heaters, pumps, or kitchen equipment will sit?
- Will Wi-Fi reach gates, detached garages, and far planting areas?
- If one device fails, can the rest of the yard still function manually?
One more planning note from project management experience. Front-of-house tech upgrades work best when bundled. If you are already replacing exterior fixtures, improving access control, or updating the approach to the house, coordinate those decisions now so the electrician makes one clean pass instead of several smaller, expensive return visits.
Top 10 Outdoor Home Renovation Ideas, Comparison
A comparison table should help you choose, not just admire the options. Use this one to weigh cost, disruption, and payoff, then mock up your top two or three ideas in an AI tool such as OutdoorBrite so you can test fit, scale, and layout in your actual yard before signing a contract.
| Item | Implementation Complexity 🔄 | Resource Requirements ⚡ | Expected Outcomes 📊 | Ideal Use Cases & Tips 💡 | Key Advantages ⭐ |
|---|---|---|---|---|---|
| Composite Decking Installation | Moderate to high. Specialized fastening, framing checks, and careful detailing matter. Typical install time is 3 to 7 days | High. Premium boards, substructure repairs if needed, skilled labor; $8K to $25K | Durable, low-upkeep surface with a long service life | Best for high-traffic spaces and wet or humid climates. Test board color in a photo mockup because darker tones hold more heat in full sun | Clean appearance, low maintenance, recycled-content options |
| Outdoor Kitchen and Patio Addition | High. Utility hookups, permits, drainage, and multi-trade scheduling often stretch the job to 3 to 8 weeks | Very high. Appliances, counters, gas, water, electrical, cabinetry; $15K to $75K+ | Strong resale appeal and a true entertaining zone | Fits households that cook outside often, not just a few holidays a year. Map grill smoke, prep space, and walking paths before finalizing the layout | Full outdoor living function, strong buyer appeal |
| Landscape Lighting Design | Low to moderate. Wiring plans, transformer sizing, and fixture placement usually take 2 to 3 weeks | Moderate. LED fixtures, controls, possible trenching; $2K to $8K | Safer circulation, stronger curb appeal, better nighttime use | Use lighting to solve dark steps, entries, and seating areas first. Review a night-effect mockup so accent lights do not compete with each other | Lower energy use, better visibility, flexible controls |
| Water Features and Pond Installation | Moderate. Excavation, pumps, filtration, and edge detailing usually take 2 to 4 weeks | Variable. Liners, pumps, stone, filtration; $2K to $50K+ | Sound, movement, and a clear focal point | Works best where equipment can be serviced easily and runoff is controlled. Test size in a photo first because many homeowner plans start too large for the space | Sensory appeal, visual focus, habitat value |
| Hardscape Patio and Stonework | Moderate to high. Base preparation and drainage determine whether the surface lasts. Typical install time is 1 to 3 weeks | High. Pavers or stone, base materials, edge restraint, labor; $3K to $15K (typical) | Durable outdoor room, better circulation, added value | Best for dining, grilling, and daily use zones. In mockups, check furniture clearance and door swing so the patio feels generous, not packed | Long service life, low upkeep, permeable options available |
| Pergola and Shade Structure Installation | Low to moderate. Footings, attachment details, and structural review can take 1 to 4 weeks | Moderate. Material choice drives cost, and motorized systems add $4K to $10K+ | More shade, stronger definition, modest cooling benefit | Good for patios that feel exposed at midday. Test orientation before building because sun angle changes the value of the structure more than style does | Better comfort, stronger architecture, optional adjustable shade |
| Sustainable Planting & Raised Beds | Low to moderate. Plant selection, soil prep, irrigation zoning, and establishment take the most time. Full maturity can take 1 to 24 months | Low to moderate. Plants, soil, mulch, irrigation; $1.5K to $5K (project) | Lower water demand, better seasonal interest, productive growing space | Ideal for homeowners who want lower maintenance and edible planting areas. Use a visual plan to group plants by size and water needs before buying | Water savings, pollinator support, food production |
| Fire Pit and Outdoor Fireplace Features | Low to moderate. Safety clearances, surface protection, and permits can affect a 1 to 3 week schedule | Low to moderate. Fuel type and finish level drive cost; $500 to $10K+ | Strong gathering point and a longer outdoor season | Best where seating can stay outside the heat and smoke zone. Mock up furniture spacing first so guests are not forced too close to the flame | Warmth, atmosphere, simple social focus |
| Outdoor Living Room with Furniture and Textiles | Low. Selection, delivery, and arrangement often take 2 to 4 weeks | Moderate to high. Quality seating, rugs, storage, and fabrics; $5K to $25K+ | Comfortable, flexible outdoor use with fast visual payoff | A good choice after surfaces and shade are handled. Test layout in a photo because oversized sectionals often block circulation and make smaller patios feel cramped | Immediate comfort, style continuity, flexible use |
| Smart Outdoor Technology Integration | Moderate to high. Power, network strength, and device coordination usually take 2 to 4 weeks | Moderate to high. Controllers, sensors, speakers, cameras; $2K to $10K+ | Better control of water, lighting, security, and convenience | Start with one system that solves a real problem, usually irrigation or lighting. Place devices in a mockup to confirm reach, access, and sightlines before purchase | Automation, remote management, operating insight |
Use the table as a shortlisting tool, then pressure-test each idea against your site conditions, budget ceiling, and tolerance for construction mess. The homeowners who make better renovation calls usually compare the visible result and the hidden work at the same time.
From Vision to Reality Start Your Outdoor Transformation
You finalize a patio on paper, order materials, and break ground. Two weeks later, the grill lid clips the new post, rainwater settles against the slab, and the seating area gets full sun during the hottest part of the day. I see versions of that mistake often. The problem usually is not the idea itself. It is making product and layout decisions before testing how the space will function.
Start with function and sequence. Fix drainage, slope, failing edges, and circulation conflicts first. Then build the base layer, usually deck or patio, shade, lighting, and planting areas. After that, add higher-cost features such as an outdoor kitchen, water element, or fire feature. This order controls rework, protects the budget, and keeps one trade from undoing another trade's work.
Homeowners are still putting serious money into exterior upgrades, as noted earlier. The better projects usually share one trait. Big layout decisions get made before deposits go out for stone, framing, cabinetry, or fixtures.
A Visualize and Decide process helps with that. Use the comparison table to narrow your shortlist to two or three ideas. Then upload a photo of your own yard and test each one against a simple checklist: Does it fit the space? Does it improve circulation? Does it work with sun, wind, and privacy conditions? Can you build it in phases if pricing comes in high?
Be specific during the mockup stage. Test paver color next to the house trim. Check whether a pergola covers the dining table at 4 p.m., not just at noon. Place furniture to confirm that people can pull out chairs and still walk through comfortably. Review night views before buying fixtures, because beam spread on a spec sheet rarely tells you how the space will read from the kitchen window or back door.
OutdoorBrite is useful here because it lets you test these choices on your actual property instead of a generic inspiration photo. That is how homeowners catch the expensive misses early: a fire pit sitting in a wind path, planting beds that are too shallow to soften a wall, or a patio that looks generous on plan and feels cramped once seating is in place.
Budget discipline improves too. Clear mockups reduce change orders, rushed add-ons, and material waste. If financing is part of the plan, OutdoorBrite Money may be one option to review alongside scope, phasing, and contractor bids.
The strongest projects are the ones that still make sense after the first summer storm, the first maintenance cycle, and the first year of actual use. Test the idea visually. Pressure-test it against cost, construction mess, and upkeep. Then build in an order that protects the investment.
OutdoorBrite Money can help you move from rough ideas to a more confident renovation plan on OutdoorBrite Money, where you can visualize backyard, patio, and garden upgrades on your actual space before committing to the work.
See your yard reimagined
Start creating