
20 Curb Appeal on a Budget Ideas for 2026
Improve curb appeal on a budget with 20 practical ideas for paint, plants, lighting, paths, cleaning, and DIY updates, plus costs and timing.
Curb appeal on a budget is less about buying more and more about deciding what deserves attention first. Research published in the Journal of Real Estate Finance and Economics found that improved curb appeal can raise house prices by up to 17%, with the appearance of the yard and house contributing about equally to that effect. Read the peer-reviewed landscape and house appearance study
That doesn't mean you should spend on a full redesign. It means a cleaned walkway, visible front door, healthy planting, and crisp bed lines can matter more than an expensive feature hidden at the side of the property. The practical sequence is simple: photograph the home from the street, visualize changes, clean and prune, define the entry, then add color, plants, lighting, and small hardscape details.
The estimates below are planning ranges, not promises. Material prices, tool rentals, labor, climate, access, and property size vary by region. DIY difficulty and completion time also depend on your experience. Stop and hire a qualified professional when a project involves structural damage, electrical work, drainage, major trees, roof height, masonry, or uncertain safety conditions.
OutdoorBrite can help you test door colors, mulch tones, plant layouts, pathways, containers, and lighting concepts on a photo of your actual property before you purchase materials. That can prevent a common budget mistake, buying attractive items that don't work together.
Quick planning checklist
- Photograph the house from the street and from the approach to the door.
- Mark the features visitors notice first, including weeds, stains, blocked windows, damaged steps, and unclear paths.
- Visualize the highest-impact change before buying.
- Clean, prune, and repair before adding decoration.
- Set aside separate amounts for materials, rentals, maintenance, and professional labor.
- Review practical exterior details with Danny's Garage Door Repair tips, especially when the garage door occupies a large share of the facade.
Prioritize the most visible problem first. A clean, safe, clearly defined entrance usually beats a larger collection of decorative purchases.
Table of Contents
- 1. Fresh Mulch and Ground Cover Refresh
- 2. Perennial Flower Beds and Strategic Plantings
- 3. Power Washing and Deep Cleaning
- 4. Budget-Friendly Hardscaping With Pavers and Pathways
- 5. Strategic Tree and Shrub Trimming and Shaping
- 6. Fresh Paint on the Front Door and Shutters
- 7. Landscape Lighting and Solar Accent Lights
- 8. Container Gardens and Potted Plant Arrangements
- 9. Updated Entry Hardware and House Numbers
- 10. Low-Cost Edging and Bed Definition
- 11. DIY Mailbox, Porch, and Entry Staging
- 12. Small Structural Repairs and Visible Fixes
- 13. Selective Fence and Gate Refresh
- 14. Driveway and Walkway Crack-and-Edge Cleanup
- 15. Front-Facing Window Box and Shutter Balance
- 16. Seasonal Cleanup and Low-Maintenance Transitions
- 17. Water-Smart Front-Yard Simplification
- 17-Point Budget Curb Appeal Comparison
- Turn the Best Ideas Into a One-Weekend Plan
1. Fresh Mulch and Ground Cover Refresh
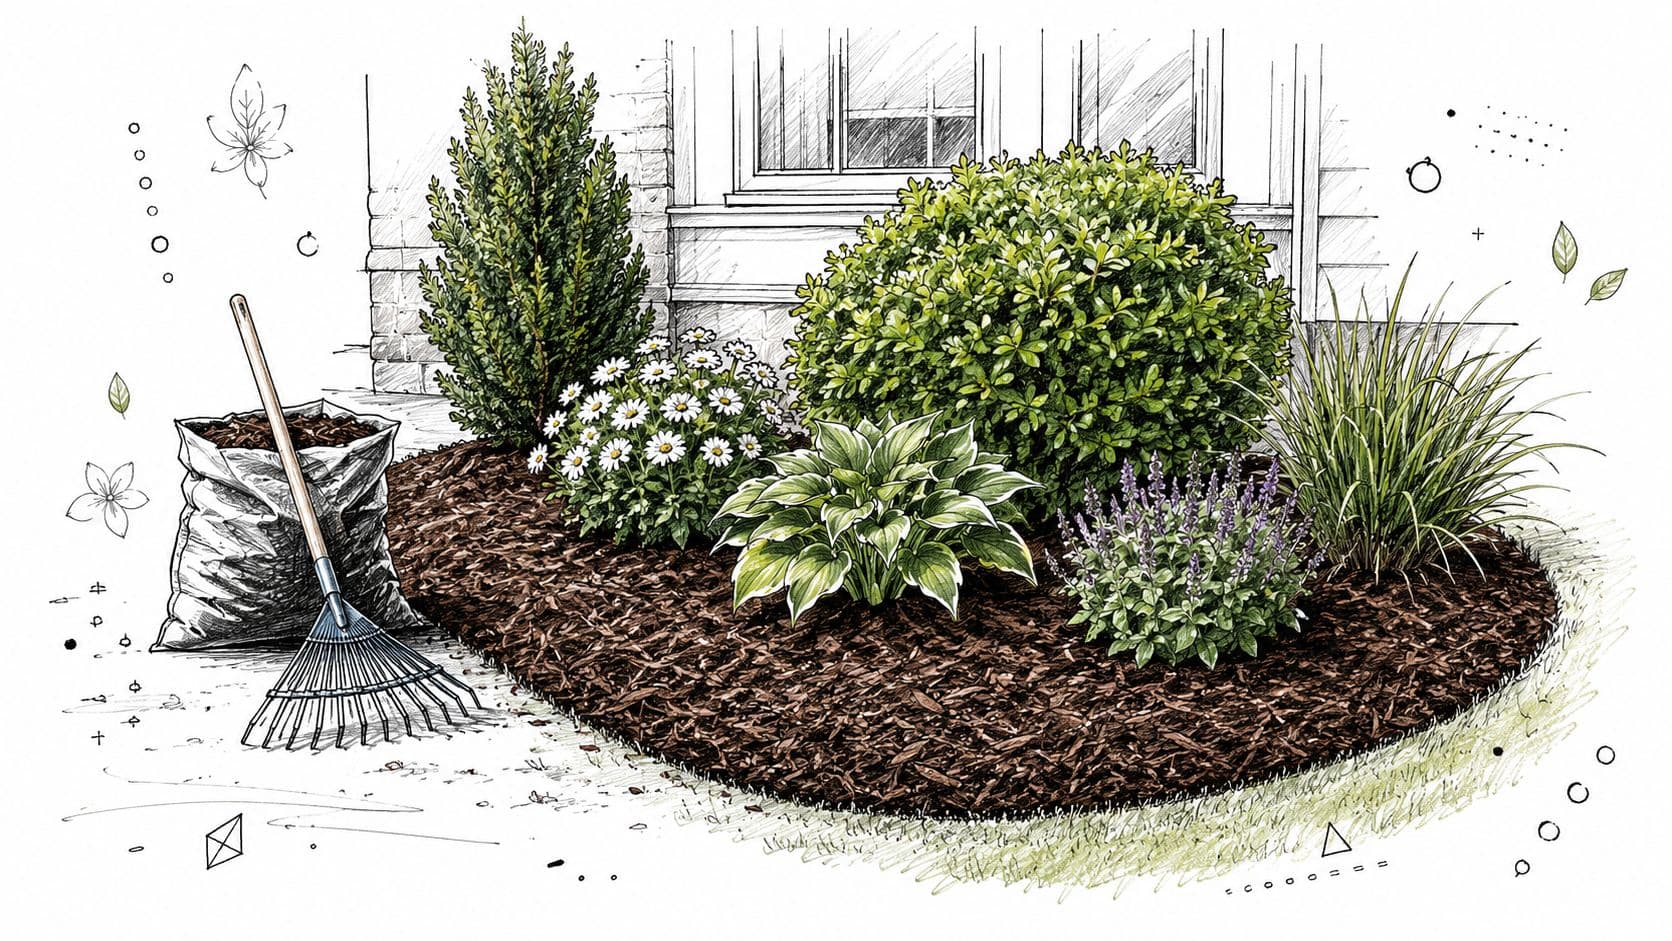
Fresh mulch is a strong first purchase because it unifies beds that already contain useful plants. It hides minor soil irregularities, suppresses weeds, strengthens contrast, and makes shrubs and flowers look intentionally grouped rather than scattered.
Planning range: $50 to $200 for materials, depending on bed size. DIY difficulty: Easy. Completion time: A few hours for a modest front bed.
Materials checklist: Mulch, gloves, rake, shovel, wheelbarrow, weeding tool, hose or rope for bed edges, and a measuring tape.
Pull weeds and remove dead debris before spreading anything. Re-cut the bed line, loosen compacted soil where needed, then spread a consistent layer of about 2 to 3 inches, keeping mulch away from trunks and stems. A dark brown mulch can sharpen green foliage in a suburban bed, while red mulch may suit a warmer cottage-style exterior. Black mulch can emphasize clean planting lines on a modern facade.
Buy in bulk from a local garden supply when practical. Bulk material often reduces packaging waste and can be easier to distribute across broad beds. Refreshing in spring works well after cleanup, while fall application can protect exposed soil before winter.
Don't build mulch against tree trunks. If the bed has poor drainage, recurring disease, or roots that are being buried, ask a landscaping professional to assess the soil and grading before adding more material.
2. Perennial Flower Beds and Strategic Plantings
Perennials stretch a planting budget because they return rather than requiring a complete seasonal replacement. The best value comes from selecting plants that suit the site, grouping them clearly, and allowing mature size to shape the design.
Planning range: Qualitative and highly regional. DIY difficulty: Easy to moderate. Completion time: One day for a small bed, with ongoing establishment afterward.
Materials checklist: Climate-appropriate perennials, compost if soil needs improvement, hand trowel, shovel, gloves, hose, labels, and mulch.
Start with three to five hardy varieties suited to your local conditions. Purple coneflowers and daylilies can create a relaxed cottage effect. Black-eyed Susans make a strong yellow mass, while ornamental grasses add movement and texture. Native perennials can also reduce the risk of choosing plants poorly adapted to local weather, though “native” doesn't automatically mean suitable for every soil or exposure.
Place plants in groups rather than scattering one of everything. Repeating a few forms creates rhythm, and staggered bloom times keep the bed useful beyond one short flowering window. Established perennials can often be divided later, giving you additional plants without another purchase.
Use ai front yard design to compare plant groupings and color combinations on your actual facade before digging. For contractors estimating material quantities or presenting options, Exayard landscaping estimating software can support the planning process.
Planting time depends on frost, heat, and rainfall. Get professional help if the bed requires irrigation changes, retaining work, extensive soil correction, or plant selection beyond your local knowledge.
3. Power Washing and Deep Cleaning
Dirty concrete, algae-streaked siding, and weathered fencing can dominate the view before anyone notices the landscaping. Cleaning is often more useful than adding new decoration, especially when the property's main problem is neglect rather than lack of color.
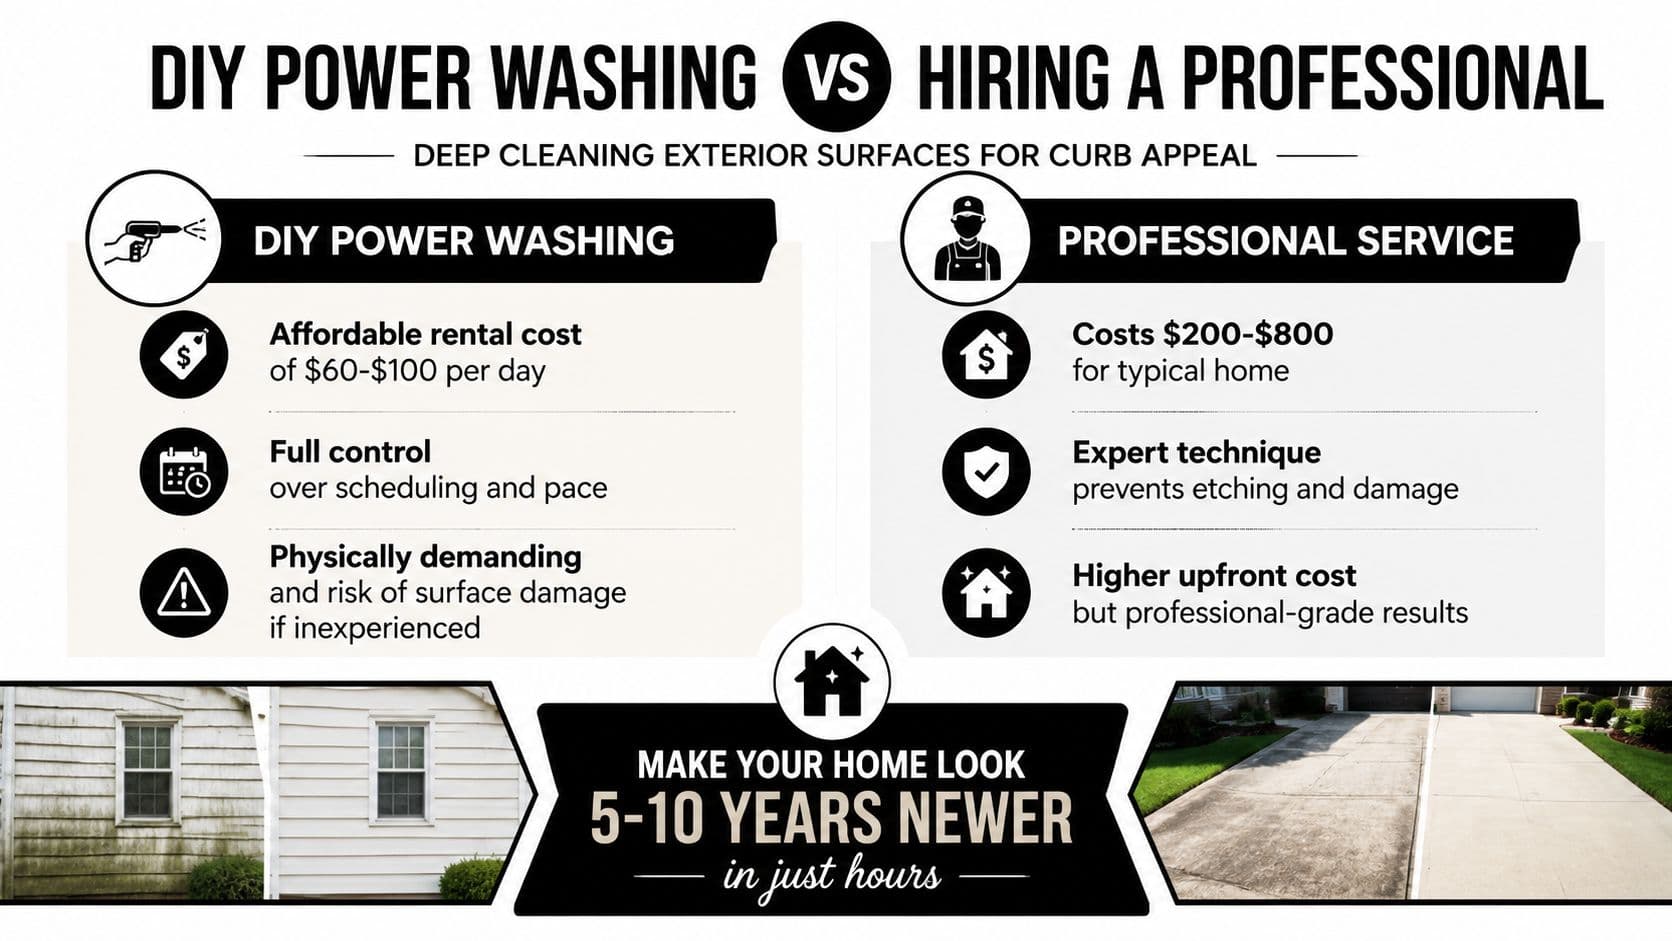
Planning range: A typical professional cleaning may cost $200 to $500, according to the supplied project guidance. DIY difficulty: Moderate. Completion time: Several hours, plus drying time.
Materials checklist: Pressure washer or rental, appropriate nozzles, exterior cleaner, stiff brush, protective eyewear, gloves, hose, and drop cloths where needed.
Start with the lowest effective pressure. The supplied guidance recommends beginning around 1,500 to 2,000 PSI and increasing only when the surface allows it. Keep the nozzle moving, maintain a consistent distance, and test an inconspicuous area first. Concrete, vinyl siding, brick, painted finishes, and old wood all respond differently.
A driveway can look brighter after grime is removed. A brick walkway may regain its original color once moss and staining are treated. Fence cleaning can reveal whether the wood needs stain or only better maintenance. Avoid spraying directly into vents, outlets, window seals, or damaged siding.
Clean before taking design photos or listing photos, then reassess what needs painting or replacement. A professional makes sense for old wood, fragile paint, lead-related concerns, high elevations, delicate masonry, or any surface where incorrect pressure could cause permanent damage.
For another practical perspective on exterior cleaning, see how homeowners can revitalise your Delray property through surface maintenance.
4. Budget-Friendly Hardscaping With Pavers and Pathways
A path gives the eye a destination and gives visitors a clear route from the street to the door. You don't need a large patio to create that structure. A short run of stepping stones, a gravel approach, or a narrow paver border can make the front yard feel more complete.
Planning range: Homeowner-installed options may fall around $2 to $10 per square foot, while professional installation may run around $15 to $25 per square foot, based on the supplied project guidance. DIY difficulty: Moderate. Completion time: A small path can take a weekend.
Materials checklist: Pavers or stepping stones, gravel or bedding sand, landscape fabric where appropriate, shovel, level, rake, hand tamper or rented compactor, string, and edging.
Lay out the route with a hose before excavating. Check how it looks from the street, not just from standing beside it. Remove unstable soil, establish a compact base, and use a level frequently. Fabric may help limit weeds in some gravel applications, but it won't correct poor drainage or an unstable base.
Permeable pavers can help where runoff is a concern. Gravel suits a xeriscape-style entry but needs containment and regular raking. Reclaimed or surplus pavers may save money, although mismatched thicknesses can make installation harder.
Preview pathway placement and patterns with landscape design software for homeowners before buying. Hire a professional for major grading, driveway work, retaining walls, drainage corrections, or any route that must meet accessibility requirements.
5. Strategic Tree and Shrub Trimming and Shaping
Pruning can reveal the home you already own. Overgrown shrubs may hide windows, siding, house numbers, or the roofline. Low branches can block the view to the entry and make a small facade feel closed in.
Planning range: Basic hand tools may cost $20 to $50, according to the supplied project guidance. DIY difficulty: Easy for small shrubs, moderate or high for trees. Completion time: A few hours for light pruning.
Materials checklist: Bypass pruners, hand saw, loppers, gloves, eye protection, disinfectant for tools, tarp, and a method for collecting branches.
Begin with dead, damaged, crossing, or visibly misplaced growth. Shape shrubs lightly rather than forcing every plant into a tight geometric form. Cut just above an outward-facing bud when making appropriate cuts, so new growth can move away from the center.
The supplied guidance recommends removing no more than one-third of a tree's branches in one year. That rule doesn't make large trees safe for casual work. Timing varies by species and region, but late winter or early spring dormancy suits many trees. Flowering species may need different timing if you want to preserve blooms.
Use a photo or OutdoorBrite concept to judge whether opening a sightline improves the facade before cutting. Call a qualified arborist for mature trees, branches near power lines, climbing, chainsaw work, storm damage, or uncertain tree health. A bad cut can take years to correct.
6. Fresh Paint on the Front Door and Shutters
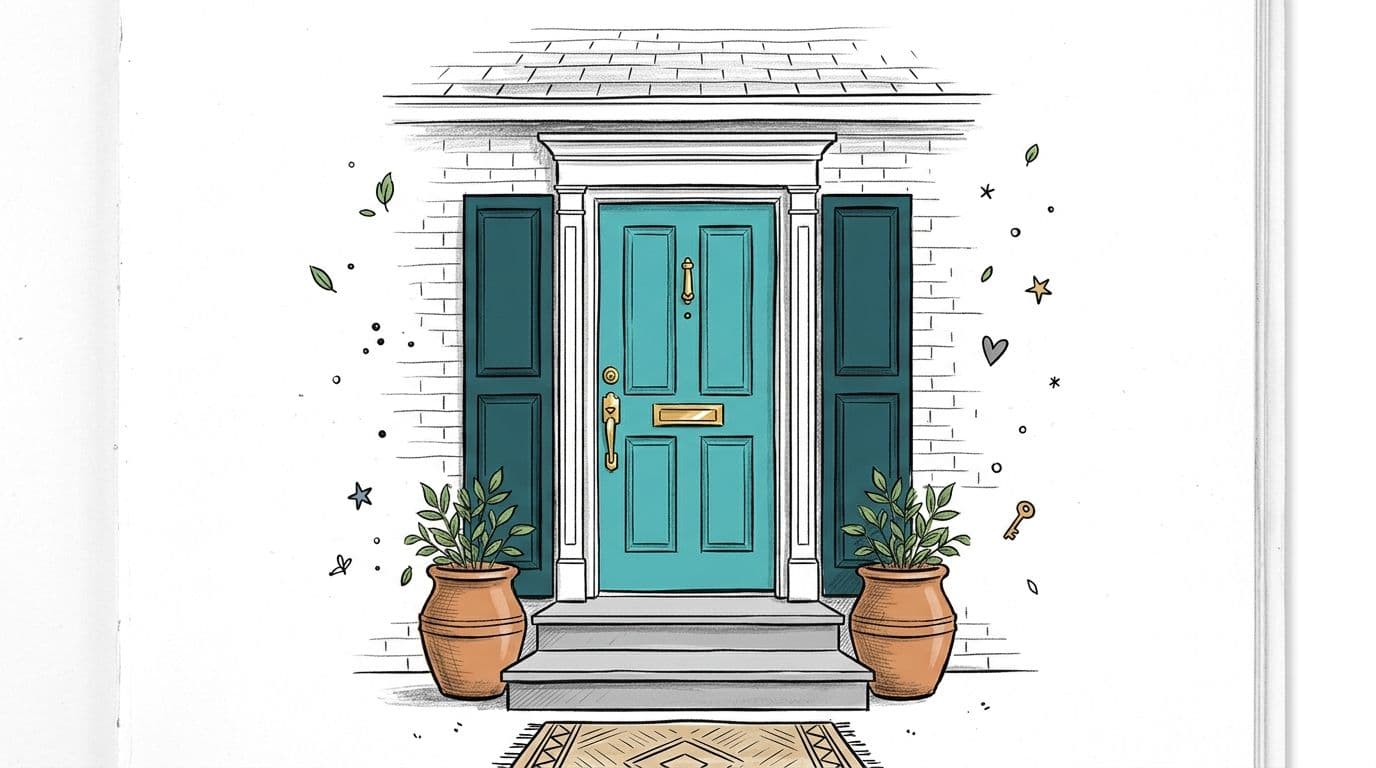
A front door is a natural focal point, so paint can change the home's identity without repainting the entire exterior. A black door with white trim can suit a traditional facade. Turquoise or coral may work on a cottage-style home, while forest green and brass can complement a more restrained exterior.
Planning range: Door paint may cost $20 to $50, while shutters and trim may require $100 to $300 in materials, according to the supplied project guidance. DIY difficulty: Easy to moderate. Completion time: One to two days, including preparation and drying.
Materials checklist: Exterior primer, exterior paint, brushes, small roller, sanding block, painter's tape, drop cloth, screwdriver, cleaner, and replacement hardware if needed.
Remove hardware where possible, clean the surface, sand loose paint, and prime bare or dramatically changed areas. Apply thin coats rather than trying to cover everything in one heavy pass. Test the color on the actual door because shade changes with sun, shade, surrounding siding, and time of day.
Choose paint rated for the local exposure. Dark colors can absorb more heat in hot climates, while pale colors may show dust and splash more readily. Shutters should support the proportions of the windows rather than compete with them.
If the door has rot, movement, water intrusion, or damaged framing, painting is only a cosmetic pause. Use a qualified contractor for those repairs, and get help when upper-level shutters require unsafe ladder work.
7. Landscape Lighting and Solar Accent Lights
Lighting extends curb appeal into the evening, but random fixtures can make a property look improvised. Use light to guide movement, identify the entry, and emphasize a few architectural or planting features.
Planning range: Solar fixtures for a property may cost $100 to $300, according to the supplied project guidance. Individual higher-quality fixtures may cost $15 to $30 each. DIY difficulty: Easy for solar, moderate for low-voltage systems. Completion time: A few hours.
Materials checklist: Solar path lights or low-voltage fixtures, stakes, replacement batteries where applicable, cable and transformer for wired systems, shovel, timer, and outdoor-rated connectors.
Place path lights where people walk, not merely along a perfectly symmetrical line. The supplied guidance suggests spacing path lights 3 to 4 feet apart for safety. Use warm white light around 2700K for an inviting traditional appearance, then adjust brightness so the fixture doesn't overpower the house.
A few uplights on focal trees can create depth. Downlighting can soften steps and planting beds. In cloudy regions, inexpensive solar lights may perform inconsistently, so wired low-voltage lighting can offer better reliability.
Review OutdoorBrite pathway lighting tips before deciding where fixtures belong. Hire an electrician for mains-voltage work, buried wiring that requires specialized installation, or any connection affected by moisture, code, or an existing electrical fault.
8. Container Gardens and Potted Plant Arrangements
Containers let you change the entry without committing to permanent beds. They're particularly useful for renters, new homeowners, shaded porches, and properties where the existing soil is difficult to improve.
Planning range: Quality containers may cost $20 to $100 each, with plants around $5 to $15 each, according to the supplied project guidance. DIY difficulty: Easy. Completion time: One to several hours.
Materials checklist: Containers with drainage holes, potting mix, plants, saucers where appropriate, slow-release or water-soluble fertilizer, hand trowel, and a watering can.
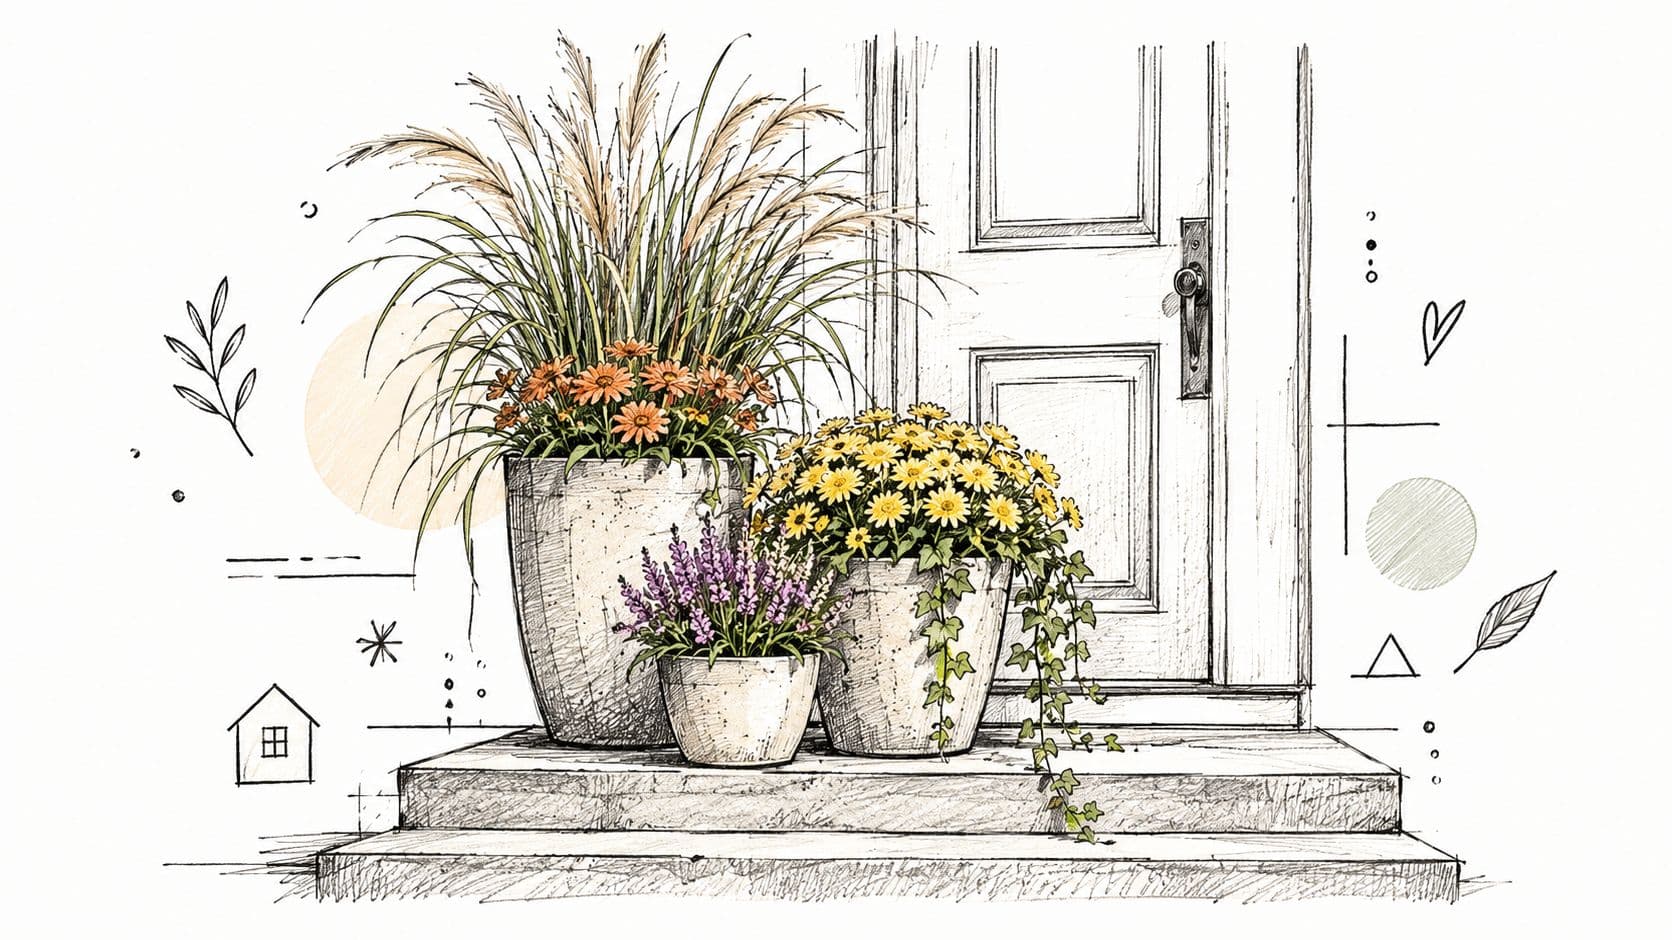
Place matching containers on both sides of a door when the facade is symmetrical. For a small stoop, group containers at different heights instead of blocking the approach. A center plant such as an ornamental grass, a flowering accent, and a trailing plant can create texture without requiring a large collection of varieties.
Seasonal substitutions can keep the entry fresh, such as petunias in summer, mums in fall, and pansies in cooler months. That convenience comes with recurring watering and replacement work. Heavy containers can also become difficult to move and may stain or damage delicate surfaces.
Test arrangements on a photo with OutdoorBrite before buying. Keep drainage away from siding and steps, and hire help if containers must be secured against wind or installed above safe lifting height.
9. Updated Entry Hardware and House Numbers
Small hardware changes work because visitors interact with the entry at close range. Readable house numbers, a clean handle, and one coordinated accent can make a freshly painted door feel finished rather than partially updated.
Planning range: Qualitative and dependent on the fixture selected. DIY difficulty: Easy to moderate. Completion time: A few hours, including measurement and installation.
Materials checklist: House numbers, exterior-rated screws, drill, screwdriver, measuring tape, level, sealant, door hardware, knocker, or mailbox components.
Measure before ordering. Check screw spacing, door thickness, backset, mailbox dimensions, and the material behind the mounting surface. A large, legible number treatment may improve the entry more than an ornate knocker that visitors can't see from the street.
Choose finishes that tolerate local sun, rain, salt, freezing conditions, or humidity. You don't need every fixture to match exactly, but the door handle, numbers, light, and mailbox should look related.
Photograph the entry and compare finishes with OutdoorBrite. Prioritize the door and address numbers before secondary fixtures. Stop if installation reveals rot, masonry damage, unstable mounting, or unsafe wiring. A professional can repair the substrate before new hardware hides the problem temporarily.
10. Low-Cost Edging and Bed Definition
Bed definition is often the missing step between an ordinary yard and a convincing design. A clean line separates lawn from mulch, gravel, or flowers and makes mowing easier without requiring new plants.
Planning range: Qualitative, depending on whether you use a trench, plastic edging, metal, or surplus pavers. DIY difficulty: Easy. Completion time: Several hours for a small bed.
Materials checklist: Hose or rope, edging spade, shovel, gloves, level, mulch or ground cover, and optional edging material.
Lay a hose or rope to test the proposed curve from the street. Broad, simple curves usually look calmer than a series of tight scallops. Straight lines can reinforce the horizontal geometry of a modern facade. Once satisfied, cut the trench, remove grass, and add mulch only after the line is clean.
Avoid making the bed too narrow for mature plants. A crowded bed will look unfinished again once shrubs expand. Check buried utilities before digging, and don't block drainage routes with raised edging.
OutdoorBrite can help compare bed proportions and border placement before you commit. Use professional assistance if the proposed edging affects grading, irrigation, utility access, tree roots, or a retaining condition. Decorative edging shouldn't create a new trip hazard or send water toward the house.
11. DIY Mailbox, Porch, and Entry Staging
A staged entry doesn't need a collection of signs, chairs, lanterns, and seasonal ornaments. It needs a clear route, a visible door, and a small number of weather-appropriate elements that support the architecture.
Planning range: Qualitative and dependent on what you already own. DIY difficulty: Easy. Completion time: An afternoon.
Materials checklist: Cleaning supplies, outdoor doormat, storage hooks or bins, containers, weather-resistant accessories, mailbox paint or hardware, and a hose or pressure nozzle.
Start by removing broken, faded, redundant, or misplaced items. Coil hoses, store tools, hide bins where allowed, and clear the steps. On a small stoop, one pair of containers and a clean mat may be enough. Around a mailbox, ground cover or a defined bed often looks better than scattered ornaments.
Choose foliage for shade rather than forcing sun-loving flowers into a covered entrance. In windy regions, secure lightweight accessories. In snowy climates, keep the route open for clearing. In hot regions, select materials that won't fade or become dangerously hot.
Use OutdoorBrite to test container groupings and entry focal points on the actual facade. Hire a professional for loose railings, unstable steps, porch settlement, or structural damage. Staging can disguise none of those conditions safely.
12. Small Structural Repairs and Visible Fixes
Decoration can't compensate for a loose handrail, sagging gate, missing fence board, or cracked trim. These defects tell visitors the property needs attention, so repair them before spending on new plants or accessories.
Planning range: Qualitative, because repair scope varies sharply. DIY difficulty: Easy for minor cosmetic work, advanced for structural or service-related work. Completion time: From an hour to several days.
Materials checklist: Camera, notebook, replacement boards or trim, exterior screws, caulk, primer, paint, basic hand tools, and protective equipment.
Walk from the street and photograph every visible defect. Rank each one by safety, water protection, prominence, and complexity. Tightening a rail or replacing a missing picket may be straightforward. Repairing rot behind trim, correcting drainage, or stabilizing a porch is not a decoration project.
After repairs, reassess the facade before choosing paint, planting, or lighting. OutdoorBrite can help you plan the visible finish around the corrected structure, but it can't diagnose hidden damage.
Use licensed or qualified professionals for structural work, electrical systems, roof issues, drainage, or anything governed by local code. The budget-friendly choice is often fixing one serious defect rather than adding several attractive but temporary details.
13. Selective Fence and Gate Refresh
You don't always need to rebuild an entire boundary to improve the street view. Clean and repair the section people see first, then make sure the transition into the untouched portion doesn't look accidental.
Planning range: Qualitative and dependent on cleaning, replacement boards, hardware, and finish. DIY difficulty: Moderate. Completion time: A weekend in suitable weather.
Materials checklist: Cleaner, stiff brush or pressure washer, replacement boards, exterior screws, stain or paint, brushes, drop cloths, gate hardware, and post supports if appropriate.
Inspect posts, rails, fasteners, and the gate before buying finish. Replacing a few failed pickets and installing a reliable latch may accomplish more than coating a structurally weak fence. Test stain or paint in an inconspicuous area, because existing wood and weather exposure can change the color.
A refreshed gate can anchor a front path. A low fence may soften when paired with restrained perennial planting, while a tall boundary may need a consistent finish to avoid looking visually heavy.
Use OutdoorBrite to compare fence colors and planting combinations. Schedule cleaning and finishing during a dry weather window appropriate to the product. Hire a professional for leaning structures, rotten posts, complex gates, property-line questions, or boundary disputes.
14. Driveway and Walkway Crack-and-Edge Cleanup
Before pricing replacement, inspect what can be cleaned, patched, or framed. Weeds in joints, stains, loose edge material, and scattered gravel can make an otherwise serviceable approach look neglected.
Planning range: Qualitative and dependent on the surface and damage. DIY difficulty: Easy for cleaning and minor patching, moderate for edge work. Completion time: Several hours to a weekend.
Materials checklist: Broom, stiff brush, compatible cleaner, joint tool, patching compound, gravel or mulch, gloves, eye protection, and a level.
Remove weeds and debris first. Identify whether cracks come from roots, settlement, freezing, water, or ordinary surface wear. Use a compatible repair product and follow its preparation and curing directions. A patch won't solve movement, and decorative gravel won't correct failed drainage.
Frame the approach with restrained planting or permeable material only where it won't narrow the route or send water toward the foundation. Solar path lighting can make a clean walkway easier to read after dark, but fixtures must not become obstacles.
Use OutdoorBrite to compare edge planting and lighting before purchasing. Hire a professional for extensive cracking, major settlement, drainage failure, or trip hazards. Keep accessible routes level, clear, and slip-resistant in every season.
15. Front-Facing Window Box and Shutter Balance
When the front door isn't enough to balance the facade, a window box or carefully sized shutter treatment can add proportion and color. The installation must look intentional from the street and remain safe for the building.
Planning range: Qualitative and dependent on box material, supports, plants, and access. DIY difficulty: Moderate. Completion time: Several hours, longer when masonry or height access is involved.
Materials checklist: Window box or shutters, brackets, level, drill, exterior fasteners, sealant, drainage materials, potting mix, and exposure-appropriate plants.
Start with one prominent window rather than installing boxes everywhere. Matching boxes can reinforce symmetry, but a single box may suit an asymmetrical facade better. Foliage-focused planting often works well on shaded elevations, while exposed windows need plants that tolerate heat, wind, and reflected light.
Check mounting surfaces, window dimensions, drainage, and clearance. Persistent wet soil against siding can cause damage. Shutters should reinforce window proportions rather than cover them or appear too narrow to serve a visual purpose.
Use OutdoorBrite to compare boxes and shutters against the whole facade. Hire a professional when installation requires masonry drilling, upper-level access, structural assessment, or uncertain attachment points.
16. Seasonal Cleanup and Low-Maintenance Transitions
Curb appeal is judged between peak bloom periods too. A property can look polished in spring and untidy by late summer if spent growth, leaves, empty containers, and hidden house numbers are left in place.
Planning range: Qualitative, with recurring maintenance determined by the outdoor space. DIY difficulty: Easy to moderate. Completion time: A few hours per seasonal reset.
Materials checklist: Pruners, rake, bags or compost system, gloves, replacement container plants, mulch, hose, and a seasonal maintenance list.
Create a local four-season routine. Spring may call for bed cleanup and mulch assessment. Summer requires attention to watering, especially for containers in hot regions. Fall emphasizes leaf removal and entry visibility. Winter shifts the focus to clean lines, readable numbers, safe steps, and dependable lighting.
Keep the structure consistent so seasonal updates don't become a full replanting cycle. Change one or two accents rather than replacing every container and bed. In windy, snowy, or rainy areas, choose accessories and plants that can handle exposure rather than relying on delicate displays.
Use OutdoorBrite to compare seasonal concepts before buying replacements. Ask a local horticulture professional about unfamiliar pruning windows, frost timing, invasive plants, or selections that may fail in your microclimate.
17. Water-Smart Front-Yard Simplification
A failing patch of lawn isn't always a cue to buy more seed and water. In a hot, dry climate, or beneath established trees where grass struggles, a smaller, deliberate planting composition may be cheaper to maintain and more attractive over time.
Planning range: Qualitative and highly dependent on lawn removal, soil, irrigation, and materials. DIY difficulty: Moderate. Completion time: A weekend for a small vignette, with plant establishment continuing afterward.
Materials checklist: Site sketch, shovel or sod cutter, mulch or gravel, climate-appropriate plants, compost if needed, fabric where appropriate, hose, and edging materials.
Start with a small, highly visible section. Group drought-tolerant plants by water needs, repeat forms, and preserve a comfortable route from the street to the door. Mulch can connect plant groups visually, while gravel can suit a xeriscape-style composition when it won't create glare, heat, or loose footing.
Confirm mature size, soil needs, water requirements, and regional suitability before removing lawn. Water-smart doesn't mean maintenance-free. New plants still need establishment care, and gravel beds may require weeding and occasional raking.
OutdoorBrite can help compare simplified bed shapes and plant masses before excavation. Consult a professional for irrigation, drainage, grading, large-scale lawn removal, or a site where runoff could affect the foundation or neighboring property.
17-Point Budget Curb Appeal Comparison
| Option | Complexity 🔄 | Resources & Cost ⚡ | Expected Outcomes ⭐ | Ideal Use Cases 📊 | Key Advantages 💡 |
|---|---|---|---|---|---|
| Fresh Mulch and Ground Cover Refresh | Low 🔄 | $50–$200; bags or bulk, rake/shovel; DIY | ⭐⭐⭐⭐ Immediate visual polish; weed suppression | Bare beds, seasonal refresh, low-budget updates | Very affordable, quick curb appeal boost |
| Perennial Flower Beds and Strategic Plantings | Moderate 🔄🔄 | $3–$15/plant; planting tools; 1–2 seasons to establish | ⭐⭐⭐⭐ Long-term color and habitat; reduces replanting | Long-term curb appeal, pollinator support, low recurring cost | Self-perpetuating plantings, improved ecosystem |
| Power Washing and Deep Cleaning | Low–Moderate 🔄🔄 | $200–$800 pro or $60–$100/day rental; safety gear | ⭐⭐⭐⭐⭐ Dramatic immediate transformation; looks years newer | Weathered siding, driveways, pre-sale prep | High ROI, fast visible improvement |
| Budget-Friendly Hardscaping with Pavers and Pathways | Moderate–High 🔄🔄🔄 | $2–$10/sqft DIY; compactor, base materials; labor-intensive | ⭐⭐⭐⭐ Adds structure, improves flow and drainage | Define walkways, durable updates, incremental projects | Professional finish at lower DIY cost |
| Strategic Tree and Shrub Trimming and Shaping | Moderate 🔄🔄 | Basic pruners $20–$50 or arborist $500–$2000 | ⭐⭐⭐⭐ Reveals architecture; healthier growth | Overgrown plants hiding facade, safety pruning | Low material cost, high visual impact |
| Fresh Paint on Front Door and Shutters | Low 🔄 | $20–$300; paint, prep supplies; weekend project | ⭐⭐⭐⭐ Instant focal point and personality | Quick entry refresh, weekend DIY | Very affordable, reversible, high impact |
| Landscape Lighting and Solar Accent Lights | Low–Moderate 🔄🔄 | $100–$500; solar fixtures or low-voltage kits | ⭐⭐⭐⭐ Enhanced nighttime curb appeal & safety | Evening visibility, highlight features, security | No wiring (solar), flexible placement |
| Container Gardens and Potted Plant Arrangements | Low 🔄 | $50–$300; containers, potting mix, seasonal plants | ⭐⭐⭐⭐ Flexible seasonal impact; movable focal points | Rentals, small porches, seasonal styling | Adaptable, low commitment, immediate color |
| Updated Entry Hardware and House Numbers | Low 🔄 | Small budget; basic tools; $20–$150 typical | ⭐⭐⭐ Improves perceived finish and readability | Final touches after cleaning or painting | High-visibility detail for little cost |
| Low-Cost Edging and Bed Definition | Low–Moderate 🔄🔄 | Spade/edging materials; low material cost | ⭐⭐⭐⭐ Immediate tidy appearance; easier mowing | Define beds without new plants | Cheap, DIY, frames existing landscaping |
| DIY Mailbox, Porch, and Entry Staging | Low 🔄 | Minimal cost; repurposed items; few hours | ⭐⭐⭐ Improved first impressions; photo-ready entry | Quick staging before showings or events | Fast, reversible, low-cost refresh |
| Small Structural Repairs and Visible Fixes | Moderate–High 🔄🔄🔄 | Varies; materials may be cheap but skilled labor may be needed | ⭐⭐⭐⭐ Removes distracting defects; improves safety | Prioritize visible safety/functional defects before cosmetic work | Protects other investments and prevents escalation |
| Selective Fence and Gate Refresh | Moderate 🔄🔄 | Cleaning, limited replacement, stain/paint; weather dependent | ⭐⭐⭐ Improved street-facing boundary appearance | Street-facing sections, phased fence upgrades | Cost-effective way to refresh key views |
| Driveway and Walkway Crack-and-Edge Cleanup | Moderate 🔄🔄 | Cleaners, patching compounds; modest cost | ⭐⭐⭐⭐ Safer, neater approach; can defer full replacement | Visible approach repair before photos/sale | Prioritizes high-visibility route, cost-saving |
| Front-Facing Window Box and Shutter Balance | Moderate 🔄🔄 | Boxes, mounts, plants or shutter materials; moderate cost | ⭐⭐⭐ Adds color and proportion at eye level | Small facades, limited ground space | Strong facade detail with limited planting area |
| Seasonal Cleanup and Low-Maintenance Transitions | Low–Moderate 🔄🔄 | Ongoing time; seasonal supplies; distributed cost | ⭐⭐⭐ Maintains intentional look across seasons | Year-round curb-appeal maintenance plans | Spreads cost/labor; preserves design between seasons |
| Water-Smart Front-Yard Simplification | Moderate 🔄🔄 | Site prep, drought-tolerant plants, mulch; variable cost | ⭐⭐⭐⭐ Lowers water/maintenance; cleaner composition | Dry climates, patchy lawns, xeriscape conversion | Reduces irrigation and routine upkeep |
Turn the Best Ideas Into a One-Weekend Plan
The strongest curb appeal on a budget usually comes from a sequence, not a shopping trip. Start by photographing the property from the street, sidewalk, driveway, and front door approach. Look at the images in grayscale if necessary. You'll quickly see whether the dominant problem is grime, blocked sightlines, weak bed definition, a confusing route, damaged structure, or a lack of entry focus.
Use OutdoorBrite to compare the most visible options on the actual property. Test a door color against the siding, compare mulch tones, place a path where visitors naturally walk, or preview a simplified planting bed before buying plants. Visualization won't replace measurements or horticultural knowledge, but it can help you reject ideas that look attractive in isolation and awkward on your facade.
Then follow the physical order. Clean the porch, walkway, driveway, and visible fence sections. Remove weeds and clutter. Prune shrubs that hide windows, numbers, or the door. Repair loose steps, railings, gates, boards, trim, and other defects before adding decorative work.
Choose one entry focal point. That might be a painted door, readable house numbers, a pair of containers, or a clean path leading toward the entrance. Don't make every feature compete for attention. One strong moment usually looks more deliberate than many unrelated accents.
Next, define the route and the beds. Re-cut the edges, refresh mulch, and add a modest pathway or border only where it improves movement and proportion. Plant after you've confirmed the bed shape. Select fewer varieties, repeat them, and leave room for mature growth. If the property sits in a hot or dry region, consider simplifying thirsty lawn sections rather than committing to a maintenance pattern you won't sustain.
Lighting comes after the route and focal points are clear. Place path lights where people walk, use warm light at the entry, and highlight only a few features. Containers and seasonal accents should finish the composition, not conceal unfinished repairs.
A simple budget worksheet will keep a small project from expanding unnoticed. Separate:
- Materials: Paint, mulch, plants, pavers, soil, hardware, lighting, and repair supplies.
- Rentals: Pressure washers, compactors, ladders, sod cutters, or hauling equipment.
- Recurring maintenance: Watering, seasonal plants, mulch replacement, pruning, batteries, and repairs.
- Professional labor: Arborists, electricians, masons, drainage specialists, structural contractors, or outdoor installers.
Record what you already own before buying. A usable shovel, hose, pruner, level, or container can change the best sequence. Price the complete task, not only the attractive finish. Pavers need a base. Paint needs preparation. Plants need water. Solar fixtures need suitable sun. A low-cost purchase can become expensive when the supporting work is ignored.
Adjust timing to your region and season. Planting, pruning, painting, pressure washing, staining, and concrete repairs all depend on temperature, moisture, frost, heat, and drying conditions. Water new plants according to local conditions and plant requirements. If you're unsure, ask a local horticulture professional rather than relying on a generic calendar.
Hire a qualified professional when the project involves:
- Structural repairs, unstable steps, railings, porches, or retaining conditions.
- Major trees, chainsaws, climbing, storm damage, or branches near power lines.
- Electrical connections, buried wiring, outlets, or code-sensitive lighting.
- Drainage, irrigation redesign, grading, runoff, or foundation-adjacent water.
- Extensive hardscape, driveway settlement, masonry, or accessibility requirements.
- Roof-height work, upper-level shutters, window boxes, or unsafe ladders.
- Rot, water intrusion, uncertain utilities, hazardous materials, or any task where safety and compliance aren't clear.
The best budget plan doesn't try to complete every idea. It identifies the first impression that matters most, fixes the visible weakness, and builds outward in phases. A clean approach, a legible entry, healthy planting, and reliable maintenance can make a home feel considered without turning curb appeal into a major renovation.
OutdoorBrite lets you upload a photo of your front yard and compare realistic concepts for planting, paths, mulch, containers, and lighting before you spend on materials. Visit OutdoorBrite to test your highest-priority curb-appeal idea and plan the next practical project.
See your yard reimagined
Start creating




