Do IT Yourself Landscaping Design
Do it yourself landscaping design - Transform your yard with do-it-yourself landscaping design. Our guide covers site assessment, plant selection, and AI tools
You're probably looking at a yard that feels harder than it should. Maybe it's a patchy lawn, a blank new-build lot, or a space that came with old shrubs planted in all the wrong places. Most DIY projects go sideways for one reason. People buy plants and pavers first, then try to force a design afterward.
Good do it yourself landscaping design works the other way around. You study the site, decide how you want to live in the space, sketch a layout, test ideas, then buy materials. That order saves money, cuts rework, and gives you a yard that functions.
Your Guide to DIY Landscaping Success
Saturday morning is when a lot of DIY yard projects go wrong. You head out for a few plants and a couple bags of stone, then come home with a cart full of decisions you have not tested. A month later, the walkway feels cramped, the bed lines fight the house, and the patio you want no longer fits cleanly.
A better approach saves money and rework. Build the plan first, then buy to match it. If you want a quick visual improvement while the full design is still taking shape, you can discover quick curb appeal wins that sharpen the front entry without forcing the wrong long-term choices.
Start with a plan you can test
Good DIY results usually come from a simple sequence. Measure the yard. Mark the fixed features. Set priorities. Sketch ideas. Test them before you commit to materials or plants.
That last step matters more now than it used to.
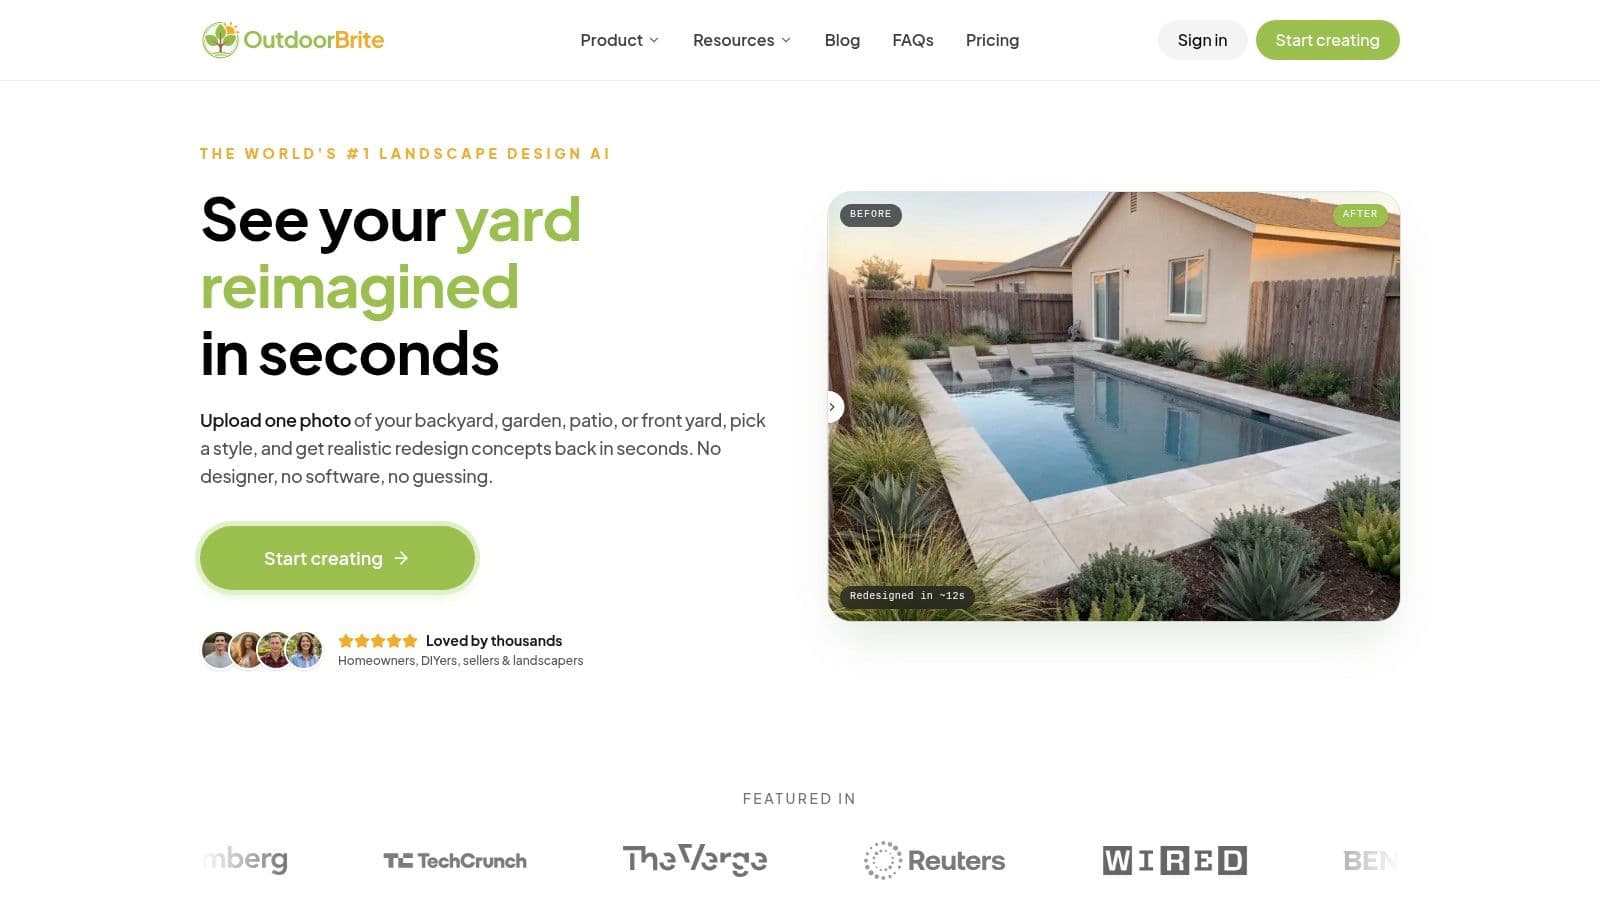
Graph paper still works, and I still use it for early layout studies. But AI visualization tools help first-time homeowners catch problems that are hard to see from a rough sketch alone. Outdoorbrite can help you compare styles, bed shapes, and layout directions before you spend a dollar on installation. That does not replace planning. It gives you a faster way to pressure-test ideas and rule out expensive mistakes.
Practical rule: If the yard is not measured and drawn to scale, hold off on buying anything permanent.
What success looks like in a DIY yard project
A successful project is not the biggest one. It is the one that fits the house, fits your routine, and still makes sense a year from now after the newness wears off.
Aim for three outcomes:
- Use the space well so paths, seating, play areas, and planting zones support real daily habits
- Match the upkeep to your schedule so the yard stays manageable in July, not just on installation day
- Keep the design consistent so materials, shapes, and planting choices feel related instead of pieced together
That is the advantage of do it yourself landscaping design. You keep control of the budget and timing, but you still need a method. The smart version of DIY is not guessing in public with a shovel. It is planning carefully, testing visually, and building once.
Lay the Groundwork with Site Analysis
The first job is learning the site you already have. The University of Florida IFAS says the first major step in residential outdoor design is creating a master plan, built through site inventory and analysis, determining needs, creating functional diagrams, developing conceptual plans, and drawing the final design plan in its residential outdoor design guidance from University of Florida IFAS.
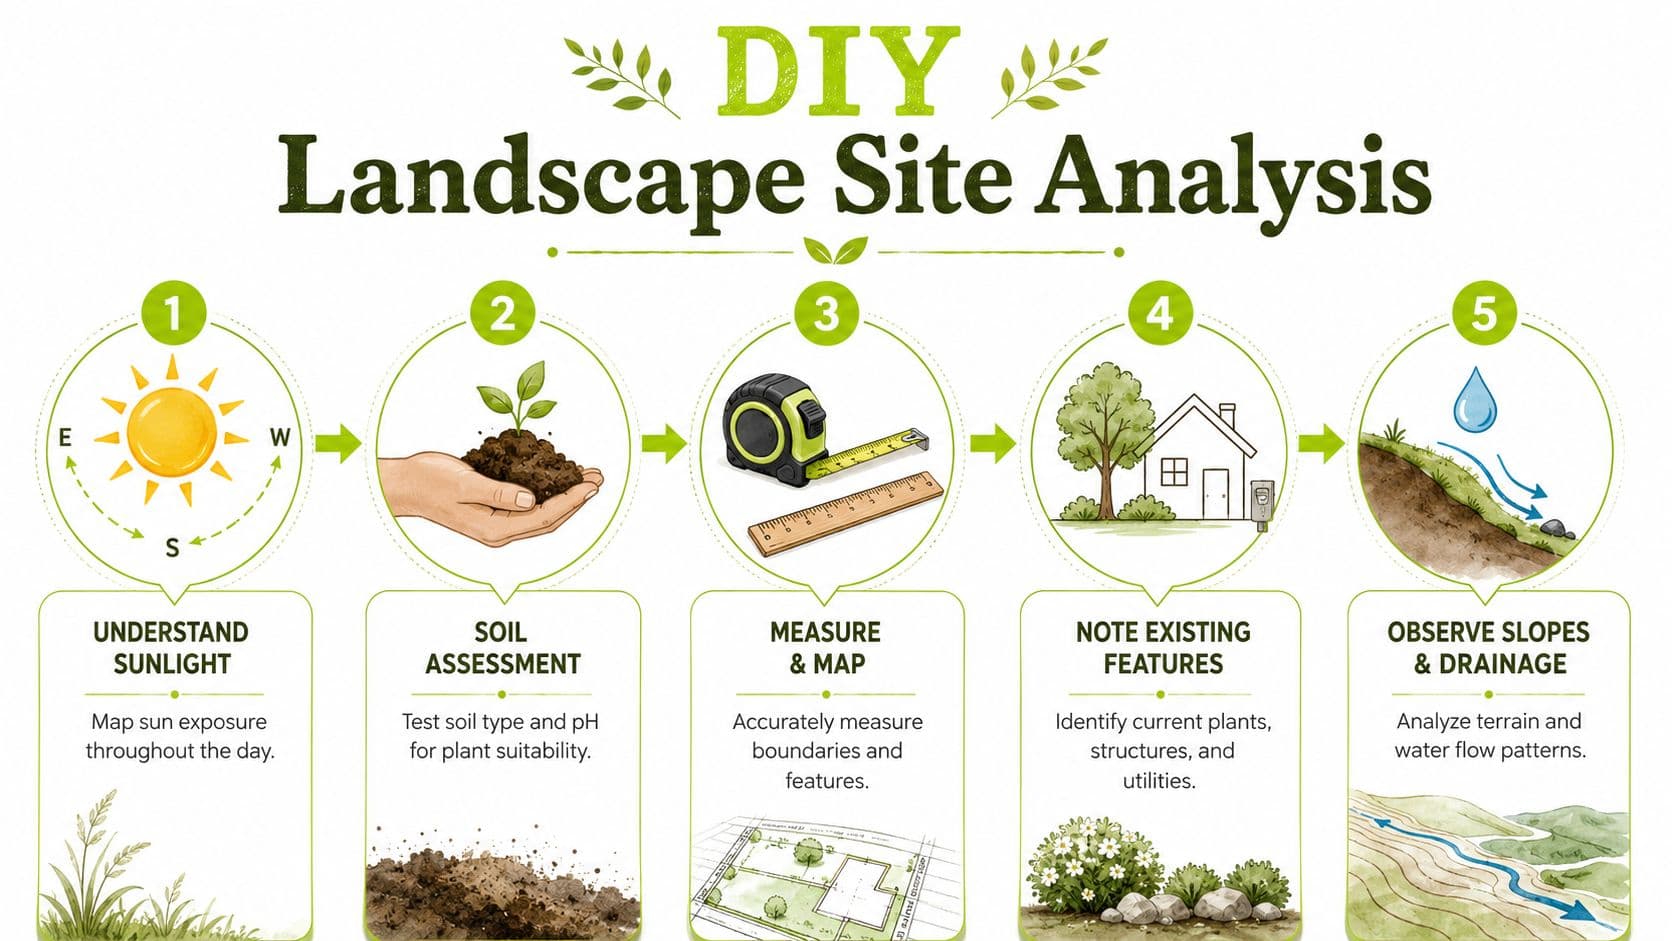
That sounds formal, but in practice it means paying attention before making decisions. You're not trying to be an engineer. You're trying to stop avoidable mistakes.
Build a base map first
Start with a to-scale base map of the property. Put in the house footprint, driveway, fence lines, gates, existing trees, utility areas, sheds, and anything else that won't move easily. Include problem spots too, such as a downspout that dumps water near a future bed or a side yard that stays muddy.
Your base map should also note:
- Sun and shade across the day
- Drainage patterns after rain
- Slopes and grade changes
- Access routes for wheelbarrows, mowers, and materials
- Views to keep or block
If you don't know where the sun lands in midsummer and where winter shade sits, plant selection turns into guessing.
Observe before you design
Spend a few days looking at the yard at different times. Morning light and afternoon light can create two very different planting zones in the same bed. A corner that looks dry can turn into a runoff channel during heavy rain.
Here's what usually matters most:
| Site factor | Why it matters |
|---|---|
| Sun exposure | Decides what plants will perform well |
| Drainage | Affects patios, turf, and root health |
| Soil condition | Shapes plant choice and amendment needs |
| Existing structure | Sets the framework for layout decisions |
| Slope | Changes safety, circulation, and erosion control |
The yard always tells you what it can support. Problems start when the plan ignores that message.
Record the constraints early
One of the best habits in do it yourself landscaping design is to mark constraints before ideas get exciting. If the trash bins need side-yard access, don't place a bed where the path should go. If the back corner holds water, don't force a seating area there just because the view is nice.
This early analysis also keeps style choices grounded. A lush layered border might suit one edge of the yard, while another side needs low-maintenance screening and durable footing. Good design isn't picking one pretty idea. It's placing the right idea in the right spot.
Define Your Vision and Set Realistic Goals
A lot of DIY projects go off track here. The yard gets measured, ideas start flowing, and then the plan expands into a little bit of everything. A dining corner, a fire pit, raised beds, screening, extra lawn, maybe a water feature. The result usually costs more and works less.
Set the job of the yard before you choose its look. The National Association of Landscape Professionals reports more than 1.4 million people employed and 692,777 grounds care businesses, which tells you how many owners hire this work out instead of guessing through it. Professional exterior design is often estimated at about $2,000 to $8,000 by HomeAdvisor. That makes clear planning one of the smartest places to save money.
It also helps you use AI tools well. OutdoorBrite and similar visualizers are useful once you know what problem you are solving. They are much less useful if you are testing random styles without a clear goal.
Decide how the yard should work
Start with use, not appearance.
Ask yourself a few direct questions:
- Will you eat outside often, or do you just want one quiet seat in the shade?
- Do kids or dogs need open space that can handle regular wear?
- Are you hoping to grow food, cut flowers, or keep planting mostly decorative?
- Do you need privacy from a second-story window, a street, or one specific neighbor?
- How much weekly upkeep are you willing to do?
Be honest on that last point. I have seen plenty of first projects fail because the owner designed for their ideal Saturday, not their real Tuesday evening.
A good starter plan usually has one main goal and one or two supporting goals. In a small yard, every extra function steals space, budget, or maintenance time from something else.
Filter inspiration through real life
Save photos for reference, but treat them as raw material, not instructions. A gravel courtyard may look sharp online and feel miserable in a hot, exposed yard. A lush cottage-style planting scheme may fit your taste and still be the wrong call if you want low upkeep and clean edges.
Write a short priority list and rank it. For example:
- A dining area near the back door
- Simple front beds that stay tidy
- Privacy screening along one fence
- A small cutting garden if the budget still works
That order matters. It tells you what gets built first, what can wait, and what should be dropped if costs start creeping up.
One more practical move helps here. Test two or three versions of your top priorities in an AI visualizer before you buy plants or order materials. You can compare a screening hedge against a fence with climbers, or a patio near the house versus one set deeper in the yard, and spot problems while changes are still free.
A finished, well-used yard beats an ambitious plan that stalls halfway through.
Sketch Your Conceptual Layout and Flow
Once the base map and goals are clear, the creative part gets easier. You're no longer staring at a blank yard. You're arranging functions inside a real set of limits.
A rigorous DIY workflow starts with a to-scale base map, then uses overlays to test circulation and outdoor rooms. One expert process recommends tracing paper and bubble diagrams so paths and patios get resolved early, and it also recommends starting with straight lines and 90° layout as the easiest geometry to install, as shown in this design workflow video on layout and path geometry.
Use bubble diagrams before hard lines
Draw loose circles or ovals over your base map to represent uses such as patio, lawn, play space, kitchen garden, planting bed, or fire pit zone. Don't worry about detail yet. You're looking for relationships.
A few questions improve layouts fast:
- What should sit closest to the house
- Where will people naturally walk
- Which spaces need privacy
- Which views should open up on arrival
This step helps you avoid one of the biggest beginner mistakes, which is locking in exact bed lines before circulation makes sense.
Make movement obvious
Good outdoor spaces feel easy to move through. Bad ones force people to cut across beds, squeeze around furniture, or take awkward turns. Paths should connect destinations people use.
Start with simple geometry if this is your first project. Straight lines and right angles are easier to measure, easier to install, and easier to keep consistent. Curves can work, but beginners often overuse them and end up with fussy edges that complicate mowing, edging, and material cuts.
Draw the walking routes before you draw the planting. Feet will always win over flowers.
Make more than one option
Don't settle on the first sketch. Create two or three versions with different patio locations, bed depths, or lawn sizes. One layout may look best on paper, while another may fit circulation and maintenance better.
Do it yourself landscaping design starts to feel professional. You're not reacting. You're comparing options.
Visualize Your Design and Avoid Mistakes with AI
The old DIY method relied on imagination. You'd sketch a bed line, guess at material colors, then hope the finished space looked the way you pictured it. Sometimes it worked. Often it didn't.
AI visualization changes that part of the process. A photo-based ai landscape design generator lets you test style directions, planting density, and hardscape ideas before ordering materials or digging. That's useful for homeowners and also for anyone trying to improve paving project ROI by reducing change orders and avoidable revisions.
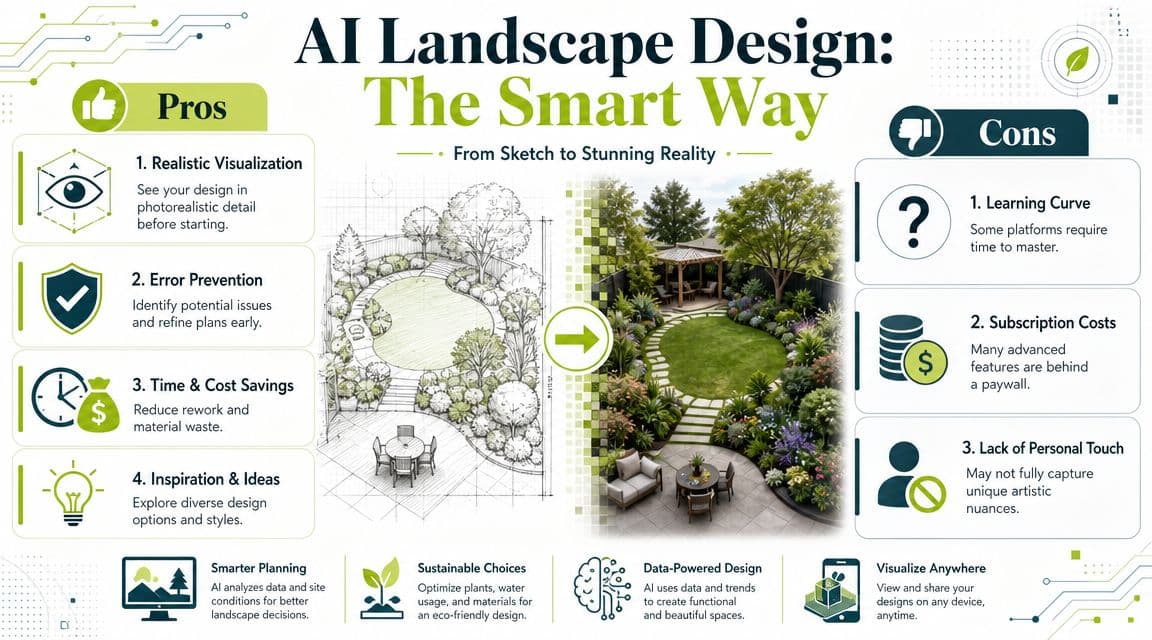
AI is most helpful after you already know the site and the basic layout. At that point, you can compare alternatives instead of generating random ideas with no context.
What AI is good at
Use AI to pressure-test design choices such as:
- Material direction, like gravel versus pavers
- Style fit, such as modern versus cottage
- Planting fullness, so beds don't end up too sparse
- Visual balance, especially near entries and patios
It also helps with confidence. A homeowner who sees a concept rendered over their actual yard usually makes faster, calmer decisions than one staring at a rough sketch.
Here's a practical walkthrough of that kind of tool in action:
What AI won't do for you
AI doesn't replace site judgment. It won't solve drainage, tell you where utilities run, or guarantee a plant belongs in your climate and light conditions. It also can't decide how much maintenance you're willing to do.
That's why the strongest use of AI in do it yourself landscaping design is validation. You still need a real plan. AI enables you to see the consequences earlier.
Select the Right Plants and Materials for Your Plan
Planting and materials should follow the layout, not compete with it. Once the circulation, seating areas, and bed shapes are settled, the next step is building a palette that fits the site and your habits.
A common mistake is designing for looks alone. Guidance for homeowners increasingly stresses matching the plan to your maintenance level and skill, while factoring in sun exposure, climate, and sustainability through low-maintenance, native, or drought-tolerant choices, as discussed in this homeowner-focused planting and maintenance video.
Choose plants for conditions, not impulse
The old rule still works. Right plant, right place. Sun lovers in deep shade won't perform. Water-hungry plants in a dry strip near pavement become a constant chore.
Build beds in layers so they read clearly:
- Upper layer with trees or tall structural shrubs
- Middle layer with medium shrubs and perennials
- Lower layer with edging plants and groundcovers
If you want the front yard to read cleanly from the street, a simple repeated palette usually beats a collector's mix. For practical ideas on that approach, this guide to front yard landscaping choices is a useful reference.
Match hardscape to use and upkeep
Hardscape choices shape both appearance and labor. Gravel is forgiving and can suit informal paths, but it migrates if edges are weak. Pavers create a more finished surface, but base prep matters. Wood can feel warm and natural, but it asks for more upkeep over time.
If you're comparing decorative paving surfaces, looking at real installation examples like Atlanta Concrete Solutions decorative concrete can help you judge texture and finish before you choose a direction.
A simple comparison helps:
| Material | Works well for | Watch out for |
|---|---|---|
| Gravel | Informal paths, dry gardens | Migration, weeds, loose footing |
| Pavers | Patios, walks, defined layouts | Prep work and cutting |
| Wood | Deck zones, transitions | Ongoing weathering and maintenance |
| Concrete finishes | Clean modern surfaces | Requires careful style fit with the home |
Good material choices save work later. Bad ones look fine on day one and become annoying every weekend after that.
Frequently Asked DIY Landscaping Questions
How should I approach a sloped yard?
A sloped yard can get expensive fast if you start with plants instead of stability. Footing, drainage, and erosion control come first. Planting comes after the ground is safe to walk on and likely to stay in place.
If the slope is mild, a simple path with good edging and a few planted pockets may be enough. If the grade is stronger, break the yard into smaller usable levels. Terraces, short retaining sections, and defined landings usually work better than one long incline that is awkward to mow, hard to walk, and quick to wash out in heavy rain.
Guidance on steep sites often points to practical solutions such as landings, railings, raised walkways, rocks, logs, and other stabilization methods in this video on designing steep and sloped yards.
What if my soil is poor?
Start by checking how the soil drains and how it feels in your hand. Sticky soil, dusty soil, and compacted fill all need different fixes. Guessing here is how DIY budgets get burned on plants that never had a fair chance.
Sometimes the smartest move is to shrink the planting area, improve a few beds properly, and leave the rest simple for now. Raised beds can help in stubborn spots, but they do not solve standing water underneath. Handle drainage first, then build better soil where it will matter most.
How do I make the yard low maintenance without making it dull?
Use fewer plant varieties and repeat them with purpose. That gives the yard a cleaner read and cuts down on pruning, replacing, and fussy seasonal upkeep. A restrained palette usually looks more confident than a yard filled with one of everything.
Hardscape matters here too. Put durable surfaces where people walk, and leave enough space between plants so they can mature without constant editing.
Should I build everything at once?
Phase the project based on what is hardest to change later. Drainage, grading, paths, and patio placement come first. Decorative planting, lighting, and accessories can follow as time and budget allow.
That order saves rework. I have seen plenty of DIY yards where nice early choices had to be torn out because the circulation or grading was never solved.
Before you buy materials or start digging, test the layout on photos of your actual yard. AI visualization tools such as OutdoorBrite can help you compare planting mass, bed shapes, and hardscape directions before you commit. That kind of preview will not replace site measurements or good judgment, but it can catch bad ideas while they are still cheap to change.
See your yard reimagined
Start creating