8 Fire Pit Ideas DIY: Costs, Build Plans, and Safety
Explore 8 fire pit ideas DIY projects with costs, build times, materials, design ideas, and practical safety guidance for your outdoor space.
You've got an empty corner of patio, a stack of saved photos, and a weekend that could easily disappear into a project that's too big, too smoky, or too close to the fence. That's the usual starting point for Fire Pit Ideas DIY research. The pit itself is simple. The hard part is matching fuel, materials, clearance, and seating to the yard you have.
This roundup compares eight builds by trade-off, not just looks. A dry-stacked block ring suits a first project and a tight budget. A gas burner kit costs more and needs code checks, but it lights fast and skips ash. A seating wall looks polished, yet it commits you to a permanent footprint.
Start with smoke before style. The U.S. Environmental Protection Agency guidance on backyard recreational fires states that these fires can become a considerable source of fine-particle air pollution, and it recommends seasoned, dry wood at approximately 20% moisture content for lower smoke. That means your plan needs dry wood storage, airflow, and a spot that keeps smoke away from doors, windows, and neighbors.
If cooking matters as much as gathering, compare a dual-purpose BBQ fire pit with the wood-only builds below. Then pick the idea that fits your skill level, not just your saved inspiration board.
Table of Contents
- 1. Stacked Concrete Block Fire Pit
- 2. Brick or Paver Circular Fire Pit with Firebrick Liner
- 3. Corten Steel Fire Ring Pit
- 4. Repurposed Steel Wheel Rim Fire Pit
- 5. Galvanized Stock Tank Fire Pit
- 6. Sunken Gravel Fire Pit
- 7. DIY Gas Fire Pit with Burner Kit
- 8. Fire Pit with Built-In Seating Wall
- 8 DIY Fire Pit Ideas Compared Side by Side
- Choose the Build Before You Buy the Materials
1. Stacked Concrete Block Fire Pit
For most beginners, this is the sensible first build. You stack retaining-wall or garden blocks into a round or square ring, usually without mortar, on a level and compacted base. Materials are easy to find, mistakes are reversible, and you can rebuild the ring if the layout doesn't feel right after a few fires.
The weakness is heat. Standard concrete block isn't made for direct flame and can crack or spall over time. A steel fire ring or firebrick liner protects the blocks and turns a cheap stack into a pit that lasts.
Build It Level or Rebuild It Later
A common version uses blocks around a steel insert, with the first course checked for level in every direction. If that first course rocks or slopes, every course above it inherits the problem.
- Compact the base: Use gravel, tamp it well, and level the first course before stacking higher.
- Add a liner: Keep flame off the concrete with steel or firebrick.
- Fill cores carefully: Sand or gravel can add stability, but don't trap water inside hollow blocks.
- Check clearance first: Position the pit in the open on a noncombustible base at least 10 feet from homes and other structures, away from overhangs, trees, and power lines.
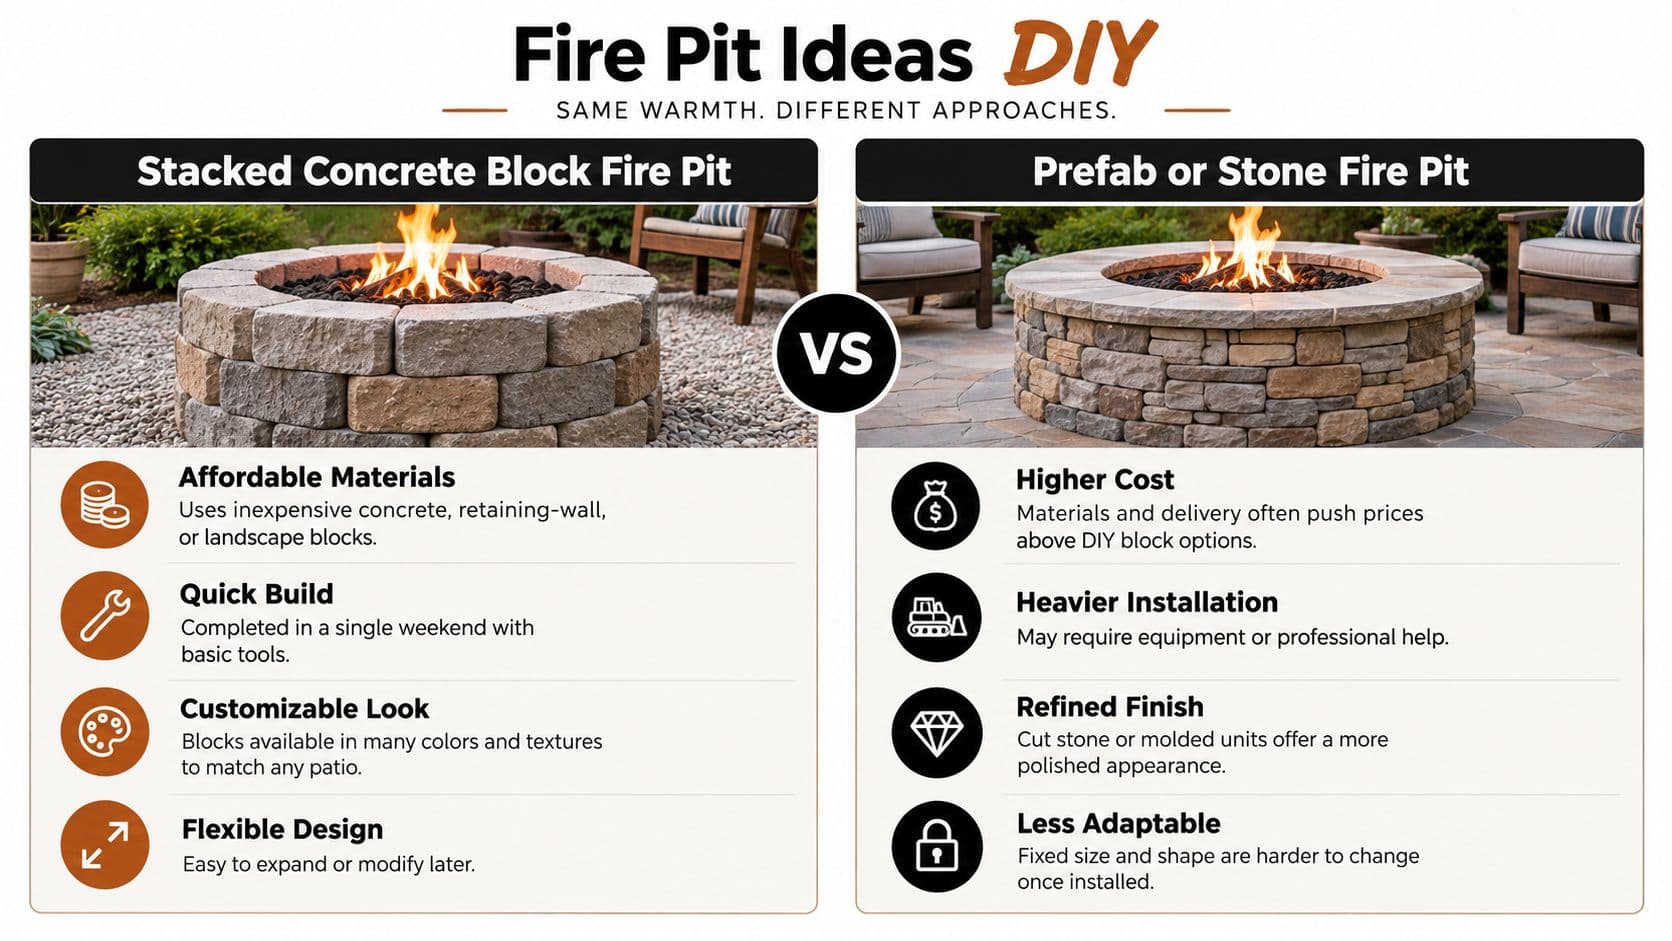
This comparison shows how a simple stacked build differs from a prefab stone design in footprint and finish.
Dry stacking is forgiving, but it isn't maintenance free. Blocks can shift after freeze and thaw cycles, and ash needs regular removal so rain doesn't turn it into a heavy paste. Keep a fitted spark screen nearby, burn clean dry firewood only, and plan to extinguish with water and stirring until the pit is cold.
2. Brick or Paver Circular Fire Pit with Firebrick Liner
A brick or paver circle looks more finished than a plain block ring, especially when it echoes an existing patio or walkway. The structure has two jobs. The outer wall handles weather and appearance, while the firebrick liner handles heat.
That separation matters. Standard clay brick and many pavers can crack when they're used as the firebox itself. Firebrick, also called refractory brick, is the part you shouldn't substitute to save a small amount of money.
A Practical Layout That Ages Well
One proven arrangement is a round outer ring built around a smaller firebrick firebox, set on compacted gravel with a sand leveling layer. Add a stone or paver cap and you've got a clean top edge that's easier to brush off and more comfortable to rest a poker or screen on.
- Use firebrick inside: Don't rely on standard brick for the inner ring.
- Leave heat room: An air gap or noncombustible bed behind the liner reduces heat transfer to the outer wall.
- Match the patio carefully: Bring a spare paver to the yard so color and texture match in daylight, not store lighting.
- Plan cleaning: Ash and soot will reach nearby paving, so learn how to clean a brick patio before stains set in.
Practical rule: Build the firebox for heat and the outer ring for looks. When one material tries to do both jobs, it usually fails at one of them.
This build takes more patience than dry-stacked block because circles expose every small leveling error. Dry-lay the full ring first, check the cap overhang, and confirm seating fits around it. You'll spend more time on layout, but the result feels intentional rather than temporary, and repairs usually mean replacing a liner brick, not rebuilding the whole pit.
3. Corten Steel Fire Ring Pit
Corten steel gives you the opposite experience from brick. There's no course-by-course stacking and no cap to cut. You buy or commission a weathering steel ring, set it level, and focus your effort on the base and surrounding surface.
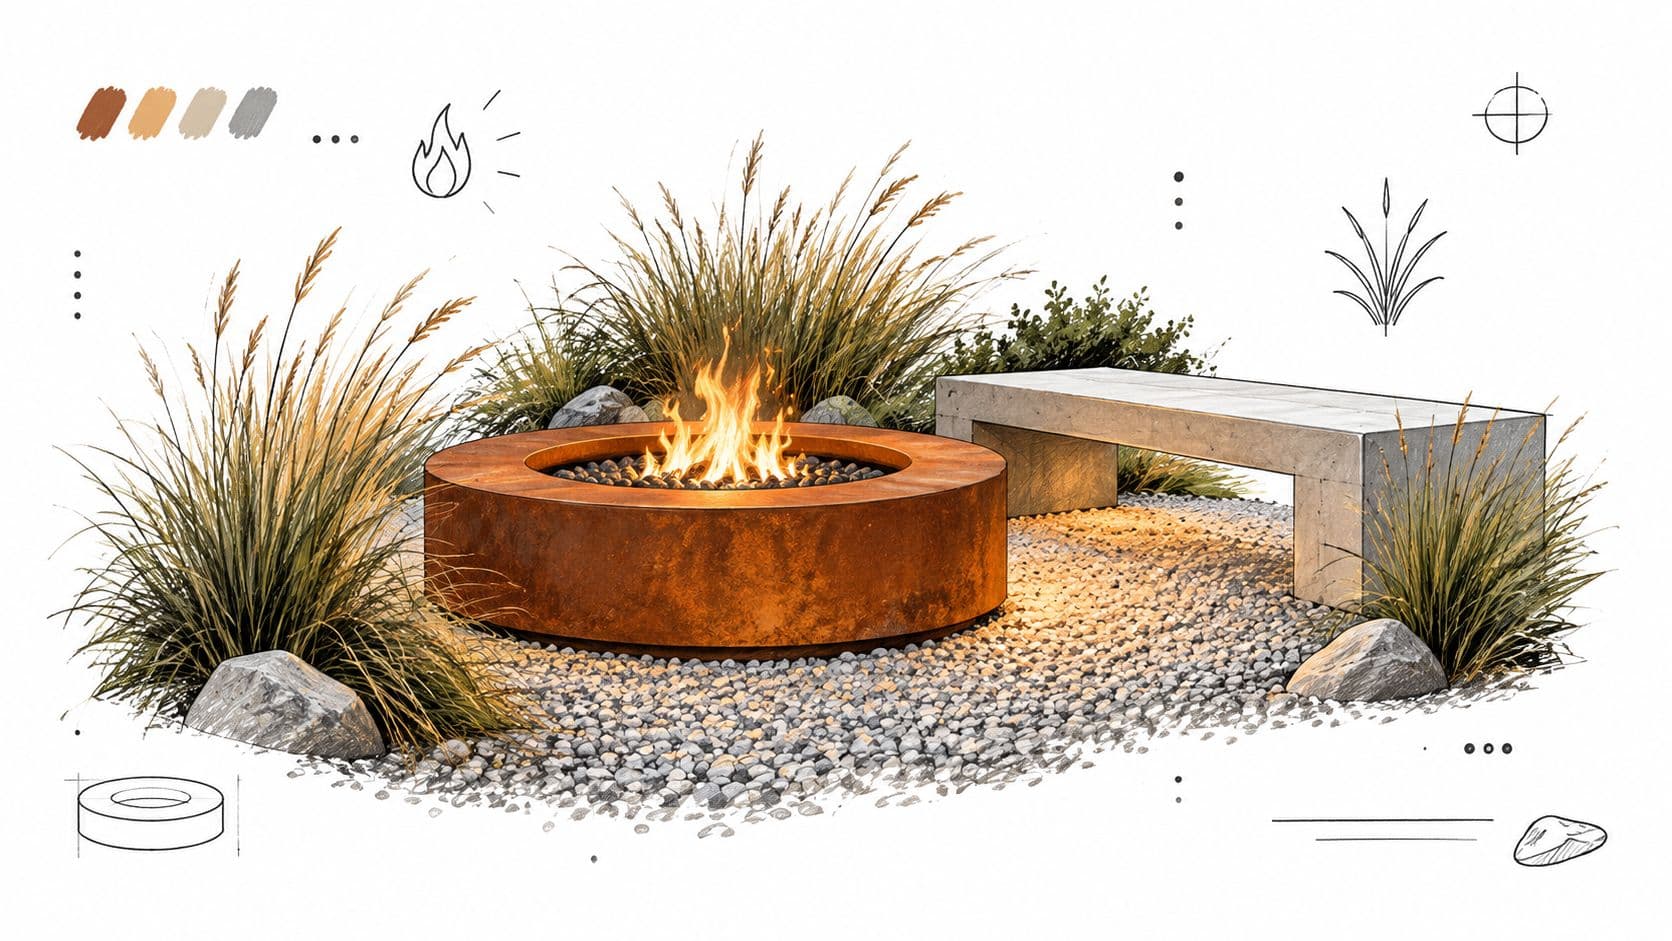
The ring develops a rust colored surface that protects the metal underneath. That finish suits modern patios, gravel gardens, and xeriscape planting, especially beside a low concrete bench or ornamental grasses set well back from the heat.
Where Corten Works and Where It Stains
The trade-off is early runoff. New Corten can stain light pavers, pale concrete, and stucco as the surface weathers. Gravel is more forgiving, and a steel tray or fire pan under the ring protects the ground while making ash removal easier.
- Choose thicker steel: Ask a fabricator about wall thickness if you want longer life and better heat retention.
- Set it on gravel: A compacted, level bed keeps the ring stable and hides minor staining.
- Keep the profile clean: Avoid piling decorative stone against the outside if you want the minimalist look.
- Compare shapes: If a round ring fights your patio lines, browse square fire pit options before ordering a custom piece.
This photo shows the low, sculptural effect a Corten ring can create with stone seating.
Corten is a strong choice when you want a permanent focal point without masonry work. It's less ideal for renters or anyone who may move the pit often, because a quality ring is heavy. It also gets hot on the outside, so keep seating and circulation paths far enough back that guests don't brush against it in the dark.
4. Repurposed Steel Wheel Rim Fire Pit
A salvaged truck or tractor rim is the budget build with real character. It's already round, already steel, and deep enough to contain a small fire. Set it on gravel or pavers, add a base plate or fire pan, and you've got a rustic pit without buying a full kit.
The savings come with prep work. Old paint, coatings, grease, and sharp edges need attention before anyone sits around it. A rim that looks ready in a salvage yard rarely is.
Prep Makes This Budget Build Safe
Strip coatings by sandblasting when possible, or burn them off outdoors before regular use while staying upwind and following local burn rules. Grind or cap sharp spots on the lip. If the base plate will sit on soil, drill drainage holes so rainwater doesn't collect and accelerate rust.
- Inspect the steel: Skip rims with deep rust, cracks, or a warped lip.
- Use a noncombustible base: Gravel or pavers beat bare soil and mulch every time.
- Keep it small: A rim pit suits a modest fire, not a pile of construction waste or yard debris.
- Add a screen: A simple mesh cover helps contain sparks when the fire pops.
A free rim stops being cheap if you have to replace cracked pavers, treat a burn, or rebuild the base after the first season.
This is one of the best Fire Pit Ideas DIY projects for a rural yard, workshop patio, or farmhouse look. It's a weaker fit for a refined patio because proportions are limited by whatever rim you find. Measure the rim before designing seating around it, and don't assume every salvaged wheel is suitable or legal to burn coatings off in your area.
5. Galvanized Stock Tank Fire Pit
A stock tank looks tempting because it's deep, inexpensive, and available at farm supply stores. That depth helps contain logs and embers, and the oval or round shape can hold a larger gathering fire than a small rim. But galvanized steel needs a hard look before you commit.
Galvanized metal is coated with zinc. Heating that coating is the concern, which is why many builders choose unpainted, uncoated steel or Corten instead, or use a separate liner so the tank isn't the direct fire container. Don't treat this as a minor detail.
Use the Shape Without Ignoring the Coating
If you proceed with a tank style build, set it on blocks to allow airflow underneath and reduce heat damage to the ground. Keep the area well ventilated, use a spark screen, and don't cook over a questionable coating. A short hot burn outdoors before regular use is sometimes used for preparation, but it doesn't turn a poor material choice into a good one.
- Prefer uncoated steel: It's the cleaner choice for direct burning.
- Raise the tank: Blocks protect soil, decking, and paving from trapped heat.
- Control sparks: Use a fitted screen, especially in wind or with a larger fire.
- Think about emptying it: Deep tanks hold ash and rainwater, so drainage and a scoop matter.
A tank on concrete blocks with a mesh screen can work as a casual gathering spot, particularly where a farmhouse look fits the yard. Still, this is the idea I'd rank lowest for direct wood burning unless you switch to uncoated metal or add a proper liner. Cheap and available doesn't always mean appropriate for open flame, and the liner cost can erase much of the original savings.
6. Sunken Gravel Fire Pit
Sinking the pit changes the feel of the whole yard. The flame sits lower, the sides block some wind, and the fire blends into gravel, native planting, or a desert inspired layout instead of standing on top of it. It also means excavation, drainage, and edge support become the main focus.
Call 811 in the US before digging so underground utilities are marked. Then excavate a shallow area, add a gravel drainage base, and install a steel or stone retaining ring so the sides don't collapse after rain.
Drainage Decides Whether It Lasts
A sunken pit that holds water will smell, rust, and turn ash into sludge. Build the base deep enough for drainage and keep the surrounding grade sloping away from the pit. Avoid river rock or stones that can trap moisture inside, because trapped water can cause them to crack or pop when heated.
- Retain the edge: Steel edging or stone keeps gravel and soil from washing into the firebox.
- Keep planting back: Native grasses look good nearby, but dry foliage doesn't belong beside open flame.
- Make entry clear: Low profiles are easy to trip into, so define the edge with paving or a visible border.
- Check small yard fit: Review OutdoorBrite small yard fire pits if circulation space is tight.
The illustration below shows how stone, pebbles, and planting can frame a low round pit without a tall masonry wall.
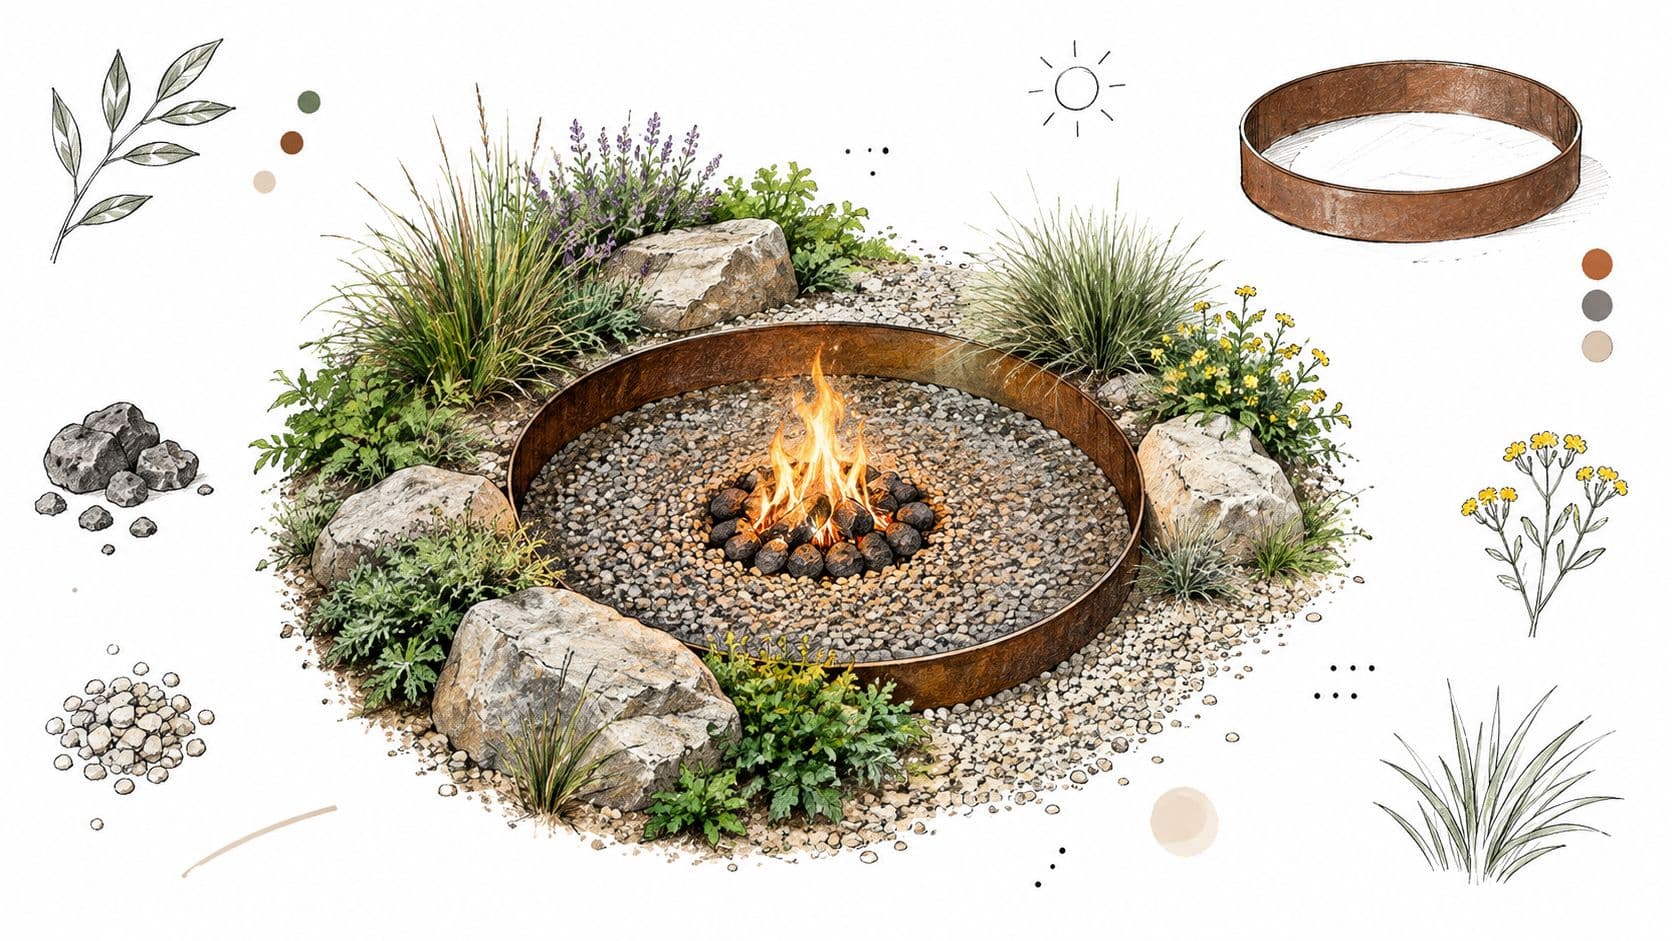
Risk planning matters here because the flame is close to ground cover and outdoor surface materials. A U.S. Fire Administration analysis of outdoor fire data estimated 176,100 intentionally set outdoor fires annually in the United States during the period studied, with vegetation involved in many incidents. Keep the surrounding surface noncombustible, clear dry plant matter, and skip burning during dry, windy conditions.
7. DIY Gas Fire Pit with Burner Kit
Gas is the convenience option. There's no ash to scoop, no wood to season, and no smoke drifting into seating when the wind shifts. A burner kit also gives you adjustable flame height and fast shutoff, which is why gas suits patios that get used for short weeknight gatherings.
The DIY boundary is strict. You can often build the basin, table, or block surround yourself, but gas connections are regulated work. Check local building code, get required permits, and use a licensed plumber or gas fitter for natural gas connections.
Build the Surround, Respect the Fuel System
A common project is a propane fire table built around a burner pan, with a concrete block base and a paver or stone top. Confirm the kit is rated for outdoor use and matches your fuel type. Propane and natural gas components aren't interchangeable just because they look similar.
- Vent the enclosure: Follow the burner manufacturer instructions for ventilation and access.
- Maintain clearances: Keep required distance from structures, furniture, and combustibles.
- Plan tank access: A propane table needs a door or removable panel that doesn't trap heat.
- Measure fittings carefully: A guide to pipe measurements for events can help you understand sizing language before you talk with a licensed installer.
- Check deck rules separately: Review fire pit options for decks before assuming a gas unit is allowed on wood or composite decking.
This video shows the general burner kit approach so you can see the components before designing a surround.
Gas costs more upfront and gives less radiant heat than a strong wood fire, but it removes the biggest day to day hassles. Choose it if you plan to use the fire often. Choose wood if crackle, cooking, and a larger flame matter more than push button convenience.
8. Fire Pit with Built-In Seating Wall
A seating wall turns a pit into a destination. Instead of dragging chairs across the lawn, you build a low curved or angled wall around a central ring, top it with a smooth cap, and define the whole gathering area with pavers or gravel. It's the most polished idea here, and the least forgiving if you guess the layout.
Start with circulation, not the wall. People need room to sit, stand, carry drinks, and step back from heat without squeezing past knees. Keep seating well back from the fire ring and check local clearance rules before you set the radius in stone.
Layout Mistakes Are Expensive in Masonry
A larger round patio with a central fire ring and a low seating wall works because the wall doubles as a windbreak and extra perch space. It fails when the wall is too close, the cap is rough, or the only entry forces guests to walk beside the flame.
- Mock it up first: Use chairs, hose, or marking paint to test the circle before buying block.
- Build on a level base: A seating wall that settles will crack caps and feel unstable.
- Use a noncombustible floor: Pavers or gravel belong between seating and fire, not mulch.
- Visualize on your yard: OutdoorBrite's elements editor lets you test pit placement and seating arrangements on a photo before excavation.
Layout check: Sit in every planned seat at the mock-up stage. If one spot feels trapped, smoky, or too hot, masonry won't fix it later.
This project suits homeowners who already want a patio upgrade and don't mind a longer build. It's poor value if you only host a few fires a year, because portable chairs around a simple lined ring will serve you just as well. Build the wall when the seating itself solves a real space problem, defines a slope, or completes a larger hardscape plan.
8 DIY Fire Pit Ideas Compared Side by Side
| Fire Pit Type | 🔄 Complexity & Build Time | ⚡ Cost & Resources | ⭐ Key Advantages & Expected Outcome | 💡 Ideal Use & Considerations |
|---|---|---|---|---|
| Stacked Concrete Block | Beginner; about 1 weekend | $100–$400; blocks, compacted gravel base, optional liner | Low-cost, customizable, easy to modify | Budget-friendly DIY yards; use a firebrick or steel liner to reduce heat damage |
| Brick or Paver with Firebrick Liner | Intermediate; 2–3 days | $250–$800; pavers or brick, firebrick, stable base | Durable, polished finish; replaceable individual bricks | Long-lasting patios that coordinate with existing hardscape; requires masonry work |
| Corten Steel Fire Ring | Beginner to intermediate; a few hours to 1 day | $150–$600; steel ring, gravel or paver base | Modern appearance, weather-resistant patina, minimal installation | Contemporary or xeriscape yards; manage rust staining and choose a suitably thick ring |
| Repurposed Steel Wheel Rim | Beginner; a few hours | $30–$200; salvaged rim, noncombustible base, optional fire pan | Very low-cost, sturdy, distinctive rustic look | Upcycling projects; remove coatings and smooth sharp edges before use |
| Galvanized Stock Tank | Beginner; 1–2 hours | $75–$250; tank, blocks or gravel base, optional screen | Deep bowl contains embers; quick, simple setup | Low-cost, large-capacity fires; zinc coatings may release harmful fumes when heated |
| Sunken Gravel Fire Pit | Intermediate; 1–2 days | $100–$400; excavation, gravel, retaining ring | Low-profile, wind-protected design that blends into landscaping | Natural or xeriscape yards; check utilities and site drainage before digging |
| DIY Gas Fire Pit with Burner Kit | Advanced; 2–5 days | $400–$1,500 plus possible permits and installation; burner kit and fuel connection | Fast ignition, adjustable flame, no smoke or ash | Convenient, low-maintenance patios; follow codes and use a licensed professional for gas connections |
| Fire Pit with Built-In Seating Wall | Intermediate to advanced; 1–2 weeks | $800–$3,000; wall materials, fire ring, larger patio area | Creates a defined gathering space and integrated seating | Spacious outdoor living areas; plan clearances, seating, and a noncombustible surface |
Choose the Build Before You Buy the Materials
The best DIY fire pit isn't the most elaborate one. It's the one you'll build correctly, use safely, and maintain without resentment. A lined concrete block ring may look basic, but it's reversible, affordable in relative terms, and easy to repair. A brick and firebrick circle takes longer, yet it gives you a durable firebox and a finish that can match an existing patio.
Corten steel and sunken gravel designs are really design decisions. Corten brings a clean modern edge and possible staining, so the surrounding surface matters as much as the ring. A sunken pit feels natural and sheltered, but drainage and edge visibility decide whether it stays pleasant or becomes a wet hole full of ash.
Salvaged rims and stock tanks need the most material judgment. Low purchase cost doesn't help if coatings, sharp edges, rust, or drainage create new problems. Gas sits at the other end of the trade-off. It costs more and pulls permits and licensed help into the project, but it removes smoke, ash, and wood storage from everyday use.
Safety isn't a finishing touch you add after the photos look right. NFPA research on fires caused by playing with fire estimated an average of 30,460 such fires annually in the United States from 2014 to 2018, with deaths, injuries, and direct property damage each year. Those figures cover a broader category than backyard pits, but the lesson for a homeowner build is direct. Containment, supervision, clearance, and a way to extinguish the fire belong in the first sketch.
Before you buy anything, measure the area and mark the pit, seating, paths, planting beds, fences, and structures together. Confirm local fire and gas requirements, because municipal rules may require more clearance than general guidance or prohibit wood burning altogether. Check wind direction in the evening, not just at noon, and notice where smoke would travel toward your house or a neighbor's windows.
Then test the design visually. OutdoorBrite lets you place a fire pit and surrounding elements on a photo of your own yard, compare layouts, and refine materials before you commit to excavation or masonry. That step is especially useful for seating walls, sunken pits, and Corten focal points, where scale mistakes are expensive to undo.
Pick one build, write down its fuel, liner, base, clearance, seating distance, and extinguishing plan, and buy for that plan only. If any one of those pieces is still fuzzy, you're not ready for the materials run yet. A clear build plan will save money, but it'll also give you a fire pit that feels relaxed to use because the hard decisions were made before the first flame.
Upload a photo of your yard to OutdoorBrite to preview fire pit styles, seating layouts, and surrounding materials on your actual space before you buy block, steel, or a burner kit. Compare a simple gravel pad with a built-in seating wall, adjust the placement, and head into your DIY build with a layout you've already seen work.
See your yard reimagined
Start creating