Flower Garden Planner: Design Your Dream Yard with AI
Ready to create your dream yard? Our flower garden planner guides you through site assessment, design, plant selection, and using AI tools.
You're probably standing at a window, looking at a yard that feels full of possibility and a little hard to decode. One area gets great light in the morning but fades by midafternoon. Another seems perfect until rain turns it soggy. You've saved photos of lush borders and tidy modern planting plans, but translating those ideas into your own space is where one often stalls.
A good flower garden planner solves that problem by turning a vague wish into a buildable layout. The old-school parts still matter. Measurements, spacing, sunlight, frost timing, and bed access are what keep a pretty sketch from becoming an expensive redo. What's changed is that homeowners can now combine those basics with AI visualization tools to see ideas on their actual yard before they buy plants or move soil.
That combination works. Start with field notes, put the design on paper, then use AI to pressure-test the look and proportions. It's practical, beginner-friendly, and far less risky than making decisions from plant tags and imagination alone.
Table of Contents
- Laying the Groundwork for a Successful Garden
- Defining Your Garden Style and Layout
- Visualizing Your Vision with AI Design Tools
- Selecting Plants for Four-Season Interest
- Bringing Your Plan to Life with Proper Planting
- Nurturing Your Garden for Long-Term Health
Laying the Groundwork for a Successful Garden
The best flower garden planner starts with observation, not shopping. Most cut flowers grow best in full sun and need at least 6–8 hours of direct sunlight per day, and planting windows depend on your local frost dates, so sunlight and timing need to be recorded before you choose anything (cut flower planning guidance).
Read the yard before you design it
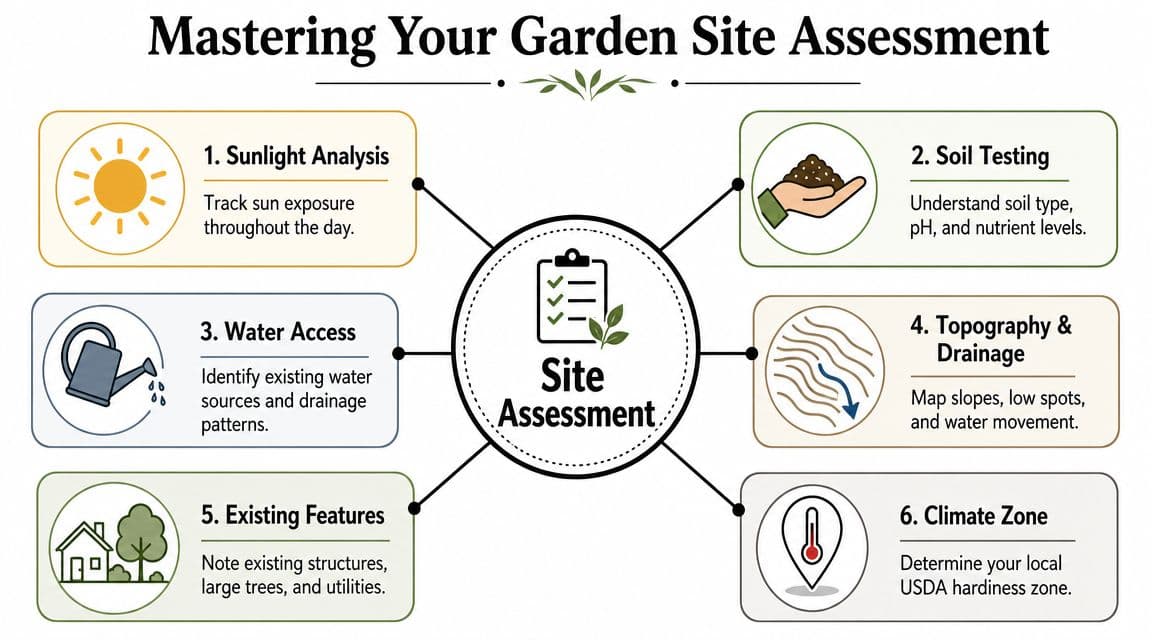
Spend a day watching your space like a surveyor. Note where the sun lands in the morning, where shadows sit at midday, and what happens late in the day when fences, sheds, and trees start changing the map. A spot that feels sunny at breakfast can still fail as a flower bed if it loses light for most of the afternoon.
Drainage matters just as much. After rain, walk the site and mark low spots, compacted zones, and places where water lingers. Beds placed in those problem areas can work, but only if you plan for them early instead of discovering the issue after plants struggle.
Practical rule: If you can't describe the light, drainage, and access in one notebook page, you're not ready to buy plants yet.
There's also the unglamorous issue of moving materials. Soil, compost, mulch, and flats of plants all need to get from driveway to bed. If your path crosses loose surfaces, reading up on wagon wheels for sand and grass can save a lot of frustration once hauling begins.
Make a site checklist you can use later
A beginner-friendly site assessment doesn't need special software. It does need consistency. Keep a short planning list:
- Sun record: Write down where you have reliable direct light and where shadows move during the day.
- Soil notes: Check whether your soil feels sticky and dense, loose and gritty, or somewhere in between. That tells you how fast it drains and how hard roots will have to work.
- Water access: Mark the closest spigot or hose route. A bed that looks perfect on paper can become annoying fast if watering is awkward.
- Fixed obstacles: Include trees, utility areas, edging, downspouts, fences, and pavement.
- Season timing: Keep your first and last frost dates in the same notebook or spreadsheet as the layout.
A lot of garden disappointment comes from skipping this stage because it feels slower than buying plants. It isn't slower. It's what prevents replanting, crowding, and putting sun lovers where they'll never perform.
Defining Your Garden Style and Layout
A flower garden planner gets much easier once you decide what kind of garden you want to maintain. Not just what looks good in photos, but what fits your house, your habits, and your tolerance for editing plants as they mature.
Choose a style that matches how you live
A cottage-style border and a modern border can use some of the same plants, but they ask for different decisions. Cottage planting allows some spill, layering, and soft overlap. Modern planting usually needs stronger shapes, clearer repetition, and more negative space so the design doesn't look messy.
If you like abundance, don't fight it. Just give that abundance a framework. Use repeated plant groups, a consistent edge, or one anchor shrub shape to keep the garden from dissolving into a collection.
If you prefer cleaner lines, be honest about that too. Many people force themselves into a “lush romantic” plan and then spend the whole season trying to make it tidier. A restrained layout often feels better long term because it matches the way they naturally manage space.
A style isn't only visual. It's also a maintenance pattern.
Put the plan on paper first
Traditional garden design relies on scale drawings. One proven method is to choose a scale that fits the whole bed on graph paper. For a 20-foot border, White Flower Farm gives the example of using two graph paper squares per foot, which puts the bed at 40 squares across. The same guidance recommends spacing plants by mature spread and using the lower end of the range, such as 12 inches instead of 18, when you want a fuller look (scale drawing and spacing guidance).
That's still one of the most useful planning habits a gardener can learn. Draw the bed outline, then block in paths, seating, existing shrubs, or any object that can't move. After that, sketch masses instead of individual flowers. Think in drifts, repeated clumps, and background layers.
A simple paper workflow looks like this:
- Measure the garden bed and transfer it to graph paper at one consistent scale.
- Reserve circulation space before placing a single plant mass.
- Mark focal areas such as an entry view, a corner seen from the patio, or the line of sight from indoors.
- Place large forms first so shrubs, grasses, or taller structural plants don't become afterthoughts.
- Fill with supporting groups rather than one-offs.
For awkward spaces, this process matters even more. Narrow side yards, angled lot lines, and clipped corners usually need stronger geometry, not more improvisation. Paper reveals those conflicts fast.
If you want help translating a real yard photo into a workable concept before finalizing the sketch, AI-powered garden layout planning can help you compare ideas without losing the discipline of the scale drawing.
Visualizing Your Vision with AI Design Tools
Graph paper gives you control. It doesn't always give you confidence. Many homeowners can map a bed correctly and still have no clear sense of how the finished planting will feel from the patio, the sidewalk, or the kitchen window.
Why sketches stop short
A hand sketch is strong on proportion and weak on atmosphere. It tells you where a mass goes, but not whether the shapes feel too heavy near the house, whether the color palette clashes with your siding, or whether a curving border softens the space the way you hoped.
That's where AI visualization earns its place in a modern flower garden planner. Instead of guessing, you can upload a photo of the actual yard and test a range of visual directions. The point isn't to let software replace design judgment. The point is to make judgment easier by showing you possibilities in context.
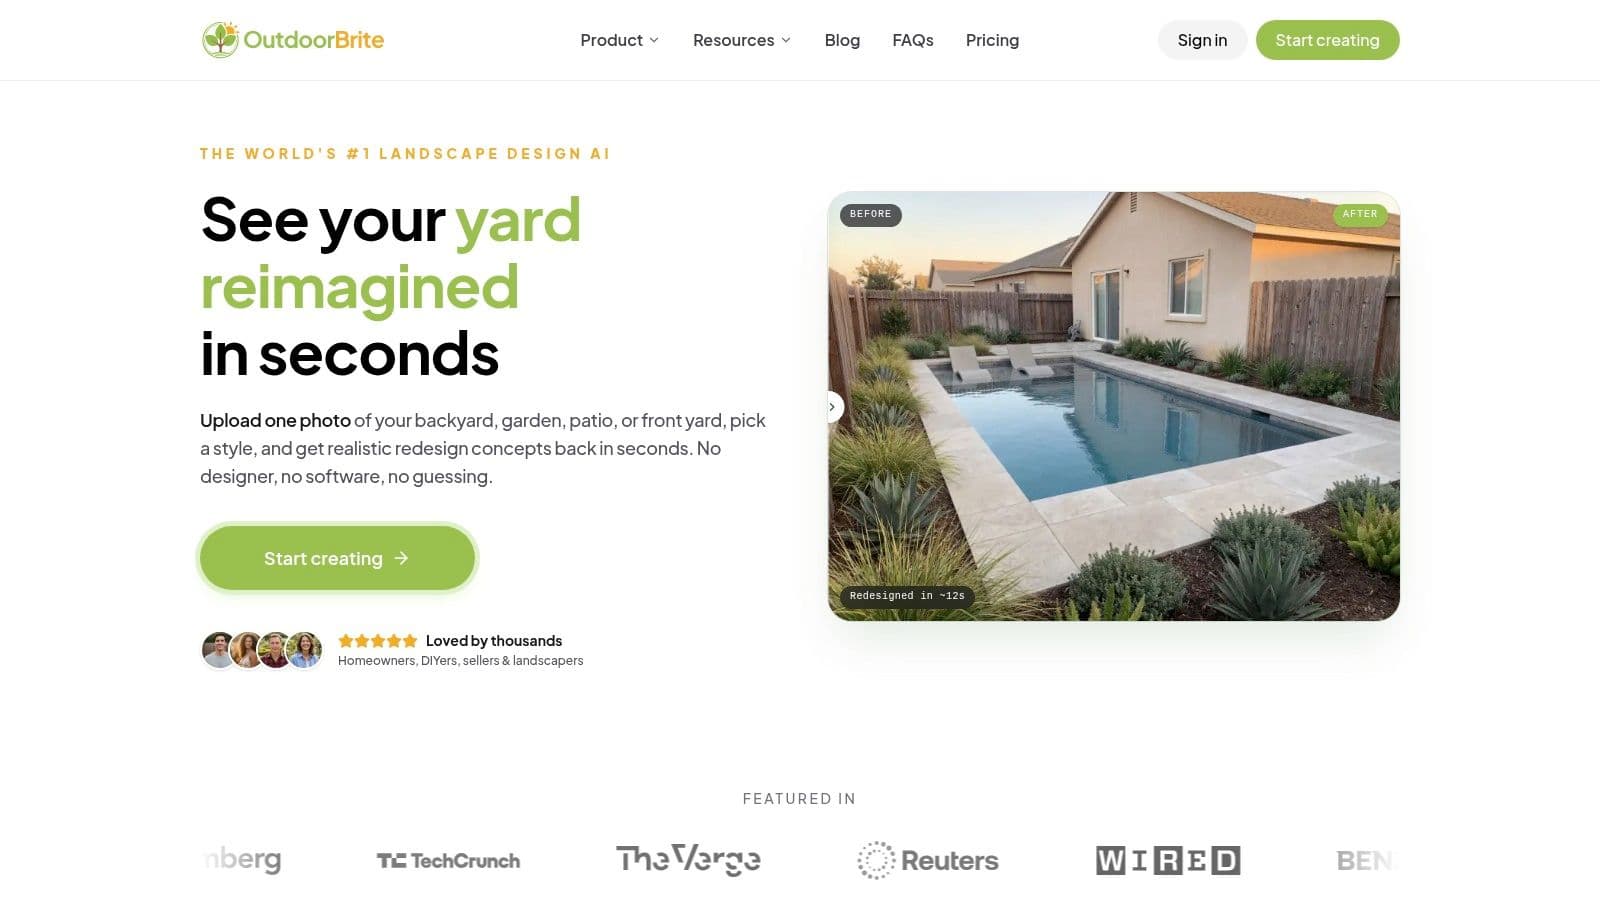
A good workflow is to create your measured plan first, then use ai garden design software to test visual style, density, edging, and material combinations. That sequence matters. If you skip the measured plan, the rendering can tempt you into choices that look appealing but won't function well on the ground.
How to use AI without losing good design judgment
Use AI as a comparison tool, not a final authority. Run the same yard through several styles and study what changes. Do you prefer stronger evergreen structure? Less lawn? Wider planting beds? More repetition and fewer mixed textures? Those are design decisions, and AI helps surface them faster.
I've found AI is especially useful when a homeowner feels stuck between two instincts, such as “lush and layered” versus “clean and architectural.” Side-by-side visuals make the trade-off obvious in a way mood boards rarely do.
A few practical uses stand out:
- Testing bed shapes: Curved edges can soften a rigid yard, while straighter lines can calm a busy one.
- Checking scale: A planting that seemed balanced on paper may feel too low or too bulky against the house.
- Reducing mismatch: Hardscape, lawn, and planting style should feel like they belong to the same property.
If your flower beds connect to turf renovation, it also helps to understand the lawn side of the equation. Resources on how to achieve healthier lawns can clarify what needs fixing before you lock in bed edges and transitions.
AI is best at shortening the trial-and-error phase. The shovel work still belongs to you.
Selecting Plants for Four-Season Interest
The strongest flower garden planner doesn't chase a single peak moment. It builds a garden that still looks intentional when one group finishes blooming and another hasn't started yet.
Cornell's garden design guidance makes the core problem plain. Many plans focus on spring bloom and ignore what follows. Better gardens use waves of bloom and structure, overlapping perennials with foliage texture and evergreen backbones to reduce dead zones and ongoing fuss (seasonal succession guidance).
Build the garden in layers
Think in three layers, not one.
The first layer is structure. This is the backbone that holds the bed together when flowers aren't carrying the show. Evergreens, shrubs, strong mounded forms, and reliable foliage plants all belong here. Without this layer, many gardens look finished for a few weeks and underdesigned the rest of the year.
The second layer is seasonal momentum. These are the perennials or annuals that trade off visual leadership over time. One group rises, another follows, and a third covers the handoff so the bed never feels vacant.
The third layer is detail. Many gardeners begin planning here, and that's why the result often feels scattered. Detail plants matter, but only after the structural and seasonal layers are doing their job.
Here's the decision filter that works in real gardens:
- Start with presence: Ask what the bed looks like when nothing is peaking.
- Then add sequence: Choose plants that carry the eye from one part of the season to the next.
- Finish with accents: Use specialty bloom, unusual color, or airy texture sparingly so it reads as design, not clutter.
A flower bed without structure asks flowers to do all the work, and flowers can't carry that job for the whole year.
Example Seasonal Plant Selection
| Season | Example Plant | Type | Notes |
|---|---|---|---|
| Spring | Hellebore | Perennial | Early color and strong foliage presence help bridge the end of winter into spring. |
| Summer | Coneflower | Perennial | Reliable midseason presence and a clear form that mixes well with grasses and mounding plants. |
| Autumn | Aster | Perennial | Useful for extending visible bloom later in the year when earlier perennials fade. |
| Winter | Boxwood | Evergreen shrub | Provides year-round structure so the bed keeps shape when flowering plants go dormant. |
That table is only a planning model, not a universal recipe. Local climate, soil, deer pressure, maintenance habits, and personal style all change the final list. What matters is the logic behind it. Every bed should contain something that anchors, something that overlaps, and something that fills the quiet gaps.
Plant tags help if you read them with discipline. Ignore the glossy bloom photo for a minute and look at the practical details instead. Mature size matters. Light needs matter. Water needs matter. A plant that's beautiful in isolation can still be a bad fit if it outgrows its spot or disappears visually after its bloom passes.
The most common beginner mistake isn't choosing ugly plants. It's choosing individually attractive plants that don't create continuity together. Repetition fixes that. So does restraint.
Bringing Your Plan to Life with Proper Planting
A finished plan isn't the hard part. Planting day is where skill shows. Timing, layout discipline, and soil handling decide whether your design settles in smoothly or spends the season recovering from preventable stress.
Build the planting calendar backward
Professional planning works backward from the bloom or harvest target. High Mowing Seeds recommends building the calendar from days-to-maturity plus local first and last frost dates, then assigning windows for indoor starting, transplanting, and direct seeding (planting calendar method).
That approach keeps planting from becoming a series of guesses. Instead of asking, “Is it warm enough yet?” you're matching each crop or flower type to a timeline grounded in your climate and the plant's development speed.
Before you start digging, it helps to review effective soil preparation methods. Good planting can't compensate for compacted, neglected soil.
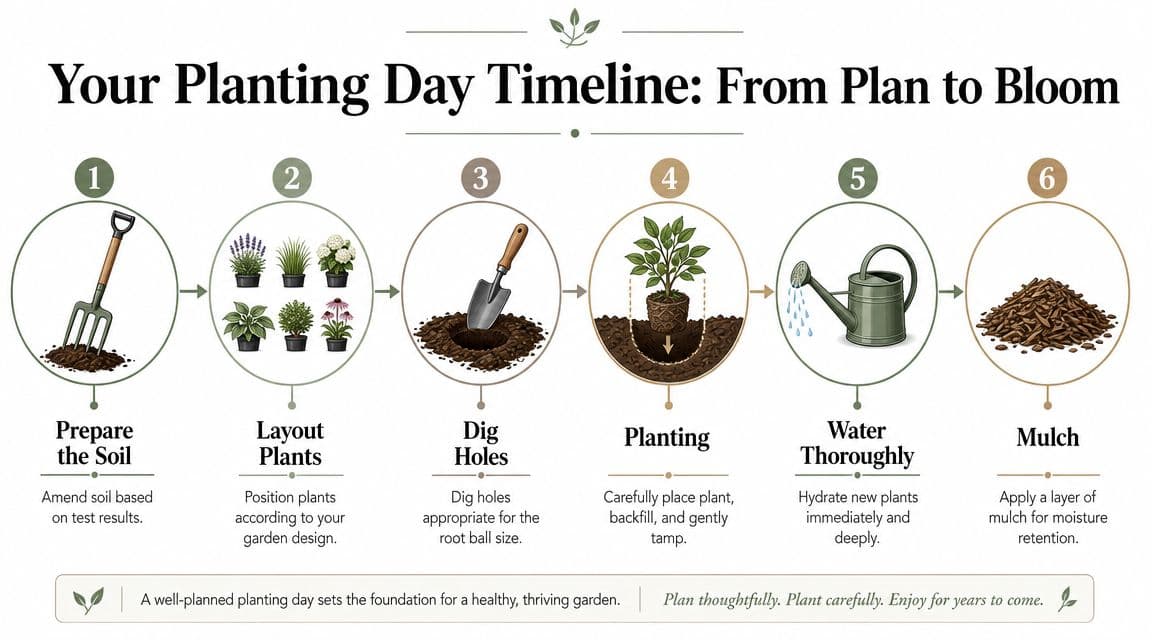
Handle planting day like a layout job
Don't rush to dig holes. Set the plants out in their pots first and confirm spacing, sightlines, and rhythm from the main viewing angles. A layout that looks correct from overhead can still feel awkward from eye level.
Use a practical sequence:
- Prep the soil first. Work in compost or other amendments suited to the soil conditions you observed earlier.
- Stage the plants in place. Keep taller forms where they won't swallow shorter neighbors.
- Check spacing twice. Mature spread matters more than how empty the bed looks today.
- Plant carefully. Set each plant at the right depth, backfill firmly but not aggressively, and water it in so the soil settles around the roots.
- Mulch after watering. Mulch helps hold moisture and reduces the speed at which weeds move in.
This visual walkthrough is helpful if you like to see the sequence before working outside:
A common mistake is planting by emotion. The bed looks sparse, so people push plants closer together. Then midsummer arrives and airflow drops, stems tangle, and the original design disappears under crowding. Trust the mature size. The garden will fill.
Good planting day behavior is mostly patience. Layout first, then dig.
Nurturing Your Garden for Long-Term Health
A flower garden planner earns its value after planting, not just before it. The layout, spacing, and plant choices only hold up if the maintenance routine supports them.
Protect the soil while you maintain the garden
One practical rule prevents a lot of long-term trouble. A commonly recommended maximum bed width is 4 ft (1.2 m) so you can reach the center without stepping into the soil, which helps avoid compaction and the problems that follow. The same expert guidance also advises starting small and limiting new species to 5-10 per season so the garden stays manageable while you learn its rhythms (bed access and scope guidance).
That advice sounds basic until you ignore it. Wide beds invite trampling. Oversized plant lists create confusion about care, pruning, and timing. Simpler beds are easier to water thoroughly, deadhead consistently, and edit when something underperforms.
Keep the routine simple enough to repeat
Long-term garden health usually comes from a few repeatable habits:
- Water thoroughly: Thorough watering encourages roots to move down instead of hovering near the surface.
- Mulch consistently: Mulch slows moisture loss and cuts down on weed pressure.
- Deadhead with purpose: Some plants respond with more bloom, while others just look neater and keep the bed intentional.
- Feed lightly and thoughtfully: More fertilizer doesn't automatically mean better flowers. Excess growth can create weak, floppy plants.
- Edit every season: Remove what isn't earning its space and repeat what performed well.
The gardeners who enjoy their beds the most aren't always the ones with the rarest plants. They're the ones with a rhythm they can maintain without resentment. That's the ultimate finish line.
If you want to turn rough ideas into realistic outdoor concepts before spending on plants, materials, or labor, OutdoorBrite Money is worth a look. It gives homeowners a fast way to visualize redesign options on real yard photos, which can make garden decisions clearer and less risky before work begins.
See your yard reimagined
Start creating