Garden Bed Planner: Design Your Dream Garden 2026
Design your perfect garden with our 2026 garden bed planner. Master site assessment, plant selection, & digital tools for a flawless, beautiful layout.
You're probably standing at a familiar starting line. There's a patch of yard, a side lot, a sunny fence, or a corner near the patio that seems perfect for vegetables and herbs. In your head, it already looks abundant. In real life, that same space may hold soggy soil after rain, afternoon shade, tight access, or a bed shape that looks good on paper and works badly once plants fill in.
That's why a good garden bed planner matters. It turns the idea of a garden into a buildable layout with room to move, soil that drains, crops that fit, and a schedule you can maintain. The strongest plans still rely on old-school principles such as measuring carefully, respecting sunlight, and rotating plant families. What's changed is how easily digital tools help you test layouts before you lift a shovel.
A lot of gardeners are already planning that way. In a 2026 snapshot of digital garden planning, 78.2% of gardeners used mobile devices to plan their gardens, compared to 10.4% on desktop according to PlanMyGarden garden statistics. That shift makes sense. Most planning happens while you're walking the yard, checking a gate opening, or standing where the hose reaches.
If you're also trying to build better habits before planting season gets busy, this guide on Essential garden prep for small homesteads is worth reading. It pairs well with bed planning because good gardens are usually won by preparation, not last-minute buying.
Table of Contents
- Your Dream Garden Starts with a Plan
- Laying the Groundwork Your Site and Vision
- Defining Your Space Beds Shapes and Materials
- The Living Design Plant Selection and Layout
- Bringing Your Plan to Life with Digital Tools
- Common Pitfalls and Keys to Success
Your Dream Garden Starts with a Plan
You clear a weekend, buy lumber, order seedlings, and by July the bed feels harder to manage than it should. The sun shifts, the hose barely reaches, and the path that looked fine on paper turns into a muddy bottleneck. I've seen that pattern for years. Good intentions are common. Good layouts are rarer.
A plan earns its keep before the first shovel goes in. It helps you size the garden to your actual time, place the bed where it will produce, and avoid building something that looks tidy in spring but fights you all season. The strongest plans are grounded in old rules that still hold up: match the bed to the site, leave room to work, and plant for mature size rather than wishful spacing.
Digital planners improve how fast and accurately you can test those decisions. Instead of redrawing the same bed three times on graph paper, you can compare layouts, spacing, access routes, and sun exposure in one sitting. That practical mix of classic garden judgment and newer tools is what makes planning useful, not decorative. If you want a starting point for that process, these AI tools for garden planning show how to turn rough ideas into a workable layout.
A good plan solves labor before it solves looks
A bed can be beautiful and still be a poor build. I judge a plan by the work it creates.
Can you reach the middle without stepping in the soil? Can you get a wheelbarrow close enough to top-dress or harvest without tearing up the edges? Will the bed still make sense in August, when tomatoes are sprawling, weeds are quick, and nobody wants a layout that adds twenty extra minutes to every task?
Those details decide whether a garden stays productive.
Here's the rule I come back to with clients and in my own beds: plan for maintenance first, then yield, then appearance. That order surprises people, but it prevents the common failure of building more than you can comfortably manage. Smaller beds that are easy to water, amend, and harvest usually outperform ambitious layouts that get neglected by midsummer.
Good planning also leaves room for revision. One season may show that a path needs another foot, a trellis belongs on the north side, or salad greens deserve a spot closer to the kitchen door. A digital planner makes those adjustments faster, but its key advantage is judgment. You can test options before spending money on soil, edging, or irrigation.
For gardeners working with limited space and real household demands, Essential garden prep for small homesteads is a useful reminder that next season usually depends on decisions made well before planting day.
Laying the Groundwork Your Site and Vision
The yard decides more than the seed catalog does. If the site is wrong, the bed struggles from the first week.
Start with the site, not the seed catalog
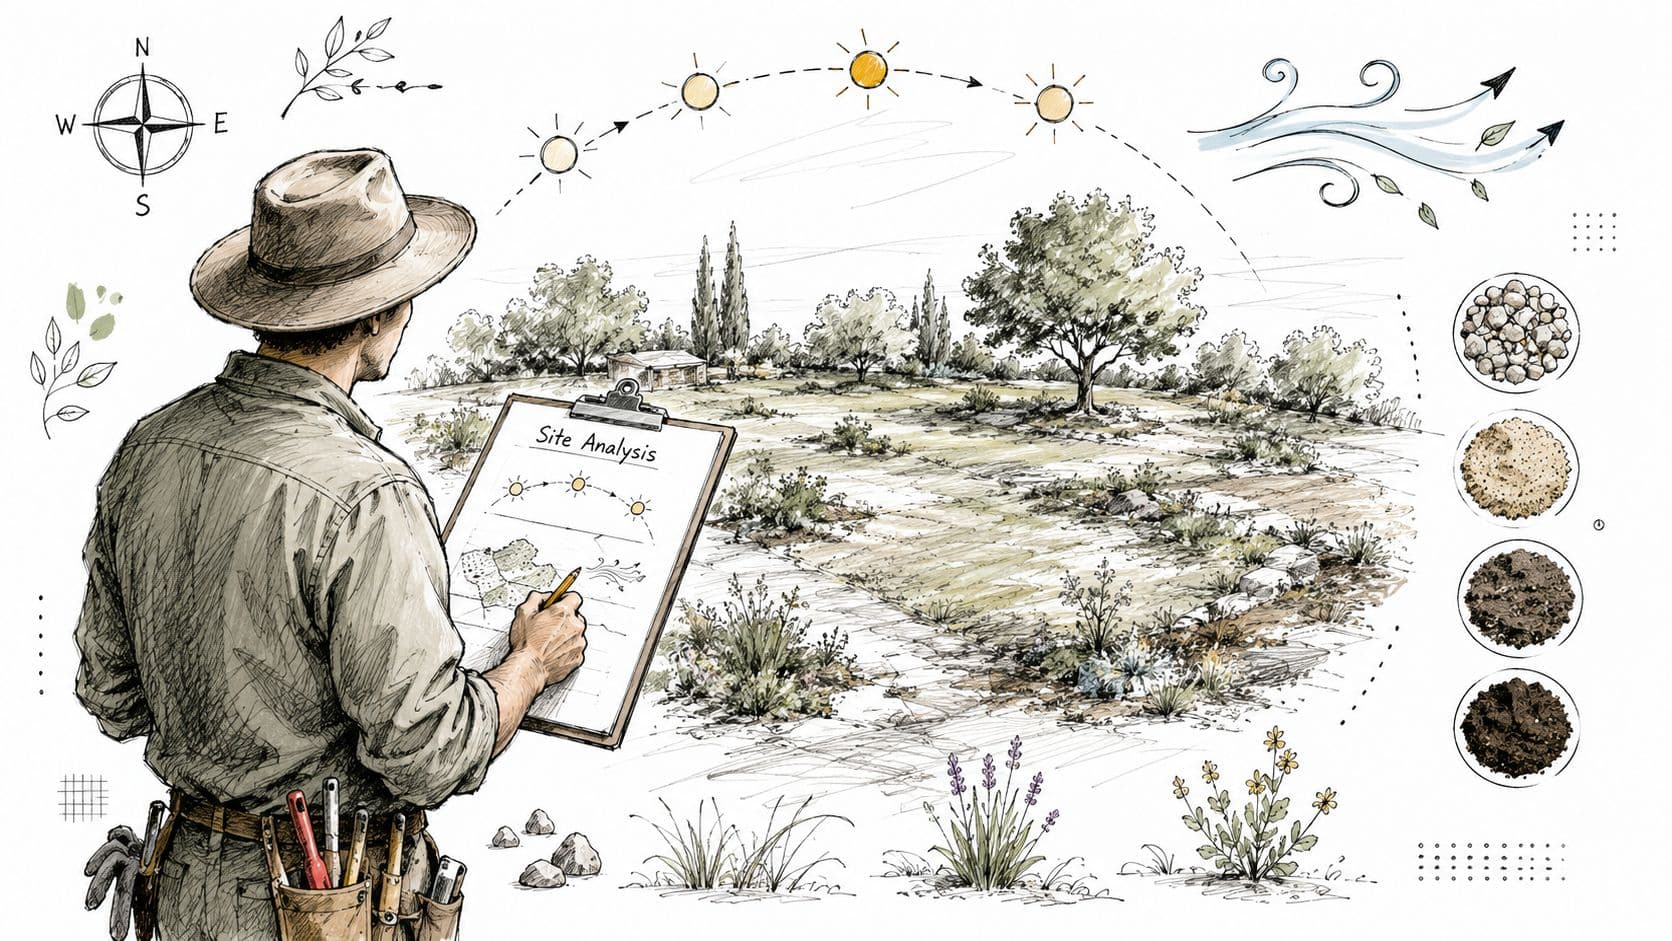
A professional site check is less glamorous than buying cedar boards, but it saves far more money. The first pass should answer four questions: where the sun lands, where water collects, how wind moves through the yard, and how you'll physically get into the space with tools and materials.
For vegetable production, prioritize a spot with 6+ hours of daily full sun, a standard included in a proven raised-bed planning method from Scotts Miracle-Gro's raised bed planting guide. If your yard has several decent options, choose the one with the easiest water access and the least daily friction. Convenience matters more than many gardeners admit. Beds hidden behind a gate, around a shed, and away from the hose often get neglected when summer gets busy.
I also like to mark obstacles before drawing a single bed. Tree roots, downspouts, utility lines, and low pockets all affect what “good garden space” really means.
A digital sketch helps here, especially if you want to compare several layouts quickly. If you want a modern workflow for testing those ideas visually, these AI tools for garden planning can help you see options before committing materials.
Run a simple drainage test before you build
The drainage test is the step too many people skip. It's also one of the few things that can save an entire project before it starts.
According to Journey with Jill's raised bed garden FAQs, only 3% of DIY gardeners in a 2025 survey performed a percolation test, and 68% of raised beds in humid regions suffer root rot within 18 months when this check is skipped. That's not a small oversight. That's a structural planning failure.
Here's the practical version of the test described in that source:
- Dig a 1-foot hole in the area where the bed will go.
- Fill it with water twice.
- Watch drain time. If it takes more than 4 hours to drain, the site has poor drainage.
If a spot drains badly, don't assume a raised frame solves everything. Raised beds help, but trapped water below the bed still causes trouble. In that case, I'd rather move the bed, regrade the area, or create a different drainage strategy before building.
Poor drainage defeats good spacing, good soil, and good intentions.
A quick visual walkthrough can help you think through placement and yard conditions before finalizing the footprint.
Map access and daily friction
Sun and drainage get most of the attention. Access often decides whether the garden remains enjoyable.
Walk the route you'll use. Carry a bag of compost or imagine pushing a wheelbarrow. Notice where you'll turn, where the ground gets soft, and whether a hose reaches without pulling across a path or patio edge. If a bed looks ideal but creates a daily wrestling match, it's in the wrong place.
Use a simple checklist during site analysis:
- Water access: Keep refill and irrigation practical, not theoretical.
- Material delivery: Compost, mulch, stakes, and soil all need a clear route.
- Harvest path: You should be able to gather produce without brushing through wet foliage every time.
- Visibility: Beds you see often get cared for sooner.
The strongest garden bed planner doesn't just find open ground. It finds the part of the yard that supports a garden all season long.
Defining Your Space Beds Shapes and Materials
A bed that looks good on paper can still be miserable to use by July. I've seen plenty of gardens with elegant curves, narrow paths, and oversized beds that worked against the gardener from the first week. Shape and material choices need to serve reach, maintenance, and the kind of crops you plan to grow.
In-ground or raised works best for different jobs
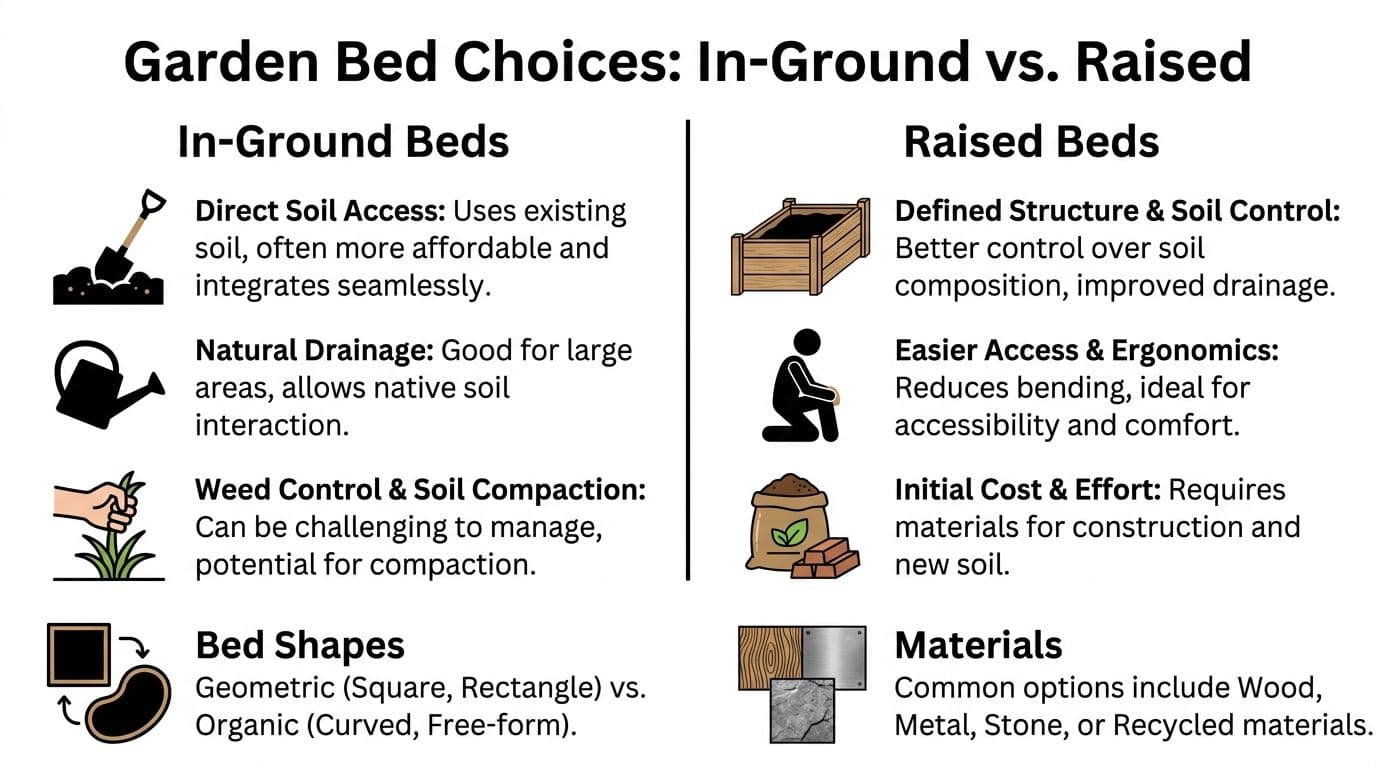
In-ground beds make sense when the native soil already has decent structure and you want to cover more area without spending heavily on lumber, metal, or imported soil. They suit larger kitchen gardens, mixed borders, and sites where a natural look matters. The maintenance trade-off shows up later. Edges soften, weeds creep in, and foot traffic compacts the root zone unless the layout is disciplined.
Raised beds earn their keep when you need control. You can set a clean footprint, build a known soil mix, and keep the growing area separate from surrounding turf or poor subsoil. They also reduce bending, which matters more than many gardeners admit after a long season. The cost is real. So is the labor. Filling deep beds takes more soil than new gardeners expect, and that expense should be planned before a single board is cut.
I usually make the call this way:
| Bed type | Best when | Hard part |
|---|---|---|
| In-ground | Soil is workable, budget is limited, larger planting area is needed | Weed pressure, edge maintenance, compaction |
| Raised | Soil quality is poor, layout needs clean structure, access and comfort matter | Material cost, construction time, soil volume |
Digital planning helps here. A good planner lets you test bed count, dimensions, and path widths before you buy materials. If you want that process to move faster, ai garden design software can map cleaner layouts than the usual graph-paper sketch and help you spot wasted corners early.
The dimensions that actually hold up in daily use
The first hard rule is reach. If you have to step into the bed to weed, plant, or harvest, the bed is too wide. That mistake leads to compacted soil and uneven plant spacing, especially in the center.
Gardenary's raised bed guide recommends keeping raised beds no wider than 4 feet, with common heights ranging from 6 inches to 2 feet. That matches field experience. Four feet works for access from both sides. Lower beds cost less to fill. Taller beds improve comfort, but they increase material and soil costs fast.
A few sizing rules save headaches:
- Width: 3 to 4 feet works for most vegetable beds.
- Height: Choose the lowest height that solves the problem. Use shallow beds for light improvement, deeper beds for comfort or poor soil conditions.
- Length: Keep long beds practical to irrigate, cover, and replant. Very long runs often look efficient but create awkward harvest and rotation zones.
- Paths: Leave enough room for a wheelbarrow, kneeling, and turning with tools. Tight paths waste time every week.
One trade secret. Draw your paths first, then fit the beds inside the remaining space. Gardeners often do the reverse and end up with beds that are generous and paths that are punishing.
Choose shapes that match how you garden
Rectangles win in productive gardens for a reason. They are easy to build, easy to irrigate, easy to cover with row fabric, and easy to space in a planner. If your goal is vegetables, herbs, or repeated succession planting, clean geometry usually gives you more usable growing area with less fuss.
Curved or organic beds can be beautiful in ornamental settings or front-yard edible gardens where appearance matters as much as output. They come with trade-offs. Irrigation lines take more fitting. Edging takes more time. Spacing tends to get sloppy near narrow tails and wide bellies unless you plan carefully.
I use curves sparingly. They belong where the bed needs to follow a walkway, soften a hardscape edge, or blend food crops into a designed setting. For straight food production, rectangles and simple L-shapes are usually the better choice.
Materials should match lifespan, climate, and skill level
Material choice is a maintenance decision disguised as a style decision.
Wood is still the most approachable option for many home gardeners because it is available, straightforward to cut, and forgiving during installation. Thick lumber holds its shape better over time than thin boards, especially once the bed is filled and watered repeatedly. Stone lasts a long time and looks settled from the start, but it demands more labor and better base prep. Metal beds go up quickly and keep crisp lines, though they can look out of place in some traditional garden settings.
Reclaimed material deserves caution. Old lumber, mystery coatings, or salvaged timbers can create safety problems in food gardens. If you do not know what a material was treated with, do not use it around edible crops.
I tell clients to choose the material they can afford to build well, not the one they hope to patch later.
For growers focused on output, durability and access usually matter more than style. That is one reason commercial-minded growers spend so much time on layout efficiency. Even small home gardens benefit from the same thinking, and these insights for profitable homestead farming are useful if you want each bed to earn its space.
The Living Design Plant Selection and Layout
A well-built bed can still fail if the planting plan is weak. I see it every season. Good materials, good soil, then a layout that ignores mature size, airflow, harvest access, or succession. By July, the tomatoes are shading the peppers, basil is buried under foliage, and half the bed is hard to reach without stepping into it.
Build around a harvest goal
Start with what the bed needs to produce, not what looked good on the nursery bench.
A salsa bed, a soup bed, a salad bed, and a cutting garden all ask for different spacing, support, and harvest patterns. Once the goal is clear, the layout gets simpler. Tomatoes and peppers belong near the easiest access if you will pick them every few days. Storage onions and main-crop carrots can sit in less convenient space because they are not asking for constant attention.
Home growers usually return to the same dependable crops year after year. Tomatoes, peppers, cucumbers, herbs, and lettuce earn their space because they get used. That is a better planning filter than novelty. A bed should feed the kitchen or serve the outdoor area on purpose.
For gardeners who want stronger output from limited space, these insights for profitable homestead farming are useful because they push the same question I ask in every design consult: which crops deserve prime real estate?
Group plants by how you work with them:
- Frequent-pick crops: Lettuce, herbs, peppers, beans, cherry tomatoes
- Long-season anchors: Indeterminate tomatoes, trellised cucumbers, pole beans
- Slow and steady crops: Onions, garlic, parsnips, storage carrots
- Cut-and-come-again fillers: Basil, parsley, scallions, leaf lettuce
That grouping matters because harvest pattern drives wear on the bed. If you put high-touch crops in the back corners, you create compaction, broken stems, and a bed you stop enjoying.
Compatibility matters more than variety count
Beginners often treat plant selection like collecting. Experienced gardeners edit hard.
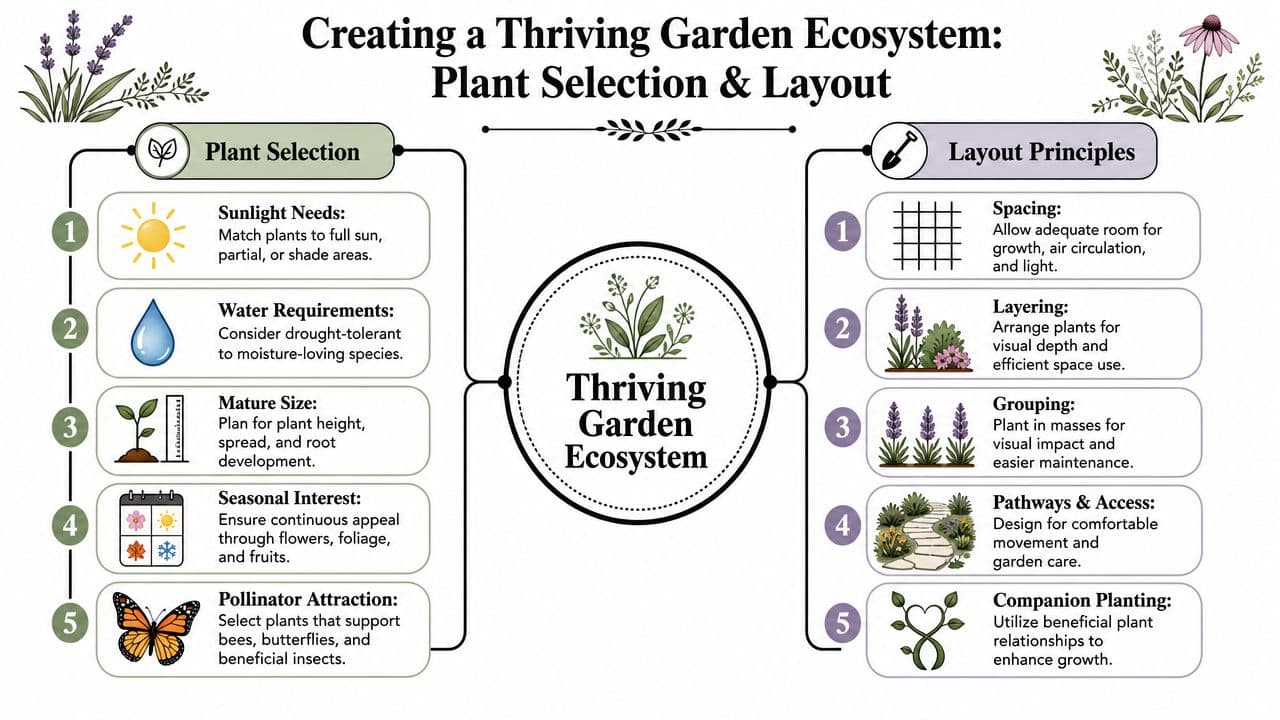
A productive bed needs plants that can share light, root room, and airflow without constant correction. The old principles still hold. Keep tall crops from throwing shade across sun-loving neighbors. Give disease-prone plants enough space to dry after rain or irrigation. Avoid packing one bed with crops from the same family year after year if you want fewer pest and soil-borne disease problems.
I lay out mixed beds in a simple order:
- Set the tallest and supported crops first. Tomatoes, cucumbers, pole beans, tall cut flowers.
- Place medium plants by mature width. Peppers, kale, chard, bush beans.
- Use the front edge for quick harvest crops. Basil, lettuce, cilantro, scallions, low herbs.
That sequence prevents a common mistake. Gardeners place small transplants by seedling size, then discover six weeks later that every plant is competing for the same airspace.
Digital planning helps because mature spacing is easier to test visually than to guess from a tag. Good ai garden design software lets you shift crops around before you build the problem into the bed.
A strong plan looks a little empty on planting day. By midsummer, it looks balanced.
Plan for July, not April
Most layout mistakes come from trusting spring appearances.
Seedlings make every bed look roomy. Mature plants tell the truth. Zinnias lean, tomatoes sprawl, squash reaches into the path, and dill suddenly sits shoulder to shoulder with peppers. A usable plan accounts for the garden at full size, after rain, after staking, and during peak harvest.
Leave room for four things:
- Mature spread, not transplant size
- Air movement for drying foliage
- A clear hand path for harvesting and pruning
- Openings for succession crops after early plantings finish
Digital tools improve an old gardening principle instead of replacing it. Gardeners have always needed to think ahead about spacing and rotation. Modern planners make that testing faster and more accurate. You can trial a tomato-and-basil layout, swap in a trellis, check crowding, and revise before buying a single plant.
Crop rotation also starts here, at the design stage. If tomatoes fill one bed this year, leave yourself a workable option for beans, roots, or greens there next season. Beds that only work for one crop create trouble later. Beds that stay flexible are easier to manage, easier to replant, and usually more productive over time.
Bringing Your Plan to Life with Digital Tools
You measure the yard, set out the bed corners, and everything looks right until you check the route for a wheelbarrow, open the gate, or stand where the summer shade will fall. That is the point where paper plans start to fight you. A digital planner earns its keep once the plan has to respond to real constraints instead of ideal ones.
I still start with a rough hand sketch on many projects. It slows the first round of decisions, and that helps catch bad proportions before you get attached to them. But hand sketches are weak at revision. Shift one bed, and you often have to redraw the path system, check clearances again, and recalculate spacing by eye.
Where hand sketches still earn a place
Old-school planning still does a few jobs well.
- Field measuring: A tape measure and a quick sketch force accuracy from the start.
- First-pass layout: You can test how many beds fit before getting distracted by details.
- Season records: Notes in the margin often beat memory when you review the year.
After that, digital tools are faster and usually more honest. They let you test the plan instead of defending your first draft.
What digital planners do better
A good garden bed planner helps answer practical questions that come up after the basic design is on paper:
- Can the bed move without breaking access? Small shifts can fix awkward circulation.
- Does the plan work with the patio, fence, or shed already there? Context changes proportions.
- Will tall structures cast shade where you do not want it? Trellises and arches affect more than vertical space.
- Does the path still feel usable once plants fill out? A path that looks generous in spring can feel cramped by July.
- Which bed shape wastes the least space? Rectangles are easy to build, but corners, side yards, and slopes often call for a different answer.
That is where modern tools improve an old gardening discipline. Gardeners have always tested spacing, access, and sun angles. Software just lets you run those tests faster, with fewer bad surprises after the lumber is cut or the soil is moved.
The strongest tools also help you work from a real photo of the yard instead of an abstract sketch. I use that feature to judge scale. A 2-foot path may read fine on a plan and still look pinched beside a fence and a row of tomatoes. Seeing the bed in context catches mistakes that measurements alone miss.
Use AI for testing, not for judgment
AI is useful when you give it a specific job. Compare two bed layouts. Preview a trellis in place. Try a wider path. Check whether a seating corner still feels usable after adding raised beds. Those are planning tasks, not gardening wisdom, and software can handle them well.
I would not hand over final decisions on drainage, sun exposure, or maintenance tolerance to any app. Those come from site observation and experience. If one corner stays wet after every storm, the smart move is to change the bed plan or choose plants that can handle it. No polished rendering can fix a soggy root zone.
If you want a starting point for comparing visual planning tools, Best landscape design apps is a useful roundup.
A practical split between paper and software
Here is the division I recommend on real jobs:
| Task | Hand sketch | Digital or AI tool |
|---|---|---|
| Rough concept | Strong | Strong |
| Fast revisions | Weak | Strong |
| Visualizing in the actual yard | Weak | Strong |
| Comparing options over time | Weak | Strong |
| Final judgment based on site conditions | Strong | Strong, with gardener review |
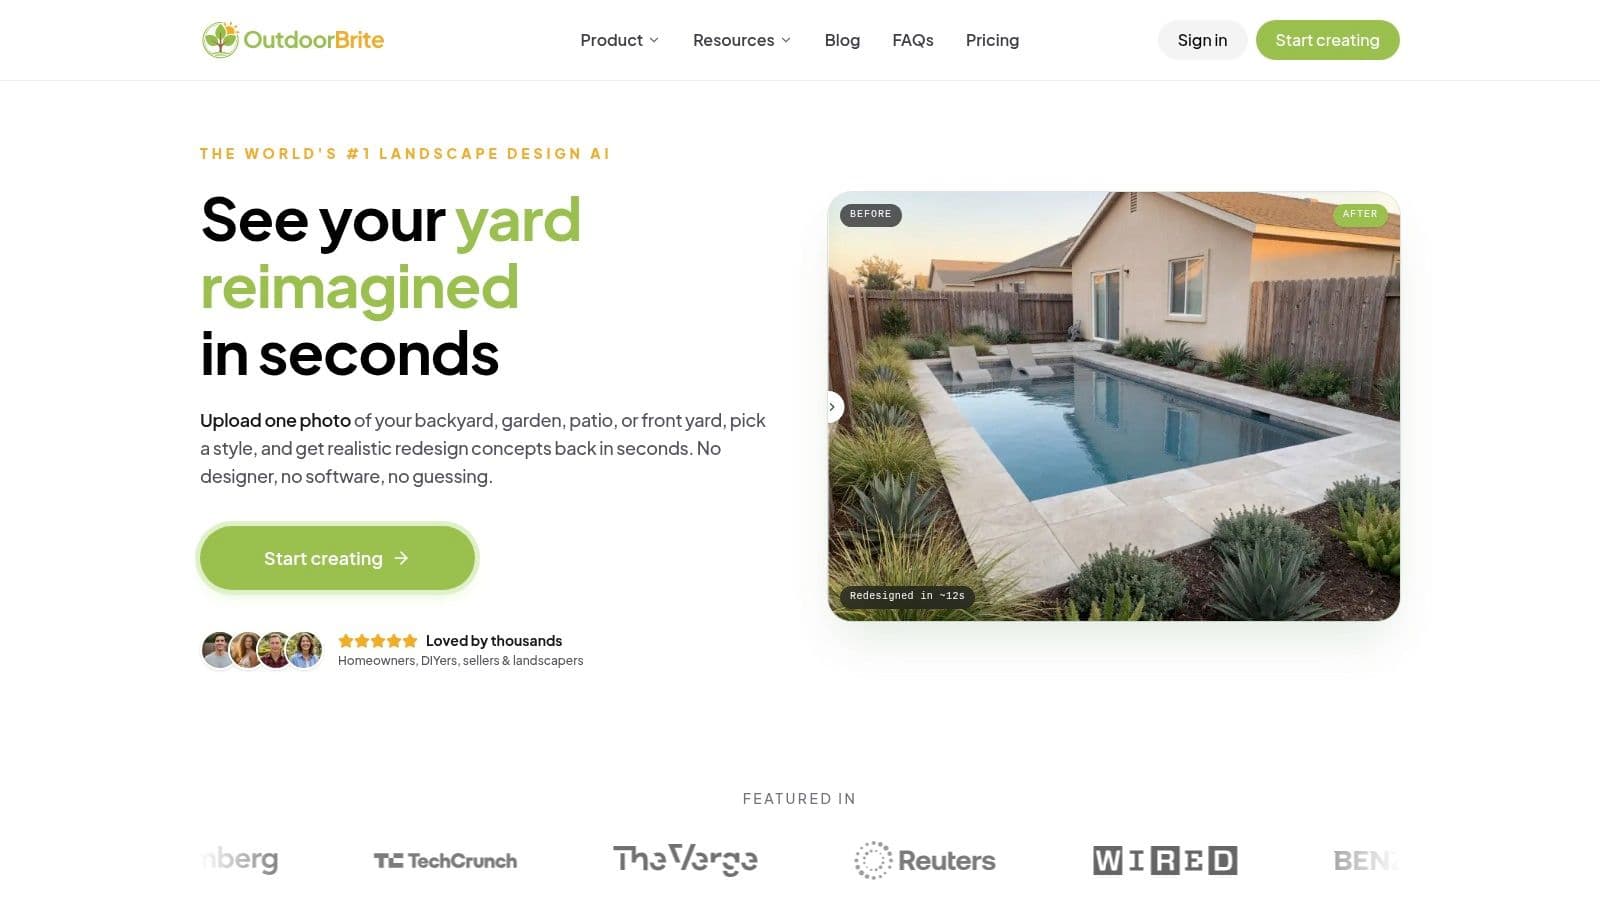
OutdoorBrite and similar AI planners are useful because they bring classic garden questions into a faster testing process. You can try bed placement against a yard photo, compare shape options, and spot conflicts before you buy materials. That does not replace the old rules. It helps you apply them with fewer expensive mistakes.
Good planning still comes down to the same fundamentals gardeners have used for years. Measure carefully. Respect drainage and access. Give plants their real space. Then use digital tools to revise quickly, test ideas against the site, and commit with more confidence.
Common Pitfalls and Keys to Success
A garden usually goes off track in ordinary ways. You build beds that are too wide to reach comfortably, tuck vegetables into the one wet corner of the yard because the shape looks tidy, or plant every crop on your wish list in the first season. Those decisions create work all summer.
Mistakes that cost a season
Bed width causes more trouble than gardeners expect. If you have to step into the bed to weed, harvest, or replant, you compress the soil right where roots need air and water movement. I keep most vegetable beds narrow enough to reach the center from either side. Four feet is a practical upper limit for many people, and narrower is often better for children's gardens or beds set against a fence.
The next mistake is drawing the garden you want instead of the garden the site will support. A low spot stays a low spot, even if the layout tool makes it look perfect. Shallow standing water, reflected heat from a wall, and a path that turns slick after rain matter more than a clean plan view. Digital planners help here because you can test bed placement against real photos, note sun patterns, and revise before you haul in soil or lumber.
Oversizing is another common problem. A modest bed that gets weeded, watered, and harvested on time will beat a large, neglected layout. New gardeners often underestimate how much time midsummer maintenance takes, especially once tomatoes need tying, cucumbers start running, and succession sowing begins.
Habits that make next year easier
Successful gardens improve because the plan keeps changing.
- Start with less square footage than you think you need. It is easier to add one more bed next season than to rescue three beds that never got proper attention.
- Keep useful records. A few dated photos, notes on pest pressure, and simple planting maps will tell you more next spring than memory will.
- Revise based on results, not attachment. If a bed stayed dry too fast or never got enough sun, move it, resize it, or change what you grow there.
- Rotate crop families where you can. Repeating the same crops in the same spot invites a familiar set of soil and disease problems.
The best planners, whether they live on paper or in software, work as season-long job sheets. I use digital tools such as OutdoorBrite to test spacing, sightlines, and layout options faster, but the winning plans still come from careful observation and honest adjustments. That mix of old garden sense and modern testing is what saves money, materials, and frustration.
If you want a faster way to visualize outdoor upgrades before you build, OutdoorBrite Money helps you test garden, patio, and backyard ideas from real photos of your space. It's a practical way to compare layouts, spot design problems early, and move from rough concept to confident plan with less guesswork.
See your yard reimagined
Start creating