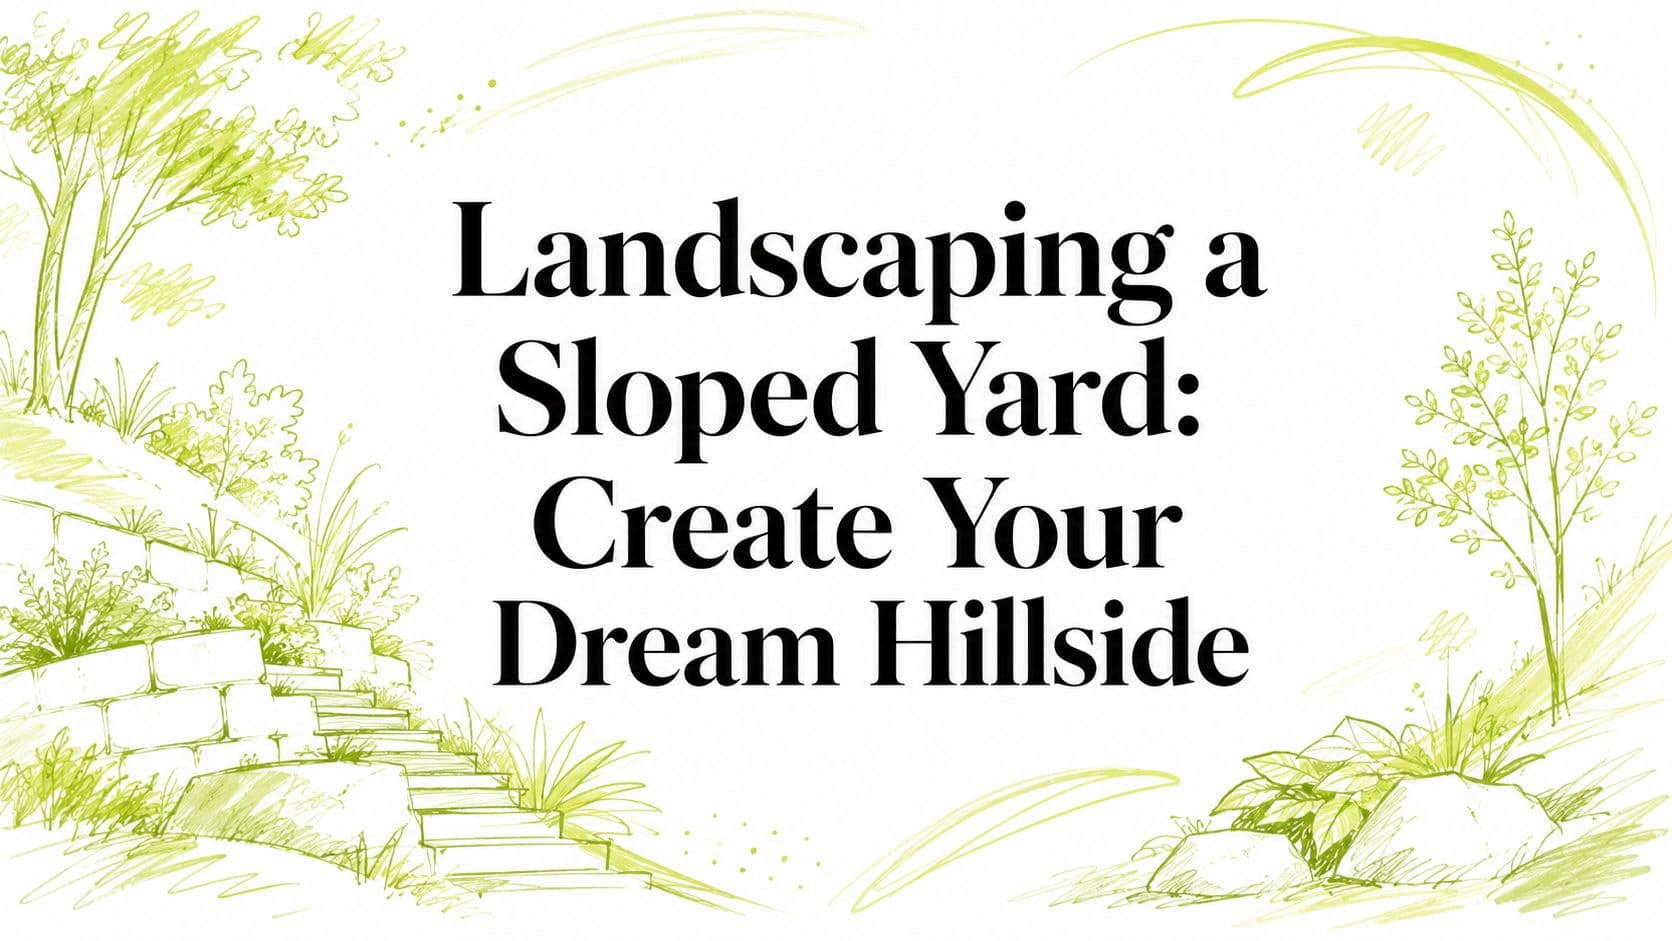
Landscaping a Sloped Yard: Create Your Dream Hillside
Turn your tricky hillside into a stunning oasis. Our guide to landscaping a sloped yard covers retaining walls, drainage, plants, and budgeting.
A lot of sloped yards feel the same at first. Water runs where it wants, mulch ends up at the bottom after every storm, mowing feels risky, and the whole space looks harder to use than it should. Many homeowners stand at the back door and see a problem they've been putting off.
That's usually the wrong way to look at it. A slope can become the most interesting part of the property if you make decisions in the right order. The biggest mistake isn't the hill itself. It's starting construction before you know what the slope can safely support, what your budget should handle, and what you want the yard to do every day.
From Problem Slope to Project Potential
One of the most common situations goes like this. A homeowner wants a patio at the bottom, a path to the shed, and planting that won't wash out. They start pricing stone, maybe even call about a retaining wall, and then realize they still haven't answered the first question. How steep is the yard, really?
That answer changes everything. A slight slope may only need grading, planting, and better water direction. A steeper hillside may need terracing, drainage, and carefully planned access. Costs also swing hard. Field estimates from national landscaping associations place sloped-yard projects anywhere from $600 for simple designs to over $40,000 for complex terraced builds with multiple retaining walls and hardscaping, so guessing early can get expensive fast.
Practical rule: The first job in landscaping a sloped yard isn't digging. It's reducing uncertainty.
Visualization matters. Before anyone orders block, gravel, or plants, it helps to see whether you're building a quiet hillside garden, a set of usable terraces, or a low-maintenance planted bank. That early clarity keeps you from spending structural money on a problem that planting and drainage could solve, or trying to plant your way out of a slope that really needs support.
Assess Your Slope and Define Your Vision
A sloped yard gets expensive when the plan outruns the site. Measure first, then decide what kind of project the yard can realistically support at your budget.
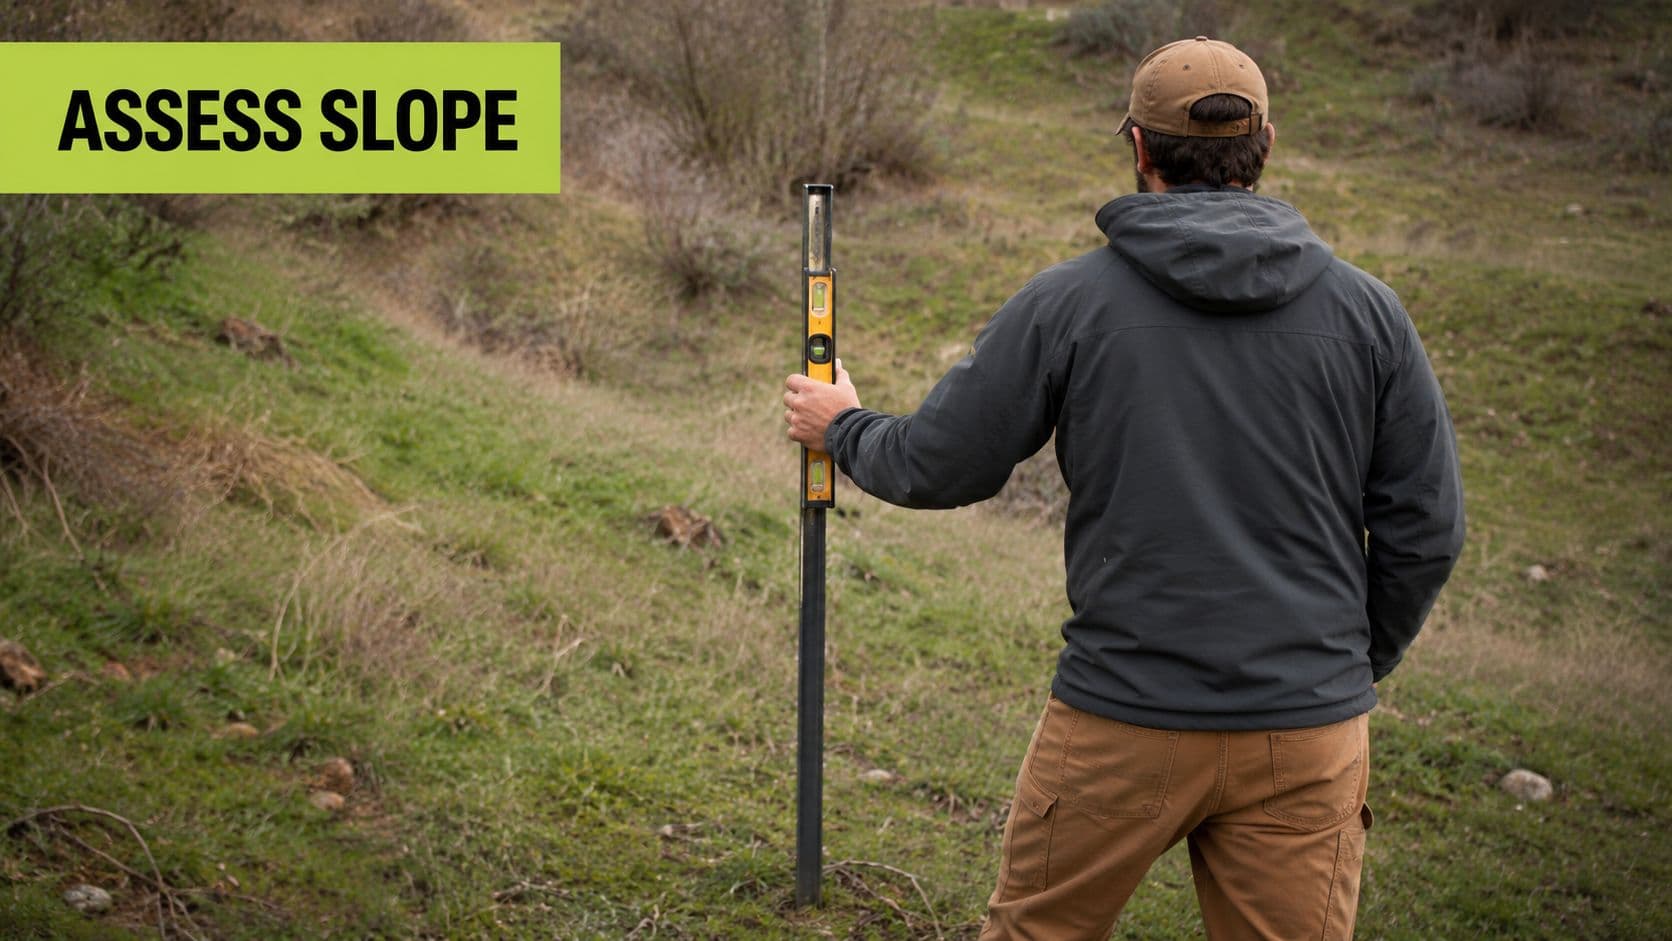
Measure the grade before you design
Start with the actual grade, not a guess from standing on the patio. A slight slope is under 5%, a medium slope is 5 to 15%, and a steep slope is over 15%. That one number helps you decide whether the job is mostly grading and planting, a mixed build with some structure, or a project that may need engineering and permits.
Budget follows slope severity fast. On a gentle yard, money often goes further in soil work, edging, and plants. On a mid-range slope, the same dollars may need to cover steps, short walls, or reinforced path edges. Once the hill gets steep, every design choice has a structural price attached.
Access is part of this early check. A path that feels comfortable on paper can feel awkward or slippery once built. If the run is too direct, use a longer route, landings, or switchbacks. For smaller wall ideas that can help shape those routes, see OutdoorBrite's small retaining wall tips.
Check the site conditions that actually matter
A quick walkaround is not enough. Spend time on the hill in dry weather and during rain if you can, then write down what you see.
Focus on four things:
- Soil behavior: Dig a few test holes. Fast-draining soil, heavy clay, and loose fill all change what will hold and what will wash.
- Sun exposure: Mark the hot, dry sections and the cooler shaded pockets. Slopes often have sharp microclimate changes from top to bottom.
- Water movement: Look for runoff tracks, eroded spots, splash marks on fencing, and damp areas near the house or foundation.
- Use goals: Decide what the yard must do first. Safe access, usable seating, play space, screening, and low maintenance do not all cost the same.
That last point saves money. A yard that needs a safe route to a shed has a different plan than one that needs entertaining space or a planted bank with very little upkeep.
Match the vision to the hill
Good sloped-yard plans start by matching ambition to conditions. A gentle rise can usually handle simple grading, broad planting beds, and an easy walking route. A medium slope often benefits from dividing the yard into clear zones so one area handles circulation while another handles planting or seating. A steep yard usually works better as a series of purposeful levels than one uninterrupted stretch of turf.
This is also the best point to test ideas with AI visualization before anyone breaks ground. I like it for one reason. It helps homeowners compare options side by side before they commit to excavation, wall block, or stairs. You can see whether a low-budget planted slope will look finished enough, whether a mid-budget terraced layout adds usable space, or whether the premium option is buying function you will use.
That early comparison de-risks the whole job. It exposes expensive mismatches, like forcing a straight path where a switchback belongs, placing thirsty plants on the driest upper bank, or planning walls taller than the budget can comfortably support.
Core Strategies for Taming Your Slope
Once you know how steep the yard is and what you can spend, the main decision is how much structure the hill needs. That choice drives almost everything else. Cost, usable space, construction time, and long-term upkeep all change depending on whether you hold the slope with walls, break it into levels, or stabilize it with planting.
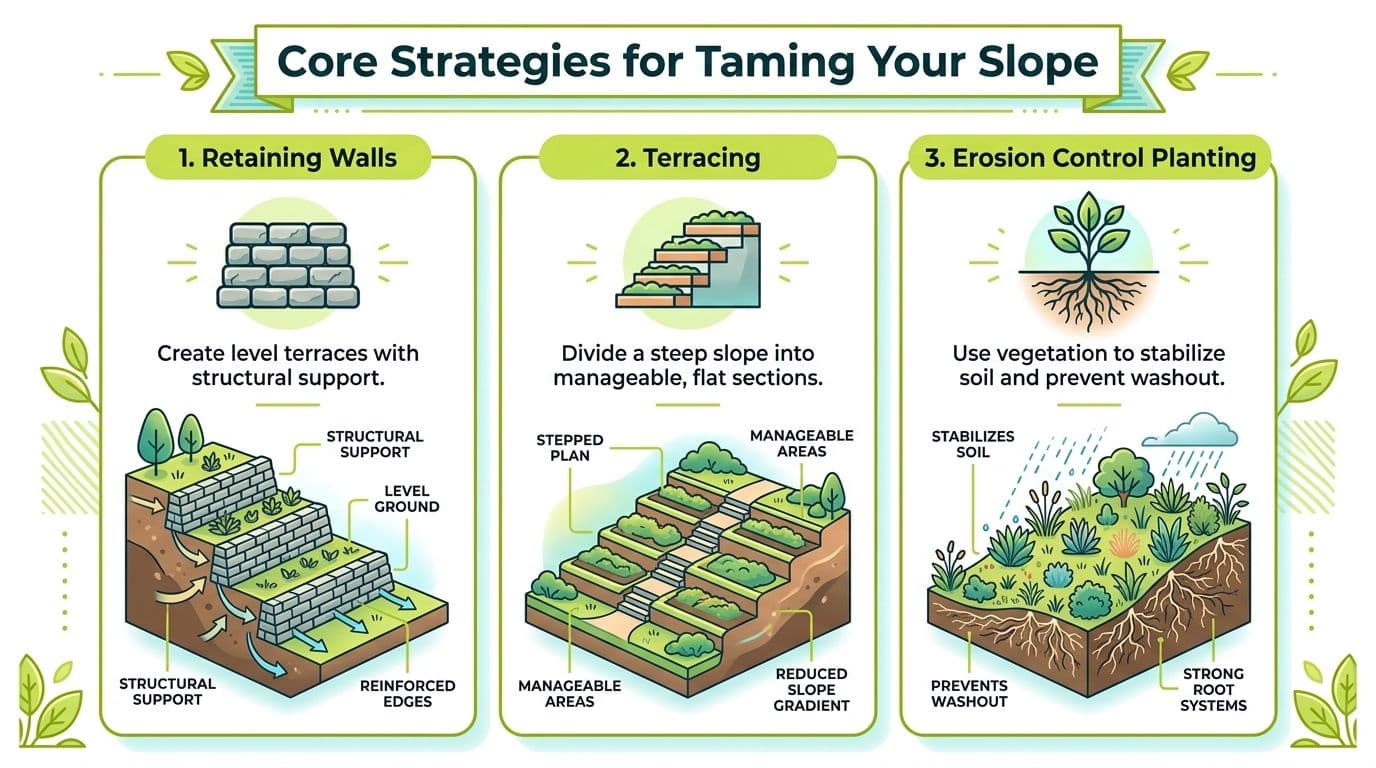
AI visualization earns its keep at this stage. It lets you compare a lower-cost planted slope, a mid-budget terraced plan, and a wall-heavy build before you pay for excavation or materials. On sloped sites, that early side-by-side review prevents expensive choices that look good on paper but waste money in the yard.
Three approaches and where they fit
| Strategy | Best fit | Strength | Trade-off |
|---|---|---|---|
| Retaining walls | Steeper areas and projects needing flat space | Creates firm, usable levels | Higher cost and more construction |
| Terracing | Hillsides that need erosion control and function | Breaks the hill into manageable steps | Needs planning, drainage, and layout discipline |
| Erosion control planting | Moderate slopes and lower-budget work | Less invasive, softer look, lower cost | Won't replace structure where major support is needed |
Here is the practical way I'd sort the options. Gentle to moderate slopes often respond well to planting, reshaping, and a simple path. Mid-range slopes usually benefit from terracing because it adds order without forcing you into one tall wall. Steeper grades, or yards where you need a patio, play area, or straight access route, usually call for retaining walls because plants alone will not create level ground.
Terracing is often the middle-ground answer. It slows runoff, gives the hill a clear structure, and creates smaller areas that are easier to plant and maintain. For homeowners comparing wall layouts, OutdoorBrite's small retaining wall tips are helpful if you are weighing several lower walls against one taller wall.
What works with retaining walls
Retaining walls fail for predictable reasons. The visible block or stone gets blamed, but the underlying problems usually start below and behind the wall.
The bottom course must be embedded at least six inches below the soil level at the lowest point, and on changing terrain the excavation depth may need to be stepped up to maintain stability. Failing to integrate drainage like French drains behind the wall is a critical pitfall that can compromise the wall's integrity, as shown in this retaining wall construction walkthrough on YouTube.
A visual demo helps here:
One budget mistake shows up all the time. Homeowners price the wall face and forget the excavation, base stone, drainage aggregate, pipe, fabric, backfill, and access for equipment. A shorter series of terraces can cost more in labor than one wall, but it often gives you better use of the yard and a more natural finish. That is why the right answer is rarely the cheapest sketch on day one.
When planting can do more than people expect
Planting is not just decoration on a slope. On the right grade, it can be the main stabilization strategy.
For moderate slopes, deep-rooted plantings, mulch, and careful soil coverage can hold soil in place at a much lower cost than masonry. The limit is function. If the yard needs a level sitting area, stair landing, or support near a fence line, planting will not do the structural job. If the goal is to control erosion, soften the hill, and keep disturbance light, planting can be the smarter choice.
This is another place where AI visualization helps. You can test whether a planted bank will look finished enough, whether terraces add usable square footage worth paying for, or whether a wall solves a problem you do not really have. That kind of preview saves people from overbuilding the mild slopes and underbuilding the steep ones.
Mastering Drainage and Water Management
Water decides whether a slope settles in or slowly comes apart. If runoff isn't managed, the nicest planting plan in the neighborhood won't hold for long.
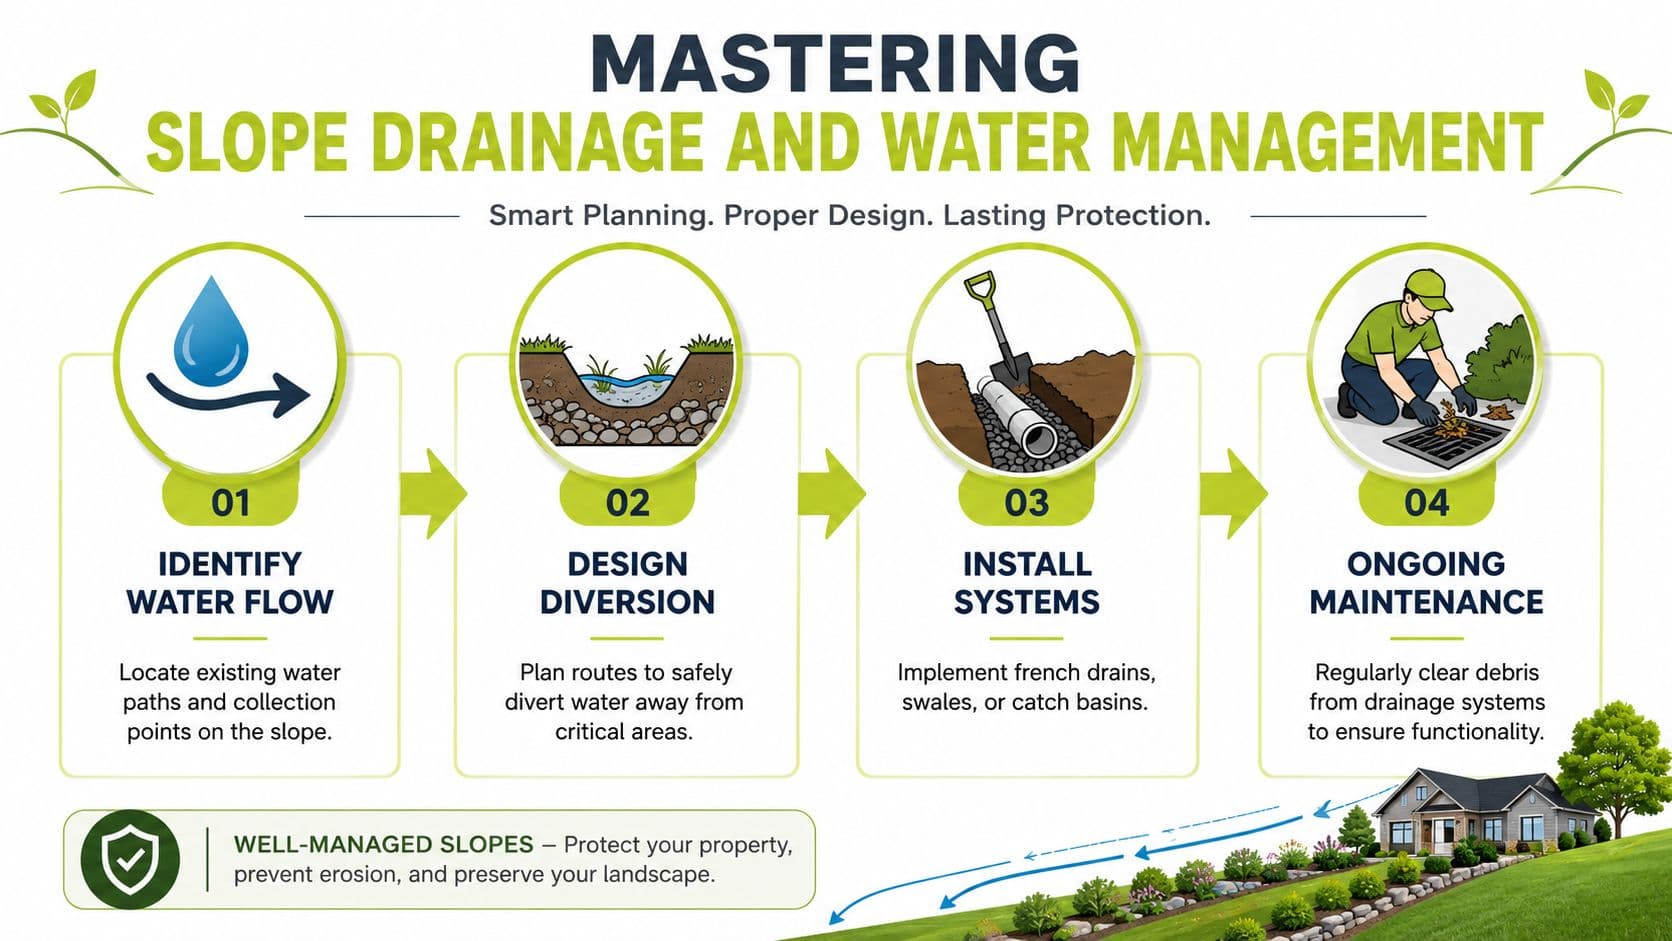
Start with the water you can see
Walk the yard during a storm if you can. Find where water sheets across the surface, where it concentrates, and whether it heads toward the house. Proper grading should always send water away from structures.
Industry data shows that 60 to 80% of steep-slope failures stem from inadequate drainage. Terracing can slow water, but long-term stability still depends on pairing that structure with drainage solutions and deep-rooted plants.
Use the right tool for the right water problem
Different drainage tools do different jobs:
- French drains: Best when water builds behind a wall or moves through the soil profile. A perforated pipe under gravel collects and redirects it.
- Dry creek beds: Good for visible surface runoff. They move water while looking intentional instead of purely mechanical.
- Basic grading: Useful when the main issue is poor water direction near the house or patio.
- Drip irrigation: Better than broad spray on slopes because it waters roots without pushing soil downhill.
If water leaves your yard carrying mulch, seed, or topsoil, the irrigation or drainage plan is working against the slope.
Pair irrigation with plant placement
Planting layout affects water use as much as hardware does. Drought-tolerant plants belong near the top of the slope, and thirstier plants fit better lower down where water naturally moves. That approach can improve irrigation efficiency by 30% and reduce maintenance costs by up to $1,200 annually in low-maintenance hillside yards.
Drip irrigation is especially useful on slopes because it delivers water where roots need it instead of encouraging runoff across the surface.
Planting and Hardscaping for a Beautiful Finish
This is the stage homeowners usually rush, and it is where expensive slope projects often start looking right but working wrong. A planted bank that is easy to maintain will outperform a pretty one that leaves bare soil between shrubs. A patio that fits the grade will get used. One that ignores the slope usually turns into a drainage fix later.
Choose plants that do real work
On mild slopes, dense groundcovers and spreading perennials often do enough to knit the surface together and cut down on maintenance. On steeper grades, I prefer a layered planting plan. Deep-rooted shrubs or grasses anchor the hill, lower growers cover exposed soil, and a few accent plants carry the visual weight so the whole bank does not read like erosion control fabric with leaves.
Native plants are usually the safest starting point because they are already suited to local rainfall, soil, and temperature swings. Creeping juniper, switchgrass, Russian sage, creeping thyme, daylilies, black-eyed Susans, and creeping phlox are all common slope choices, but they do different jobs. Juniper and thyme spread well. Grasses hold and soften. Flowering perennials add seasonal color without asking you to replant every year.
Mulch still earns its place, especially while new planting fills in. Keep it moderate and use a mulch that will stay put on a grade. On steeper areas, shredded bark usually holds better than light wood chips that wash downhill after the first hard rain.
Hard materials should match the slope and the budget
The finish materials need to fit how people will move through the yard. Gravel suits a casual garden path on a gentler incline, but it can shift underfoot on a steeper route. Flagstone and pavers cost more up front, yet they usually give better footing and cleaner edges where daily use matters. If the hill rises quickly, switchbacks are often easier to live with than a straight run of stairs that feels too abrupt.
Patios on slopes are where planning saves real money. A small sitting area tucked into one level change can be far less expensive than cutting a large flat pad into the hill and building extra wall support around it. Before choosing size, shape, or material, test the layout on your actual yard photo with AI patio design. That step helps you compare a compact pad, a stepped terrace, or a path-first plan before you pay for excavation, base prep, and stone.
Budget should guide the finish, not just the structure. A modest slope often looks better with fewer hard materials and stronger planting. A steeper yard may need the opposite. More built surfaces, fewer fussy beds, and simpler plant masses that are easier to access and maintain.
If you like a softer, habitat-friendly look, a planted slope can support that well. For inspiration on that direction, Cottagecore pollinator garden design offers ideas that can translate nicely to sunny hillside beds.
Good hillside design feels calm underfoot. You should be able to walk it, water it, and maintain it without feeling like every trip is a balancing act.
Your Next Steps to a Stunning Sloped Yard
A sloped yard doesn't need brute force. It needs sequence. Measure the grade, understand the water, choose the right level of intervention, and finish with plants and materials that make the hill easier to live with.
That's what separates a yard that keeps washing out from one that improves year after year. Terracing has its place. Retaining walls have their place. So does a smart planted slope that avoids unnecessary construction. The trick is deciding which route fits your hill, your goals, and your budget before you commit to labor and materials.
That's also why visualization should come first. It's the simplest way to de-risk the project. You can test a terraced layout against a planted one, compare path alignments, and see whether a low-maintenance hillside makes more sense than a wall-intensive build. Instead of guessing from sketches or trying to imagine finished grades in your head, you get a clearer read on what's worth building.
If you're ready to pressure-test ideas before spending on excavation, block, or plants, start by using ai for landscape design to explore realistic concepts for your actual yard photo.
Outdoor projects get expensive when the first real draft happens in the dirt. OutdoorBrite lets you test layouts, patio concepts, plant groupings, and style directions before construction starts, so you can make sharper decisions on your sloped yard with less risk and more confidence.
See your yard reimagined
Start creating