8 Low Maintenance Landscaping Along Fence Ideas
Explore 8 low maintenance landscaping along fence ideas, from grasses and native ground covers to rock beds, screening plants, and hardscaping.
A narrow strip beside the fence can make an otherwise finished yard look neglected. It may be too shaded for lawn, too hot for thirsty plants, or too awkward to mow without scraping the fence. Add poor drainage, foot traffic, wind, or a need for privacy, and the obvious solution is rarely just “plant a row of shrubs.”
The best low maintenance landscaping along fence lines starts with the problem you need to solve. Privacy calls for screening plants, while recurring weeds may justify mulch, gravel, or ground cover. A dry, exposed border needs water-wise planting, and a busy side path often works better with pavers and deliberate access space. The fence itself matters too. A wooden fence may need airflow around posts, while an unattractive boundary may benefit from layered planting or a trellis.
The eight ideas below pair each approach with its strengths, limitations, and installation decisions. Before choosing plants or materials, review the fence style and surrounding conditions, including the options discussed by FenceScape. A convincing design has to survive the space, not just look good in a photograph.
Table of Contents
- 1. Ornamental Grasses Along Fence Lines
- 2. Mulch and Rock Beds with Weed Barriers
- 3. Evergreen Shrubs and Screening Plants
- 4. Native Ground Covers and Spreading Plants
- 5. Perennial Flower Borders and Cottage Gardens
- 6. Hardscaping Elements with Pavers, Gravel, and Edging
- 7. Living Fence Alternatives with Green Walls and Trellises
- 8. Succulent and Xeriscape Plantings
- Low-Maintenance Fence Landscaping: 8-Option Comparison
- Turn the Best Idea Into a Manageable Fence-Line Plan
1. Ornamental Grasses Along Fence Lines
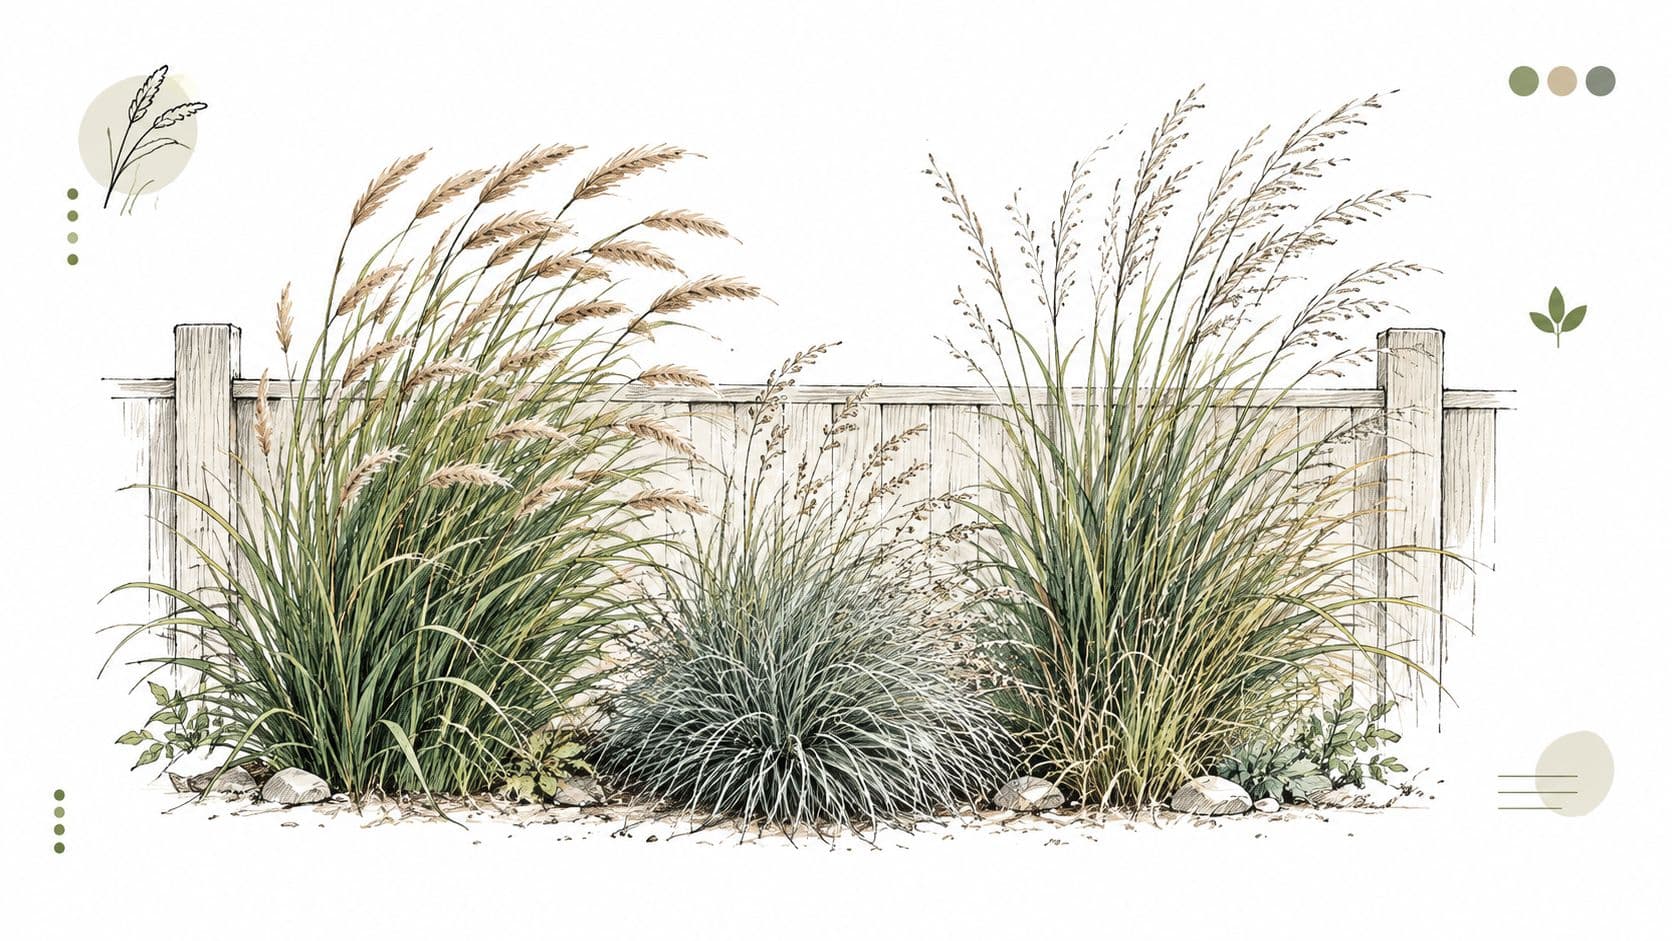
Ornamental grasses solve two common problems at once: they soften a hard fence and add height without demanding constant shaping. Their foliage moves in the wind, their seed heads provide texture after flowering, and many varieties cope well with dry conditions once established. They're especially useful when you want a relaxed screen rather than a solid green wall.
Choose the grass by mature height and the scale of the fence. Giant miscanthus can create a tall backdrop, while switchgrass offers an adaptable option with a more upright habit. Blue fescue suits a low border, and fountain grass provides rounded form and arching foliage. Native or regionally adapted varieties are generally the safer choice because they're more likely to fit local weather and soil conditions.
Installation decisions that reduce work
Plant in spring or fall when conditions support root establishment. Space each grass according to its mature width, not the small pot size at purchase. Crowded grasses may look full quickly, but they'll need division, thinning, or extra watering sooner than a properly spaced planting.
A simple bed preparation approach works well:
- Group matching varieties: Repeating one or two grasses creates cohesion and makes seasonal care easier.
- Suppress early weeds: A properly installed weed barrier can reduce competition while plants fill in, but it must be covered and secured so it doesn't become exposed.
- Protect the fence base: Keep soil and mulch from piling directly against fence posts or boards.
- Plan the cutback: Many deciduous grasses can be cut back in late winter before new growth appears.
Practical rule: Don't use a tall grass where a narrow access route is essential. Mature clumps can lean into paths and turn a low-care border into a trimming job.
Grasses aren't maintenance-free. They may need seasonal cutbacks, removal of dead foliage, and occasional division when clumps become congested. Still, they're a strong choice for movement, texture, and moderate screening without the clipped appearance of a formal hedge.
2. Mulch and Rock Beds with Weed Barriers
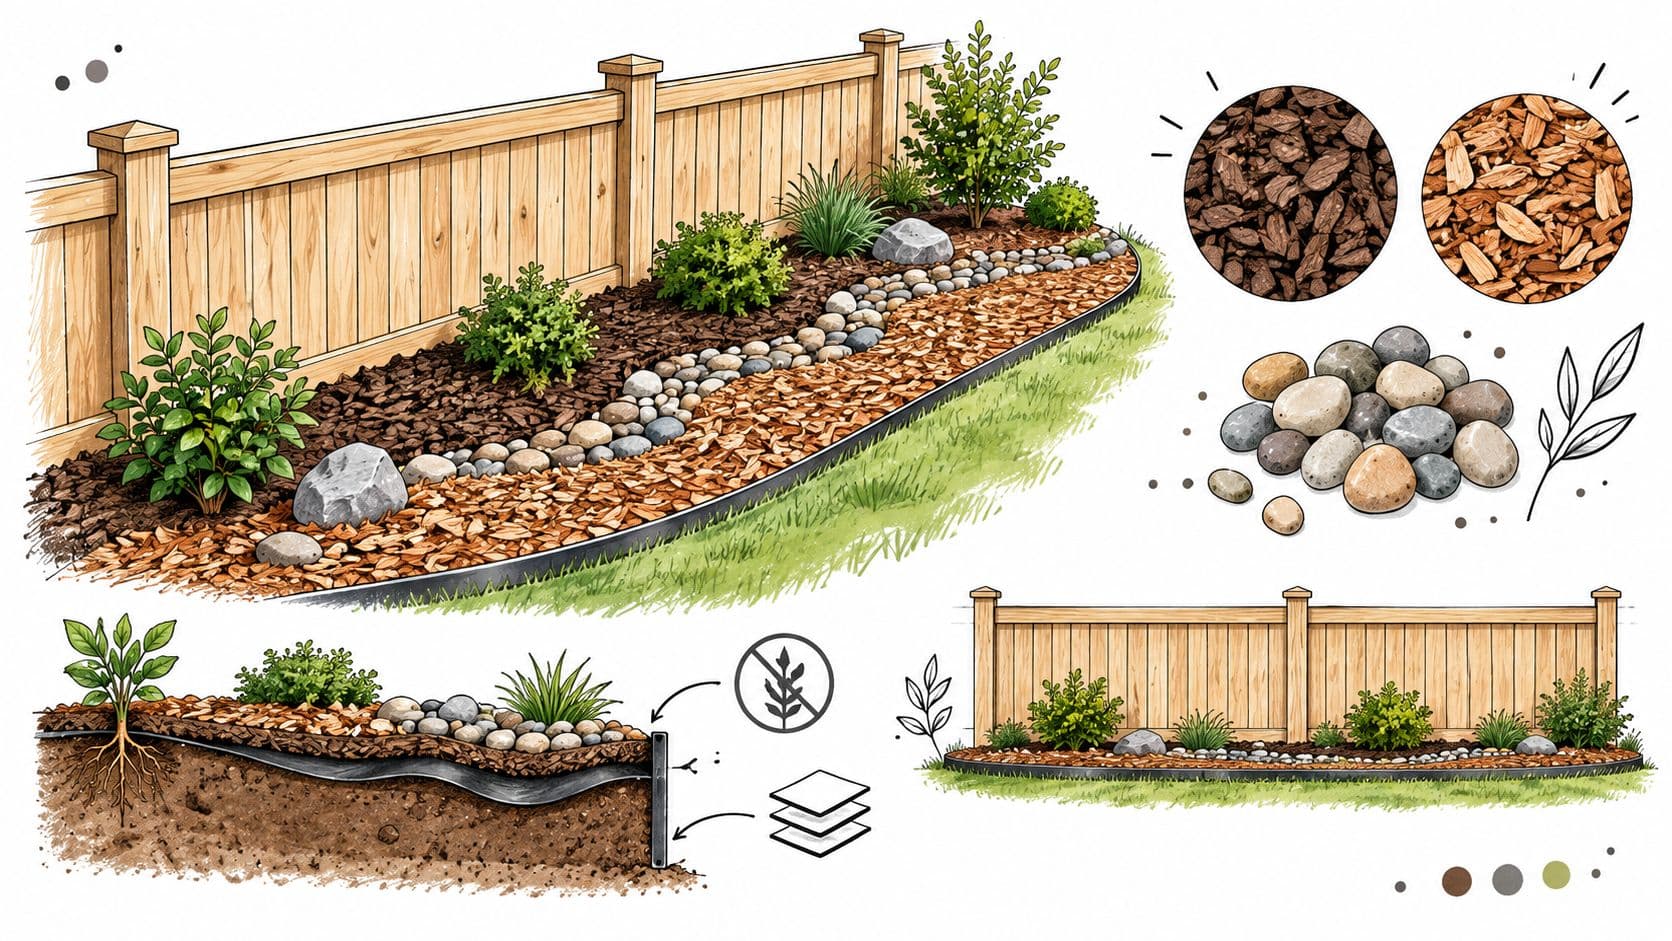
A narrow side yard, shaded strip, or poorly irrigated fence line often works better as a managed bed than as a dense planting border. Mulch or rock covers exposed soil, defines the boundary, and leaves room for a few structural plants. It also reduces mowing and makes recurring weeds easier to spot and remove.
Choose the surface according to the maintenance problem. Cedar or bark mulch softens the fence and suits mixed or shade-tolerant planting. Gravel and river rock provide a more architectural finish and suit drought-tolerant plants that prefer drier crowns. Rock holds its appearance longer, but it can heat up, spread onto paths, and make later digging difficult. Organic mulch is more comfortable around plants and easier to refresh, though it decomposes and requires periodic renewal.
Set up the bed for access and water flow
Start by checking how rain moves along the fence. A bed that traps water against wooden posts or boards can shorten their service life, while dense mulch in a shaded, poorly drained strip may keep the surface wet too long. Correct grading, a shallow swale, permeable material, or improved soil may matter more than the surface color.
A weed barrier helps during establishment, especially where weeds repeatedly return, but it cannot correct poor drainage or replace inspection. Lay it flat, overlap and secure the seams, and leave access to posts, gates, drains, and irrigation components. In areas intended for spreading plants, treat fabric as temporary support. Soil and roots can build over it, creating new pockets for weeds.
Make the installation decisions before spreading the finished material:
- Match the surface to the planting: Use mulch with mixed beds, and reserve rock for plants suited to drier conditions.
- Protect the fence base: Keep wet mulch and piled soil away from wooden boards and posts.
- Hold the edge in place: Steel, composite, brick, or stone edging limits migration into lawn and walkways.
- Check after heavy rain: Remove washed-out mulch, uncover exposed fabric, and clear rock from gates or drains.
Rock beds require less replacement, while mulch is easier to amend if the planting plan changes. Either option still needs occasional hand weeding, edge maintenance, and surface raking. Install only as much bed as you can reach comfortably, especially beside gates or narrow access routes.
3. Evergreen Shrubs and Screening Plants
A fence that still exposes the yard after installation often leads homeowners toward a hedge. Evergreen shrubs provide year-round privacy and soften an unattractive boundary, but they can create more work if their mature size exceeds the planting strip. Choose species according to the fence height, available width, drainage, winter exposure, and the amount of pruning you can realistically manage.
Arborvitae remains a common screening choice, particularly in narrow, upright cultivars. Green Giant types can form a substantial screen, while Emerald Green forms suit tighter spaces when their mature dimensions are respected. Sky Pencil holly adds a vertical accent, and cold-hardy arborvitae cultivars may perform better where winter exposure limits other evergreens. Fast-growing conifers close gaps sooner, but their eventual height and width can turn pruning, removal, or fence access into a difficult job.
Give screening plants room to mature
Privacy borders often fail because shrubs are spaced for their container size rather than their mature spread. Set shrubs 12 to 18 inches away from the fence to preserve airflow and access. Nature Hills' plant-spacing guidance explains why a long-term layout should follow expected plant dimensions, not the size at purchase.
For privacy-focused evergreens, single or staggered rows are commonly spaced about 3 to 6 feet apart, depending on cultivar and the density you want, according to fence-line screening guidance from Outdoor Brite. Use the plant label's mature width as the controlling measurement. Narrow cultivars can sit closer than broad ones, but crowding them rarely saves maintenance later.
A dense row blocks views sooner, while an open arrangement offers easier inspection, pruning, and watering. Dense planting can also trap moisture inside the hedge, increasing the need to check foliage and branches after wet weather. Water new shrubs consistently during establishment, then adjust care to rainfall, soil, and climate. Evergreen does not automatically mean drought-proof.
Leave gates, utility access, and overhead wires clear. The most manageable screen is one you can reach without ladders, severe shearing, or repeated replacement.
4. Native Ground Covers and Spreading Plants
Weeds are often the main reason a fence border becomes a chore. Bare soil between shrubs invites germination, while lawn can be difficult to edge neatly beside posts and panels. Native ground covers and spreading plants address that problem by occupying the soil surface with a living layer, reducing open space for unwanted growth once the planting has established.
Good choices depend heavily on region and exposure. Creeping phlox suits sunny borders and offers spring color. Creeping juniper provides low evergreen structure, while sweet woodruff is better suited to shade. Wild strawberry can create a low native carpet in appropriate conditions, and lamb's ear adds silvery foliage where drainage and sun support it. These examples aren't universal prescriptions. A plant that spreads politely in one climate may become difficult to control in another.
Match the ground cover to the fence microclimate
Prepare the soil before planting, remove competitive weeds, and water consistently while roots are developing. The faster the ground cover closes, the less exposed soil remains, but planting too densely can create unnecessary cost and crowding. Set plants according to mature spread and leave enough space to inspect the fence, clear leaves, and reach irrigation.
A native nursery or regional plant society can help identify species that fit your local soil and weather. Look for plants that share the same water requirements, since a mixed border of drought-adapted and moisture-loving species will never be equally easy to maintain.
If you're comparing planted borders with other lawn-replacement approaches, review the cost of ground cover lawn alternatives before committing to a large installation.
A ground cover reduces weeds only after it fills the space. Early hand-weeding is part of the installation period, not evidence that the design has failed.
The main trade-off is spread. A vigorous plant may cover the fence line quickly, but it can move into lawn, neighboring beds, or the space beneath the fence. Use edging where necessary, and confirm that a selected species isn't invasive in your area. Done carefully, a living carpet can be quieter and more natural-looking than a fully covered rock bed.
5. Perennial Flower Borders and Cottage Gardens
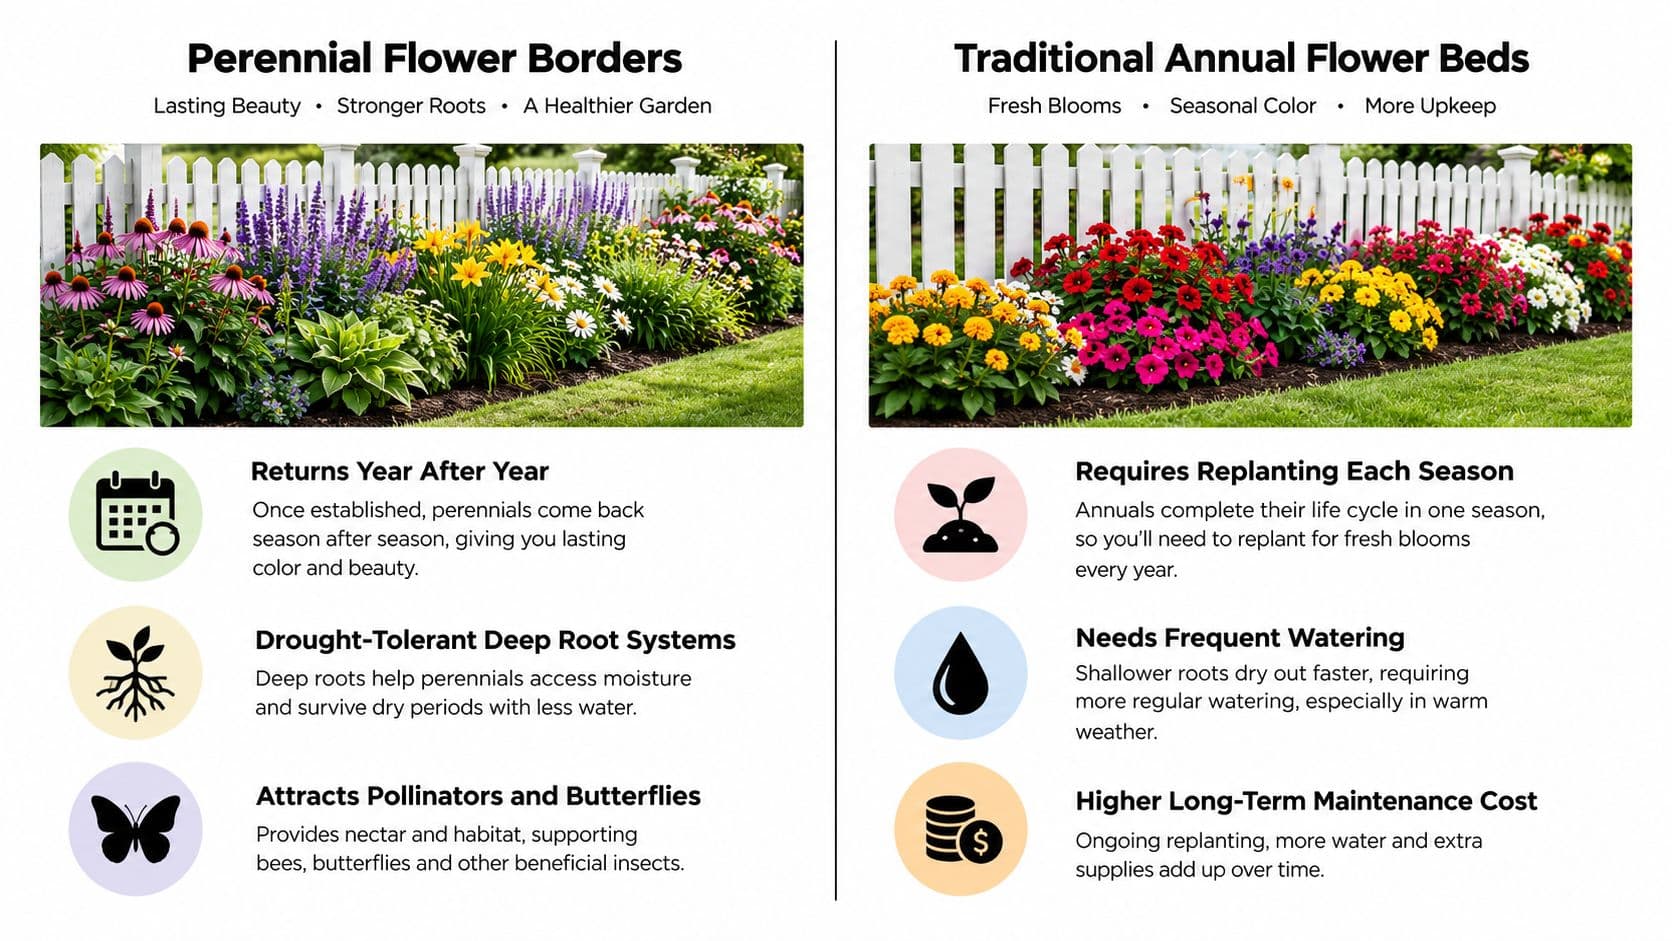
A bare or utilitarian fence can make an otherwise finished yard feel incomplete. A perennial border adds seasonal color and softens the boundary, provided the planting suits the site and leaves enough room for fence maintenance. Layer low plants near the front, medium clumps through the center, and taller flowers near the fence to build depth without blocking access.
Black-eyed Susan, coneflowers, daylilies, salvia, and sedum offer dependable forms for a straightforward palette. Coneflowers and black-eyed Susan provide strong summer color, salvia adds upright flower spikes, daylilies contribute durable foliage and blooms, and sedum carries interest later in the season. Their water needs still need to match local conditions. Pairing drought-tolerant sedum with a moisture-demanding shade perennial can create separate watering work.
Build the border around its maintenance problem
For easier weeding and division, repeat small groups rather than scattering every plant individually. Set each perennial according to its mature width, and keep foliage from pressing against the fence. Leave a service gap where painters, repair workers, or homeowners need to reach the boards.
Use this planting order:
- Front edge: Choose low, spreading plants that stay out of paths.
- Middle layer: Add clump-forming perennials to cover lower stems without invading neighboring plants.
- Fence-side layer: Place taller flowers where they screen the fence, while preserving access for repairs and painting.
- Winter structure: Leave selected seed heads for winter form, then cut them back before new growth when needed.
Deadheading can extend flowering, but many varieties remain acceptable without it. Choose plants that retain shape after bloom if reducing weekly care matters. Mulch limits exposed soil and early weed growth, but keep it away from direct contact with the fence.
A cottage border can look informal without becoming disorderly. Track which plants bloom well, flop, spread, or fail in that location. Remove poor performers instead of repeatedly supporting them. Over time, the most manageable border is the one shaped by proven plants, consistent spacing, and realistic seasonal care.
6. Hardscaping Elements with Pavers, Gravel, and Edging
A fence-side path earns its space when the area handles daily traffic. Bins, gate access, deliveries, and children's shortcuts can break stems, compact soil, and turn planting beds muddy. Pavers, gravel, or brick create a durable route while keeping the fence line defined.
Choose the surface according to use and upkeep. Brick suits traditional homes, while large-format pavers and steel edging give a cleaner modern boundary. Gravel and decomposed granite are flexible and easier to repair, but they can migrate into lawns and shift under wheels. Pavers offer steadier footing, though they require careful excavation, a compacted base, and accurate leveling.
Solve drainage and access before choosing materials
Water should not collect against the fence or wash soil into the path. Grade the surface away from the boards where possible, and plan drainage before selecting the finish. Permeable materials can help manage runoff when site conditions and local requirements allow them, but they still need a prepared base and restrained edges.
Make these installation decisions early:
- Define the route: Separate the walking surface from planting beds so routine access does not crush plants.
- Contain loose materials: Use edging around gravel and decomposed granite to limit spreading.
- Reduce joint weeds: Fill paver joints with suitable material, then sweep away leaves and soil before weeds establish.
- Preserve repair access: Leave enough room to inspect, paint, or repair the fence without stepping into beds.
Homeowners comparing proportions, materials, and furniture placement can use landscape design software for homeowners before excavation begins.
Hardscaping still needs attention. Gravel may require raking after heavy use, pavers need sweeping, and leaves collect where the surface meets the fence. Its advantage is predictable care. A properly built route avoids pruning, watering, and plant replacement, making it practical for narrow, busy side yards.
7. Living Fence Alternatives with Green Walls and Trellises
An unattractive fence doesn't always need to be replaced. A trellis, wire system, or carefully managed climber can add height and seasonal interest while hiding boards, chain link, or a visually harsh boundary. This approach works best when the fence is structurally sound and the homeowner is willing to inspect and prune the growth.
Climbing hydrangea can soften a shaded wall with foliage and flowers. Boston ivy offers strong seasonal color and can cling to suitable surfaces. Clematis needs a support structure and rewards a more deliberate design, while trumpet vine provides vivid flowers but can be vigorous. English ivy may offer evergreen coverage, yet its invasive potential and ability to overwhelm structures make it unsuitable in many regions.
Put the support in place first
Install wire mesh or a trellis before planting. That keeps vines from attaching directly to fence boards, makes future maintenance more manageable, and creates a controlled route for growth. Self-clinging plants can reduce the need for tying, but they still require monitoring near gates, rooflines, and neighboring property.
Check local invasive-plant lists before purchasing. A plant that covers a fence quickly may also invade nearby beds, lift into trees, or exploit gaps beneath the boundary. Deciduous climbers provide seasonal change and let more light reach the fence in winter, while evergreen climbers offer more consistent screening but can hold moisture against the structure.
Fence protection matters: Keep vines from growing through gaps, wrapping around posts, or entering moving hardware. Annual pruning is cheaper than repairing a damaged fence.
Inspect dense foliage for pests, disease, and trapped debris. Water regularly during establishment, then reduce care only after the plant has rooted into the site. For more ways to create screening without relying on a conventional hedge, compare OutdoorBrite's privacy fence alternatives.
A living wall can be visually striking, but it isn't the lowest-care option for every homeowner. Choose it when the fence needs softening and you're comfortable with seasonal control.
A trellis can transform a plain fence while keeping the planting footprint narrow. The following video offers a visual reference for living-fence concepts and climbing systems.
8. Succulent and Xeriscape Plantings
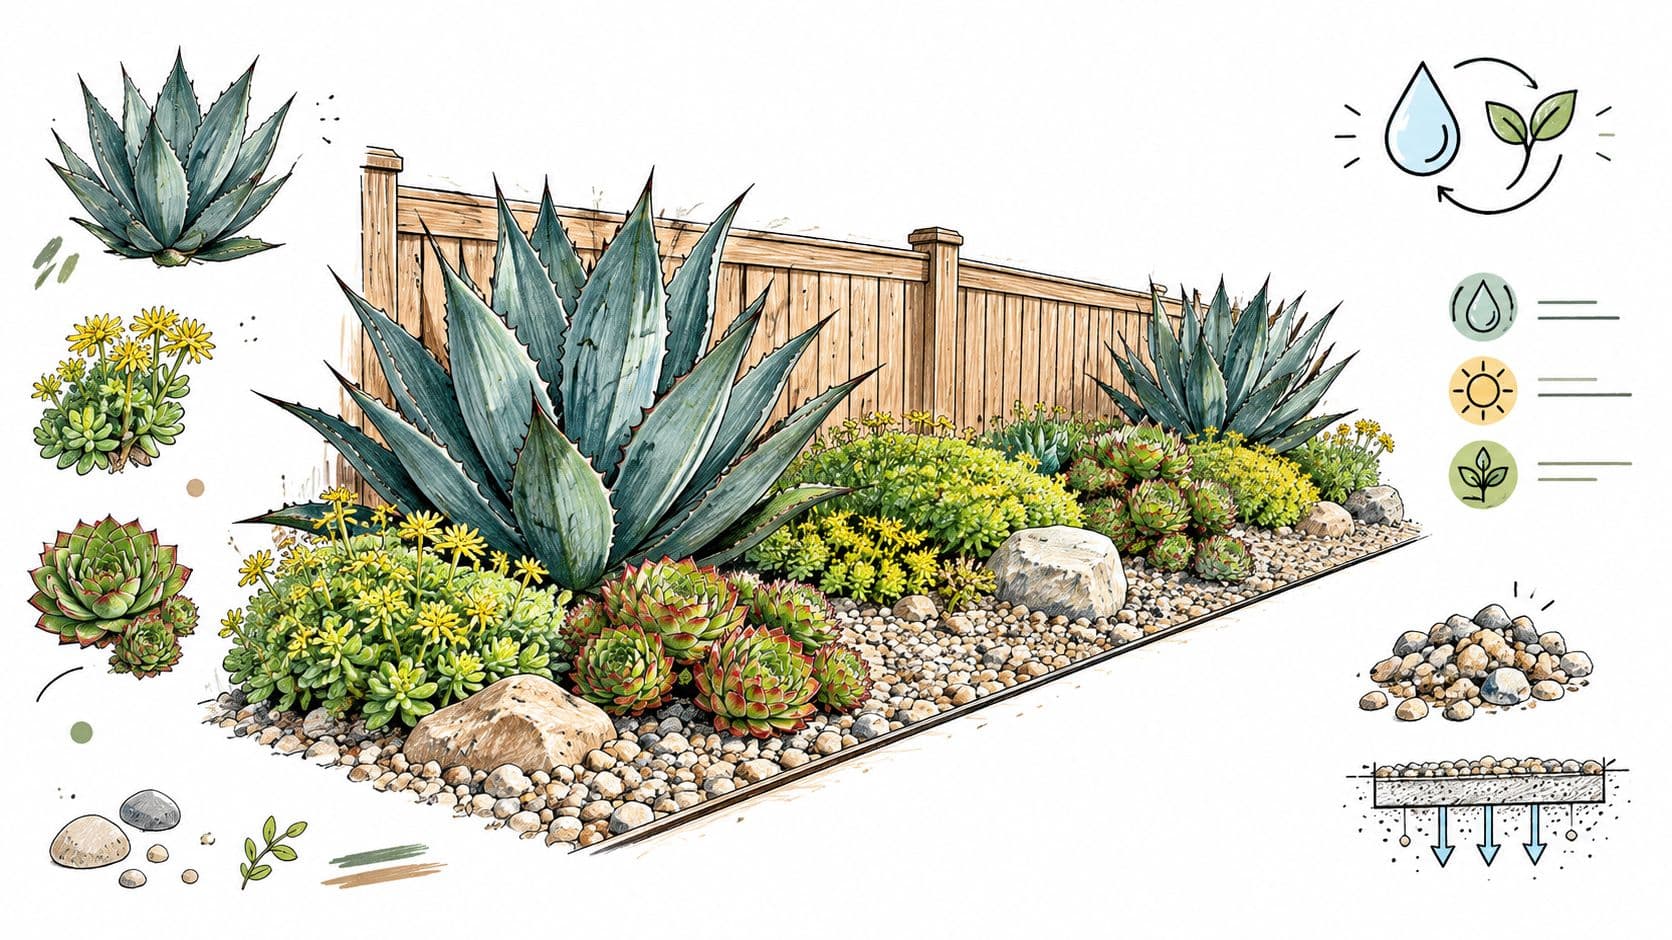
A fence line that bakes in reflected heat or sits beyond the hose's reach can turn a conventional border into a constant watering chore. Xeriscape planting addresses that problem with succulents, drought-tolerant shrubs, gravel, mulch, and deliberate spacing instead of a dense row of thirsty plants. The trade-off is that plant selection and drainage require more care during installation.
Sedum ranges from low ground covers to taller flowering clumps. Hens and chicks form compact rosettes, while agave and prickly pear add strong architectural shapes where winter temperatures allow them. Desert sage and other drought-adapted plants can provide fragrance and pollinator value, but match every choice to local cold, soil, and sun exposure.
Make drainage the priority
Standing water is a common cause of succulent failure. Improve heavy soil with suitable mineral material where appropriate, raise or gently mound the bed if water collects, and keep plants away from roof runoff that repeatedly saturates their roots. Rock mulch gives the bed a finished appearance and reduces exposed soil, though it can reflect additional heat toward the fence. Use it only with plants suited to those conditions.
Water new plants consistently during establishment, then reduce irrigation gradually as roots develop. Subsurface drip systems can reduce water use by 30% to 50%, according to New Mexico State University's water-conservation guidance. Drip delivery also keeps water off the fence, limits evaporation from overhead spray, and distributes moisture more evenly along a narrow bed.
Allow room for mature growth. Small succulents can eventually crowd neighboring plants, making leaf cleanup, division, and access more difficult. Remove dead leaves annually, clear debris from rosettes, and choose cold-hardy varieties for areas exposed to repeated freezing and thawing.
Xeriscape planting can soften an unattractive fence without creating a barren strip. Combine gravel with a few structural plants and one or two flowering accents to reduce irrigation and mowing while keeping the installation intentional.
Low-Maintenance Fence Landscaping: 8-Option Comparison
| Option | Implementation Complexity 🔄 | Resource Requirements ⚡ | Expected Outcomes 📊 | Ideal Use Cases 💡 | Key Advantages ⭐ |
|---|---|---|---|---|---|
| Ornamental Grasses Along Fence Lines | Moderate, establishment 1–2 seasons | Low water & upkeep after establishment; moderate upfront cost | Year‑round texture and movement; moderate privacy | Soften fence edges; modern, cottage, naturalistic yards | Low‑maintenance privacy; deer/pest resistant ⭐⭐⭐ |
| Mulch and Rock Beds with Weed Barriers | Low, straightforward install; labor for large areas | Low cost materials; mulch needs replenishing every 2–3 years | Strong weed suppression, moisture retention, clean appearance | Water‑wise borders, any style, DIY projects | Affordable, easy to install, year‑round neatness ⭐⭐⭐ |
| Evergreen Shrubs and Screening Plants | Moderate, planting and occasional pruning | Moderate–high upfront plant cost; low long‑term water | Reliable year‑round privacy, wind/noise reduction | Privacy screens, backdrops, formal and suburban settings | Dense evergreen screening; long‑term reliability ⭐⭐⭐⭐ |
| Native Ground Covers and Spreading Plants | Moderate, species selection; 1–2 year establishment | Moderate initial cost; very low maintenance after established | Dense weed suppression, high ecological benefit | Lawn alternatives, slopes, pollinator corridors | Supports biodiversity; long‑term low upkeep ⭐⭐⭐ |
| Perennial Flower Borders and Cottage Gardens | Moderate, design for bloom succession; 2–3 years to mature | Low–moderate cost; annual cleanup and occasional staking | High seasonal color and pollinator support | Decorative borders, cottage-style yards, cut‑flower gardens | Long‑term seasonal interest; pollinator friendly ⭐⭐⭐ |
| Hardscaping Elements (Pavers, Gravel, Edging) | High, skilled installation often required | High upfront cost; minimal ongoing resources | Durable, near‑zero maintenance, defined structure | High‑traffic areas, modern aesthetics, problem spots | Virtually no maintenance; long lifespan ⭐⭐⭐⭐ |
| Living Fence Alternatives (Green Walls and Trellises) | Moderate, install support; 1–3 year establishment | Low–moderate cost; periodic pruning and monitoring | Living privacy screen, cooling effect, wildlife habitat | Soften fences, urban vertical gardens, privacy screening | Aesthetic & ecological benefits; living coverage ⭐⭐⭐ |
| Succulent and Xeriscape Plantings | Low, site prep for drainage and species choice | Low–moderate cost; minimal water and upkeep | Drought‑tolerant, sculptural interest; low irrigation needs | Hot, sunny exposures; xeriscape and modern designs | Extremely water‑efficient and low maintenance ⭐⭐⭐⭐ |
Turn the Best Idea Into a Manageable Fence-Line Plan
Start with the job the fence line must perform. If you need privacy, compare evergreen screening with a trellis and climber. If weeds are the recurring problem, consider a ground cover, mulch bed, or rock surface. If people walk through the strip, prioritize a stable path. If drought or hose access makes watering unpleasant, use a xeriscape layout with fewer, tougher plants and efficient irrigation.
Sunlight and drainage should narrow the choices before appearance does. A sunny, dry strip can support grasses, succulents, or drought-tolerant perennials, while a shaded border may favor ground covers, selected shrubs, or a climber suited to lower light. Watch the area after rain. Water that pools near the fence needs a grading or drainage solution before you install mulch, plants, or decorative stone.
Measure the mature width of every plant. Keep shrubs and screening plants approximately 12 to 18 inches away from the fence for access and airflow, following the practical spacing guidance cited by Nature Hills. Don't fill the entire gap just because it looks empty on installation day. A service space lets you inspect boards, clear leaves, repair posts, and reach irrigation without trampling the planting.
Prepare the base thoroughly. Remove perennial weeds, improve compacted soil, and correct drainage before planting. For hardscape, stabilize the sub-base and contain loose materials with edging. For organic beds, keep mulch away from fence posts and avoid creating a damp pocket against wood. For trellises, attach the support securely and direct growth away from gates, fixtures, and neighboring structures.
Budget for establishment care rather than assuming the finished border will be immediately self-sufficient. New plants need observation, watering, and weed removal while roots develop. A drip system or soaker line can make this stage easier, especially along a long fence where hand watering is inconsistent. Once the planting has settled, adjust care according to weather and plant performance.
A simple seasonal routine keeps the work manageable:
- During establishment: Water thoroughly and consistently as site conditions require, and remove competing weeds before they set seed.
- After storms: Check drainage, exposed roots, displaced gravel, and mulch gathered against the fence.
- In growing season: Prune only when needed, remove damaged growth, and keep paths and gates clear.
- At season's end: Cut back selected grasses and perennials, while retaining useful winter structure where appropriate.
- As beds age: Refresh decomposed mulch, thin crowded plants, and replace failures with better-adapted choices.
- For hardscape: Sweep gravel and pavers, restore displaced edging, and clear leaves from joints and drains.
OutdoorBrite can help you compare these choices on a photo of your actual yard before you buy plants, pavers, mulch, or fencing. You can upload the space, test styles such as modern, cottage, Mediterranean, or xeriscape, and refine concepts with features including planting beds and other outdoor elements. For a fence that needs a more substantial visual update, you can also compare stylish metal fence options alongside the layout plan.
OutdoorBrite turns a photo of your yard into realistic fence-line design concepts, so you can compare grasses, screening plants, gravel beds, trellises, and xeriscape layouts in the actual space. Visit OutdoorBrite to test a manageable fence-line plan before purchasing materials or hiring a contractor.
See your yard reimagined
Start creating