Garden Design Using AI: A Step-by-Step Planning Guide
Learn how to use garden design using AI to visualize ideas, refine concepts and check plants and water needs before you buy.
You're looking out at a patchy lawn, an awkward fence corner and a patio that never quite feels inviting. You can describe what you don't like, but deciding where the seating, paths and planting should go is harder. An AI-generated picture can make those possibilities easier to compare.
The useful approach to garden design using AI is to treat every render as a design hypothesis, not a finished plan. Start with your actual yard, test alternative layouts, then validate the plants, water needs, mature sizes and upkeep before buying anything.
Table of Contents
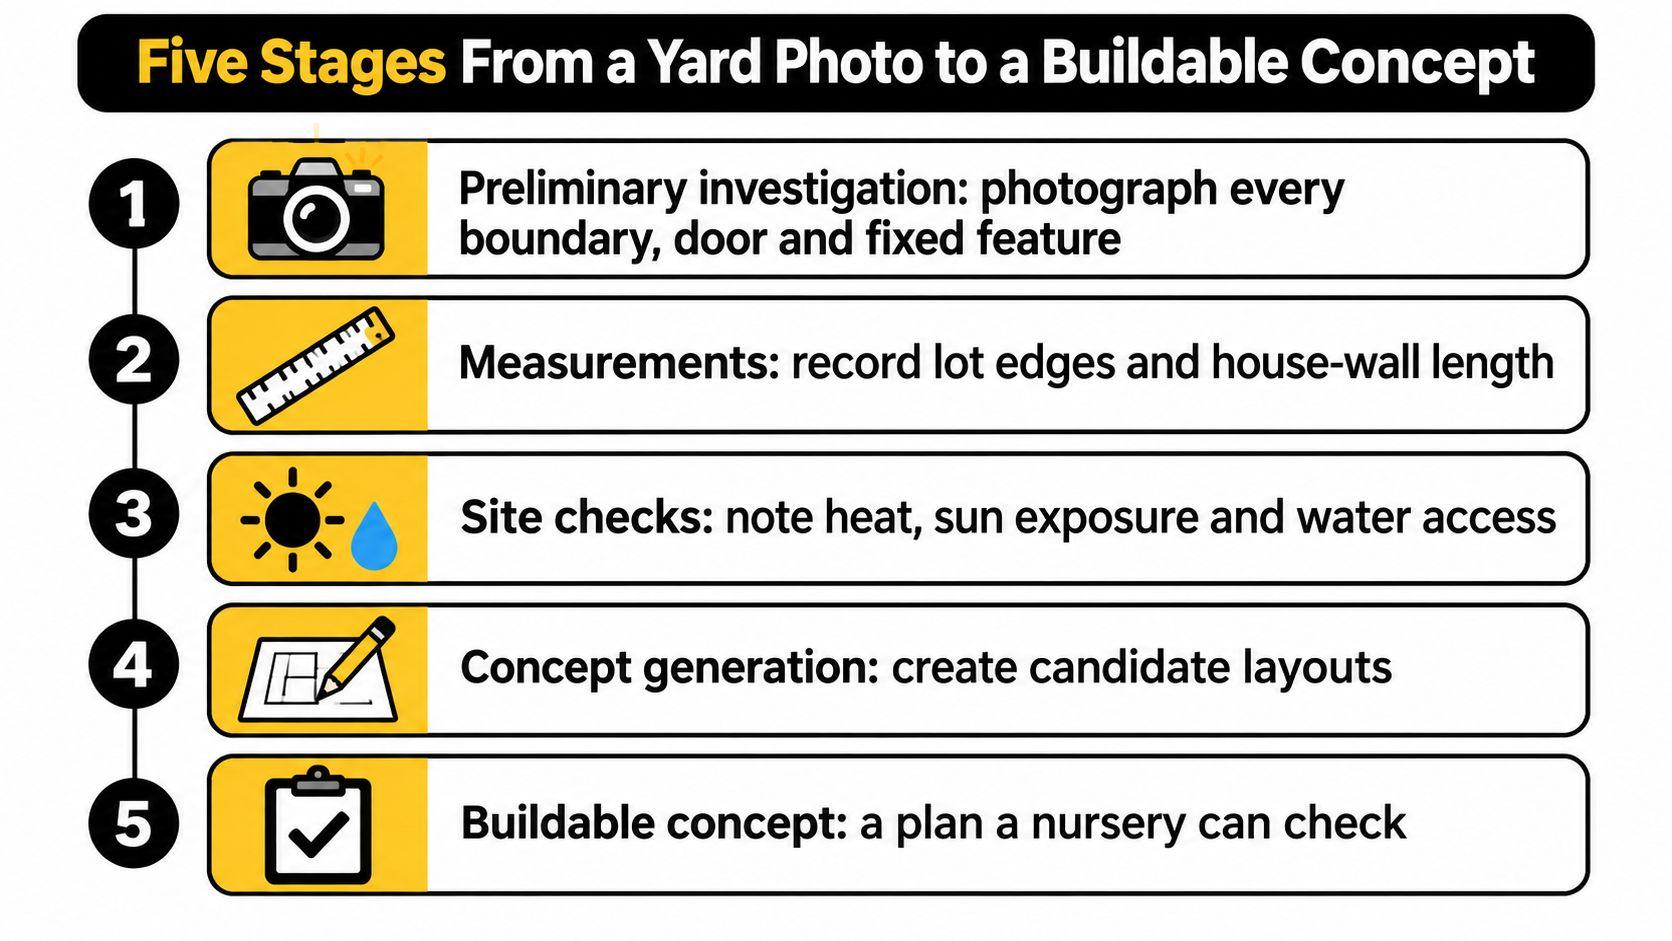
- Five Stages From a Yard Photo to a Buildable Concept
- How to Brief the AI With Your Site Photo
- Generate and Compare Concepts Without Trusting Every Plant
- Check Plants, Water and Upkeep Before You Buy
- Score Each Concept on Heat, Water and Daily Use
- Take Your Verified Concept to a Landscaper
Five Stages From a Yard Photo to a Buildable Concept
Give each stage a tangible output. That stops you from jumping from an attractive image straight to ordering plants or paving.
Five-stage AI garden design workflow
| Stage | What you do | What you keep | Check before moving on |
|---|---|---|---|
| Preliminary investigation | Photograph the site and record dimensions and must-keep features | Clear site photos and a requirements list | Photos cover every boundary, door and fixed feature |
| Analysis | Note sun direction, slope, drainage and utilities | Annotated site notes | Sun and drainage are recorded, not guessed |
| Concept development | Generate several text-to-image or image-to-image alternatives | A small set of distinct concepts | Each concept keeps the fixed elements unchanged |
| Design refinement | Review circulation, proportions, materials and planting zones | A shortlist of workable concepts | Paths and beds are sized against real dimensions |
| Presentation | Turn the chosen concept into notes for a nursery or landscaper | An annotated image and a plant and materials note | Plant and material claims are labelled as concept-level |
Keep the site in control
For preliminary investigation, photograph what surrounds the garden, not just the area you want to change. Record lot edges, the house-wall length and anything that must stay. During analysis, mark observed sunny areas, slopes, wet spots and utility lids on a copy of the photo. Use an existing survey or GIS file if you have one, but don't delay a simple garden exercise to obtain unfamiliar software.
The sequence below keeps image-making connected to site checks.
For inspiration about how outdoor activities might fit together, Pacific Builders' Sacramento outdoor living design ideas can help you think through seating and entertaining priorities. Translate inspiration into requirements rather than copying a layout onto a different site.
In the ASLA 2024 technology survey, 55% of respondents already used AI in practice, teaching or research, and 41% used it for conceptual design, evidence of an emerging practice rather than a substitute for measurement.
Practical rule: AI supplies options. Your site notes decide which options deserve further work.
How to Brief the AI With Your Site Photo
A vague photo and a request for a beautiful garden leave too much unresolved. The model may fill an unseen corner with planting, widen the yard or overlook the route you use to wheel bins outside.
A garden-design methodology published by Weihenstephan-Triesdorf University of Applied Sciences keeps manual site interpretation and sketching alongside image generation because models can misread spatial relationships. Your brief should therefore explain what the photograph cannot.
-
Photograph the view that matters. Stand at the back door or on the approach from the street. Shoot in daylight with the camera level, keeping boundaries and the house wall visible. Take supporting photographs where the main view hides a corner.
-
Write down measurements. Use a tape measure for lot edges, the house wall and the largest fixed feature. Record everything in metres on a rough sketch, and distinguish measurements from estimates.
-
Name what must stay. Include the mature tree, shed, utility lids and slope. Mark a drainage low point even if it looks like ordinary lawn in the photograph.
-
Describe activities before choosing a style. Specify the route to the bins, the seating area, privacy needs, lighting and any child or pet area. Then choose an appearance that supports those uses, such as a simple modern patio for entertaining or a low-water planting approach for a dry, sunny side yard.
-
Write a short, concrete brief. Name the features you want and where they should connect. Asking for a patio, border and lawn strip gives you something to evaluate; asking for beauty doesn't.
A brief that explains the space
For a hypothetical six-by-four-metre backyard, the brief might read:
Keep the house wall, boundary fence and mature maple in the south-west corner unchanged. Create a patio beside the back door, a planting bed along the opposite fence and a narrow lawn strip. Preserve access to the gate and utility lid. Use a restrained modern style, and keep planting beneath the maple provisional until its growing conditions are checked.
Add the north direction and observed sun exposure to the sketch. Don't expect the image generator to infer orientation from shadows or know where underground services run.
The test is simple: could someone who's never visited understand the yard from the photograph, sketch and brief alone? If not, clarify the missing detail before generating alternatives.
Generate and Compare Concepts Without Trusting Every Plant
Upload the photo, set the style and fixed elements, then generate alternatives. Keep the starting brief unchanged while comparing different layouts, so you can tell whether a change improves the garden rather than merely changing its appearance.
Use this visual sequence as a reminder to review and refine rather than accepting the first result.
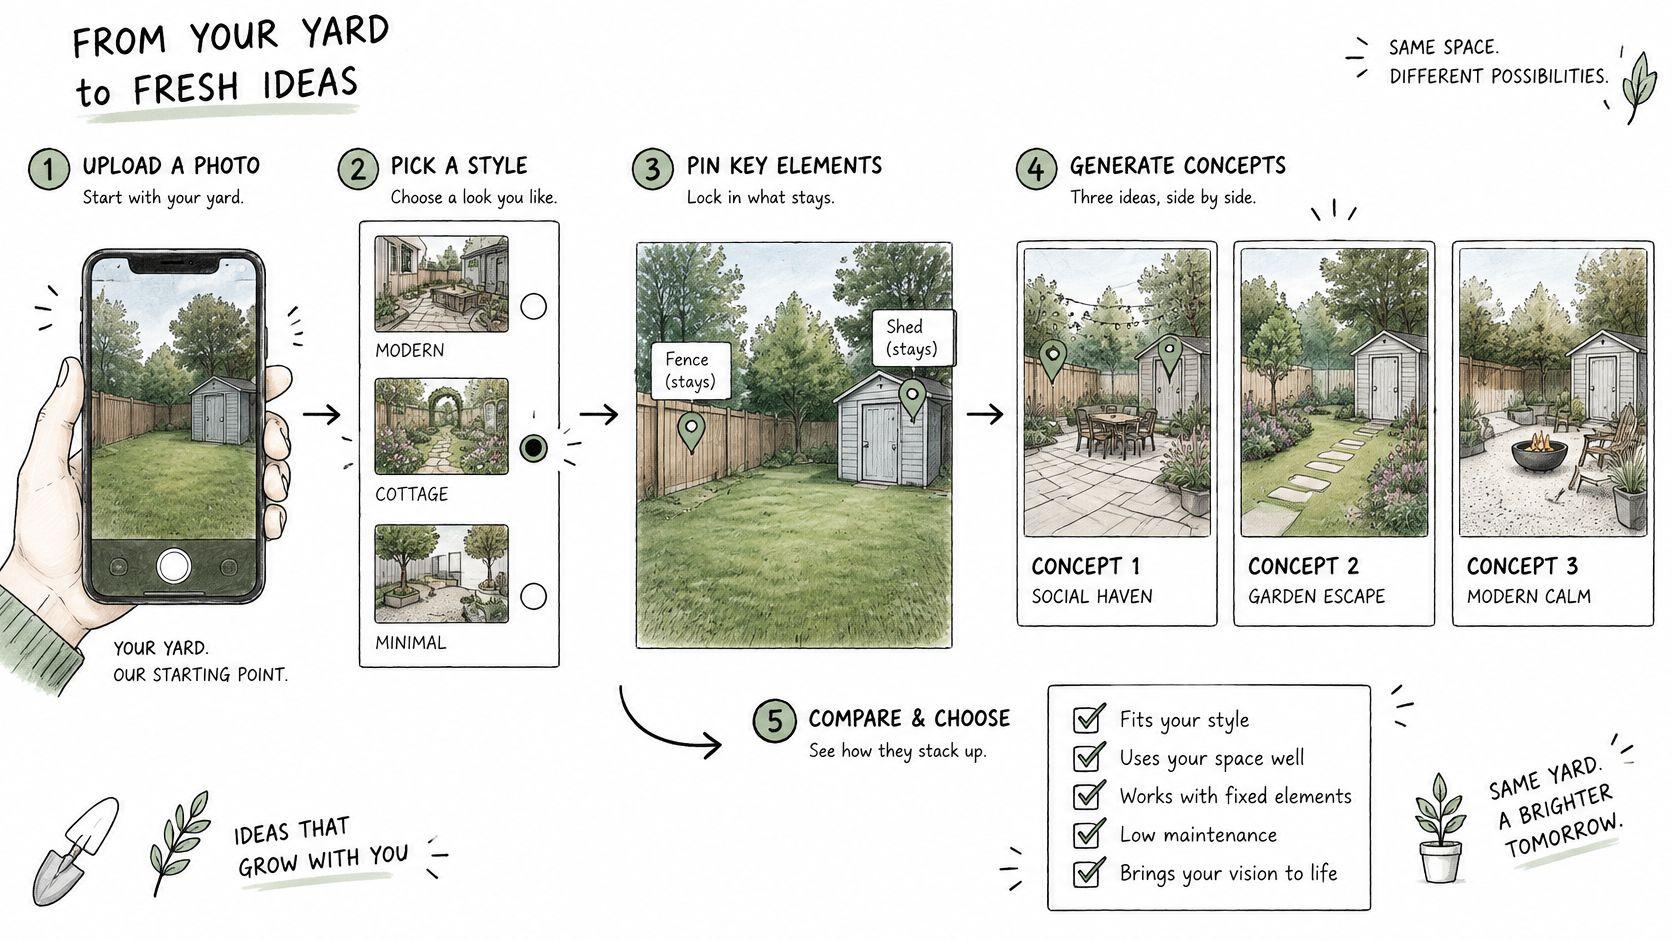
Compare the images beside the original photograph, not just beside each other.
- Fixed elements: Confirm that the tree, fence, doors and utility access remain in place.
- Plausible scale: Check patio furniture and bed depths against measured walls and boundaries.
- Connected routes: Trace an uninterrupted route from the door to the gate, bins and seating.
- Drainage awareness: Reject layouts that conceal a low point beneath paving without resolving where water will go.
- Usable planting space: Look for beds that can accommodate plants without narrowing access.
Change a feature, then check the consequences
If your chosen software has an elements editor, add a pergola, fire pit or planting bed to the strongest layout and regenerate. Change a feature at a time so the consequences remain visible. A pergola may affect light reaching nearby planting; a fire pit may leave too little usable circulation once chairs are occupied.
Compare the available editing approaches in our guide to the best free garden design software. For this task, being able to revise and compare a layout matters more than producing an elaborate presentation.
The accompanying video offers another visual reference for the redesign process.
Separate convincing foliage from identified plants
AI-generated trees can capture broad colour and seasonal appearance while struggling with species-specific form, bark texture and structural detail, as described in this Digital Landscape Architecture paper. A convincing silhouette isn't reliable identification.
Label pictured plants provisional. Describe their intended role, such as light-canopy shade tree, low flowering border or evergreen screen, rather than guessing a species from the render. Those descriptions let a nursery suggest suitable replacements without losing the composition you liked.
Keep the concept that solves the brief, not the one that looks best in a single render.
Check Plants, Water and Upkeep Before You Buy
Will this grow here? That question matters more than whether the planting looks lush on screen. Local climate, soil, sunlight, wind, rainfall and available irrigation determine whether the proposed planting is plausible, a limitation discussed in Big News Network's residential landscape overview.
A humid-looking garden isn't automatically suitable for a dry site. Likewise, a desert-style image doesn't establish that its plants can tolerate your winter or wet soil.
Plant and site feasibility checks
| Factor | Question to answer | Where to check |
|---|---|---|
| Hardiness zone | Does the plant tolerate your area's winter cold? | Regional hardiness map from your local extension service |
| Mature size | What are its expected height and spread, including its ten-year size and eventual mature size? | Plant label or nursery database, clarified by nursery staff |
| Sun exposure | How many hours of direct sun reach the spot each day? | Your observations through morning, midday and evening |
| Soil and drainage | Does the soil drain well, and what is its pH? | Home soil test kit or local extension service |
| Water demand | How much irrigation does it need during a dry spell? | Nursery plant label and local watering guidance |
| Invasiveness | Is it listed as invasive in your region? | State or regional invasive species list |
| Yearly upkeep | How many hours of pruning and care should you allow each year? | Your task estimate, checked with nursery staff and care instructions |
Wildlife value also involves garden size, plant-species richness, vegetation structure and connections to surrounding habitat, not the amount of green in a render. A more varied garden may attract birds and butterflies and encourage you outdoors, but it can also require more weeding, pruning and seasonal care. Choose that trade-off deliberately.
Turn the image into a verified plant list
Take your provisional list and site notes to a local nursery or extension service. Ask for the botanical name and cultivar, expected spread, suitable position and an alternative if the pictured plant won't work. Write the answer beside each planting zone rather than relying on memory.
For an Arizona project, Pool & Landscaping of Vistancia LLC's guide to drought resistant plants for Arizona offers a regional starting point for that conversation. Don't transfer the same selections to a different climate without checking them.
Use our drought-resistant yard design steps to organise a water-conscious layout. Group plants with compatible irrigation needs, and distinguish establishment watering from ongoing care.
Estimate maintenance by task: watering checks, weeding, pruning, leaf collection and irrigation repairs. If the total exceeds the time you'll realistically give, simplify the planting before purchase. Leave the nursery with confirmed species and care requirements, not just replacements that look similar.
Score Each Concept on Heat, Water and Daily Use
A style name doesn't tell you whether a garden works on a hot afternoon or after heavy rain. The Royal Horticultural Society's State of Gardening report overview highlights the importance of durable planting, permeable surfaces and water management when considering garden resilience.
Evaluate whole layouts, leaving individual plant suitability to your checked plant list. For this exercise, use a simple one-to-three scale: one means a recurring failure, two means a workable compromise, and three means the design meets your brief without a workaround. These are planning scores, not engineering calculations.
The visual checklist groups the main concerns; use the scoring scale above consistently on your written sheet.
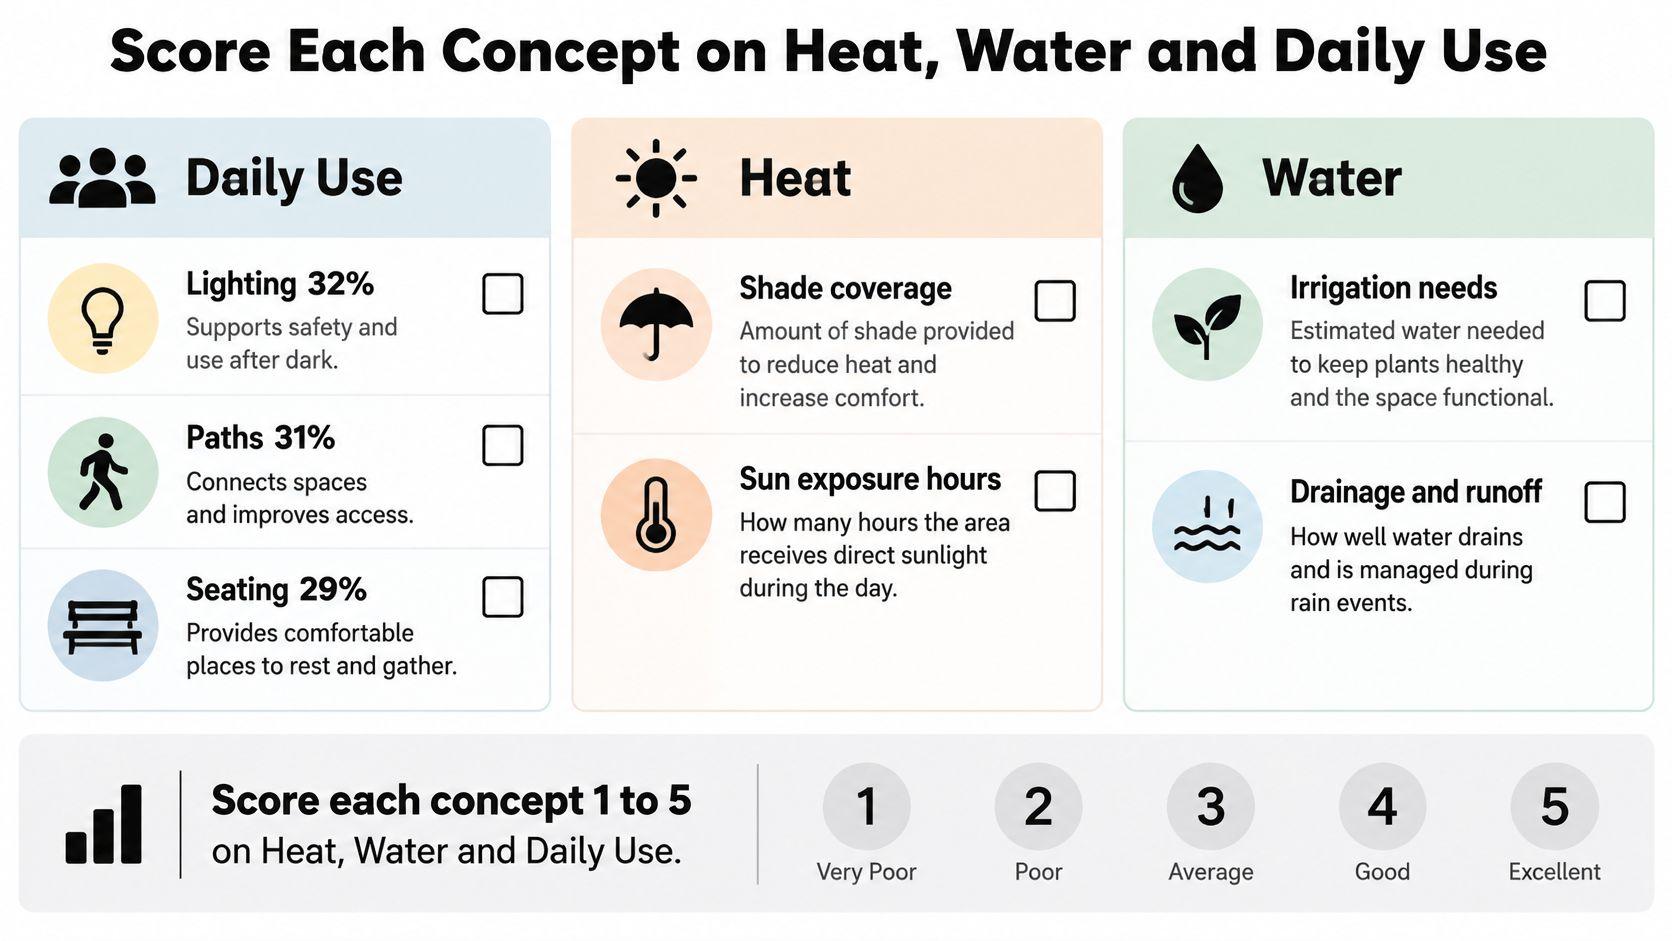
Garden concept resilience scorecard
| Criterion | What you score | A score of 1 looks like |
|---|---|---|
| Water use | Irrigation needed during a dry spell | Every bed depends on frequent watering |
| Shade | Cover over seating and hot paving | No shade where people sit at midday |
| Stormwater capture | Where rain from paving goes | Runoff is dumped on a wall or neighbour |
| Heat exposure | Surfaces and seating in afternoon sun | Dark paving without planted or shaded relief |
| Safe circulation | Routes to the gate, bins and seating | Paths stop, narrow sharply or cross a low point |
| Pet toxicity | Planting and access within pet areas | Known toxic plants remain accessible |
| Night lighting | Visibility at paths, steps and doors | The route is dark after dusk |
| Privacy | Screening from neighbours and street | Seating is fully overlooked |
| Five-year maintenance | Pruning, weeding and repair workload | Upkeep exceeds your available time |
| Child-safe edges | Access to water, drops and sharp boundaries | An unguarded drop or open water is reachable |
| Step-free route | Access between door and seating | Steps are the only route to the main seat |
Repair a low score before choosing
Say a proposed solid patio sends runoff towards a neighbour's wall. Give stormwater capture the lowest score, even if the paving looks excellent. Ask a garden designer whether a permeable strip, planted swale or another drainage solution can manage water safely within your property.
Don't draw a swale into the picture and assume the problem is solved. Its position, levels, soil conditions and overflow route need checking on site.
Water scores must reflect local conditions. A dry-region xeriscape isn't the automatic winner where rainfall is high or drainage is poor.
Selection safeguard: Prefer the highest total, then the fewest lowest scores. An unresolved safety or drainage problem can disqualify a concept regardless of its total.
Take Your Verified Concept to a Landscaper
Your handover should contain more than the winning picture. Attach the scorecard, nursery-checked plant list, annotated photographs and measured sketch, with unresolved questions clearly marked.
Set the scope before calling
Decide whether you're changing the whole yard or fixing a particular zone. Moving the paths, seating and planting together calls for coordinated planning; replacing an awkward border may not.
Our AI garden design tool suits a whole-yard redesign, while the matching area tool suits a single-space project, and you can use several tools. Regenerate from the same photograph so you and the contractor can compare proposals against identical fixed features.
If installation needs to happen gradually, use a phased backyard build-out plan to arrange the work. Resolve access and groundworks before installing planting that later work would disturb.
Ask for a buildable handover
Give the nursery or garden designer a specific request:
- Measured drawing: Confirm the dimensions of paths, beds, paving and structures.
- Species confirmation: Check the proposed plants against your zone, soil and actual positions.
- Drainage review: Establish levels, runoff routes and any necessary specialist input.
- Written upkeep estimate: Identify recurring tasks and the effort they require.
- Quantities and specifications: Calculate materials from measurements, not from the rendered image.
Don't order plants, paving or timber by counting what appears in the picture. Before the meeting, replace provisional plant names with confirmed choices and mark any resulting changes to shade, spacing or access. The useful outcome is an agreed scope that a professional can measure, specify and price.
OutdoorBrite turns a photo of your garden, backyard, patio or front yard into realistic redesign concepts you can compare and refine. Visit OutdoorBrite with a clear site photo and your must-keep list, then take your preferred concept through the plant checks and scorecard before committing to materials.
See your yard reimagined
Start creating