How to Xeriscape Your Yard: A Complete 2026 Guide
Learn how to xeriscape your yard and create a beautiful, drought-resistant landscape that saves water and reduces maintenance.
Properly designed and maintained xeriscapes typically save about 30 percent of outdoor water use, while poorly planned yards may save far less because of overwatering and mismatched plant groups. The difference comes from design and maintenance decisions, not from replacing grass with gravel or cacti alone.
Xeriscaping works when you treat the yard as a water-management system. The right plants matter, but so do soil, shade, irrigation layout, mulch depth, drainage, and the way you maintain the yard after installation. A yard can look "low-water" and still waste water if spray heads run across planting beds or every plant receives the same irrigation schedule.
The practical goal isn't to create a barren yard that survives by neglect. It's to build an attractive yard where each plant receives the water it needs, where hard surfaces don't create unnecessary runoff, and where shade and soil structure help the garden stay healthy through heat.
Table of Contents
- Understanding Real Xeriscape Water Savings
- Assessing Your Yard Before You Start
- Choosing Mulch, Hardscape, and Soil Strategies
- Selecting Drought-Tolerant Plants by Zone
- Designing Efficient Irrigation for a Xeriscape Yard
- Visualizing Your Xeriscape with OutdoorBrite
- Maintaining a Low-Water Yard Year Round
Understanding Real Xeriscape Water Savings
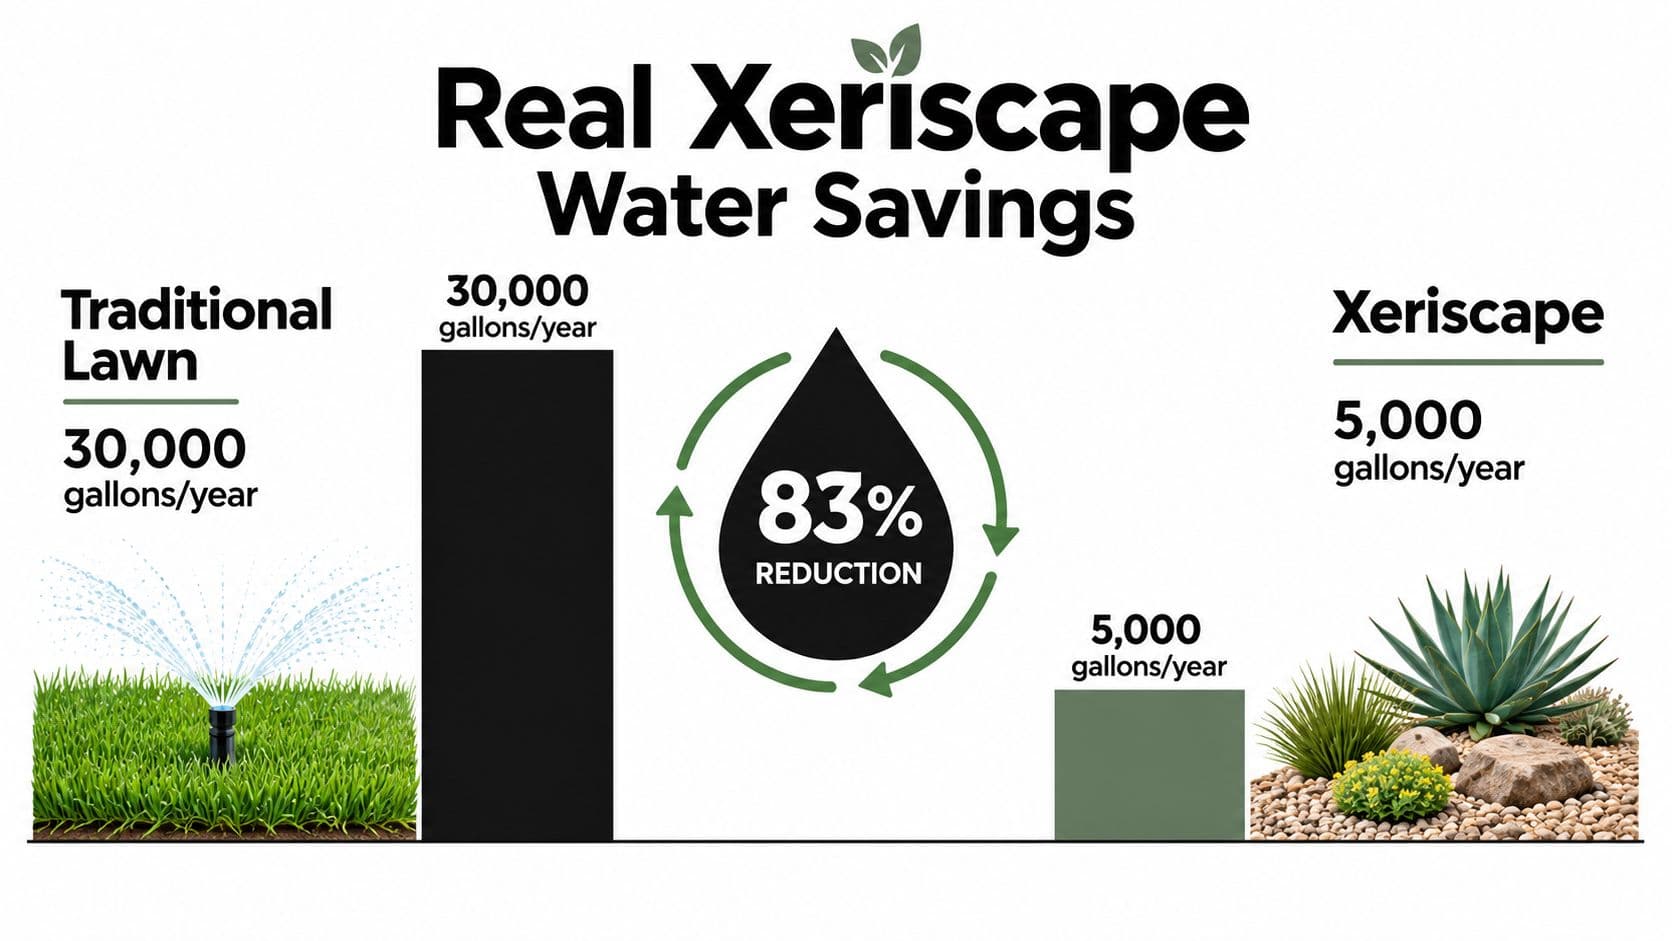
A Texas comparison found buffalograss and no-grass xeriscapes used about 30% less water than St. Augustine, while other low-water grasses saved closer to 15%. That spread matters. A yard labeled xeriscaped can perform well below its potential if the plant mix, irrigation setup, and maintenance routine do not match local conditions. Independent turfgrass research reviewed by the EPA links water performance to plant choice, climate, and design quality.
Reliable conversions follow a seven-step workflow: planning and design, efficient irrigation, mulch, soil preparation, limiting turf, selecting water-efficient plants, and ongoing maintenance. These decisions reinforce one another. Removing turf without changing spray coverage or watering times leaves much of the old waste in place.
Why some low-water yards still waste water
The common failure is a plant-shopping approach. A homeowner removes grass, spreads rock, and keeps the existing spray system on its old schedule. Water then reaches paths, overheated gravel, and plants with different moisture needs. Rock can also reflect heat toward foliage, increasing stress during establishment instead of solving a watering problem.
Plant grouping determines whether irrigation can be set accurately. A flowering border with higher water needs should not share a zone with drought-adapted shrubs. Likewise, plants in a shaded bed should not receive the same run time as those beside a hot western wall. Trees and larger shrubs can reduce heat stress by shading nearby beds, but their roots and canopy also change how quickly those beds dry.
Practical rule: Judge a xeriscape by how its zones, soil, and irrigation work together, not by whether the plant list contains the words “drought tolerant.”
Documented conversions have achieved reductions as high as 80%, but other properties perform much closer to the average. The Southern Nevada Water Authority's conversion research reported an average 30% reduction in total annual residential water consumption, equal to about 96,000 gallons saved per home per year after turf conversion. That result describes one research context, not a guarantee for every yard.
In practice, savings decline when emitters clog, controllers keep seasonal schedules, or replacement plants receive frequent shallow watering long after establishment. Inspect the system, adjust zones as plants mature, and replace failures with species suited to the site. Xeriscaping saves water through consistent decisions after installation, not through the surface materials alone.
Assessing Your Yard Before You Start
A xeriscape succeeds or fails at the site-assessment stage. Start with a map, not a plant list. Walk the yard in morning, midday, and afternoon light, then mark full sun, filtered light, deep shade, reflected heat, and strong wind. A south- or west-facing wall can create a hot pocket where new plants need more establishment care. A shaded corner may remain damp after other areas have dried.
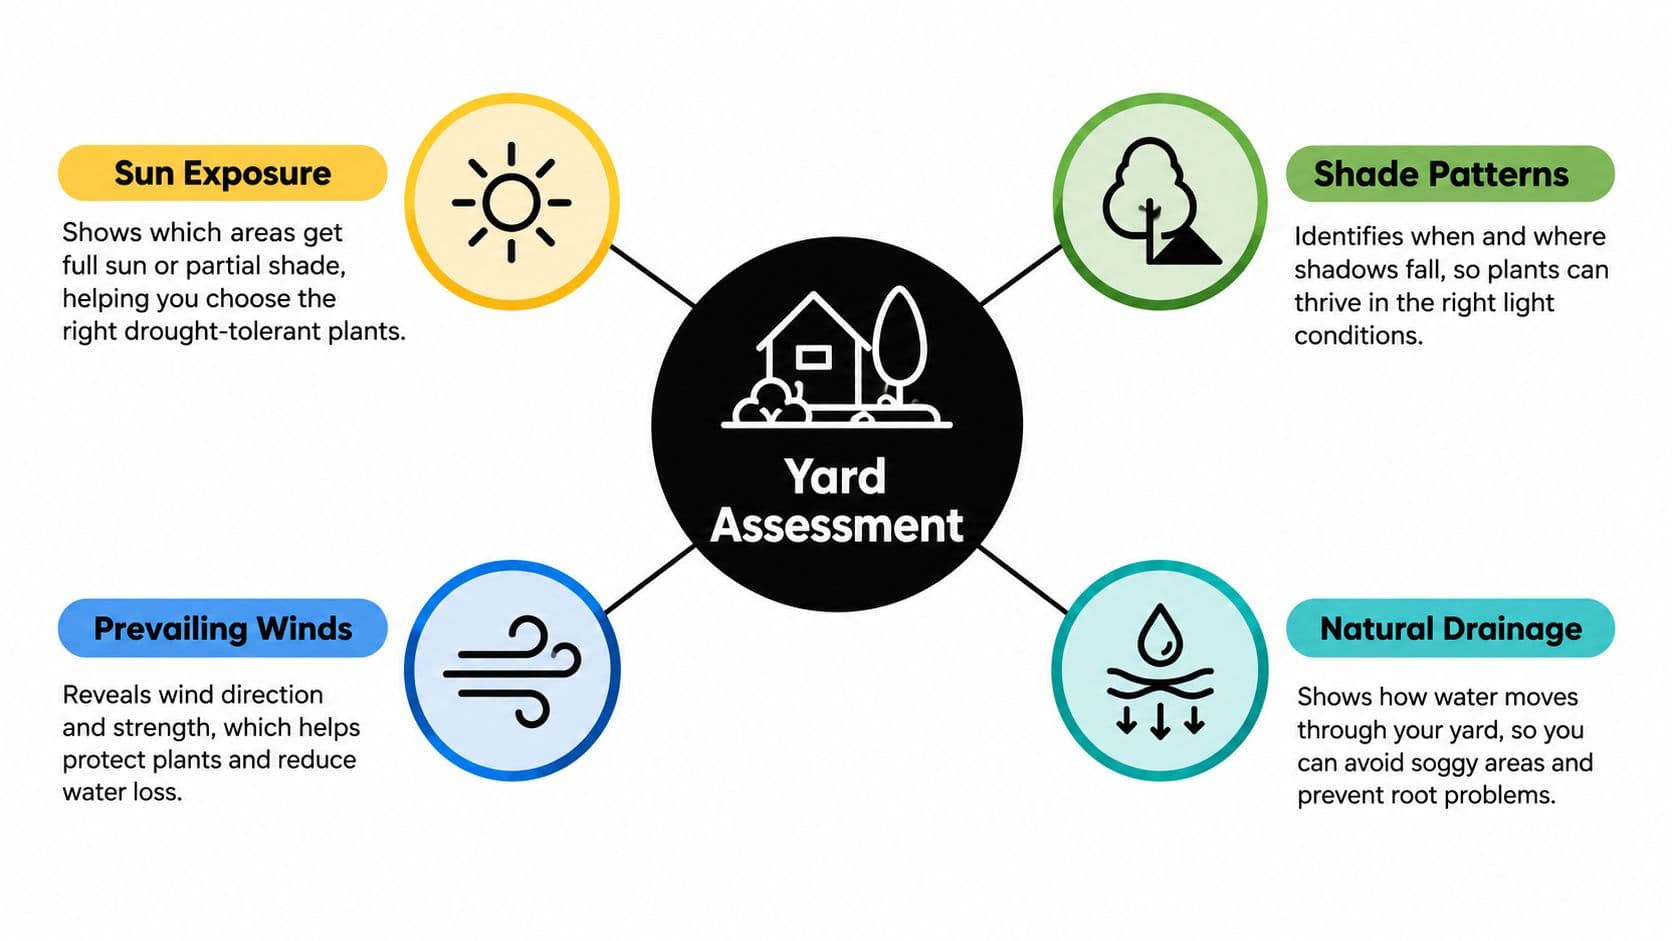
Map water and soil behavior
Watch the yard during and after rain. Low spots, downspout outlets, compacted paths, and lawn edges often collect or shed water in ways a dry inspection will miss. Plants that need sharp drainage will struggle in a basin. A slope can also look dry while runoff leaves the upper soil before water reaches the roots.
Test soil in several locations, including future planting beds and areas near existing turf. One sample from the easiest bed can hide major differences. Soil that forms a sticky ribbon points toward clay. Gritty soil that falls apart quickly behaves more like sand. For a simple drainage comparison, dig a small hole, fill it with water, and observe how quickly it empties. The result helps determine whether the bed needs organic matter, better grading, or plants suited to slower drainage.
Shortcuts here cost more later. A contractor or DIYer who skips soil and drainage checks may install plants that require constant rescue watering.
Before digging, locate buried utilities and irrigation lines. Mark valves, outdoor electrical runs, hose bibs, sprinkler pipes, and drainage structures. A tree planted over a utility route can create an expensive repair. A new bed across a sprinkler line may require irrigation changes after plants are installed.
Divide the yard by use
Use the map to create zones that reflect how the property functions:
- Entry zone: Keep the front walk welcoming with durable groundcovers, shrubs, and turf only where people use it.
- Living zone: Place seating, shade, and planting around patios, where comfort may matter more than removing every green plant.
- Low-water zone: Assign the hottest or least-used areas to drought-adapted plants, gravel, and carefully selected hardscape.
- Drainage zone: Use a dry creek bed, rain-garden approach, or moisture-tolerant planting where runoff naturally collects.
This planning sequence follows the seven-step xeriscape guidance from extension guidance on the seven xeriscape steps. Mark each zone on the site map with its sun exposure, wind conditions, and drainage behavior before pricing plants or materials.
Choosing Mulch, Hardscape, and Soil Strategies
Materials determine whether a xeriscape feels like a comfortable garden or a hot maintenance problem. Mulch reduces evaporation, erosion, and soil temperature swings, but no single material works equally well in every bed. Choose based on plant needs, foot traffic, wind, heat, and how much organic matter the soil requires.
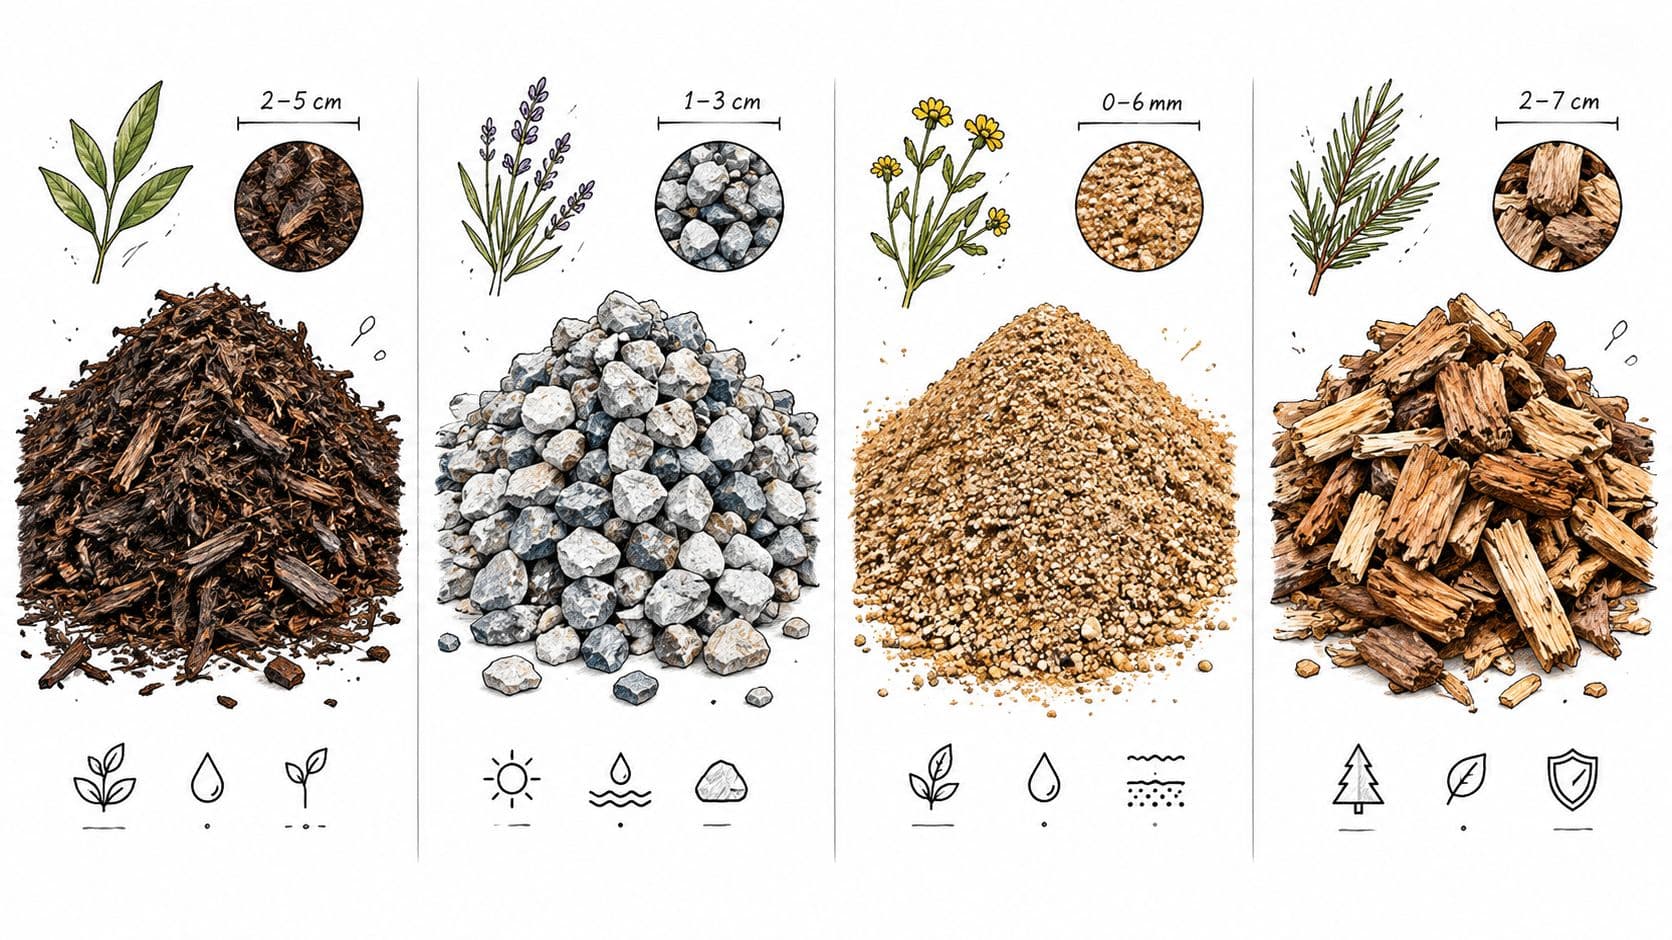
Match mulch to the planting bed
Wood chips and shredded bark suit trees, shrubs, and perennial beds because they protect the soil while gradually contributing organic material. They're comfortable around seating areas, but wind can move them and they need occasional replenishment. Keep organic mulch away from direct contact with trunks and stems so moisture doesn't stay pressed against the plant.
Gravel and decorative stone resist decomposition and work well around plants that prefer sharp drainage. They can suppress weeds when installed over properly prepared ground, but dark stone absorbs heat and light-colored stone can reflect it into foliage or windows. Gravel also exposes every weed that emerges, so fabric and surface preparation shouldn't be treated as substitutes for future maintenance.
Decomposed granite creates a more compact walking surface than loose gravel, especially when installed with appropriate edging and compaction. It can still migrate onto paths and planting beds, particularly on slopes. Sand belongs in specific soil or design applications, not as a universal top dressing. A shallow layer rarely fixes drainage or compaction beneath it.
Prepare the ground beneath the surface
Rocky or sandy soil still benefits from thoughtful preparation. Loosen compacted beds, remove construction debris, and incorporate suitable organic matter where plants need improved root development. Don't amend every planting hole with rich compost while leaving the surrounding soil dense. Roots eventually move beyond the hole, and the abrupt change can interfere with drainage.
Raised beds make sense for vegetables, herbs, or plants that need a deeper, more fertile root zone. Keep those beds on their own irrigation zone because edible crops generally need different watering than established drought-adapted shrubs.
Build hardscape that handles water
Solid concrete moves water toward the lowest point and can concentrate runoff. Permeable pavers, open-jointed surfaces, and thoughtfully placed gravel allow more water to enter the ground while still providing stable paths. A dry river bed can guide runoff through the yard, but it should follow the site's natural grade rather than serve as a purely decorative strip.
Hardscape should direct water deliberately, not simply cover soil and push the problem elsewhere.
Use edging where gravel meets turf, mulch, or paths. Without a clean boundary, materials migrate, mower wheels catch stones, and maintenance becomes frustrating. The cheapest surface isn't always the lowest-cost choice after repeated raking, weed removal, and repairs.
Selecting Drought-Tolerant Plants by Zone
Plant selection separates a resilient xeriscape from a collection of stressed specimens. Begin by grouping plants according to water need, then place each group where the site conditions support it. Cacti and succulents may suit a hot, sharply drained bed, while a drought-adapted shrub may prefer deeper soil and occasional irrigation. Native plants can be excellent choices, but “native” doesn't automatically mean suitable for every exposure or soil type.
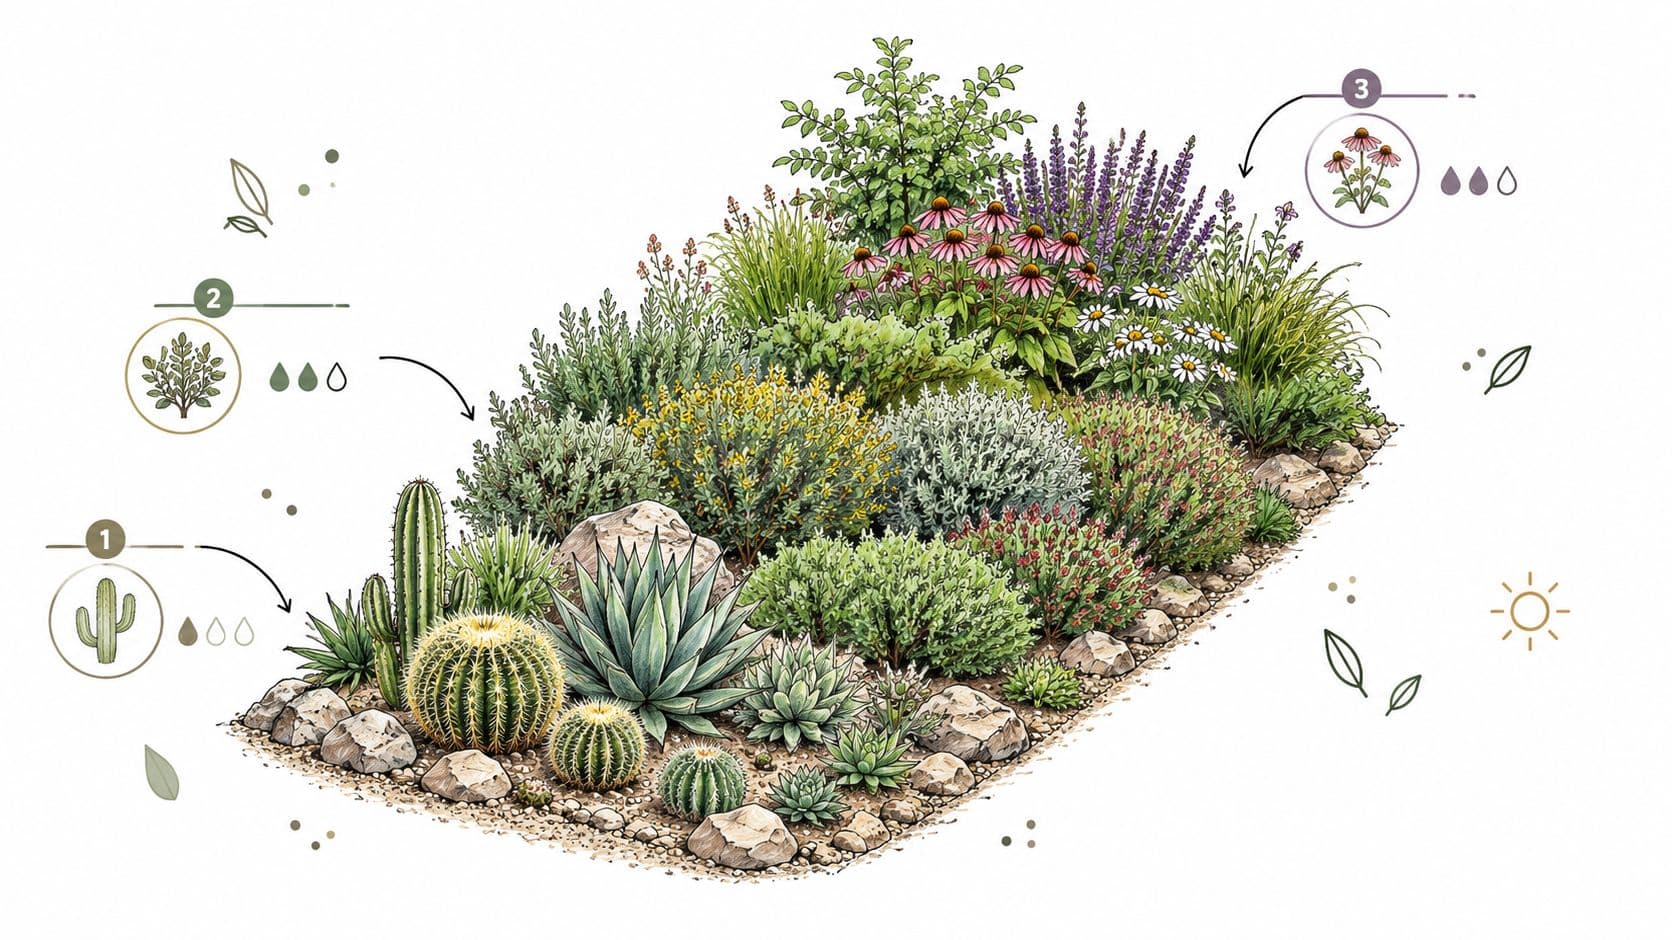
Create planting zones before buying
Use three broad categories as a planning tool:
- Very low water: Cacti, many succulents, and plants adapted to dry, fast-draining conditions. Place them away from downspout outlets and beds that receive frequent irrigation.
- Moderate water: Drought-adapted shrubs, flowering perennials, and small trees that need establishment watering and occasional supplemental moisture.
- Higher-use areas: Limited turf, vegetable beds, or lush plants near outdoor living spaces where people value softness, shade, or frequent harvests.
The categories aren't rigid labels. A plant's water demand changes with wind, soil depth, reflected heat, and canopy cover. Use regional nursery recommendations and observe how mature plants perform locally before committing to a large purchase. This guide to drought tolerant landscaping plants can help you build a regional shortlist, but verify each selection against your own hardiness, exposure, and drainage conditions.
Design for shade and structure
A yard filled only with low plants often becomes hotter and less inviting. Use trees and taller shrubs to create layers, then fill beneath them with groundcovers and perennials that tolerate the resulting shade. Canopy also protects soil from direct sun, although plants beneath trees still compete for moisture and may need their own carefully managed zone.
Choose plants by function rather than catalog appearance. A small tree can provide shade and height, a shrub can screen a utility feature, a flowering perennial can support seasonal color, and a groundcover can soften the edge of a path. Repeating a limited palette usually looks more intentional than buying one of everything.
The video below offers another visual reference for combining drought-adapted plants and structure in a water-wise garden.
Keep turf only where it earns its place. A small play area or seating lawn may be useful, but unused strips beside fences often consume water without adding function. Replace those areas with planting beds, permeable paths, or a durable groundcover that fits the site.
Designing Efficient Irrigation for a Xeriscape Yard
Irrigation is where many otherwise careful conversions lose their savings. A bed planted with drought-adapted shrubs can still consume turf-level water if a spray head covers the entire area. Divide irrigation into separate zones based on plant needs, sun exposure, soil, and slope.
Use drip irrigation for shrubs, trees, and planting beds where practical. Properly installed subsurface drip can reduce water use compared with conventional turf irrigation, but the equipment only performs well when it is correctly sized, positioned, and maintained. Clogged emitters, shallow tubing, and leaks erase the expected benefit.
Build zones around actual demand
A low-water shrub bed should have its own valve rather than sharing one with a vegetable garden. Plants at the top of a slope also need different run times from plants at the bottom, where runoff collects. Pressure-compensating emitters can provide steadier flow on slopes, while short cycles with pauses give water more time to infiltrate compacted or clay soil.
Keep emitters close to the active root zone. Do not leave them at the edge of the original planting hole. As plants mature, extend or reposition the tubing so moisture reaches the expanding roots. Avoid placing an emitter directly against a plant crown, where ongoing wetness can promote disease or stem damage.
One design rule prevents many failures: group plants with similar water demand and similar exposure.
Check the system instead of trusting the controller
Walk each zone while it runs. Check for clogged emitters, split tubing, geysering connections, overspray, ponding, and water running onto paths. A moisture probe can help you compare shaded and exposed beds. A smart controller can adjust watering when it receives reliable weather information, though neither tool replaces a physical inspection.
Established plants generally need irrigation less often than new installations. Their reduced demand still requires monitoring. Adjust run times as temperature, wind, and plant growth change. A controller left on a summer setting through cooler weather can overwater shaded areas, while an exposed bed may dry quickly during a hot, windy spell.
Use personalized plant watering schedules as a reference when matching irrigation to plant type and exposure. Keep a manual shut-off within reach so you can stop a zone during a leak, heavy rain, or a temporary heat adjustment.
Drip irrigation saves water only when the right plants share a zone and someone checks the tubing.
Visualizing Your Xeriscape with OutdoorBrite
A visual mockup can reveal expensive design mistakes before you order stone, remove turf, or plant a tree in the wrong location. Start with a clear photo of the existing yard showing the house, paths, fences, grade, and major trees. Include the full space rather than a cropped view that hides drainage routes, established shade, or access points.
Upload the photo to the AI garden design tool, choose a xeriscape style, and compare concepts using drought-tolerant planting beds, gravel, mulch, and hardscape. Treat each result as a layout study, not a construction drawing. It can help you judge whether a broad gravel area feels too exposed, whether a tree can shade a patio, and whether the front entry keeps a clear walking route.
Test the design against your site map
Use the elements editor to test planting bed shapes, patio placement, shade features, and mulch zones. Compare every concept with the site assessment you made earlier. A design may look polished while putting moisture-demanding plants beside hot masonry or in a reflected-heat pocket. Revise that arrangement before turning the image into a shopping list.
The conversion research cited earlier supports careful planning, but real water savings depend on choices that suit the property and on maintenance after installation. A visual plan cannot account for every soil, drainage, exposure, or irrigation constraint. It can, however, expose conflicts while they are still inexpensive to correct.
Use the preferred concept to prepare a practical contractor discussion. Mark fixed elements such as utility access, drainage routes, and mature trees. Mark flexible elements such as bed edges, plant groupings, and decorative stone. This distinction helps prevent a common retrofit problem: an attractive installation that leaves poor access for repairs or directs water toward the wrong area.
Export the concept you prefer and annotate dimensions, access routes, and materials before requesting labor or installation estimates. Keep the approved image with your site notes so changes made during construction can be checked against the original plan. That record also makes it easier to identify which design decisions should remain fixed and which can change if site conditions differ from the photo.
Maintaining a Low-Water Yard Year Round
A xeriscape isn't set and forget. New plants need consistent drip irrigation for 12 to 18 months while roots establish, according to recent xeriscape maintenance guidance. During that period, inspect the soil and plants rather than relying only on a timer. A plant that wilts in a hot exposure may need better placement or temporary support, while a damp, declining plant may be receiving too much water.
Keep the irrigation tuned
Inspect emitters, flush lines, and replace failed components before small problems affect an entire bed. Check tubing after animal activity, construction, edging work, and heavy storms. Seasonal adjustments matter because the same schedule won't suit cool weather, active growth, heat, and dormancy.
Watch for hidden overwatering in shaded zones. Moss, algae, persistent puddles, unusually soft soil, and plants with yellowing leaves can point to excess moisture rather than drought. If runoff reaches a sidewalk, shorten each irrigation cycle and add a pause before repeating it. On compacted ground, improving infiltration may matter more than increasing total run time.
Maintain appearance without feeding water demand
Top up mulch when soil becomes exposed, but don't bury plant crowns or raise the surface against siding and wood. Prune selectively to remove dead growth, preserve natural form, and keep mature plants from blocking paths. Severe shearing often encourages weak, dense regrowth and can make shrubs less attractive in the long term.
Replace plants that repeatedly fail instead of giving them more water indefinitely. A failed specimen may be poorly matched to the microclimate, installed at the wrong depth, or competing with nearby roots. Moving a plant to a better zone is often more effective than trying to rescue it with a larger irrigation dose.
Before seasonal weather shifts, inspect gutters, downspouts, edging, paths, and exposed irrigation components. A practical checklist for preparing your home for autumn can help you include the yard in broader exterior maintenance rather than treating it as a separate task.
Call a yard professional for an irrigation audit when zones remain uneven, slopes keep producing runoff, or mature trees and utilities complicate the redesign. A contractor can also identify plants that should be replaced, adjust emitter placement, and confirm that the finished yard is using its water where roots can access it.
OutdoorBrite lets you upload a photo of your yard, explore xeriscape concepts, and test planting beds, mulch, trees, patios, and other elements before buying materials. Visit OutdoorBrite to turn your site assessment into a practical visual plan you can refine yourself or share with a yard design professional.
See your yard reimagined
Start creating