10 Patio Design Ideas on a Budget for DIYers
Explore 10 patio design ideas on a budget, from gravel and pallets to lighting and DIY shade structures, with practical costs and layout tips.
A polished patio doesn't require a full concrete pour or a wall of expensive pavers. That popular advice often mistakes a complete hardscape installation for a finished outdoor room. A more practical approach combines one affordable foundation with portable seating, shade, plants, and lighting that can evolve as money and needs change.
Start with the surface because it determines drainage, stability, upkeep, and much of the project's labor. Then define the job the space must do, whether that's dining, lounging, children's play, gardening, or evening entertaining. Only after those decisions should you add comfort and atmosphere. Patio installation costs can range from about $500 to $8,000, while a 7-by-7-foot patio may cost roughly $250 to $5,000 and a 20-by-20-foot patio about $2,000 to $20,000, according to patio installation cost guidance. Smaller footprints and simpler materials remain the clearest ways to control the budget.
The ideas below organize patio design ideas on a budget by the problem they solve, from ground surfaces to shade and evening ambiance. Before buying, use OutdoorBrite to compare concepts on a photo of your actual patio, so you can test proportions and combinations rather than relying on inspiration photos alone. For additional styling context, this outdoor patio decorating guide can help you think about furniture, color, and accessories as one composition.
Table of Contents
- 1. Repurposed Pallet Patios and Decking
- 2. Gravel and Crushed Stone Patios
- 3. Concrete Staining and Scoring
- 4. Mulch and Bark Chip Patios With Stepping Stones
- 5. Recycled Asphalt and Reclaimed Brick Patios
- 6. Container Gardens and Portable Patio Decor
- 7. DIY Pergolas and Shade Structures Using Simple Materials
- 8. Upcycled Furniture and DIY Seating Solutions
- 9. Grass and Synthetic Turf Patios
- 10. String Lights and Affordable Outdoor Lighting Design
- Budget Patio Design: 10 Ideas Compared
- Build the Patio in Affordable Layers
1. Repurposed Pallet Patios and Decking
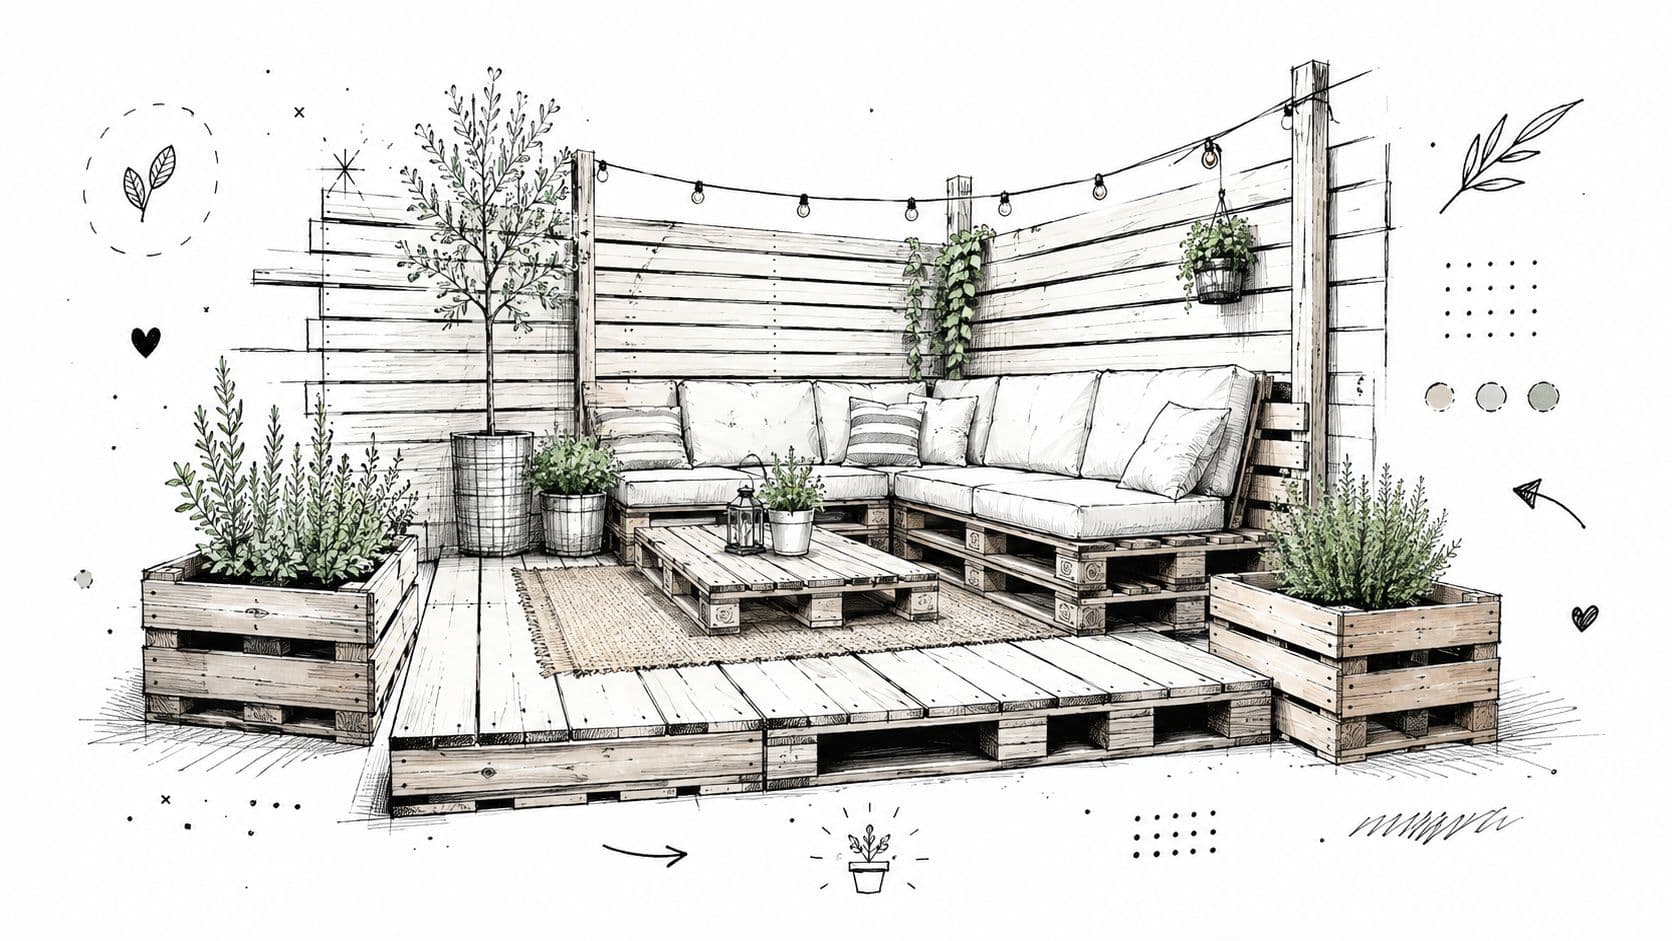
Pallets can create a raised, rustic platform when the existing ground is reasonably level and dry. They work best for a small lounge zone, a reading corner, or a temporary deck rather than a large, permanent dining patio. Businesses, warehouses, salvage listings, and local marketplaces may have usable pallets, but free material still demands sorting, transport, cleaning, and careful inspection.
Choose pallets marked HT, meaning heat-treated, and avoid those marked MB, which indicates methyl bromide treatment. Remove broken boards, sand rough edges, and seal the wood with an exterior product suited to your climate. Lay fabric beneath the platform to discourage weeds, then support and fasten the pallets so the surface doesn't shift under furniture.
Preview the platform before building
Measure the intended footprint and mark it with string, chalk, or flattened cardboard. Place a chair and small table inside the outline to check whether doors open freely and whether the platform leaves a practical path through the yard. An ai deck design preview can help you compare a pallet-style platform with gravel, plants, or a more conventional deck treatment on your own photo.
Practical rule: Test one pallet section first. If it flexes, holds moisture, or feels awkward beside the house, expanding the project will only multiply the problem.
Pallets save money on the visible surface, but they don't eliminate preparation. Expect ongoing inspection, resealing, and possible board replacement. Their uneven, weathered appearance is an advantage for bohemian or farmhouse spaces, but it won't suit homeowners seeking a clean, low-maintenance finish.
2. Gravel and Crushed Stone Patios
Gravel is often the most forgiving surface for a homeowner who wants an informal patio without committing to a rigid slab. Pea gravel feels softer and shifts more underfoot, while crushed granite or quarry process locks together more firmly. The best choice depends on whether you prioritize a relaxed garden look, wheelchair-friendly movement, or easy future expansion.
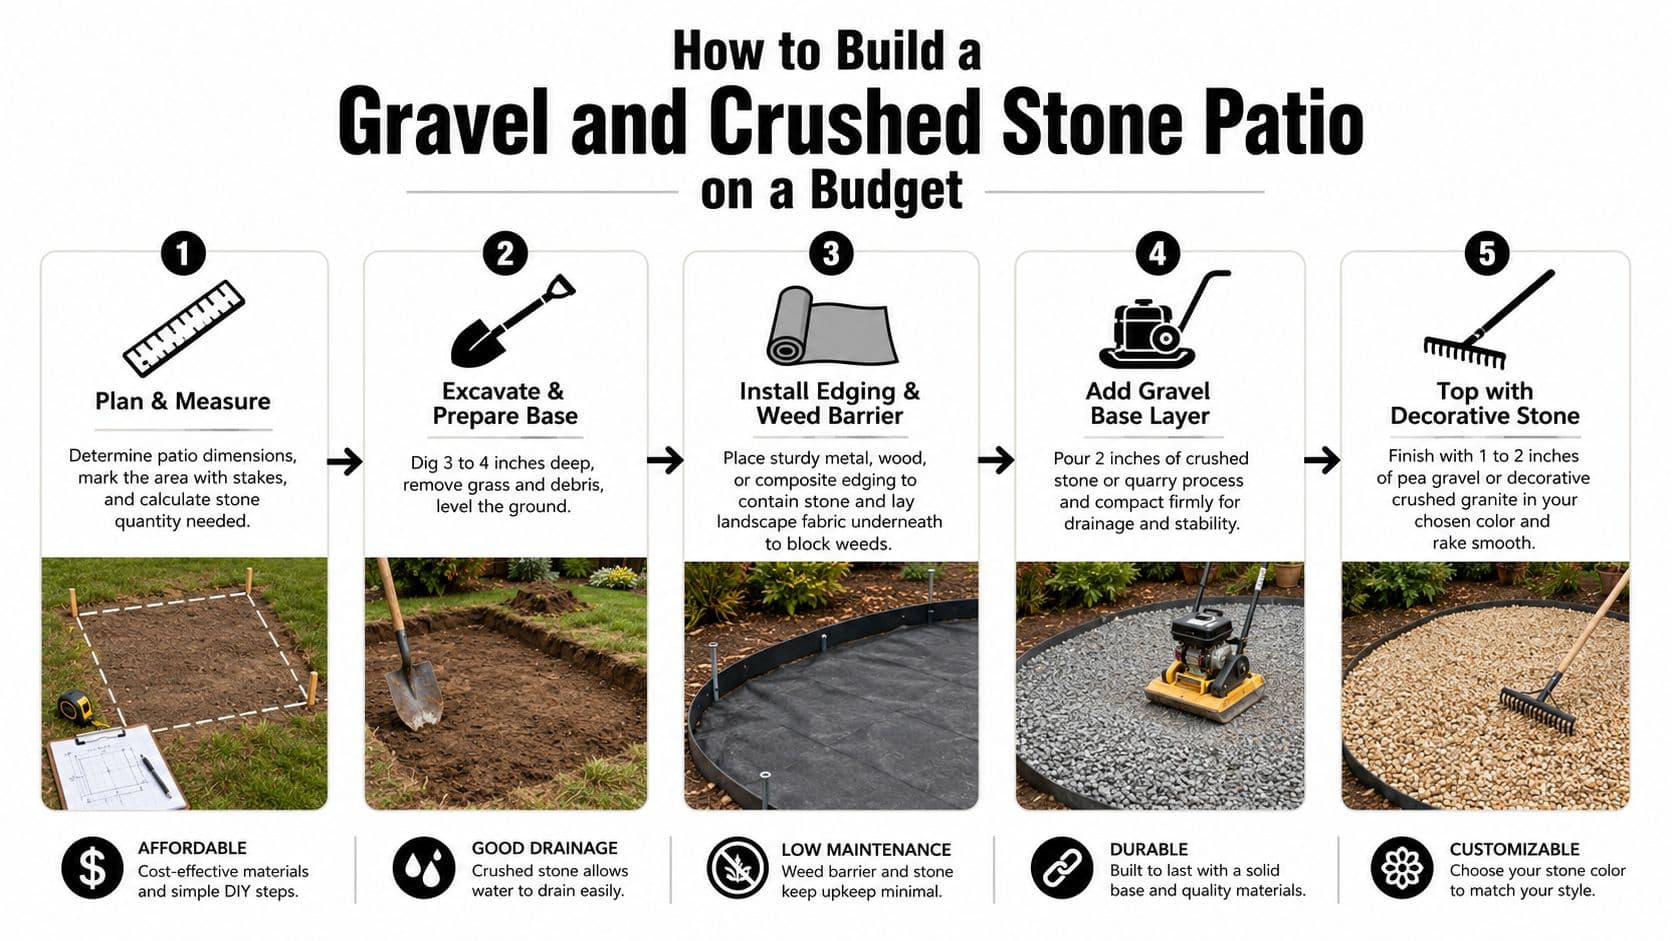
Good installation starts below the stone. Remove vegetation, establish a slight fall for drainage, compact the soil, and use a weed barrier where appropriate. Add strong edging, such as metal, timber, or composite, because loose stone spreads into planting beds and lawn edges when nothing contains it. A depth of 2 to 3 inches is commonly recommended in the plan for stability, but the exact amount depends on the stone and site conditions.
Make loose stone feel intentional
Use stepping stones where chairs are dragged, people enter from the house, or guests walk toward a fire pit. Keep the main seating zone broad enough for furniture legs, and avoid placing loose gravel directly against a door threshold where it can migrate indoors. A restrained stone color that echoes the home's siding, roof, or masonry usually looks more deliberate than several competing aggregates.
Mark the proposed patio with a hose and photograph it from the kitchen, back door, and yard. You can also use the best free patio design app to compare gravel with pavers, planting borders, and furniture placement before ordering material.
Gravel drains well and can be extended in stages, but it isn't maintenance-free. It needs occasional raking, weed control, and replenishment where traffic displaces it. Poor grading or missing containment can turn a supposedly cheap surface into a recurring repair job, which is why the least expensive material isn't always the least expensive project overall.
3. Concrete Staining and Scoring
An existing concrete slab may offer the strongest budget opportunity because the expensive excavation and base work have already been completed. Instead of covering it with new pavers, clean the surface, test a compatible stain, and use scoring to create a pattern that gives the slab visual structure.
Acid stains can produce varied, mineral-like color, while acrylic stains offer more predictable tones. Epoxy coatings can create a stronger decorative effect, but they require careful surface preparation and may not be appropriate for every exterior condition. A sealer protects the finish, yet the right product depends on exposure, moisture, freeze-thaw conditions, and expected foot traffic.
Use pattern instead of premium material
A simple grid, border, or geometric band can make a plain slab feel designed without adding another surface layer. Keep the pattern aligned with the house or the dominant furniture orientation. Random scoring often looks accidental unless the surrounding planting and furniture support a more informal style.
Test the color in an inconspicuous area first. Concrete absorbs unevenly, and stains rarely look exactly like a printed color sample. Clean thoroughly, allow the slab to dry as directed, and apply the product in shade or under overcast conditions where possible. Preview the intended color and pattern by drawing the layout on a photograph of the patio, then place actual furniture inside the marked zones.
Watch the process before committing to a weekend project.
Staining saves money only when the slab is structurally sound. Cracks, drainage problems, and major leveling issues still need attention, and decorative color won't correct them. If the concrete is stable, however, scoring and sealing can change the character of the space without reducing its usable area.
4. Mulch and Bark Chip Patios With Stepping Stones
A mulch patio suits a garden-first yard where softness, drainage, and an informal appearance matter more than a perfectly stable furniture platform. Shredded bark or wood chips can define a small sitting area beneath trees, beside a cottage garden, or around a casual fire-free lounge zone. The material is comfortable underfoot and visually connects the patio to surrounding planting.
Excavate vegetation and loose topsoil, shape the area so water doesn't collect, and install a suitable fabric if weed pressure is significant. Use bark mulch rather than the lowest-grade material, since inconsistent pieces can break down quickly or scatter across paths. Stepping stones create a firm route through the space, but they must sit securely and remain close enough for a natural walking stride.
Let the garden define the layout
Instead of forcing a rectangle into the yard, follow an existing bed edge or tree canopy. A curved outline can look intentional with irregular stone, while a straighter arrangement works better with rectangular pavers or sawn timber edging. Place a chair, side table, and plant container on cardboard cutouts before spreading mulch. That simple test reveals whether furniture legs will sink or whether the zone is too small for the way you plan to use it.
Mulch saves on hardscape and makes later expansion straightforward. It also asks for more seasonal attention than concrete or compacted stone. Refreshing the surface in spring, pulling emerging weeds, and correcting washed areas are part of the trade-off. This solution doesn't work well for heavy dining furniture, wheeled equipment, or anyone who wants a crisp surface with little movement.
Use stepping stones for the high-traffic line rather than covering the entire patio with them. You'll spend less on rigid material and preserve the natural, low-pressure character that makes bark useful in the first place.
5. Recycled Asphalt and Reclaimed Brick Patios
Recycled asphalt and reclaimed brick solve two different surface problems. Compacted recycled asphalt creates a firm, utilitarian base with a dark, understated appearance, while salvaged brick provides color, texture, and the irregular character of older masonry. Either can reduce dependence on new finish materials, especially when sourced locally from demolition contractors, salvage yards, or reuse suppliers.
Reclaimed brick requires patience. Sort pieces by size and condition, clean mortar from the faces, and keep extra material for breakage and fitting. A sand and gravel base supports drainage and stability, but the finished surface may remain slightly uneven. That unevenness can look authentic in a historic, farmhouse, or eclectic setting, yet it can be frustrating beneath delicate furniture or for anyone expecting a perfectly level patio.
Choose the surface that matches your tolerance
Recycled asphalt suits a simple seating pad, path, or sub-base where appearance is secondary to compaction. Reclaimed brick works better when the patio itself is a visual feature. Combining the two can be effective, with asphalt forming a restrained field and brick marking an edge or entrance, but the transition needs deliberate containment.
Draw the patio perimeter on your actual yard photo and test several brick patterns, including a border and a running layout. Place representative salvaged bricks on the ground before buying a large quantity. Color variation can be an asset, but a small sample helps you decide whether the mix complements the house or appears disorderly.
Salvaged material is affordable only after you account for sorting, cleaning, transport, and the time required to make imperfect pieces work together.
Don't use reclaimed brick to hide drainage problems. Water that sits beneath the base can cause movement, frost damage, or persistent algae. Spend effort on grading and compaction first, then let the material's age provide the character.
6. Container Gardens and Portable Patio Decor
Permanent planting beds, masonry planters, and built-in benches can consume a budget before the patio has even become comfortable. Containers offer a more flexible way to define edges, screen an unattractive view, and introduce color without changing the ground plane. They also suit renters and homeowners who want to rearrange the space through the seasons.
Group containers by role rather than scattering them everywhere. A tall planter can mark an entrance, a cluster can soften a hard corner, and a broad pot can separate lounge seating from a walking route. Larger containers usually create more visual weight and can reduce watering frequency compared with many small pots, though they cost more to move and require a stable location.
Design for the actual climate
Select plants according to sun, wind, heat, cold, and available water. Drought-tolerant choices can reduce upkeep in hot or dry regions, but they still need appropriate drainage and establishment care. Self-watering containers help in some settings, yet they aren't a substitute for a plant that belongs in the site.
Before buying pots, use empty boxes, buckets, or cardboard circles to test groupings on the patio. Photograph the arrangement from inside the house, since the view from a kitchen or living-room window matters as much as the view from the yard. Keep a clear route around furniture, especially where containers could become trip hazards or block drainage.
Portable decor also lets you postpone expensive construction. Start with one cohesive pot color, a weather-resistant rug, or a movable screen rather than buying unrelated accessories. The trade-off is ongoing watering, seasonal storage, and occasional replacement of plants that don't tolerate the conditions.
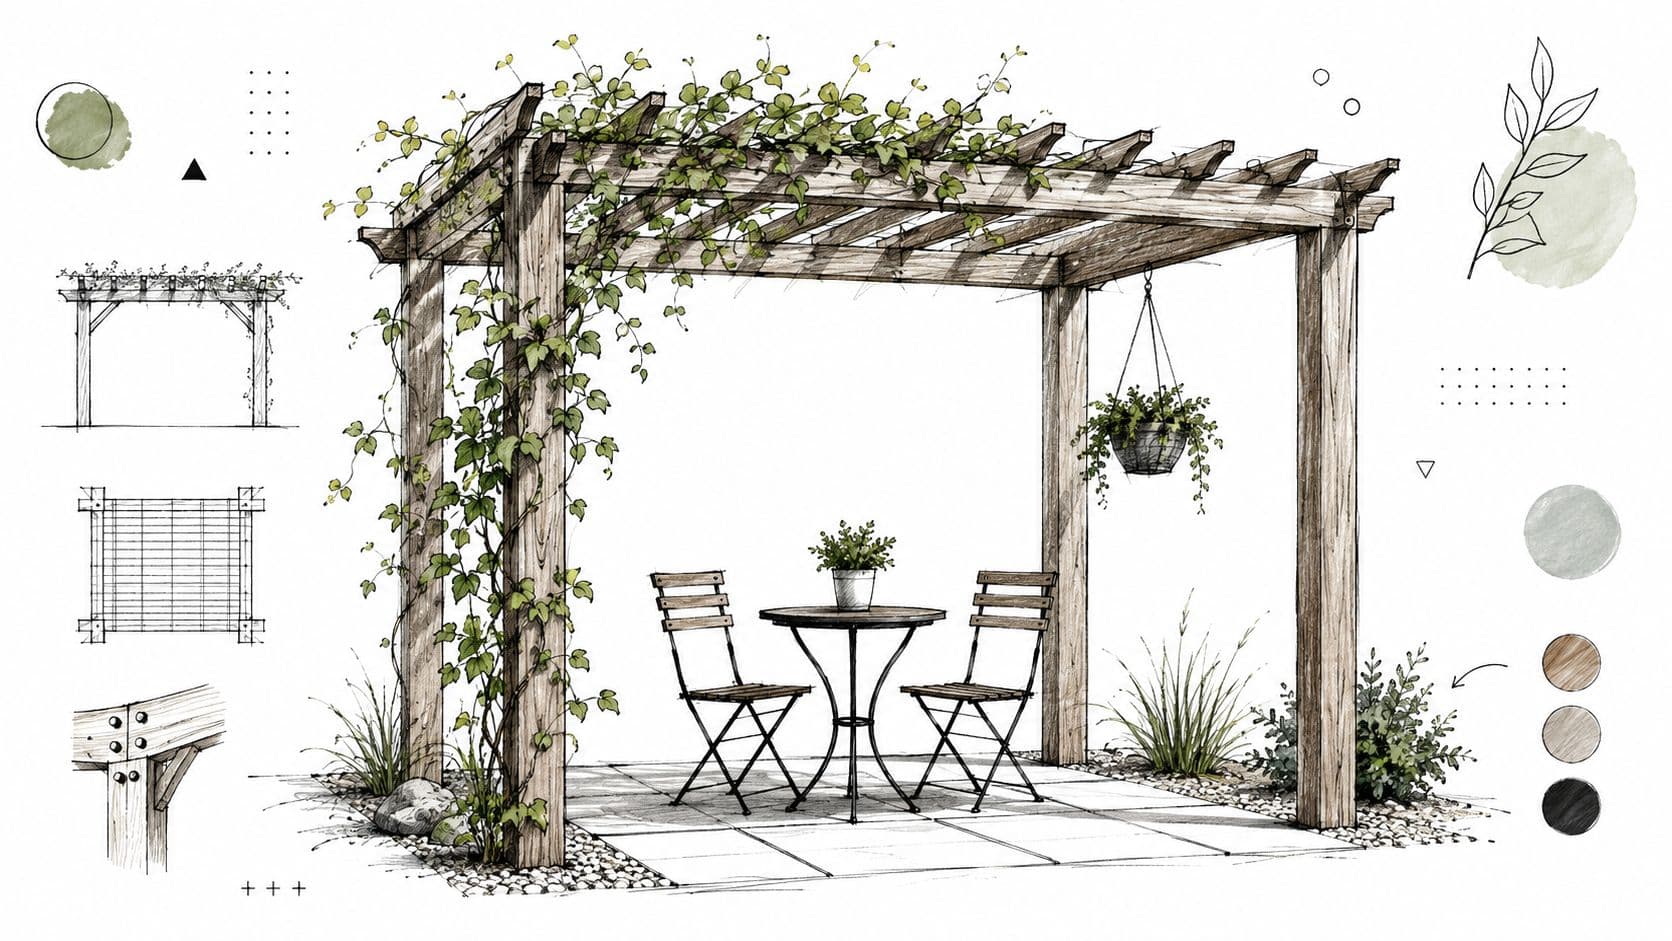
7. DIY Pergolas and Shade Structures Using Simple Materials
Shade often changes whether people use a patio more than a decorative surface does. A simple pergola, arbor, or open screen can define the seating zone and make a basic gravel, mulch, or concrete patio feel like an outdoor room. Pressure-treated lumber, metal conduit, or PVC can work for different visual styles, but each requires appropriate connections, anchoring, and weather protection.
Keep the structure proportional to the patio. A narrow seating pad may need only a small overhead frame, while a large dining area requires posts that don't interfere with chairs or circulation. Use cardboard tubes, stakes, or temporary poles to mark post locations before digging. Stand inside the proposed footprint and check sightlines from the house.
Budget structure still needs proper support
Install posts on suitable concrete footings or approved ground anchors, and account for wind exposure before choosing a lightweight design. A structure that moves or lifts becomes a safety issue, not a bargain. Pressure-treated wood or composite materials improve durability, while paint or stain can visually connect the frame to the house.
An open pergola won't provide the same shelter as a solid roof. Climbing vines may eventually add shade, but they need support, water, pruning, and time. Adjustable fabric panels or louvers offer more control, though they add hardware and maintenance.
Preview the frame over the actual furniture rather than as an isolated object. If the posts align with chair backs, doors, or windows, revise the plan before purchasing lumber. The most economical pergola is the one that shades the place where people sit, not just the one that looks attractive from the lawn.
8. Upcycled Furniture and DIY Seating Solutions
A patio can feel unfinished because it lacks comfortable places to sit, not because its surface is expensive. Upcycled pallets, wine barrels, tree stumps, salvaged boards, and old indoor furniture can supply benches, side tables, stools, and storage with more personality than a matching set.
Safety and weather resistance determine whether the idea succeeds. Sand every contact surface, remove protruding fasteners, strengthen joints, and finish wood with an exterior stain or paint. A stump can make a good occasional seat or side table, but it needs to be stable, dry, and free of rot. A wine barrel may work as a table base, yet its curved top needs a secure surface that won't tip drinks or lamps.
Spend on the part people touch
Save on the frame and reserve some budget for cushions, seat pads, or washable outdoor fabric. Comfortable seating encourages use, while a clever but uncomfortable bench becomes visual clutter. Choose cushion colors that repeat a pot, rug, or wall tone so individual salvaged pieces look like a collection rather than leftovers.
Use masking tape on the patio to represent the furniture footprint. Leave enough room to pull chairs out and walk behind them, then test the arrangement with temporary boxes at the same height as tables or storage. A photo preview can help compare a low bench, bistro set, or sectional arrangement against the actual architecture.
Upcycling doesn't mean zero labor. Cleaning, sanding, sealing, and storing cushions all take time, and some materials won't withstand prolonged moisture. Avoid building more furniture than the patio can support. A focused seating group with one useful table usually looks more intentional than a crowded assortment of rescued objects.
9. Grass and Synthetic Turf Patios
Grass can serve as the patio when the desired experience is casual, flexible, and connected to the garden. A small lawn clearing supports children's play, lightweight seating, and informal gatherings without covering the entire yard in hardscape. Synthetic turf offers a more consistent appearance and can complement a compact paved or gravel zone, but it still requires correct preparation and drainage.
Natural grass demands a climate-appropriate seed blend or sod, soil preparation, watering during establishment, and regular mowing. It can become muddy or worn where people repeatedly place chairs, walk, or gather. Synthetic turf avoids mowing, but installation involves removing the existing surface, building a stable base, securing edges, and managing runoff. Its upfront labor may outweigh the appeal if the area is poorly graded or receives little use.
Separate movement from lounging
Define the patio with stepping stones, a clean edge, or a narrow hardscape strip. Keep heavy furniture on a firm surface where possible, and use turf as a visual and functional extension rather than forcing every activity onto it. For families, this arrangement can provide a softer play area beside a stable seating zone.
Preview the border with a hose or garden stakes, then place actual chairs and a table inside the proposed layout. Check the view from the house and consider how grass color or synthetic texture will relate to existing planting. This modern turf landscape ideas resource can provide visual direction, but the final decision should follow drainage, sun, and maintenance needs.
Turf isn't automatically a low-cost answer. Natural grass may need recurring care, while synthetic turf needs a properly prepared base and periodic cleaning. Choose it because it solves a use problem, not because it looks green.
10. String Lights and Affordable Outdoor Lighting Design
Lighting can deliver the strongest visual change after the surface and seating are in place. String lights, solar lanterns, and LED path fixtures add evening definition without excavation or permanent electrical work. They also reveal whether your patio has useful zones, since a light over the table, a glow near the entrance, and low illumination along a path create a clearer layout than one bright fixture.
Begin with function. Light steps and changes in level first, then add softer illumination around seating and planting. Warm-white LED string lights suit relaxed dining and lounge areas, while solar path lights can guide movement without cables. Choose weather-resistant products and keep electrical connections protected according to the manufacturer's instructions.
Layer light instead of flooding the yard
Try several arrangements with temporary clips or painter's tape. Photograph the patio after sunset from the house and from the seating position. Lights hung at one height can feel flat, while a combination of overhead strands, low lanterns, and discreet path lights adds depth. Timers or smart bulbs reduce the need to switch everything manually.
The best pathway lighting design tips can help you plan movement and spacing, while this guide to the cost of permanent outdoor lighting explains why a portable lighting layer is useful when you aren't ready for trenching and fixed wiring.
Don't use lighting to compensate for an unsafe surface or poorly placed furniture. Install the fixtures after you finalize circulation, and keep cords away from walkways. Lighting is a finishing layer, but it works best when the underlying layout already makes sense.
Budget Patio Design: 10 Ideas Compared
| Item | Implementation Complexity 🔄 | Resource Requirements ⚡ | Expected Outcomes ⭐📊 | Ideal Use Cases 💡 | Key Advantages ⭐ |
|---|---|---|---|---|---|
| Repurposed Pallet Patios and Decking | 🔄 Low, basic carpentry; inspect pallets | ⚡ Very low material cost; basic tools, sealant | ⭐ Moderate durability; 📊 Rustic unique aesthetic; maintenance needed | 💡 Budget, bohemian, test layouts | ⭐ Extremely low cost; sustainable; customizable |
| Gravel and Crushed Stone Patios | 🔄 Low, simple spread & compact; edging needed | ⚡ Low cost; compactor, landscape fabric, edging | ⭐ Functional surface; 📊 Excellent drainage; migrates over time | 💡 Mediterranean, xeriscape, quick installs | ⭐ Cheapest per ft²; fast install; easy to refresh |
| Concrete Staining and Scoring | 🔄 Medium, prep, staining skill; scoring precision | ⚡ Moderate materials; possible pro labor | ⭐ High-quality finish; 📊 Durable when sealed; color variability | 💡 Existing slabs, modern or industrial styles | ⭐ Mimics expensive finishes; long-lasting with maintenance |
| Mulch & Bark Chip Patios with Stepping Stones | 🔄 Very low, lay fabric, spread mulch, place stones | ⚡ Low cost; annual replenishment | ⭐ Casual, soft surface; 📊 Excellent drainage; short lifespan | 💡 Cottage, woodland, play areas | ⭐ Comfortable underfoot; integrates with planting |
| Recycled Asphalt & Reclaimed Brick Patios | 🔄 Medium-high, sourcing, sorting, labor-intensive install | ⚡ Low–moderate material cost; significant labor | ⭐ Durable if well installed; 📊 Authentic vintage character | 💡 Historic, rustic, eclectic designs | ⭐ Sustainable reuse; authentic, time-worn look |
| Container Gardens & Portable Patio Decor | 🔄 Very low, arrangeable, no build | ⚡ Very low startup; ongoing plant care | ⭐ Flexible aesthetic; 📊 Highly changeable seasonally | 💡 Renters, small spaces, seasonal styling | ⭐ No permanent changes; highly versatile |
| DIY Pergolas & Shade Structures | 🔄 Medium, carpentry skills; anchors/permits possible | ⚡ Moderate materials and tools; installation time | ⭐ Architectural focal point; 📊 Adds shade & structure | 💡 Define outdoor rooms; support vines | ⭐ Affordable shade; strong visual impact |
| Upcycled Furniture & DIY Seating Solutions | 🔄 Low–Medium, crafting/time and skill | ⚡ Minimal material cost; tool access required | ⭐ Unique pieces; 📊 Variable durability depending on finish | 💡 Personalized, budget-conscious patios | ⭐ Very low cost; creative and sustainable |
| Grass & Synthetic Turf Patios | 🔄 Low–Medium, ground prep; install turf or seed/sod | ⚡ Low–moderate cost (synthetic higher); drainage prep | ⭐ Comfortable surface; 📊 Synthetic = low maintenance year-round | 💡 Family play areas, garden-forward designs | ⭐ Soft, child/pet friendly; consistent green look |
| String Lights & Affordable Outdoor Lighting | 🔄 Very low, simple install; layout planning | ⚡ Low cost; LED/solar options; anchors required | ⭐ High ambiance impact; 📊 Extends usable hours at low cost | 💡 Any patio needing evening ambiance | ⭐ Immediate ambiance; energy-efficient options |
Build the Patio in Affordable Layers
A budget patio becomes easier to control when you treat it as a sequence of decisions rather than one large purchase. Start by naming the primary use. A dining patio needs stable furniture and a clear route from the kitchen, while a reading corner may need only a small surface, shade, and one comfortable chair. A family space may benefit more from a durable edge and open turf than from decorative paving.
Choose the surface according to drainage, climate, traffic, and maintenance tolerance. Concrete can be economical at about $4 to $15 per square foot, while pavers are listed at about $10 to $25, stamped concrete at $8 to $20, and natural stone at $15 to $30 in one recent cost guide. Labor may add $5 to $15 per square foot, and site preparation can add $1,000 to $5,000, according to patio renovation cost guidance. Those figures explain why a smaller, simpler surface often leaves more room for seating, shade, planting, and lighting.
Mark the layout before buying anything. Use a hose for curves, cardboard for furniture, stakes for pergola posts, and temporary containers for planting groups. Photograph the space from the doors and windows you use most. OutdoorBrite lets you upload that photo, select styles such as modern, cottage, Mediterranean, tropical, Japanese zen, or xeriscape, and compare redesign concepts on the actual patio. Its elements editor can help you test features such as pergolas, fire pits, and planting beds before you commit to construction.
Add comfort next, but buy only what supports the main use. A portable umbrella, a simple shade frame, an upcycled bench, or a small group of containers can make a basic surface functional without locking you into a permanent arrangement. In hot or dry climates, prioritize shade, drainage, and water-wise planting before decorative extras. Recent outdoor trend coverage also emphasizes that homeowners are often responding to deteriorated outdoor elements and everyday livability rather than resale value, with the 2026 U.S. Houzz Outdoor Trends Study reporting 41% citing broken or deteriorated elements and 15% citing resale value as renovation triggers, as summarized by outdoor living trends coverage.
Finish with atmosphere. Layer string lights, lanterns, and pathway lighting after you know where people walk and sit. Build in phases, keep the materials coordinated, and accept that a patio can look complete without including every popular feature at once. A deliberate gravel pad with comfortable seating, shaded planting, and warm lighting often feels more resolved than an oversized hardscape with no practical place to relax.
OutdoorBrite helps you turn a photo of your own patio into realistic design concepts, compare styles, and test surfaces, seating, shade, planting, and lighting before you buy materials. Upload your space and explore the options at OutdoorBrite before starting your next DIY patio project.
See your yard reimagined
Start creating