Planning a Vegetable Garden Layout Free with Our 2026 Guide
Start planning a vegetable garden layout free today with our complete 2026 guide. Learn site assessment, bed design, plant spacing, and get free tools and
A blank patch of yard can feel harder to work with than an overgrown one. When nothing's built yet, every choice seems permanent. Put the garden too far from the hose and you'll drag watering cans. Put tall crops in the wrong spot and they'll shade everything behind them. Start too big and the weeds will teach you humility fast.
That's why planning a vegetable garden layout free matters so much. Good planning costs nothing, and it solves most beginner problems before you buy a single seedling. The trick is to stop thinking about the garden as one giant decision. It's a chain of smaller decisions, made in order, from the broadest site choice down to where each plant sits.
Start with the essential elements. Sunlight comes first. Most vegetables need 6 to 8 hours of direct sunlight according to VegPlotter. Iowa State Extension also recommends a site with 6+ hours of full sun, well-drained fertile soil, and a location near both water and the house in its guide to planning your vegetable garden. Once those basics are right, the layout gets much easier.
A vegetable garden is part map, part workflow, part season-long experiment. Done well, it feeds you and saves effort. Done poorly, it turns simple jobs into annoying ones. The good news is that you can plan it with a notebook, a tape measure, and honest observation.
Table of Contents
- Introduction
- First Things First Reading Your Landscape
- Designing Beds and Pathways for Your Space
- The Gardeners Chess Strategic Plant Placement
- Bringing Your Plan to Life with Free Tools
- Three Sample Garden Layouts to Inspire You
Introduction
Individuals don't struggle because they lack enthusiasm. They struggle because a garden layout asks too many questions at once. Where should it go. How big should it be. Rows or beds. Tomatoes or greens. Paths or no paths. That confusion is normal.
The easiest way through it is to make decisions from macro to micro. First choose the site. Then shape the beds. Then place the crops. That order prevents expensive rework and saves you from designing a beautiful garden in the wrong place.
A free plan doesn't mean a sloppy plan. It usually means a better one, because you pay closer attention. You walk the yard more. You watch shadows. You notice where water puddles and where you naturally cut across the lawn. Those details matter more than fancy software.
Practical rule: If the location is wrong, the layout won't rescue it.
The payoff is simple. You end up with food you want to harvest because the garden fits your routine. It's close enough to visit, open enough to work, and organized enough that you can keep it going after the first burst of spring energy fades.
First Things First Reading Your Landscape
A free garden plan starts with shoe leather. Walk the yard with a notebook, not a seed catalog. The goal at this stage is simple. Find the spot that gives crops the best chance with the least daily friction.
Sun decides almost everything
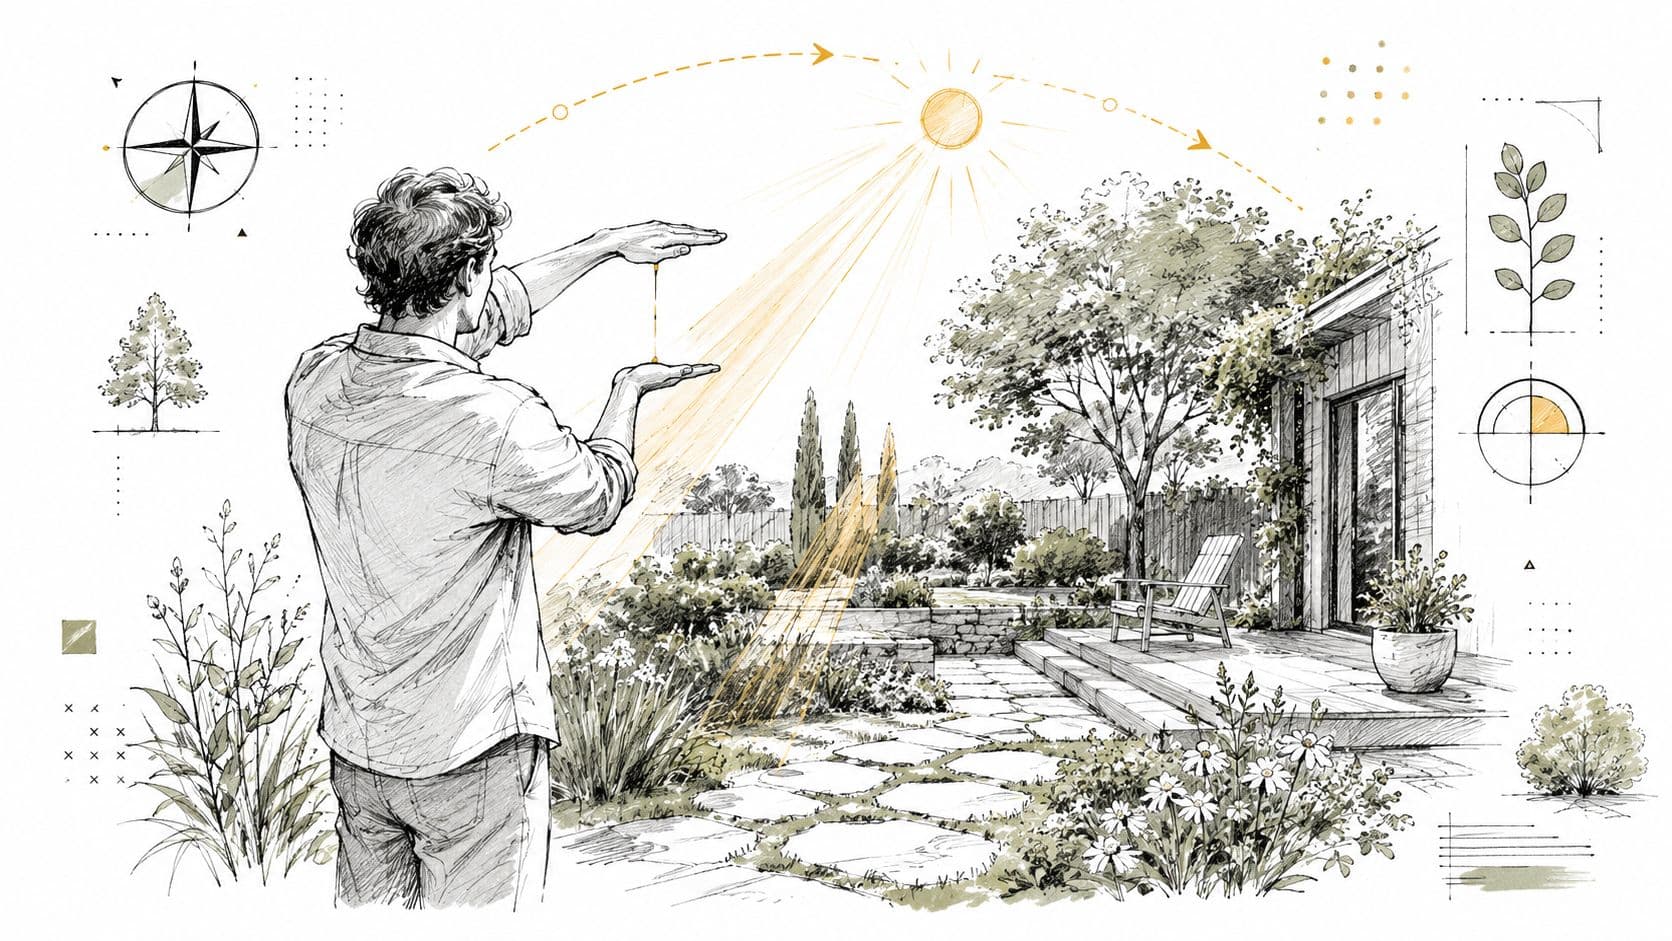
Vegetables that make fruit need real light. If a spot stays shaded for much of the day, save yourself the disappointment and use it for ornamentals, storage, or movable containers. Iowa State Extension recommends full sun for a productive vegetable patch and notes that beginners usually do better starting with a modest space in its vegetable garden planning guide.
Do a simple sun check before you draw anything. Look at the same area in the morning, near midday, and late afternoon. Mark where the house, fence, shed, and trees cast shade. Repeat it on another day if you can. Two or three walks will tell you more than an hour online.
Small-space gardeners have to make harder choices here than large-plot growers. The sunniest area is often also the hottest, driest, or most exposed to wind. A slightly less sunny bed close to the door can outproduce a perfect back-corner site you forget to water. I have learned this the hard way. Convenience affects yield because neglected plants do not care how good the sketch looked on paper.
Use that trade-off to sort sites fast:
- Open, bright spot: Best for tomatoes, peppers, beans, squash, and other fruiting crops.
- Area with some afternoon shade: Often better for lettuce, spinach, cilantro, and herbs in hot summers.
- Shade from buildings for most of the day: Poor choice for the main food bed.
- Ground under mature trees: Usually not worth the fight because roots and shade both cut production.
One more practical note. Spring sun and midsummer sun are not the same. If you plan to add a trellis later, count its shadow now.
Soil, water, and the route your feet already take
Once a spot passes the light test, check the ground and your routine. Good soil can be improved over time. An awkward location keeps costing you season after season.
Start with three free checks:
- Drainage check: After rain, note where water stands and where it drains within a reasonable time.
- Jar test: Shake soil in a jar of water and let it settle so you get a rough read on sand, silt, and clay.
- Traffic test: Walk from the door to the tap, compost, and the proposed garden site. The path that feels annoying in March feels worse in July with a full watering can.
That last test matters more in a small yard than many guides admit. A compact garden has to share space with pets, kids, laundry lines, gates, and the route you already use to move through the yard. If the vegetable bed blocks a gate or turns the hose path into a tangle, you will resent it. In tight spaces, the best site is often the one that gives up a little beauty to gain easier watering, quicker harvests, and fewer daily annoyances.
Put the garden where you will visit it often enough to notice problems early.
Soil chemistry matters too. If you want a plain-language example of how growers think about root-zone conditions, this guide on optimal pH ranges for cannabis shows how strongly pH affects plant performance. The same principle applies in a vegetable patch. Test before you guess.
If the site is promising but rough, OutdoorBrite's soil preparation guide gives a practical cleanup checklist before planting.
Choosing between in-ground and raised beds
The ground usually tells you which build makes sense.
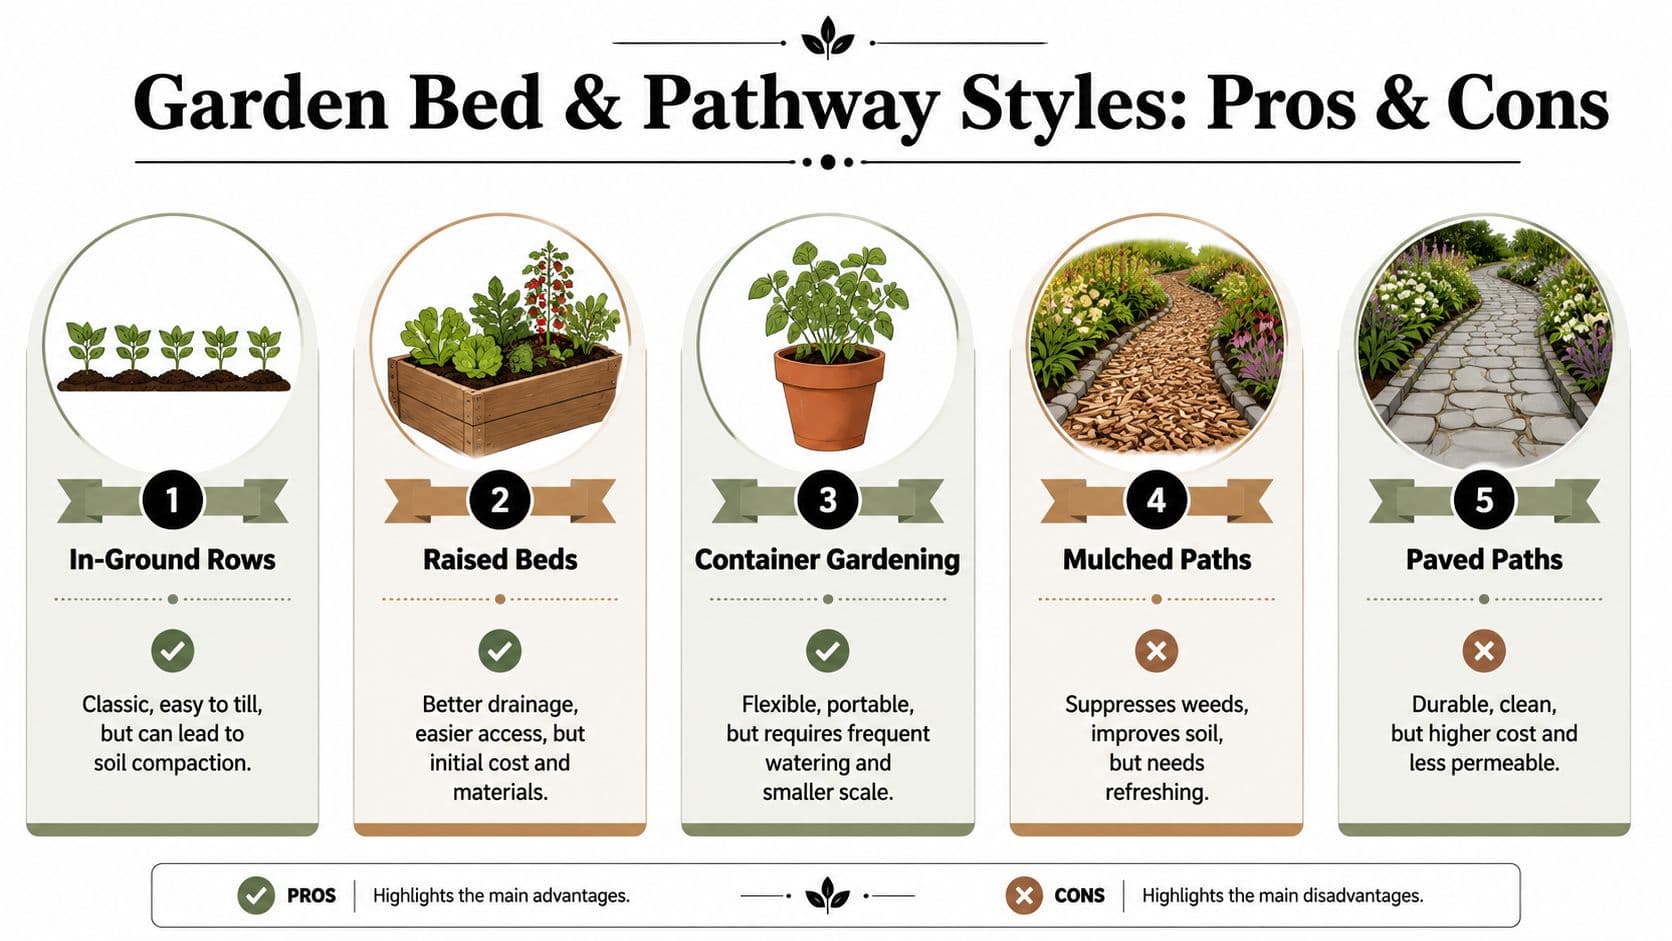
In-ground beds are the cheapest option when the soil is workable and drainage is acceptable. They are easy to expand and cost almost nothing to mark out. The trade-off is control. Heavy clay, foot traffic, and weed pressure can slow you down fast.
Raised beds solve a few stubborn problems. They help in wet ground, rocky ground, and spots where bending is hard on your back. They also create clear boundaries in a crowded yard. The trade-off is money, time, and imported soil or compost, which can stretch a zero-budget plan.
There is a middle road that works well for many beginners. Start with one modest in-ground or lightly mounded bed, improve that soil, and grow a season before building more. In small spaces, restraint is part of good design. A smaller bed in the right place usually feeds you better than a larger one placed where sun, water, and daily use are all working against you.
Designing Beds and Pathways for Your Space
A bed looks good on paper until you try to weed it with a bucket in one hand and a hose snagging your ankles. Good layout work starts there. The test is not whether the sketch looks tidy. The test is whether you can reach, harvest, water, and turn around without stepping where you grow.
Bed shapes that work in real life
For small gardens, compact beds usually outproduce long rows because they waste less ground on walking space. The catch is reach. As noted earlier, VegPlotter recommends beds you can work from the edge without stepping into them, and that rule holds up in real gardens. If reaching the middle means leaning on plants or compacting soil, shrink the bed.
Main paths need the same practical test. A narrow path may look efficient, but it stops feeling efficient the first time you carry a watering can, drag a hose, or try to pass with a harvest basket. I have learned to protect one comfortable main route even in a tiny plot. Crops can be thinned. Access problems usually get worse.
Use the layout style that matches the space you have, not the one that looks best in a garden photo.
| Layout style | Works well when | Common downside |
|---|---|---|
| In-ground rows | You have extra width and want easy expansion | More walking space and more chances to compact soil |
| Block planting | You need higher yield from a tight area | Overcrowding can trap moisture and invite disease |
| Raised beds | You want clear edges and easier access | Filling and building them can strain a free plan |
For anyone planning beyond the vegetable patch, this piece on creating profitable outdoor plans is useful because it shows how circulation and layout affect the whole yard, not just the growing area.
Small-space trade-offs people usually skip
Small-space gardening is a series of choices, and every choice gives something while taking something away.
A trellis saves ground space. It also throws shade. Dense planting cuts weed space. It also slows airflow. A narrow side-yard bed can be productive, but only if you can reach both sides or keep the width tight enough to work from one edge. These are the decisions that matter after the excitement of planning wears off.
Food Garden Life touches on these spacing compromises in its guide to vegetable row spacing and small-space tradeoffs. The lesson is simple. In a cramped garden, placement has to follow a clear order. First protect sun. Then protect access. Then fit in as many crops as the space can support.
That order helps in awkward spots:
- Balconies: Put the tallest containers where they will not shade the rest by midday. One tomato cage in the wrong place can cut production from the herbs and greens behind it.
- Narrow side yards: Beds along a fence often look neat, but fences cast shifting shade and make airflow worse. Keep taller crops where morning sun still reaches the lower leaves.
- Corners and odd shapes: Use the best-lit, easiest-to-reach zone for crops you harvest often. Save tight wedges for marigolds, scallions, or one zucchini that can spill outward.
One hard-earned rule has saved me more trouble than any spacing chart. In a small garden, reduce the number of crops before you reduce the path space you need to maintain them.
Another trade-off many free guides skip is maintenance time. A tightly packed bed can produce well if you stay on top of pruning, tying, and picking. If you miss a week in hot weather, that same bed can turn into a damp tangle. Cucumbers mildew faster, lettuce gets buried, and beans hide where they are easy to miss. A little empty space is often working space.
A short video can help you visualize bed and path choices before you build.
Paths are part of the harvest
Paths are working ground. They decide whether daily jobs stay easy enough to do on time.
Mulch is my usual choice for a free or near-free setup because it is forgiving, simple to refresh, and easy on the knees. Pavers stay cleaner in wet weather, but they cost more and seal off ground that could otherwise absorb water. Bare soil seems cheap at first, then turns into mud, weeds, and compacted ruts.
If space is tight, make one path wide enough for the jobs that happen every week, then keep secondary routes simple. That single decision often separates a garden you visit from a garden you avoid.
The Gardeners Chess Strategic Plant Placement
A good layout isn't finished when the beds are drawn. The essential strategy starts when plants begin competing for light, air, root room, and your attention.
Think in layers not single crops
Most beginners place vegetables one packet at a time. That creates a bed full of isolated decisions. Better gardens are arranged in relationships.
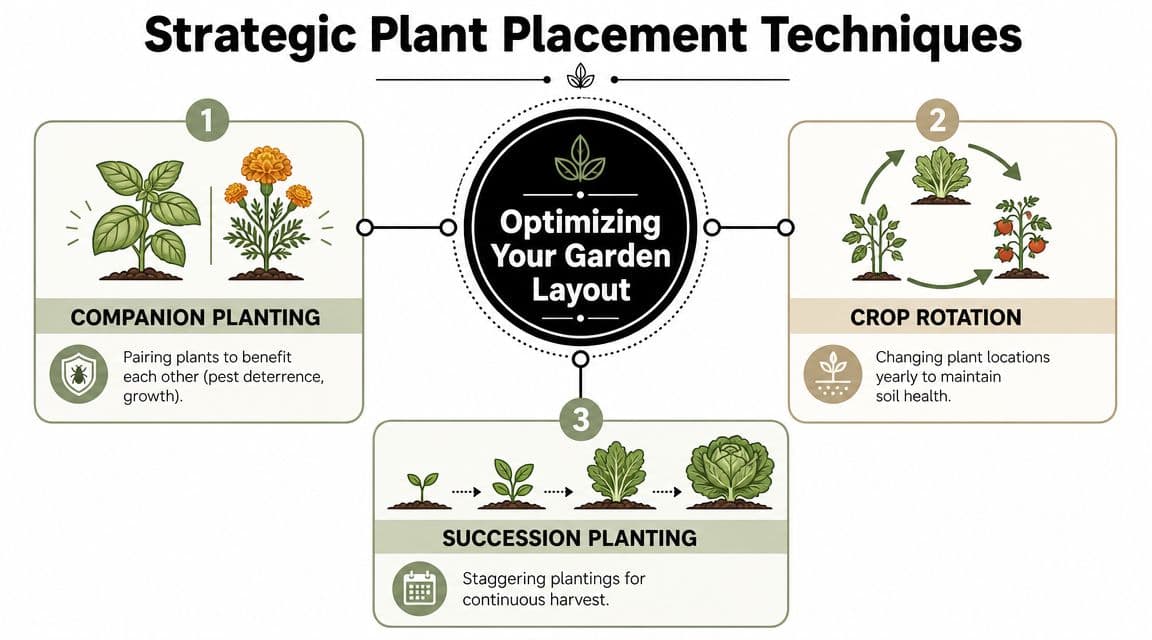
Companion planting is useful when it solves a real problem. Tall crops can shelter lower ones. Herbs can sit near vegetables you harvest often. Flowers can be tucked into edges where they don't block access. Classic combinations still hold up because they're spatially sensible, not just traditional.
A few reliable patterns:
- Tall at the back or north side: Keeps trellised or towering plants from shading lower crops.
- Fast harvesters near the edge: Lettuce, herbs, and other quick-pick plants belong where your hands reach them easily.
- Sprawlers where they can spill: Squash and similar growers need a place to roam without swallowing the path.
- Support-hungry plants grouped together: One trellis zone is simpler than scattered stakes all over the bed.
If squash is in your plan, this 2026 garden guide for squash is useful for thinking through pairings and nearby plant choices.
Don't ask only “What grows together?” Ask “What can I reach, tie, prune, and harvest without disturbing everything around it?”
Use succession before you expand square footage
Succession planting is one of the cheapest ways to make a small garden act bigger. Instead of increasing bed count, reuse the same space in sequence.
The logic is simple. Quick crops leave openings. Those openings shouldn't sit empty if another plant can follow. A spring patch can become a summer patch, and later a fall patch, as long as you remember that the garden is a calendar as much as a map.
This works best when you sketch planting windows directly onto your bed plan. Mark one crop lightly in pencil, then note what follows it. That small habit prevents the common mistake of sowing everything at once and harvesting everything at once.
Here's a simple way to approach it:
- Start with permanent or season-long crops such as tomatoes or peppers.
- Fit shorter crops around them where space opens early.
- Reserve replacement spots so you know what goes in when the first round finishes.
Rotation keeps you honest
Crop rotation sounds complicated until you reduce it to one rule. Don't grow the same plant family in the same place year after year if you can avoid it. Rotation helps interrupt disease cycles and balances how the soil gets used over time.
This is one place where a notebook beats memory. Label each bed by plant family, not just by crop name. “Tomatoes” matters less next year than “nightshade family.” The same goes for beans, squash, brassicas, and others.
A tiny garden won't give you perfect rotation. That's fine. Move families as much as the space allows, and avoid repeating the exact same arrangement out of habit.
Paper first digital second
You don't need an app to make a strong plan. Start with paper because it forces clarity. Draw the site boundary, mark fixed obstacles, sketch bed outlines, then pencil in crops by height and harvest pattern.
After that, digital tools become helpful. They're especially useful for spacing, drag-and-drop rearranging, and keeping a cleaner record than a coffee-stained notebook. But the tool should serve the thinking, not replace it.
The best free planners usually mirror what experienced gardeners already do by hand. Measure the area, place permanent structures first, leave access room, then assign crops. If your paper plan is sloppy, the software version will be a neater kind of sloppy.
Bringing Your Plan to Life with Free Tools
A free garden plan usually succeeds or fails before you open any tool. If the measurements are sloppy, the bed spacing is optimistic, or the path looks wide enough only on paper, the finished garden will punish you all season. I have learned to start with the plain setup that catches mistakes fastest: pencil, grid paper, measuring tape, and a few minutes of honest walking back and forth through the space.
For paper planning, make your own grid if you do not have printable sheets. A ruler and notebook are enough. Give every square a real meaning, mark doors, fences, spigots, and shade sources, then sketch more than one version. The first draft usually reflects what you want to grow. The second starts to reflect how you will water, weed, harvest, and carry a bucket through the area.
Scenario one the balcony grower
A balcony plan is really a placement map. Every pot competes for light, floor space, and access to water.
Put the thirstiest containers where you can reach them without dragging a hose or sloshing a watering can through the whole setup. Keep the tallest crops where they will not throw afternoon shade onto shorter plants that need full sun. If a trellis sits against a railing or wall, accept the trade-off and reserve the dimmer spot below for herbs or greens that can tolerate less light.
Small spaces reward restraint. Three well-placed containers usually outperform six crowded ones.
Scenario two the narrow side yard
A side yard looks generous until you start using it. Then the main question appears. Can you walk it, turn in it, and carry tools through it once supports, hoses, and sprawling plants are in place?
Free digital planners earn their keep. They let you test bed width, path width, and support placement before you dig. As noted earlier, VegPlotter is one option people use for rough layout testing, but the value is not the software itself. The value is seeing, before planting day, that one trellis can turn a workable side yard into an awkward corridor.
A visual option can help if you want to judge fit before building. OutdoorBrite's garden ai design tool can turn uploaded outdoor photos into concept layouts, which is useful when you are deciding whether a bed belongs there at all, not just whether it fits by measurement.
Scenario three the backyard starter plot
A starter plot gets oversized in the planning stage more often than any other setup. The usual mistake is drawing for peak summer enthusiasm and then maintaining with average weeknight energy.
Keep the first version smaller than you think you need. A modest plot that gets watered, weeded, and harvested on time will produce more than a larger one that turns into a scramble by July. Digital tools help with neat spacing and cleaner records. Paper still does the harder job better. It lets you test ideas quickly, scratch things out, and compare one practical version against another without fuss.
Working method: Draw one map for sun and shade, another for beds and paths, and a third for crop placement. Separate drawings expose crowding, access problems, and bad assumptions much faster than one overloaded sketch.
The right free tool is the one you will use again after the first draft. If that is graph paper on the kitchen table, good. If it is a browser planner, also good. The useful framework stays the same. Start with the whole space, pressure-test access and maintenance, then place each crop where its size, season, and harvest habit make sense.
Three Sample Garden Layouts to Inspire You
Examples make layout decisions easier because they turn theory into something you can adapt. None of these are magic templates. They're starting points you can resize, simplify, or revise after a season of real use.
| Garden Size/Type | Bed Configuration | Sample Plantings (with succession) | Key Consideration |
|---|---|---|---|
| Small balcony container garden | Group containers by height along the brightest edge, with one vertical support zone and clear standing space for watering | Herbs and leafy greens in easy-reach pots, a climbing crop on support, then replant harvested containers with another round of quick greens | Watch shade cast by supports and taller containers |
| 4x8-foot raised bed | One accessible bed with tall crops on one side, lower and quick crops near the front edge, open center reach from both long sides | Season-long fruiting crops paired with herbs, plus a quick early crop replaced later by another short-season planting | Don't crowd the bed just because the frame looks roomy |
| 10x10-foot in-ground plot | A few compact beds with one main path and room for tools or a wheelbarrow, rather than filling the whole square with planting space | One bed for long-season crops, one for quick harvests that can be replanted, one for sprawling crops that need elbow room | Keep the workflow simple so maintenance stays realistic |
The best sample plan is the one that matches your habits. If you love tinkering, a denser mixed bed can work. If you want low stress, fewer crops with better spacing usually wins.
If you want help visualizing a layout from an actual yard photo before you mark anything out, this homeowner's guide to garden design is a useful next step.
If you want to go beyond sketches and test layout ideas on a real photo of your yard, OutdoorBrite Money gives you a practical way to visualize beds, paths, and planting zones before you build.
See your yard reimagined
Start creating