
Sloped Yard Landscaping: Your Hillside Transformation
Transform your tricky hillside with our guide to sloped yard landscaping. Control erosion, build terraces, choose plants, & visualize with AI.
You're probably looking at a yard that feels harder to use every season. The mower slips. Mulch ends up at the bottom of the hill after every storm. Water cuts little channels through the soil, and the whole space starts to feel like a problem you're always chasing instead of a yard you enjoy.
That frustration is real, but it's also where good sloped yard landscaping starts. A slope isn't just an obstacle. It can become the reason your property has better views, more interesting planting layers, and more distinct outdoor rooms than a flat lot ever could. The key is getting the order right. On a hillside, drainage and stability come first. The visual design comes second.
Table of Contents
- Your Sloped Yard Is an Opportunity Not a Problem
- Assess Your Slope Soil and Water Flow
- Fundamental Strategies for Erosion Control
- Designing Your Sloped Yard Layouts and Structures
- Visualize and Implement Your Perfect Sloped Yard Design
- Budgeting Maintenance and Ensuring Long-Term Success
Your Sloped Yard Is an Opportunity Not a Problem
Most homeowners come to a slope project after fighting the same cycle for years. They reseed thin grass, spread fresh mulch, and hope this season will be different. Then a hard rain hits, the water picks its route, and the yard reminds them that gravity always wins when the site plan doesn't respect it.
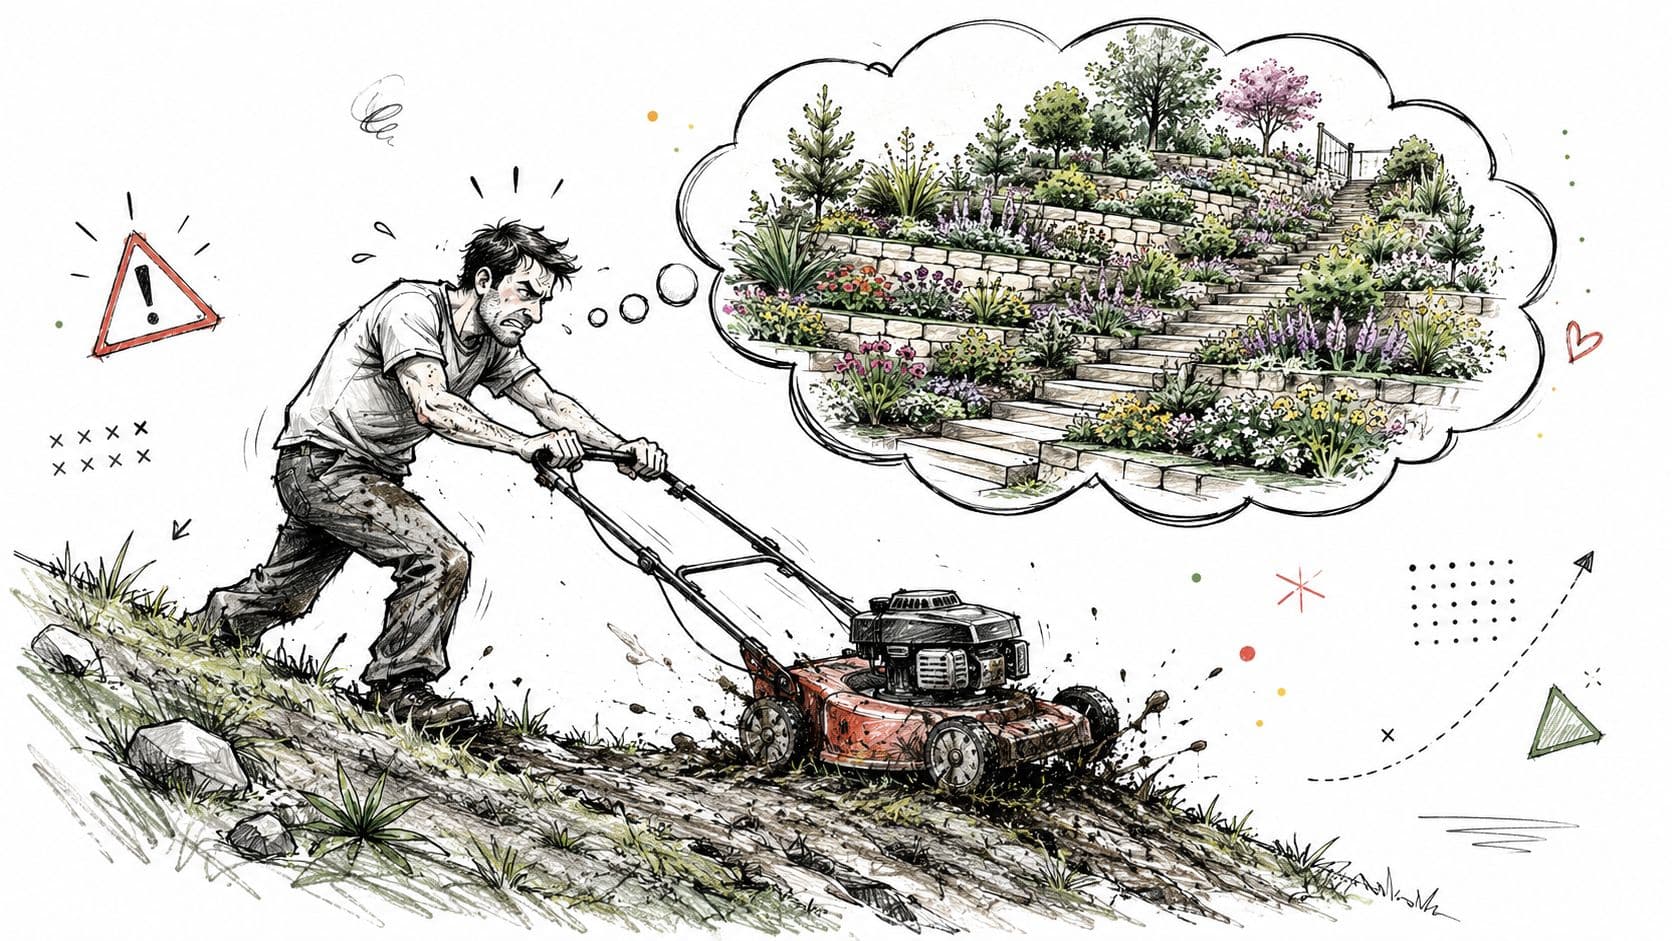
The turning point comes when you stop treating the hill like a flat lawn that happens to lean. A slope needs its own logic. One useful benchmark from The Garden Scene's sloped backyard guidance is that residential slopes between 10° and 20° are generally manageable with proper design, while slopes above about 25° usually need terraces, reinforced retaining walls, or engineered drainage to stay stable. The same source reports that well-managed slopes can reduce erosion by 60% to 80%.
That's why the smartest projects don't begin with plant shopping. They begin with measuring the site, tracking water, deciding where the hill should stay natural, and deciding where it needs structure. If you want a useful outside perspective on how sloping sites affect construction choices, this roundup of expert advice for sloping land construction is worth reading before you commit to excavation or walls.
What a slope gives you that a flat yard can't
A well-designed hillside can do things a flat backyard often can't:
- Create natural zones for dining, planting, and play without making the yard feel chopped up.
- Improve views by lifting seating areas or framing planting bands across the grade.
- Turn drainage into design with swales, stepped beds, stone channels, and planted terraces.
- Make the yard feel larger because elevation change adds depth.
Practical rule: On a slope, every attractive feature has to do a job. A wall retains. A path slows people safely. A planting bed holds soil. A drain redirects water.
If you want to test broad style directions before spending on materials, Outdoorbrite can help you visualize layout ideas from a photo of your yard. That's useful on sloped sites because scale mistakes are expensive, and even simple changes like wall height, path placement, or planting mass can feel very different once you see them on your own grade.
Assess Your Slope Soil and Water Flow
A successful slope project starts with observation, not demolition. Before you move soil, buy block, or mark out steps, spend time understanding how the hill behaves in dry weather and in rain. Most costly mistakes happen because someone installed a surface fix on top of an unresolved drainage pattern.
Measure the slope before you design for it
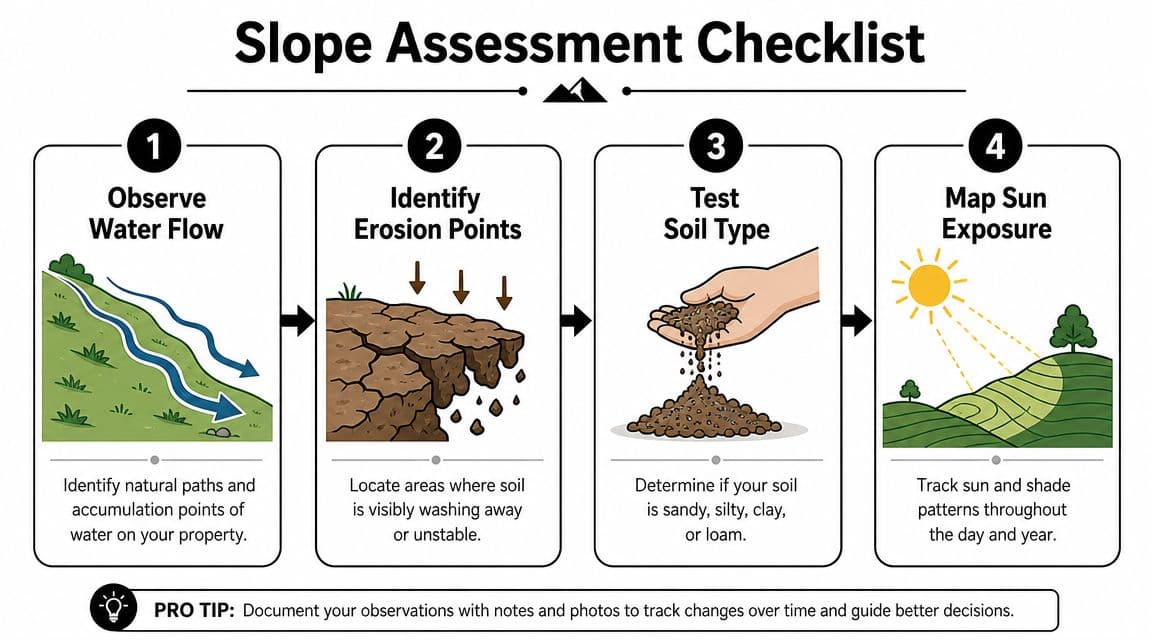
You don't need surveying equipment to get a practical read on grade. Use two stakes, a string line, and a level. Set one stake uphill and one downhill, level the string, then measure the vertical drop between the string and the lower stake. That basic field check won't replace professional grading plans, but it tells you whether you're dealing with a planting slope, a terrace slope, or a structural slope.
Independent guidance from New England Tree and Landscape notes that slopes under 25% can often be handled with vegetation and basic grading, 25% to 50% usually need terracing or retaining walls, and slopes above 50% require engineered structural solutions. That same guidance emphasizes intercepting water at the top of the hill with swales, berms, and French drains.
That threshold matters. Homeowners often think the big decision is stone versus plants. It isn't. The first decision is whether the site is still in DIY territory at all.
Watch water during and after rainfall
Walk the property during a steady rain if you can do it safely. If not, go out right after. Look for these signals:
- Sheet flow: Water moving broadly across the surface instead of sinking in.
- Rills: Small channels cut into bare soil or mulch.
- Base saturation: Wet ground collecting at the bottom of the slope.
- Roof runoff concentration: Downspouts sending a hard stream directly downhill.
Map those paths on a sketch or phone photo. Water almost never behaves the way a homeowner assumes it does until they see it in motion.
Don't judge a slope by dry weather. Judge it by where the water goes on the worst day you're likely to get.
Check the soil and surface stability
Soil affects both planting success and structural risk. Sandy soil drains faster but can shift. Clay holds water longer and can stay slick and heavy. Loam is usually the easiest to work with, but even good loam can fail on a bad slope if runoff keeps scouring it.
A quick homeowner assessment helps you identify whether you need stronger drainage, tougher plant selection, or professional input on stabilization. If you're planning planting zones after your site audit, this guide on how to prepare soil for landscape projects is a useful next step.
Know when to stop and call in help
Use this simple rule set:
| Slope condition | Likely approach |
|---|---|
| Mild grade with stable soil | Planting, grading, and drainage corrections |
| Moderate grade with runoff pressure | Terracing, low walls, stronger drainage planning |
| Steep or visibly unstable slope | Professional engineering and structural design |
If you see leaning soil, exposed roots, cracking ground, or water pushing toward the house, don't treat the project like decorative landscaping. At that point, the hill is asking for structural judgment.
Fundamental Strategies for Erosion Control
Erosion is the first battle in sloped yard landscaping because every later investment depends on winning it. If the soil keeps moving, your mulch won't stay put, your plants won't establish evenly, and your path edges will slowly unravel. Good-looking slopes are usually stable slopes first.
Soft stabilization with roots and coverage
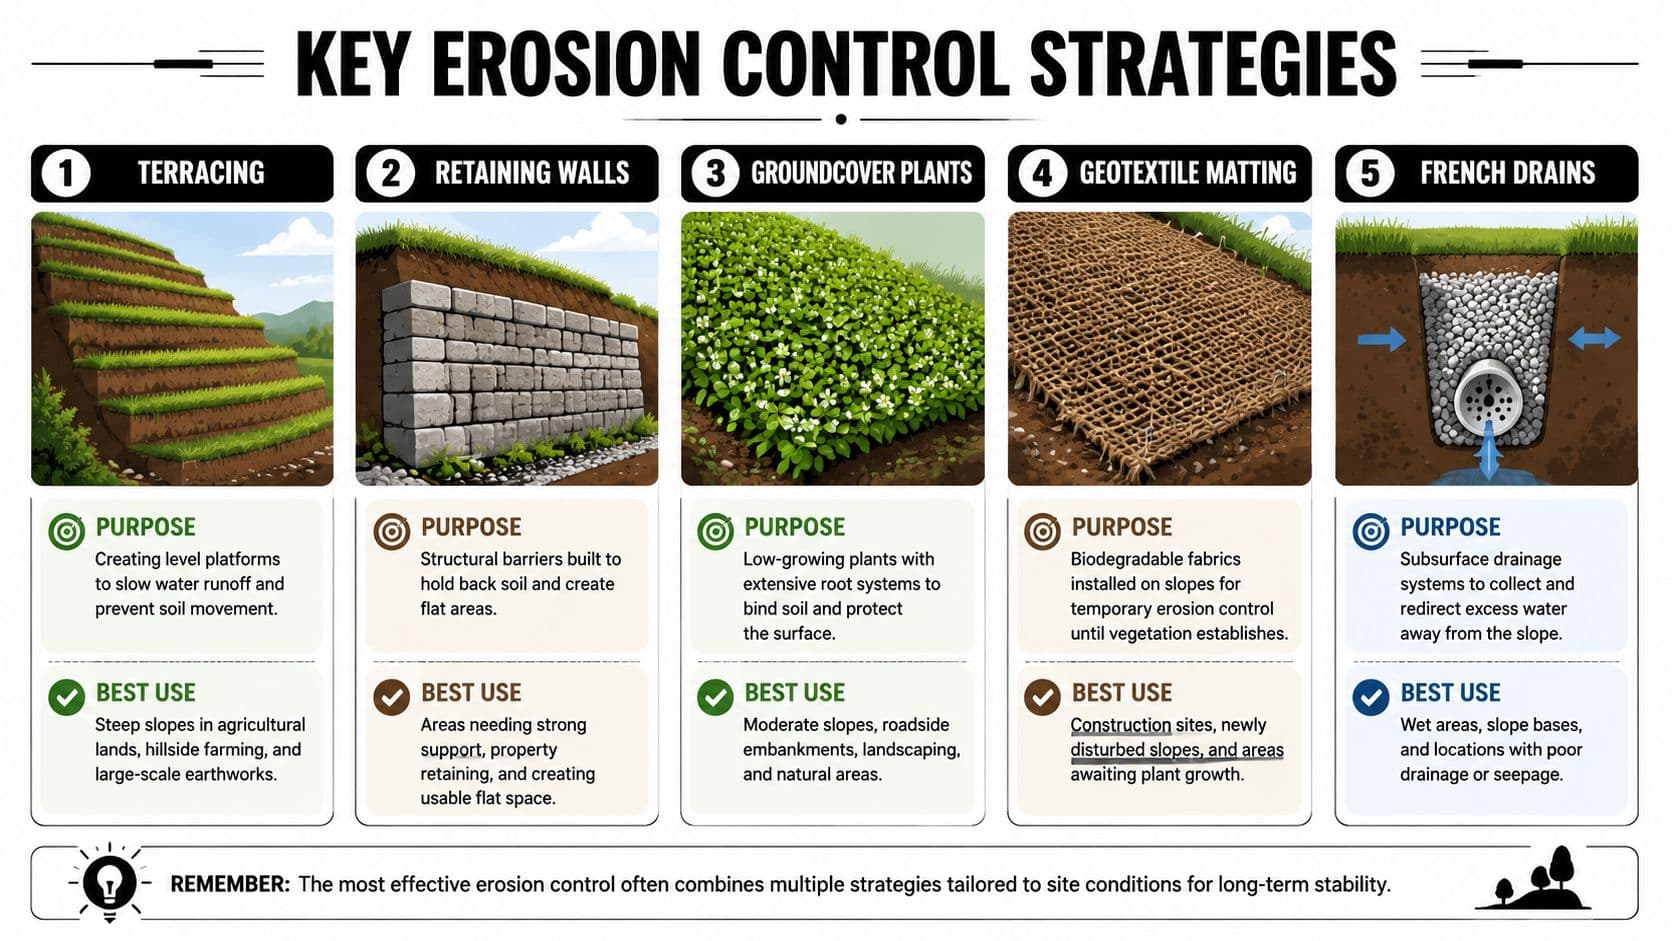
The strongest low-infrastructure approach is dense planting combined with irrigation that doesn't wash the slope. Timberline Landscaping's guidance on sloped yards recommends deep-rooted shrubs and trees, fibrous-root groundcovers, and drip irrigation, noting that surface watering can move soil before roots anchor it.
That advice lines up with what works in the field. Bare pockets are where failure starts. Isolated specimen plants may look tidy on installation day, but they often leave too much exposed soil between root zones. On a hill, that gap becomes a runoff lane.
A practical soft-stabilization palette usually includes:
- Ground-hugging plants that spread and knit the surface together.
- Shrubs with stronger root systems placed where the slope needs anchoring.
- Mulch used sparingly and strategically, not piled thick enough to slide.
- Drip irrigation, so water goes into the root zone instead of racing downslope.
Hard stabilization when plants alone won't hold
Plants need time. Some slopes don't have that kind of patience. Freshly shaped banks, recently disturbed soil, and higher-energy runoff areas often need temporary or permanent reinforcement.
Common hard-control tools include:
- Erosion control blankets for newly seeded or planted slopes.
- Geotextile matting where you need temporary surface hold while roots establish.
- Stone edging or structural toe support where the bottom of the slope keeps sloughing.
- French drains to reduce subsurface moisture pressure.
These products don't replace planting. They buy time for planting to work.
A slope usually fails in its establishment phase, not after it's fully rooted. Protect the soil early and the rest of the design has a chance.
Choosing between soft and hard approaches
A lot of yards need both. Here's a simple way to look at it:
| Condition | Better first move |
|---|---|
| Mild erosion with stable soil | Dense planting and drip irrigation |
| Freshly cut or reshaped slope | Blanket or matting plus planting |
| Water concentration from above | Drainage interception before more planting |
| Repeated washout at the base | Edge support or structural correction |
If roof water or uphill runoff is feeding the problem, don't waste money on replacement plants until you fix the source. For homeowners dealing with recurring stormwater problems, this article on rainwater management for Massachusetts homeowners gives a helpful overview of why intercepting and redirecting water matters before cosmetic improvements.
What usually doesn't work
Three failures show up again and again:
- Turf on a steep face that's hard to mow and rarely dense enough to resist erosion well.
- Ornamental planting with too much spacing, which looks designed but behaves like bare ground.
- Top-dressing the problem with fresh mulch every season while water still takes the same path downhill.
The best erosion control plan keeps the surface covered, slows runoff, and localizes irrigation while the slope is young. If you don't do those three things, the hill keeps redesigning your work for you.
Designing Your Sloped Yard Layouts and Structures
Once the slope is stable, layout decisions start to matter more than plant labels. Structure determines how the yard feels, how people move through it, and whether the space becomes usable or stays decorative. The biggest mistake here is trying to force one solution across the entire hill. Most good sloped yard landscaping uses a combination of structural benches, circulation routes, and softer planted transitions.
Terraces create usable outdoor rooms
Terracing changes the entire character of a hill because it shortens the effective slope. ShrubHub's sloped-yard retrofit guidance recommends grading the site into discrete functional benches before any planting, since terracing reduces runoff velocity. The same guidance recommends pairing terraces with French drains, swales, and catch basins.
That sequence matters. A terrace isn't just a flat spot cut into a hill. It's a piece of infrastructure with its own drainage behavior and load. If one bench sends too much water onto the next, the whole chain starts to fail.
A terrace works well when you want:
- A dining or seating area that feels level
- Raised planting zones that are easier to maintain
- Safer transitions between upper and lower yard sections
- A clearer visual hierarchy from house to garden
Retaining walls are functional first, decorative second
Homeowners often choose a wall style before deciding whether they need a wall at all. That reverses the process. The first question is how much soil has to be held back and what drainage sits behind it. The second is material.
Here's a practical comparison:
| Structure | Best fit | Watch-outs |
|---|---|---|
| Low garden wall | Mild grade changes and bed definition | Can look structural without actually solving drainage |
| Segmental retaining wall | Moderate grade change and clean geometry | Needs proper base and water relief |
| Natural stone wall | Organic style and visual weight | Layout and stability depend heavily on installation skill |
| Timber wall | Informal gardens and short-term budget control | Durability and moisture exposure need careful thought |
A wall should feel like part of the landform, not a hard stop dropped into the yard. On steep properties, a series of smaller interventions is often easier to maintain and better looking than one oversized retaining gesture.
Softer layouts that work with the hill
Not every slope needs to be tamed into platforms. Some of the most convincing outdoor spaces embrace the grade and make it navigable rather than flat.
That approach can include:
- Switchback paths that ease movement and stretch the experience of the yard
- Rock gardens that stabilize and visually anchor open banks
- Layered planting bands that read clearly from below
- Small landings instead of one large patio cut
A hillside feels calm when the layout follows the contour. It feels forced when every element fights the grade.
If you're in a wet or wooded climate, local style guidance matters because materials age differently and planting behavior shifts with rainfall and shade. These Seattle-Tacoma yard landscaping tips are a useful regional reference for naturalistic design choices on sloped properties.
Match structure to how you'll use the yard
A family that wants level play space needs a different solution from a homeowner who wants a low-maintenance planted hillside. A terraced yard with walls, steps, and defined zones asks for more build discipline up front. A softer hillside design asks for stronger plant planning and patience during establishment.
The right choice usually becomes obvious when you ask one blunt question: Do you want to occupy the slope, or mostly stabilize and view it? That answer determines whether you're building rooms, routes, or a living hillside backdrop.
Visualize and Implement Your Perfect Sloped Yard Design
At this stage, planning shifts into decisions you can build. On a slope, implementation works best when you move from big moves to fine detail. First place the structural elements. Then lock in access. Then fill the spaces with plants that match moisture, sun, and root-holding needs.
Start with the layout you can walk safely
Before you think about color or bloom time, decide how people will move through the yard. Steps and paths do more than connect areas. They control traffic, reduce slipping, and keep people from trampling newly stabilized banks.
Use these guidelines in practice:
- Keep routes obvious. If the intended path isn't clear, people create their own shortcut.
- Add landings where the grade changes direction. That makes movement more comfortable and gives the eye a place to rest.
- Choose durable edging. Path edges on slopes unravel fast if they aren't well defined.
- Respect drainage crossings. Never place steps where water wants to run without addressing the runoff first.
Build plant palettes by zone, not by wishlist
A sloped yard usually contains multiple microclimates. Upper banks dry out faster. Lower areas often stay cooler and hold more moisture. Sunny exposed faces need tougher plant choices than shaded toe zones.
A practical planting method is to divide the yard into bands:
| Yard zone | Good design direction |
|---|---|
| Upper exposed slope | Drought-tolerant, erosion-resistant planting masses |
| Mid-slope transition | Mixed shrubs and groundcovers for coverage and structure |
| Lower shaded or moist area | Shade-tolerant plants and softer textures |
| Near steps and patios | Cleaner forms with less flopping growth |
This is also where repetition helps. Large drifts of the same low-growing plant read better on a hill than scattered one-off specimens. From below, a slope needs visual cohesion.
Use AI to test the risky decisions before you buy materials
On a flat yard, a design mistake can be annoying. On a slope, it can be expensive. Wall material, terrace width, stair alignment, and plant massing all affect function and cost. That's why visualization has become a practical step, not a novelty.
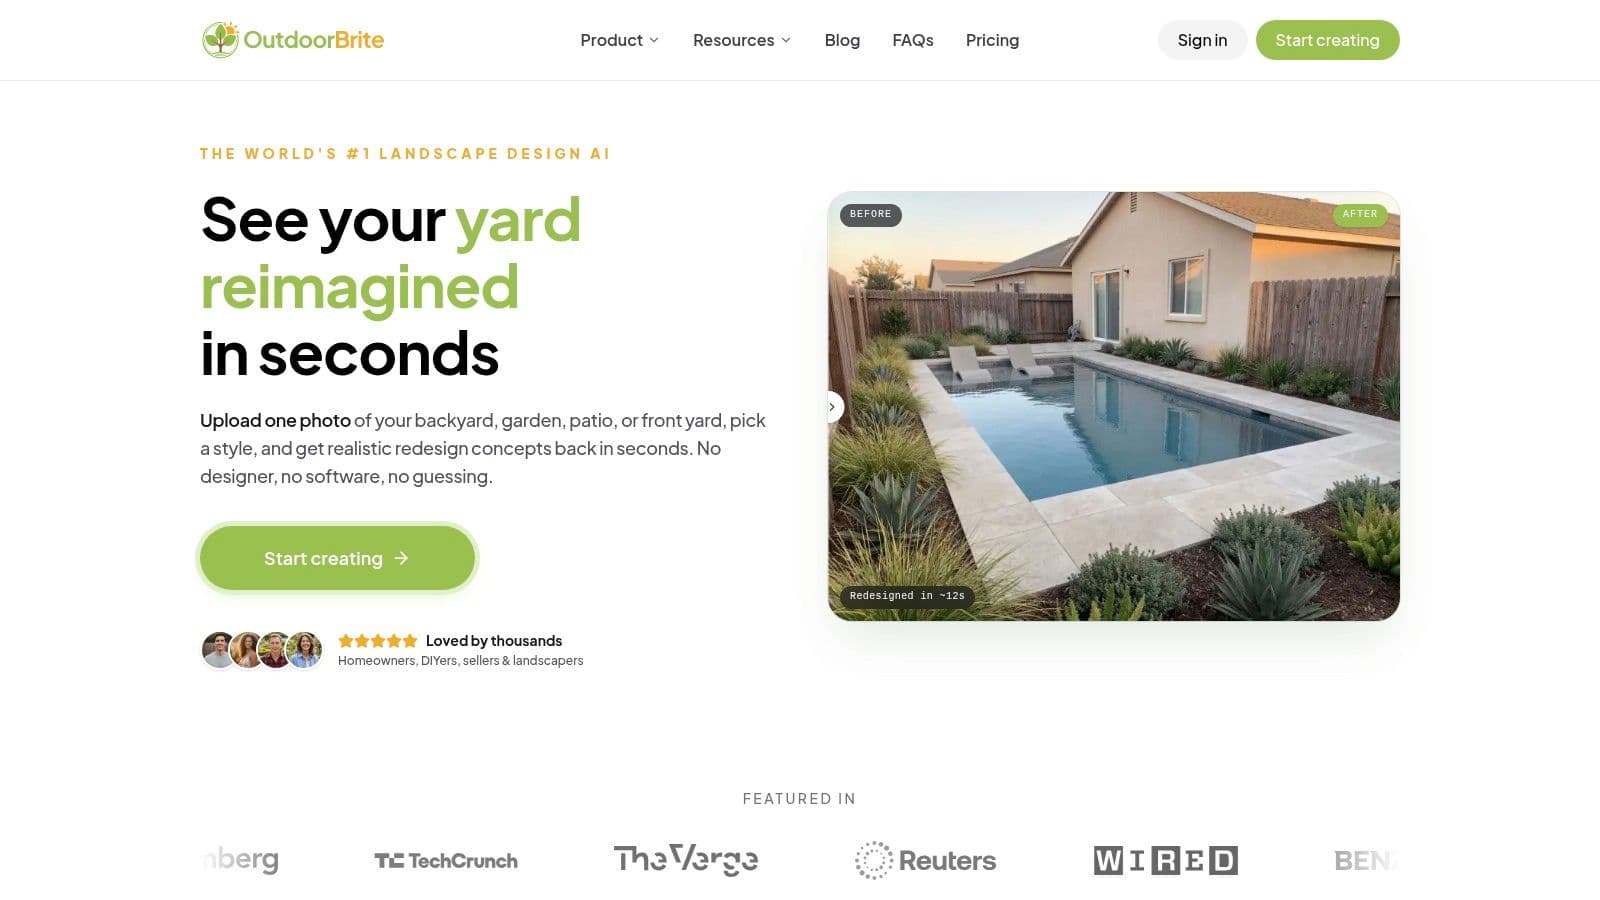
A tool like ai landscape design software lets you upload a yard photo and test different retaining wall finishes, path placements, and planting arrangements before installation. That kind of preview is useful when you're deciding between a softer planted hillside and a more defined terraced look, or when you want to compare how different materials change the feel of the grade.
One modern option in that category is OutdoorBrite Money. It turns yard photos into photorealistic concept variations, which helps homeowners and contractors pressure-test ideas before ordering block, stone, or large plant quantities.
Here's a quick demo of the design workflow in action:
A clean implementation order saves rework
The most reliable install sequence looks like this:
- Mark structure and drainage first. Confirm terraces, wall lines, drains, and swales.
- Build access routes next. Install major steps and paths before planting crowds the work area.
- Place anchor plants and stabilizers. Put the structural planting in before ornamental fillers.
- Install irrigation carefully. Drip systems are easier to tune before beds fully fill in.
- Finish with surface details. Mulch, stone topping, and accent plants come last.
Good slope installs don't happen by improvisation. They happen because the layout, drainage, and access were resolved before the decorative layer went in.
If you follow that order, the finished yard usually looks more intentional and costs less to correct later.
Budgeting Maintenance and Ensuring Long-Term Success
The build cost gets the attention, but the maintenance pattern decides whether a slope remains attractive. That's where many homeowners make the wrong trade. They choose the least expensive installation path, then spend years dealing with difficult watering, awkward access, weed pressure, and repeated repairs.
Bacqyard's discussion of sloped yard tradeoffs puts it plainly: the cheapest-looking solution upfront is often not the cheapest over 5 to 10 years, and a heavily planted slope that's poorly irrigated or hard to access can become more expensive than a well-engineered terrace or retained flat area.
Think in phases, not in one giant push
A phased project often leads to better decisions because it gives you time to see how the slope behaves after each improvement. That can mean handling the yard in this order:
- Phase one: Drainage interception and emergency stabilization
- Phase two: Walls, terraces, paths, or steps
- Phase three: Primary planting and irrigation
- Phase four: Decorative upgrades, lighting, and finishing touches
This approach spreads labor and spending, but it also lowers the chance that you'll install a surface finish over a problem you haven't solved yet.
Match the design to the maintenance you'll actually do
Different slope solutions create different long-term chores.
| Solution | Ongoing reality |
|---|---|
| Dense planted hillside | Less mowing, but more establishment care and selective weeding |
| Terraced garden beds | Easier access, but walls and drainage need periodic inspection |
| Sloped lawn | Familiar look, but hard mowing and uneven irrigation |
| No-mow slope design | Lower routine cutting, but still needs seasonal cleanup and monitoring |
The right answer depends less on trend and more on lifestyle. If you won't maintain a steep planted bank carefully during establishment, don't install one just because it looks natural. If you want usable space and easier access, structure may save you frustration later even if it costs more up front.
Protect the investment after installation
The first maintenance season tells you whether the design is holding. Watch for:
- Mulch movement
- Exposed soil
- Standing water
- Plant stress in upper banks
- Drain outlets clogging with sediment
Those signs show up early. When you catch them early, corrections stay manageable.
A sloped yard doesn't need perfection. It needs a design that respects water, supports the soil, and fits how you live. That's what keeps the space from turning back into a weekend problem.
If you're weighing trade-offs between drainage work, terracing, planting, and long-term upkeep, OutdoorBrite Money can help you compare concepts before you commit. Seeing a few realistic options on your actual yard photo makes budgeting easier, especially when you're deciding which phase to build first and which ideas are worth leaving on paper.
See your yard reimagined
Start creating




