8 Xeriscape Yard Ideas for a Low-Water Landscape
Explore 8 xeriscape yard ideas with drought-tolerant plants, gravel, pavers, rain gardens, containers, and practical low-water maintenance tips.
A water-wise yard doesn't have to look sparse, gravel-covered, or borrowed from a desert postcard. The popular advice to remove the lawn and spread stone misses the true work of xeriscaping. A successful design matches plants to the climate, groups them by water needs, improves soil and drainage, uses irrigation carefully, and gives hardscape a clear purpose.
That process can produce a flowering native border, a structured succulent bed, a rain garden, a Mediterranean courtyard, or a grass-filled prairie effect. The eight xeriscape yard ideas below are organized as distinct design systems, so you can choose according to your site constraints, preferred look, and tolerance for maintenance. The right answer may also be a combination, such as native plants beside a gravel path or containers positioned near a rain garden.
Before buying boulders, pavers, or plants, use OutdoorBrite to preview a xeriscape concept on a photo of your own yard. Seeing the proposed layout in context can help you test the balance between planting, paths, and open space before installation begins.
Table of Contents
- 1. Desert Landscape with Native Drought-Tolerant Plants
- 2. Hardscape-Dominant Design with Gravel and Pavers
- 3. Succulent and Cactus Garden Beds
- 4. Rock Garden and Alpine Planting Design
- 5. Ornamental Grass-Based Planting
- 6. Mediterranean-Style Xeriscape Design
- 7. Rain Garden and Bioswale Integration
- 8. Container and Raised Bed Xeriscape
- 8-Option Comparison: Xeriscape Yard Ideas
- Turn a Water-Wise Concept Into a Site Plan
1. Desert Landscape with Native Drought-Tolerant Plants
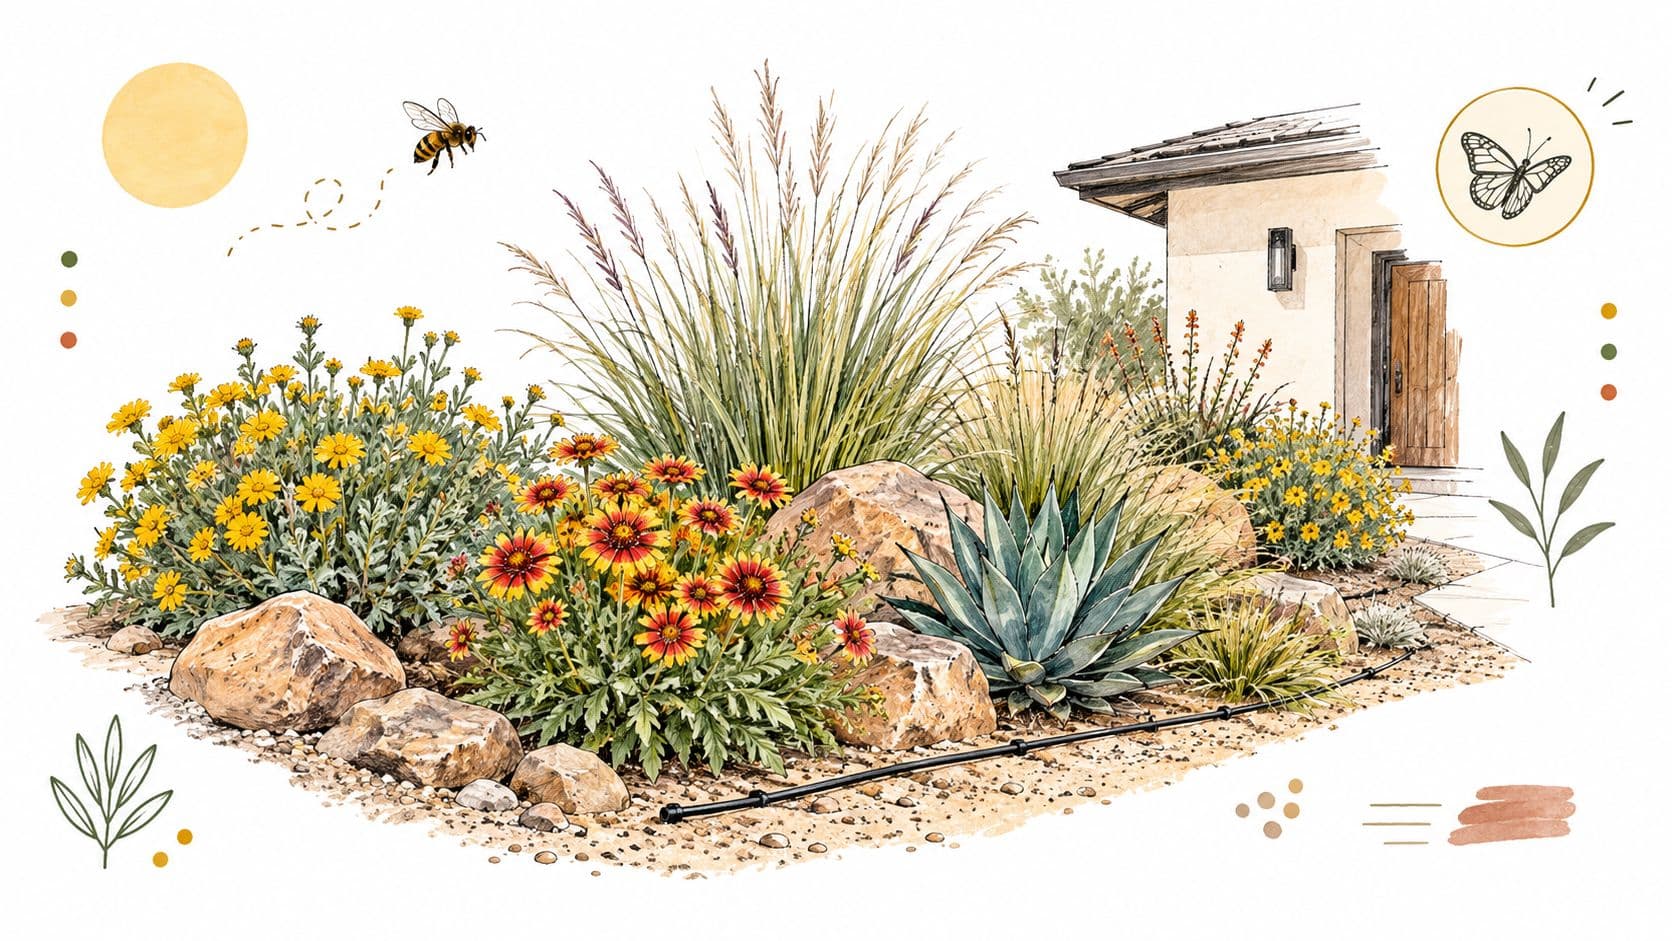
A desert-inspired planting works best when it reflects the conditions of the site rather than copying a generic cactus garden. In Arizona, Nevada, and Southern California, plants such as agave, desert rose, palo verde, desert marigold, blanket flower, and locally adapted grasses can create a strong composition with contrasting silhouettes and seasonal color. In cooler or less arid regions, choose native plants suited to the local hardiness zone instead of forcing desert species into unsuitable conditions.
Native plant communities are valuable because they're selected for the relationship between local rainfall, soil, heat, and exposure. Demonstration gardens in Santa Fe and Albuquerque show how water-wise plantings can remain layered and visually generous, rather than bare. The most convincing designs use a canopy or focal tree, shrubs at middle height, flowering perennials, and low ground-level texture.
Build the planting around water zones
Hydrozoning is the practical backbone of this approach. Place plants with similar water requirements together, then give each zone the appropriate irrigation rather than watering the entire yard according to the thirstiest plant.
- Start with local research: Check native plant lists, soil conditions, and local water restrictions before choosing a palette.
- Use drip irrigation: Deliver water near the root zone instead of spraying paths, walls, and exposed soil. For broader irrigation guidance, see this practical guide to smart irrigation for dry climates.
- Mulch the planting beds: A 2 to 4 inch mulch layer can help retain moisture and moderate soil temperature, as recommended in the project brief.
- Water for establishment: New plants need closer attention than mature plants. Once roots settle in, deeper and less frequent watering generally supports better root development than shallow, habitual watering.
The trade-off is that native does not mean maintenance-free. Newly installed plants need watering, weeds can compete before the planting fills out, and some native species spread more aggressively than expected. Preview combinations with OutdoorBrite before purchasing, especially if the front yard needs to look deliberate from the street.
2. Hardscape-Dominant Design with Gravel and Pavers
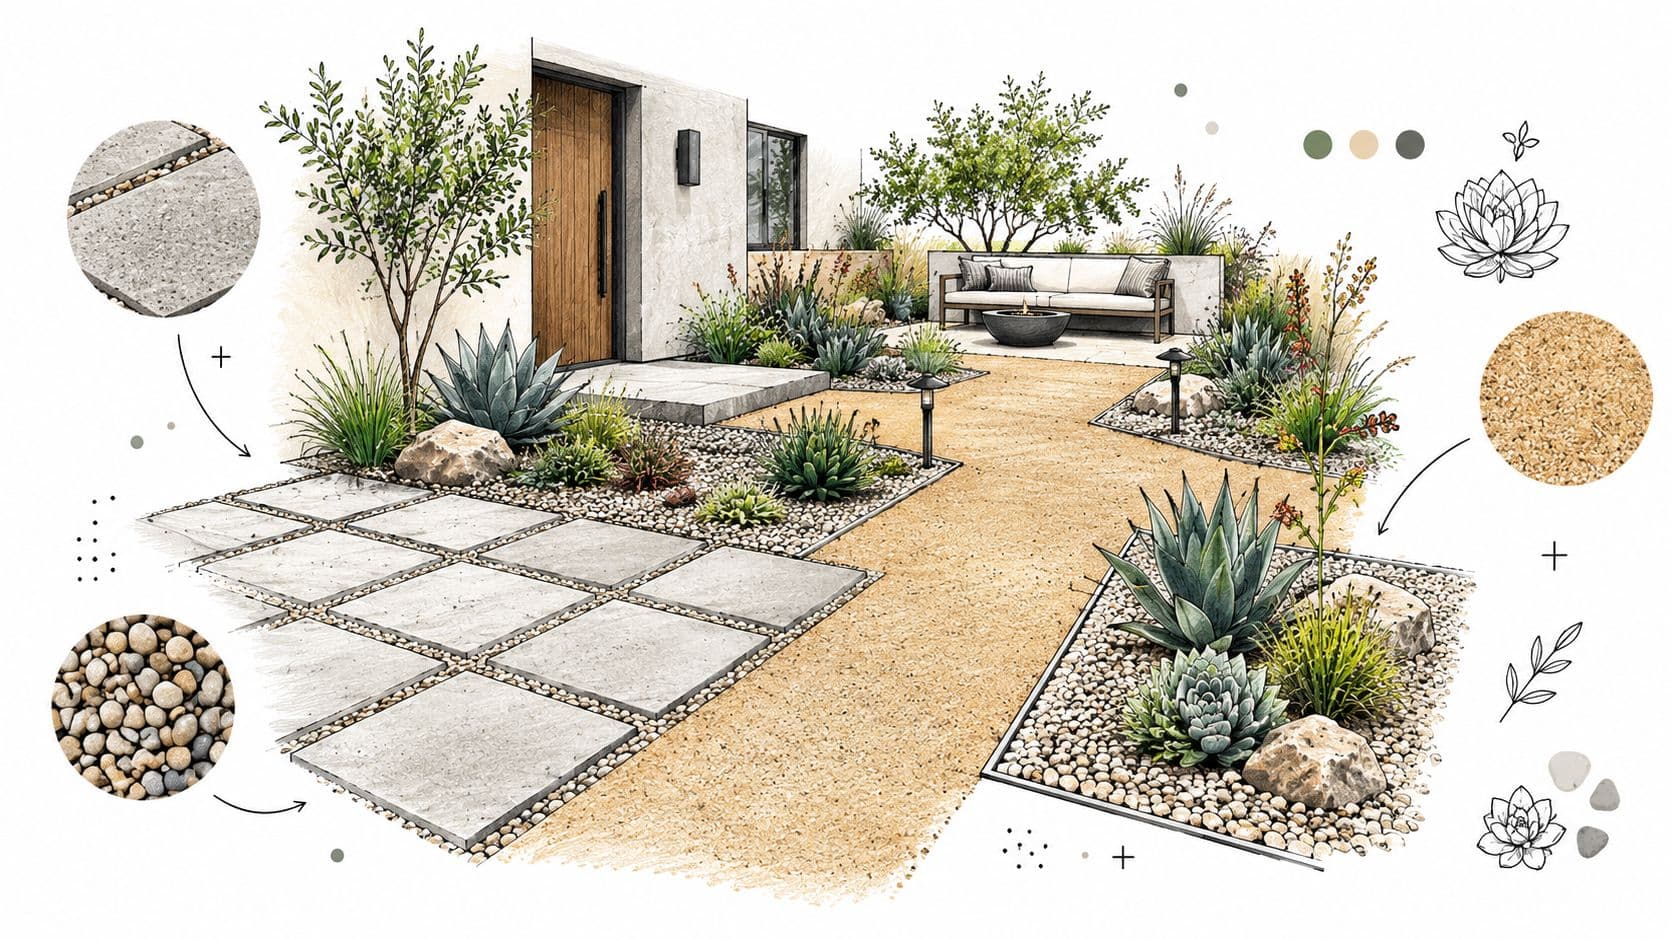
Start with the site's movement and drainage needs, then choose materials. Gravel and pavers suit homeowners who want defined circulation, outdoor seating, and less turf to maintain. Decomposed granite, pea gravel, permeable pavers, and decorative stone can form a patio, walkway, entry court, or seating zone. Their success depends on how well the surface supports those uses.
A modern California courtyard might pair large permeable pavers with low succulents. A Mediterranean setting could use warm-toned stone and decomposed granite around a dining area. A Japanese-inspired composition may rely on positioned rocks, restrained planting, and raked gravel, while Colorado Front Range homes can combine gravel with shrubs and grasses suited to local exposure.
Make the surface work for the site
- Define functions first: Mark arrival, circulation, seating, and planting areas before ordering materials. This reduces awkward transitions and unnecessary excavation.
- Check drainage before installation: Permeable surfaces can help water enter the soil, but only when the base, slope, and surrounding drainage are configured correctly. Poor grading may send runoff toward the house, while a weak base can cause pavers to settle.
- Match stone to the house: Gravel color should support the exterior palette rather than compete with it.
- Use varied texture: Combine a primary surface with larger accent stones and planted openings. A completely mineral yard can feel harsh and visually flat.
- Plan for upkeep: Excavation and suitable underlayment help control weeds, but gravel still needs occasional raking and weed removal.
Practical rule: Gravel reduces irrigation across the covered area. It does not remove the need for drainage planning, stable edging, or routine maintenance.
Material choice also affects comfort. Dark stone absorbs heat in sunny yards, loose gravel can shift beneath furniture, and broad areas of bare paving may feel stark without canopy or planting structure. A compacted gravel path is easier to walk on than loose pea gravel, but it usually requires more preparation. Permeable pavers can improve water movement, though their base installation demands careful grading and compaction.
Test the relationship between pavers, gravel, and greenery with one of the Best landscape design apps before committing to a material order.
3. Succulent and Cactus Garden Beds
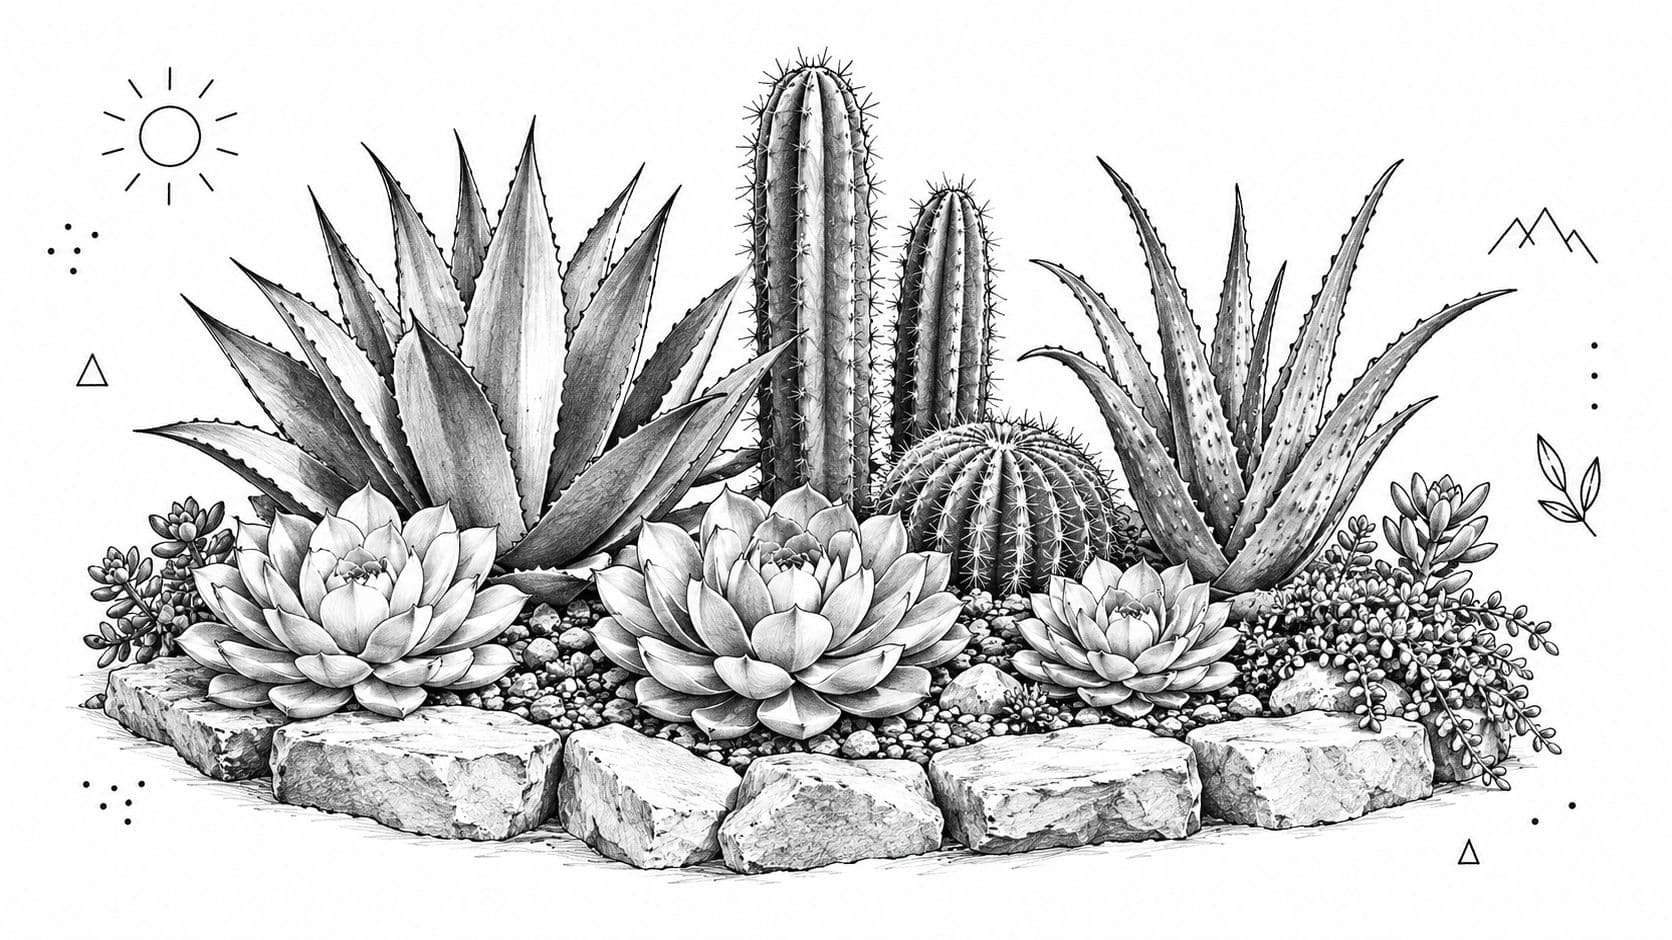
Succulent and cactus beds create a strong sculptural system within a xeriscape yard. Thick leaves, water-storing stems, spines, rosettes, and branching forms provide structure even without flowers. They suit hot, dry climates, sunny slopes, contemporary front yards, containers, and rooftops where the soil profile can be controlled.
The limiting factor is drainage. Cacti and succulents decline in wet, compacted soil, particularly during cool or rainy periods. Raised mounds, gritty soil, and a deliberate slope often matter more than installing a larger plant collection.
Start with the root zone, then choose the plants. Use a coarse, fast-draining growing medium and make sure water can exit the bed instead of collecting beneath the root balls. Project guidance recommends heavy amendment with coarse sand or perlite, including at least 50% drainage material for this specialized system. Treat that as a starting point, because native soil, rainfall, and plant selection determine the final mix.
A planting plan should account for differences within the group:
- Group by moisture tolerance: Some succulents accept more water than cacti. Separate them rather than placing every species on one irrigation circuit.
- Limit harsh exposure: In climates that regularly exceed 95°F, afternoon shade can protect sensitive plants, according to the project plan.
- Time installation well: Fall or spring planting gives roots time to establish before difficult weather.
- Keep crowns dry: Mulch and other moist organic material against a succulent can encourage rot.
Drainage is the design. Plant resilience depends on the soil and slope beneath each bed.
The trade-off is climate fit. A dramatic cactus bed may perform well in a hot, dry region but struggle where winter moisture, frost, or heavy summer rain dominates. Coastal Southern California gardens, Phoenix botanical collections, and contemporary residential beds can use this style with fewer adaptations. In other regions, hardy sedums, native dryland plants, or movable containers provide safer options. Containers also make it easier to shelter vulnerable specimens, although they dry out faster and need closer watering during hot weather.
OutdoorBrite can help compare rosette shapes, vertical forms, and exposed gravel on the actual site before you buy. Use the layout to test spacing and maintenance access, not just the final visual arrangement.
4. Rock Garden and Alpine Planting Design
A rock garden can suit far more than desert properties. Use it to model a mountain slope, scree field, or rocky hillside in Colorado, Utah, Wyoming, California, and other regions where plants benefit from sharply drained pockets. The system combines boulders, grade changes, stone chips, and species that tolerate lean soil and exposed conditions.
Start with the stone structure, then fit plants into it. Large boulders should look embedded, not dropped onto the surface. Smaller rocks connect the composition, while narrow soil pockets give alpine plants, sedums, thyme, and regional dry-site species a place to root.
Shape the grade before filling the pockets
A flat mound of rocks often looks artificial and can complicate mowing or edging. Build gentle changes in grade where the site allows, then place each plant according to its sun, wind, and moisture exposure.
- Source local stone: Local boulders usually match nearby geology and avoid the visual mismatch of imported material.
- Bury the visual base: Set larger stones into the slope so they appear stable and weathered.
- Create planting pockets: Fill gaps with gravel and stone chips, while retaining enough soil for roots.
- Choose for elevation: Match alpine plants to the property's hardiness and exposure, not only to a catalog photograph.
This design can turn a dry edge or difficult slope into a deliberate feature, but installation takes work. Moving boulders safely, shaping the grade, and controlling runoff may require equipment or professional assistance. Spring planting gives many species time to establish before winter, although the suitable window varies by region.
Drainage determines whether the planting succeeds. A pocket that holds water can defeat the purpose of the rockwork, while an exposed slope may dry roots faster than expected. Check the soil beneath each pocket and leave practical access for future weeding, stone adjustment, and plant replacement.
Scale matters at the entry point. A nursery boulder may overwhelm a small bed, while undersized rocks can disappear beside mature shrubs. Use OutdoorBrite to assess boulder placement, path alignment, and visible planting space before excavation begins.
5. Ornamental Grass-Based Planting
Ornamental grasses add movement, sound, and structure without forcing a desert look. Prairie-style yards in the Midwest and Great Plains can pair native grasses with flowering perennials. Coastal California gardens may combine regional grasses with shrubs and low ground covers. In contemporary designs, vertical feather reed grass can frame a path or patio with a clean, architectural rhythm.
Seasonal change is another advantage. Some grasses retain seed heads for winter structure, while others turn warm shades before their foliage is cut back. That behavior keeps a low-water planting visually active through the year, although dormant stems will not suit every homeowner.
Design around the plant's mature spread
Spacing grasses by nursery-container size is a common installation mistake. Many varieties expand substantially, and crowding eventually hides their form and increases division or removal work. Set taller species behind the main planting, use medium forms to connect layers, and reserve compact varieties for edging or repeated accents.
- Match grass to soil: Some varieties need lean, sharply drained ground, while others tolerate heavier soil or greater moisture. Confirm the site conditions before choosing the palette.
- Build repeated drifts: Repetition gives mixed textures and colors a clear visual order, but large drifts require enough bed width to mature without swallowing paths.
- Add companion plants: Drought-tolerant perennials and shrubs extend seasonal interest and prevent the planting from becoming a single-texture bed.
- Plan the cutback: Cool-season grasses are generally cut in early spring. Warm-season grasses are often cut in late fall after frost, following the project guidance.
A grass planting still needs editing. Remove weak, crowded, or invasive plants before the planting becomes difficult to manage.
The main trade-off appears during dormancy. Tawny stems can provide useful winter structure, yet homeowners expecting a consistently green yard may find the bed untidy. Some grasses also shed seed or spread outside their intended area. Choose non-invasive, locally suitable varieties, and install clear bed edges to contain growth.
OutdoorBrite can preview the planting at maturity and compare the structure left across seasons. That check helps front-yard planning, where grass height can affect windows, sightlines, and entry visibility.
6. Mediterranean-Style Xeriscape Design
A Mediterranean-style yard is a planting system built around sun, drainage, fragrance, and outdoor living. Lavender, rosemary, sage, thyme, catmint, olive trees, ornamental shrubs, and warm-toned paving can shape a courtyard, dining area, or front walk. The approach fits hot, dry summers and comparatively mild winters. In colder or wetter regions, use hardy regional equivalents rather than forcing tender plants to survive.
Start with the site, not the color palette. Mediterranean plants commonly decline when watered like lawn or installed in heavy, poorly drained soil. Improve drainage where needed, provide open air movement, and keep irrigation zones separate from plants that require more moisture. This setup may increase installation effort, but it reduces root problems and makes later watering easier to control.
Build the look around use and contrast
Place fragrant herbs beside paths and seating, where passing contact releases their scent. Pair silvery foliage with deep green shrubs, set terracotta against pale gravel, and use one architectural tree or narrow evergreen to frame a view. Warm materials support the style, though they can absorb heat and raise surface temperatures in exposed yards.
- Set a plant backbone: Lavender, rosemary, sage, thyme, and catmint establish the palette, provided the soil and winter conditions suit them.
- Use structure selectively: An olive tree can anchor a courtyard, while a narrow evergreen may fit a smaller space. Check mature size before planting.
- Choose practical surfaces: Terracotta, golden stone, and textured plaster reinforce the design, but gravel and paving still need stable edging and proper drainage.
- Prune for access: Shape shrubs to preserve paths, windows, and seating rather than treating pruning as purely cosmetic.
A fountain can strengthen the Mediterranean mood, yet it adds cleaning, equipment, and water requirements. Use one focused feature if those tasks fit the maintenance plan.
The main limitation is climate fit. Plants suited to mild winters may need protection or replacement elsewhere. Local substitutes usually lower winter losses and irrigation adjustments. OutdoorBrite can help compare hardscape warmth, planting density, and mature structure before installation.
7. Rain Garden and Bioswale Integration
A rain garden or bioswale can make stormwater part of the planting plan instead of treating runoff as waste. A shallow depression temporarily holds water from roofs, patios, or paving, slows its movement, and supports plants that tolerate periodic wetness. This system suits wet climates and yards where storms repeatedly concentrate water in one area.
Start by tracing the flow across the site. Watch where downspouts discharge, where puddles form, and how quickly the soil absorbs water. A poorly placed basin can keep soil wet beside a foundation, while a basin outside the runoff path may receive too little water to function.
Design the feature around its drainage job
Shape the installation from inlet to overflow. Give downspout water a stable route into the basin, spread the flow across the depression to prevent erosion, and select plants that withstand both saturated periods and dry intervals.
- Verify the grade and soil: A professional can assess slope, infiltration, and the safest location before excavation.
- Keep water away from foundations: The project guidance recommends positioning rain gardens 5 to 10 feet from home foundations.
- Set a drainage target: The basin should empty within 24 to 48 hours after heavy rain, according to the provided plan.
- Use plants suited to fluctuation: Native species that tolerate occasional saturation and later dry conditions are a better fit than plants selected for appearance alone.
- Plan for overflow: A rain barrel or cistern can store excess water for hand watering during dry weather.
A bioswale needs routine inspection, just like any other planted system. Remove accumulated sediment, check inlet and outlet points, replace mulch while plants establish, and control aggressive weeds before they dominate the basin. Local requirements may govern grading, runoff connections, or incentive eligibility, so confirm them before digging.
The feature can also serve as a visible garden element. Place its strongest planting or a clear change in texture where it can be seen from a window or path. OutdoorBrite can help coordinate the basin with nearby planting, paths, and seating, so the drainage work contributes to the yard's composition.
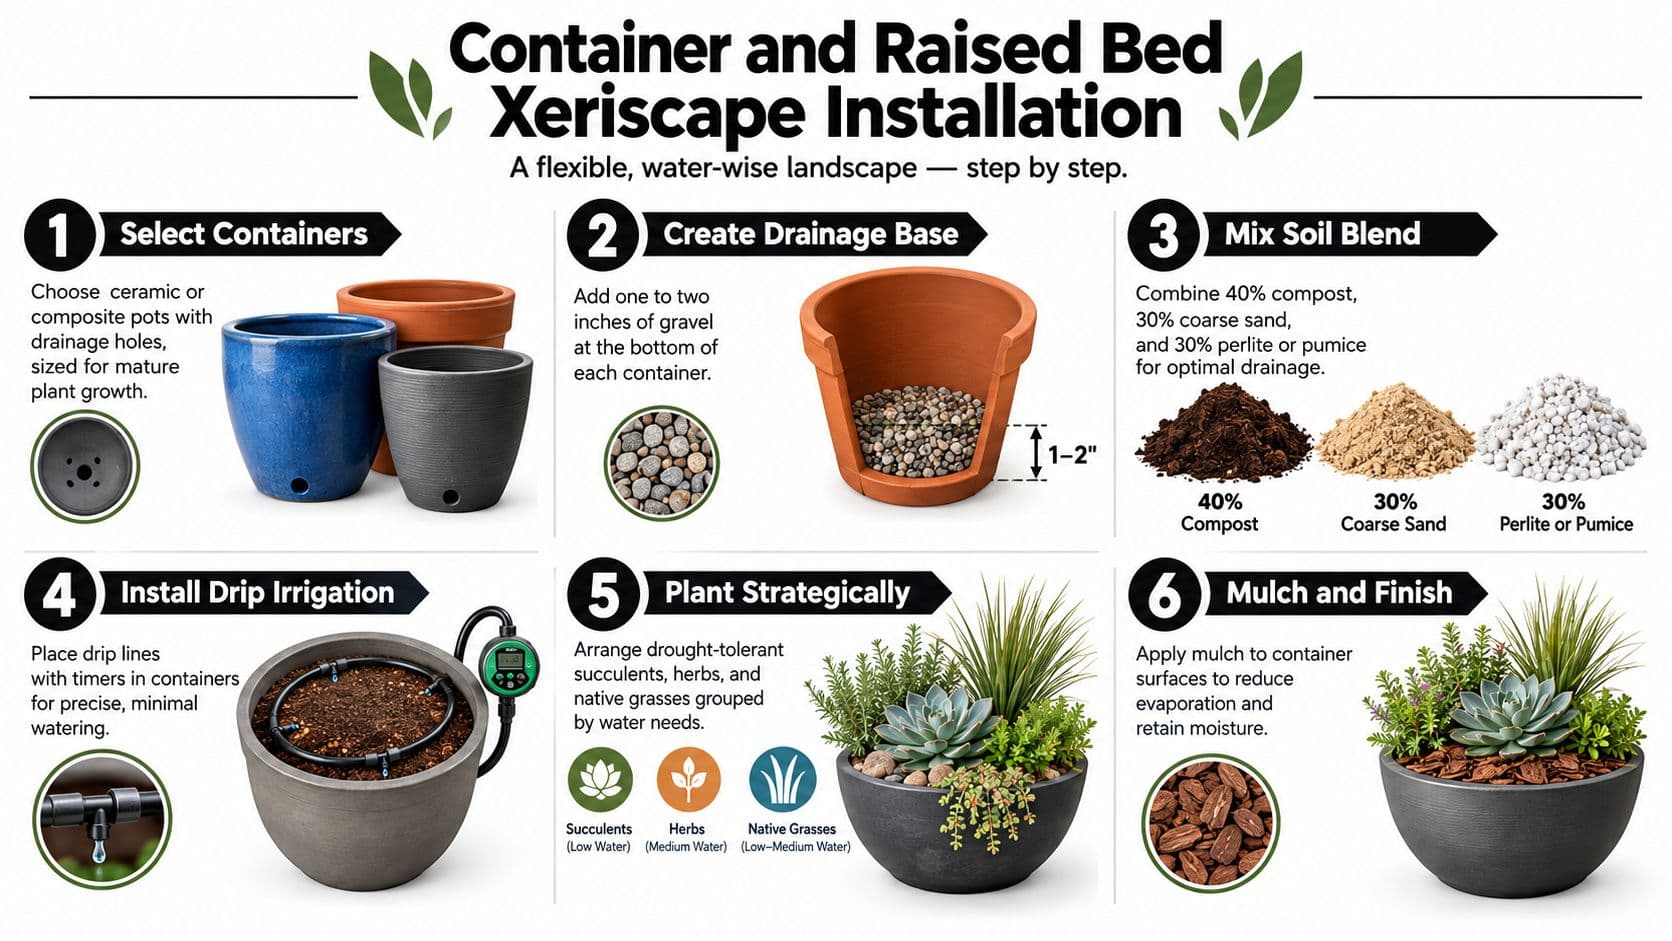
A visual walkthrough can clarify the installation sequence before materials arrive.
8. Container and Raised Bed Xeriscape
Containers and raised beds solve specific site problems: poor native soil, limited space, rental restrictions, rooftops, patios, and compact front yards. They also let you trial a planting style before committing to a larger in-ground bed. Because the growing medium, drainage, spacing, and irrigation are easier to control, they suit gardeners who need precision.
The trade-off is faster drying. Containers lose moisture more quickly than surrounding soil, while dark pots can become hot in exposed positions. A few vessels are easy to monitor. A larger collection creates separate watering needs, so group plants and irrigation points before buying more containers.
Set up for lower maintenance
Choose pots with drainage holes, and size them for the plant at maturity. The project plan recommends 1 to 2 inches of gravel at the base, followed by a mix of 40% compost, 30% coarse sand, and 30% perlite or pumice. Treat that blend as a starting point. Climate, plant type, and the material already available may call for adjustments.
- Group by water needs: Keep plants with similar requirements together to simplify irrigation.
- Install a timered drip line: Consistent delivery limits foliage wetting and keeps nearby hardscape drier.
- Select light-colored containers: Pale surfaces can reduce soil temperatures in hot, exposed areas.
- Mulch the surface: A suitable top layer slows evaporation and gives the arrangement a finished look.
- Prepare for winter: In cold climates, move tender plants to shelter rather than risking the whole collection.
Raised beds work well for accessible herb gardens, drought-tolerant vegetables, and mixed plantings beside a patio. Containers suit movable accents, seasonal trials, and rental properties. Vary vessel shape and height to avoid repetition, while keeping the color palette controlled.
A visual walkthrough can clarify the installation sequence before materials arrive.
Use OutdoorBrite's AI garden design to test container groupings, raised-bed placement, and planting heights near doors or windows.
8-Option Comparison: Xeriscape Yard Ideas
| Design Option | Implementation Complexity 🔄 | Resource Requirements ⚡ | Expected Outcomes 📊 | Ideal Use Cases 💡 | Key Advantages ⭐ |
|---|---|---|---|---|---|
| Desert Landscape with Native Drought-Tolerant Plants | Moderate–Advanced, plant selection & establishment 🔄 | Low ongoing water; moderate initial labor/soil amendments ⚡ | High water savings; improved native biodiversity 📊 | Arid/semi‑arid yards seeking low‑water, habitat‑friendly landscapes 💡 | Long‑term low maintenance; cost‑effective; supports pollinators ⭐ |
| Hardscape‑Dominant Design with Gravel and Pavers | Moderate–High, grading and installation work 🔄 | Very low water; high upfront materials and labor ⚡ | Near‑zero irrigation; crisp contemporary aesthetic 📊 | Small urban yards, minimalist designs, areas needing low upkeep 💡 | Durable, virtually no irrigation for surfaces; low maintenance ⭐ |
| Succulent and Cactus Garden Beds | Low–Moderate, soil prep and correct siting 🔄 | Extremely low water after establishment; requires well‑draining mix ⚡ | Very low maintenance; strong architectural form and year‑round interest 📊 | Dry climates, containers, coastal arid gardens, botanical displays 💡 | Extremely drought‑tolerant; low pests/diseases; versatile placements ⭐ |
| Rock Garden and Alpine Plant Landscape | High, heavy grading/boulder placement; skilled siting 🔄 | Low ongoing water; high material and installation cost ⚡ | Naturalistic focal points with excellent drainage; site‑specific impact 📊 | Slopes, mountainous/rocky sites, properties wanting a natural alpine look 💡 | Unique focal elements; excellent drainage; low long‑term irrigation ⭐ |
| Ornamental Grass‑Based Landscape | Moderate, plant grouping and seasonal care 🔄 | Low water and fertility needs after establishment ⚡ | Year‑round structure, seasonal movement, wildlife habitat 📊 | Prairie‑inspired yards, wide climate suitability, mass plantings 💡 | Low maintenance once established; strong seasonal interest; cost‑effective ⭐ |
| Mediterranean‑Style Xeriscape Design | Moderate, climate‑appropriate plant selection and drainage 🔄 | Low water in suitable zones; needs excellent drainage ⚡ | Fragrant, mature aesthetic in 2–3 years; low irrigation needs 📊 | USDA zones 8–10, hillside or outdoor living areas, warm‑climate homes 💡 | Sensory appeal (fragrance), culinary uses, attractive mature look ⭐ |
| Rain Garden and Bioswale Integration | Moderate–High, site analysis, grading, possible permitting 🔄 | Uses captured rainwater (low added irrigation); construction & upkeep ⚡ | Reduces runoff, improves water quality and groundwater recharge 📊 | Sites with runoff issues, urban streetscapes, stormwater management projects 💡 | Captures free water, reduces pollution, may qualify for rebates ⭐ |
| Container and Raised Bed Xeriscape | Low–Moderate, container choice, soil mix, irrigation setup 🔄 | Moderate, precise water control but more frequent monitoring ⚡ | Flexible, accessible, controlled plantings with efficient water use 📊 | Renters, rooftops, poor soils, accessible gardens, temporary installs 💡 | Complete soil control, mobile/adjustable, excellent for testing combos ⭐ |
Turn a Water-Wise Concept Into a Site Plan
The best xeriscape system starts with the site, not a plant trend. A sunny, sandy slope calls for a different solution than a shaded clay yard with runoff from a roof. A front yard that needs formal curb appeal may suit structured pavers, native shrubs, and clipped grasses, while a backyard used for play may need a small functional lawn surrounded by lower-water planting.
Use the following questions to narrow the choice:
- What is the climate fit? Desert plants, Mediterranean herbs, alpine species, and ornamental grasses each have different temperature and moisture limits.
- Where does water go? Mark downspouts, low points, slopes, compacted areas, and places where water stands after rain.
- What does the soil do? Test whether it drains quickly, holds moisture, or needs improvement before selecting plants.
- How much maintenance is acceptable? A gravel court reduces mowing but still needs weed control and occasional raking. A native border offers habitat and seasonal change but needs editing while it establishes.
- How much space is available? Containers and raised beds work in small spaces, while grass drifts, bioswales, and layered native communities need room to develop.
- What should the yard feel like? Choose between formal, naturalistic, architectural, fragrant, habitat-focused, or recreational planting before materials start competing for attention.
Don't treat the eight systems as mutually exclusive. Native plants can line a permeable gravel path. Ornamental grasses can screen a patio while containers hold herbs near the kitchen. A rain garden can sit below a hardscape area, and a succulent bed can anchor the entry while broader native planting fills the rest of the yard.
Water savings also depend on the design's actual plant mix, canopy cover, climate, and proportion of turf replaced. The Texas Water Development Board study reported average xeriscape savings ranging from 16% to 40%, with buffalograss and no-grass xeriscapes using about 30% less water, or roughly 175 gallons per day, than traditional St. Augustine grass yards. Those results show why a plant-by-plant and zone-by-zone plan is more useful than promising one universal performance level.
A larger conversion can produce a different result. The Southern Nevada Water Authority conversion study found average residential savings of 30% of annual household water use, equal to about 96,000 gallons per home per year, and reported average area savings of 55.8 gallons per square foot compared with turfgrass. The figures apply to that study context, not every yard, but they demonstrate why design quality and replacement scale matter.
Start by mapping sun and drainage. Group plants by water needs, then plan hardscape, irrigation, soil preparation, and mature spacing. Confirm local requirements, utility guidance, and any neighborhood rules before installation. For mulch planning and soil coverage, consult these tree service mulch recommendations. Finally, use OutdoorBrite to visualize the arrangement on your property before purchasing plants, gravel, pavers, or containers.
Successful xeriscaping isn't just lawn removal. It's the deliberate matching of each zone with the right plants, surfaces, drainage strategy, and level of care.
OutdoorBrite turns a photo of your front yard, backyard, patio, or garden into realistic xeriscape concepts with drought-tolerant planting, gravel, and hardscape. Upload your own space, compare styles, and refine the layout before you spend money on materials or hire a contractor. Visit OutdoorBrite to preview your water-wise yard ideas.
See your yard reimagined
Start creating