Front Yard Landscape Planner: A Step-by-Step Design Guide
Create stunning curb appeal with our front yard landscape planner. This guide walks you through site analysis, design, AI visualization, and budgeting.
You're probably standing at the front window or walking up your driveway thinking the same thing most homeowners think at the start of this project: the yard looks tired, disconnected, or harder to maintain than it should be, but it's also hard to picture what would fix it. A few shrubs by the foundation won't solve that. Neither will buying plants first and hoping the layout works itself out.
A good front yard design planner gives you something much more useful than inspiration. It gives you a sequence. You study the site, decide what the yard needs to do, sketch a layout that fits the house, test ideas visually, choose plants and materials that belong there, and only then start spending money. That order matters because front yard mistakes are visible every day, and they're expensive to undo.
Most online guides stop at broad advice like “pick a style” or “set a budget.” Real projects need more than that. They need a way to analyze drainage and wind, check HOA rules before plans are final, and visualize options clearly enough that you can make decisions without guessing.
Table of Contents
- Your Foundation for Success Site Analysis and Goal Setting
- From Blank Slate to Concept Plan Layout and Style
- Visualize the Future with AI Landscape Design
- Choosing Your Palette Plants and Hardscape Materials
- Budgeting Phasing and Navigating the Rules
- Bringing Your Front Yard Plan to Life
Your Foundation for Success Site Analysis and Goal Setting
You walk outside after a hard rain and find mulch washed onto the sidewalk, a soggy strip near the porch, and one corner by the driveway already baking in reflected heat. Those are design inputs, not minor annoyances. A front yard plan that ignores them usually looks fine on paper and underperforms once money is in the ground.
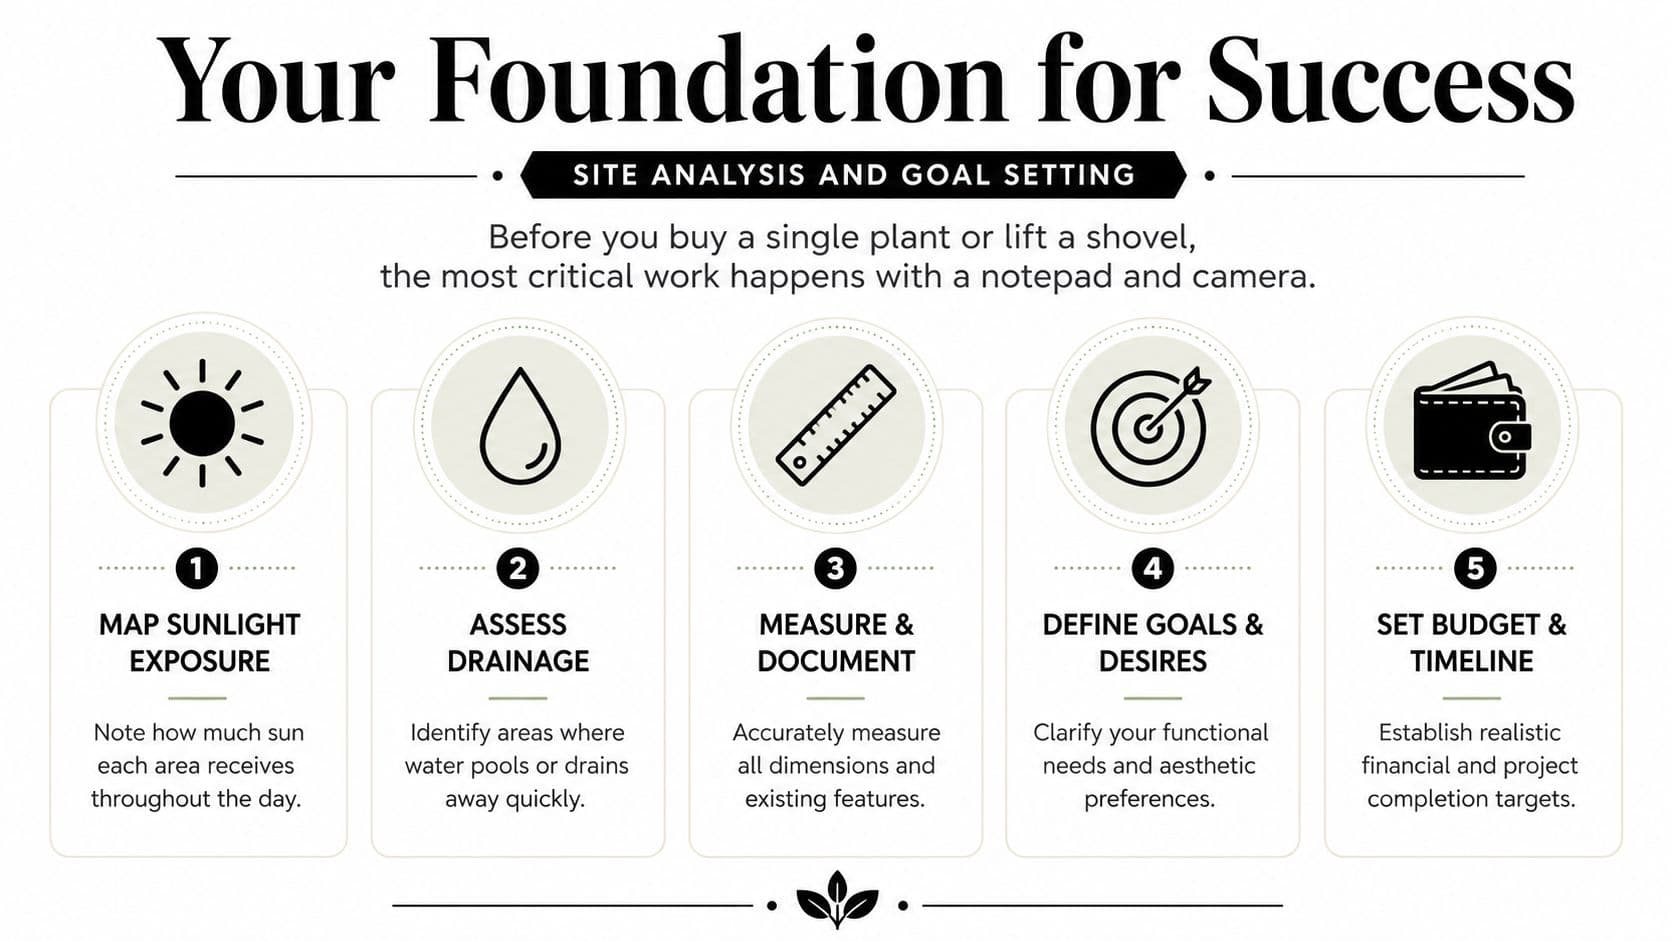
That is why the first job is to study the yard as it behaves in real conditions. Good planning starts with measurements, photos, and repeated observation across different times of day. It also starts before plant shopping.
According to Chelsea Green's garden design questions, the right early questions focus on how you use the space, what the site can support, and where constraints will shape the design. That matters even more in front yards because this part of the property has less room for error. Every path, bed line, and shrub is visible from the street and from inside the house.
Start with observation, not shopping
One site visit is rarely enough. I prefer to see a front yard in morning light, late afternoon light, and after rain before making any meaningful decisions. Homeowners can do the same with a phone camera and a notebook.
Watch where people cut across the lawn instead of using the walk. Notice which windows need screening and which ones should stay open to the street. Pay attention to where snow is piled, where irrigation oversprays the porch, and where the driveway throws heat onto nearby beds. In HOA neighborhoods, look for practical constraints early. Mailbox rules, approved edging materials, height limits near driveways, and requirements for turf coverage all affect the plan long before style enters the conversation.
Microclimate matters here more than many first-time homeowners expect. The area near a south-facing wall may handle very different plants than the strip beside a shaded front walk, even though they are only a few feet apart.
Practical rule: If you have not mapped sun, drainage, wind exposure, utility access, and traffic patterns, you are still gathering facts.
Build a usable site inventory
Keep the base map simple. It needs to be clear enough to design from, not polished enough to frame.
Start with the fixed pieces:
- Measure permanent elements. House corners, porch edges, steps, driveway width, existing walkways, utility meters, downspouts, and property lines.
- Track sun and shade. Note full sun areas, seasonal shade from the house, and heat reflected off paving, masonry, or garage doors.
- Follow water. Mark puddling spots, runoff paths, splash zones at downspouts, and any area that stays wet longer than the rest of the yard.
- Record wind patterns. Side yards, driveways, and gaps between houses often create stronger gusts than the rest of the front garden.
- Protect existing trees. Mature trees set hard limits on excavation, grading, and new paving, especially near major roots.
Photos help, but a marked-up sketch is better because it forces decisions. I often recommend printing a front-yard photo and drawing directly on top of it. That also sets up the next step well if you want to test ideas with AI tools such as OutdoorBrite. A rough base map plus a few site photos gives you something concrete to iterate on before you spend on demolition, stone, or large shrubs.
If you want a simple worksheet to organize those notes before sketching, use this guide to plan your dream yard.
Turn observations into goals
A workable front yard plan needs priorities in order, not a wish list with everything tied for first. That is where many DIY projects drift. Homeowners want stronger curb appeal, less maintenance, better privacy, more pollinator value, a wider walk, and lower water use. All are reasonable. Some compete with each other.
Here is a practical way to sort those priorities:
| Priority | What it means in practice |
|---|---|
| Curb appeal | Clear entry sequence, visible focal point, tidy bed edges, balanced scale from the street |
| Low maintenance | Less turf, simpler bed shapes, durable materials, plants that do not need constant pruning |
| Privacy | Screening placed where it blocks views without making the entry feel closed off |
| Wildlife support | Layered planting, longer seasonal interest, less empty mulch area |
| Safer access | Comfortable path width, stable surfaces, clean step transitions, room for lighting |
Write your top three goals down and rank them. Then add one line for what you want to avoid. That last part is useful. “No weekly hedge clipping,” “no blocked front windows,” or “no beds that spill into the walkway” gives the design clear boundaries.
This is also the right stage to check the rules. HOA review, local setback requirements, sightline rules near driveways, and utility easements should be treated as design inputs from the start. It is much cheaper to adjust a sketch, or an AI mockup, than to rework a built front yard after a violation notice or a failed planting choice.
A front yard does not need to do everything. It needs to solve the right problems well.
From Blank Slate to Concept Plan Layout and Style
A front yard usually goes off course at the same point. The homeowner has a measuring tape, a list of favorite plants, and ten saved photos. Then the entry path ends up too narrow, the focal point lands in the wrong spot, and the utility box gets buried behind shrubs that will need trimming twice a month.
The fix is simple. Build the concept plan before choosing the plant palette.
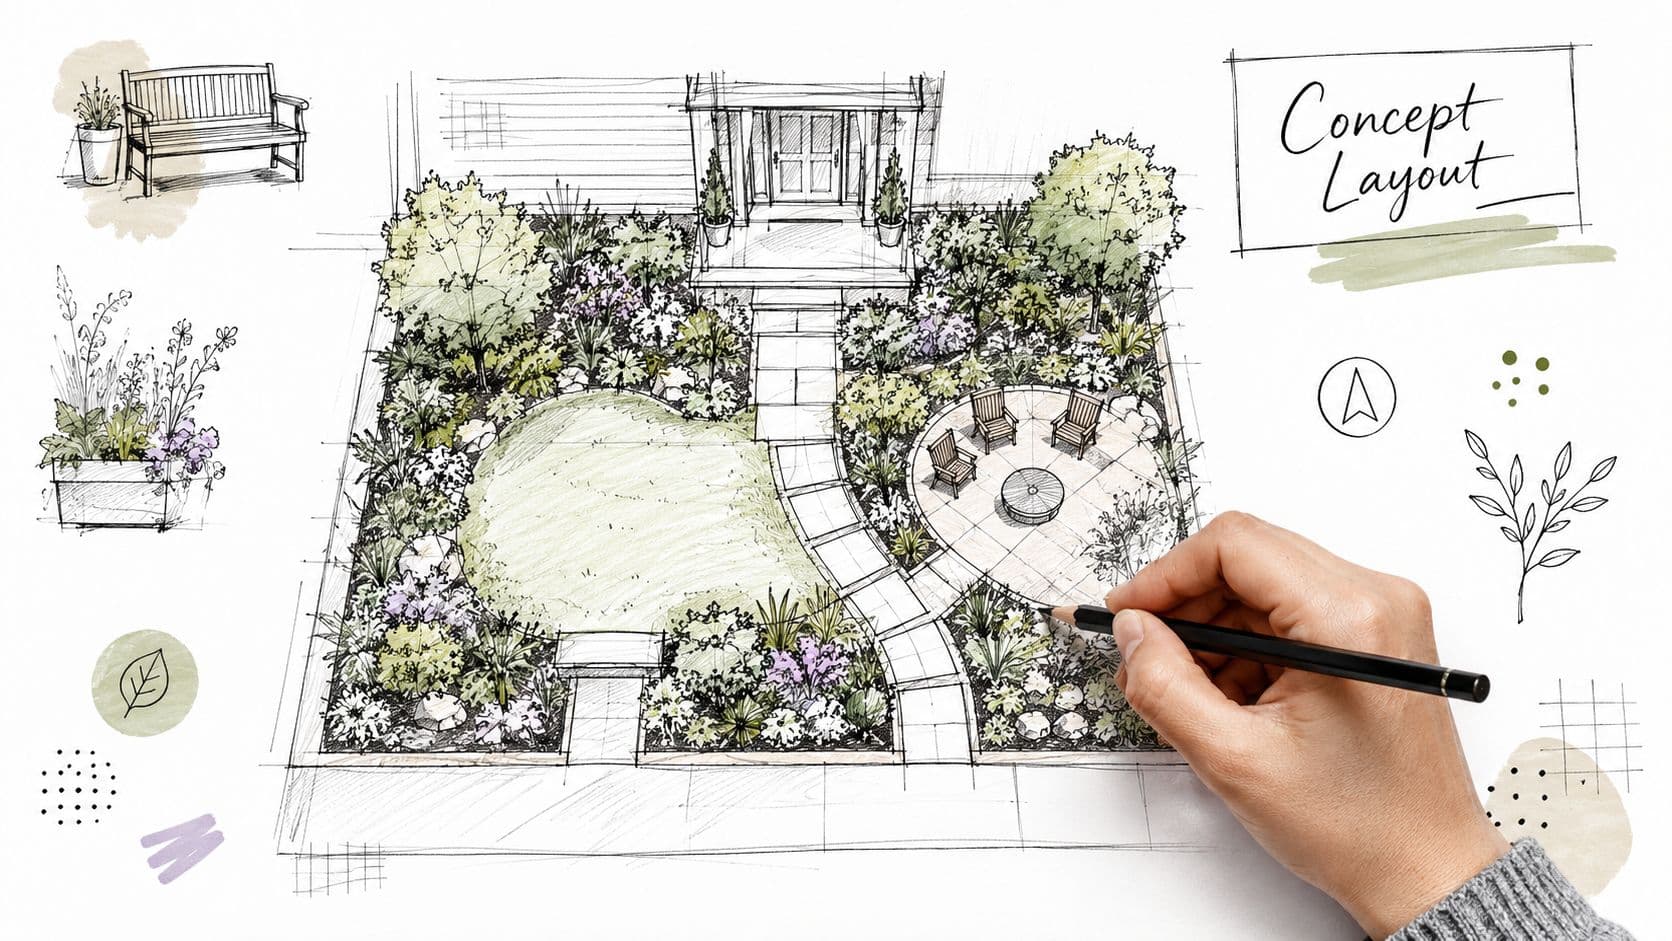
Start with tracing paper over your base map, or use a tablet if that is easier. Mark the fixed items first: driveway, front walk, porch, steps, windows, meter locations, sightline triangles near the street, and any HOA constraints that affect bed depth, edging, fencing, or tree placement. Then sketch how the yard needs to work. I tell homeowners to solve circulation and visual structure first because those are the expensive mistakes to correct later.
A workable concept plan usually answers four layout questions:
-
Where do people move?
The path to the front door should read clearly from the sidewalk or driveway. If guests hesitate, the layout is not doing its job. -
Where should the eye land first?
Every front yard needs one primary visual anchor near the entry sequence or front elevation. That might be a small tree, a mass of evergreen structure, or a clean hardscape feature. -
What needs screening or softening?
Foundation walls, porch piers, meters, side yards, and property edges often need visual control, but screening should not block windows or make the front door feel hidden. -
What needs access later?
Trash routes, hose bibs, electrical panels, irrigation controls, and side gates need working room. Ignoring service access is one of the fastest ways to create an attractive plan that becomes annoying to live with.
Create functional zones first
Front yards are small, which makes structure more important, not less. A simple zoning pass keeps the plan from turning into scattered beds around the perimeter.
Use four zones:
-
Arrival zone
Walk, steps, porch edge, and the planting or materials that frame the door. -
Display zone
The area with the strongest view from the street. This space carries most of the curb appeal and usually deserves the clearest composition. -
Buffer zone
Side edges, foundation strips, and street-facing bands that soften hard lines, filter views, and connect the house to the lot. -
Service zone
Utility access, garbage movement, side-gate passage, and any spot that has to stay practical year-round.
This stage is also a good place to test options quickly with photo-based AI tools before anything gets built. A rough sketch can tell you where a bed might go. A generated image of your actual house can show whether that bed feels too heavy, too sparse, too formal, or out of scale. If you want to compare platforms before committing to one workflow, review this guide to best ai garden design software.
Give the plan one clear organizing idea
Good front yards are usually edited, not crowded. Pick one organizing idea and repeat it across the site.
That could be:
- a straight, formal walk with symmetrical framing
- a broad curved bed line that softens a boxy façade
- a single dominant tree supported by lower masses
- a restrained material palette with repeated shapes and spacing
Without that organizing idea, homeowners start adding one plant they like here, another edging detail there, and a decorative feature near the porch. The result feels busy because nothing is related.
Match the style to the house and the maintenance reality
Style choices should follow the architecture and the amount of upkeep the homeowner performs. A clipped, formal entry can look sharp on a colonial or brick traditional home, but it asks for regular pruning. A looser cottage approach can suit a craftsman façade, but it still needs a strong edge and enough negative space near the walk to avoid looking overgrown. Gravel-forward xeric designs reduce irrigation demand in the right climate, but they can feel harsh against some homes and can collect debris if the layout is fussy.
Use the house as the filter.
- Modern homes tend to work best with simple geometry, fewer plant varieties, and stronger repetition.
- Traditional homes often support balanced layouts, layered foundation planting, and a clearer front-door axis.
- Craftsman and cottage homes can carry more texture and species mix, but the layout still needs visible structure from the street.
- Dry-climate styles depend on spacing, material consistency, and plants that look intentional at maturity, not freshly installed and empty.
One practical test helps. Look at the concept plan and answer three questions without explaining it away: Where do people walk? What do they notice first? What will this look like in three years, not three weeks?
If those answers are clear, the plan is ready for visualization and refinement.
Visualize the Future with AI Landscape Design
Paper plans are useful, but most homeowners don't struggle with the plan itself. They struggle with translation. It's hard to look at a sketch and know whether dark mulch will feel too heavy, whether that ornamental tree will crowd the entry, or whether a clean modern scheme will look cold against brick.
That's where AI visualization has become practical.
Why photos beat imagination
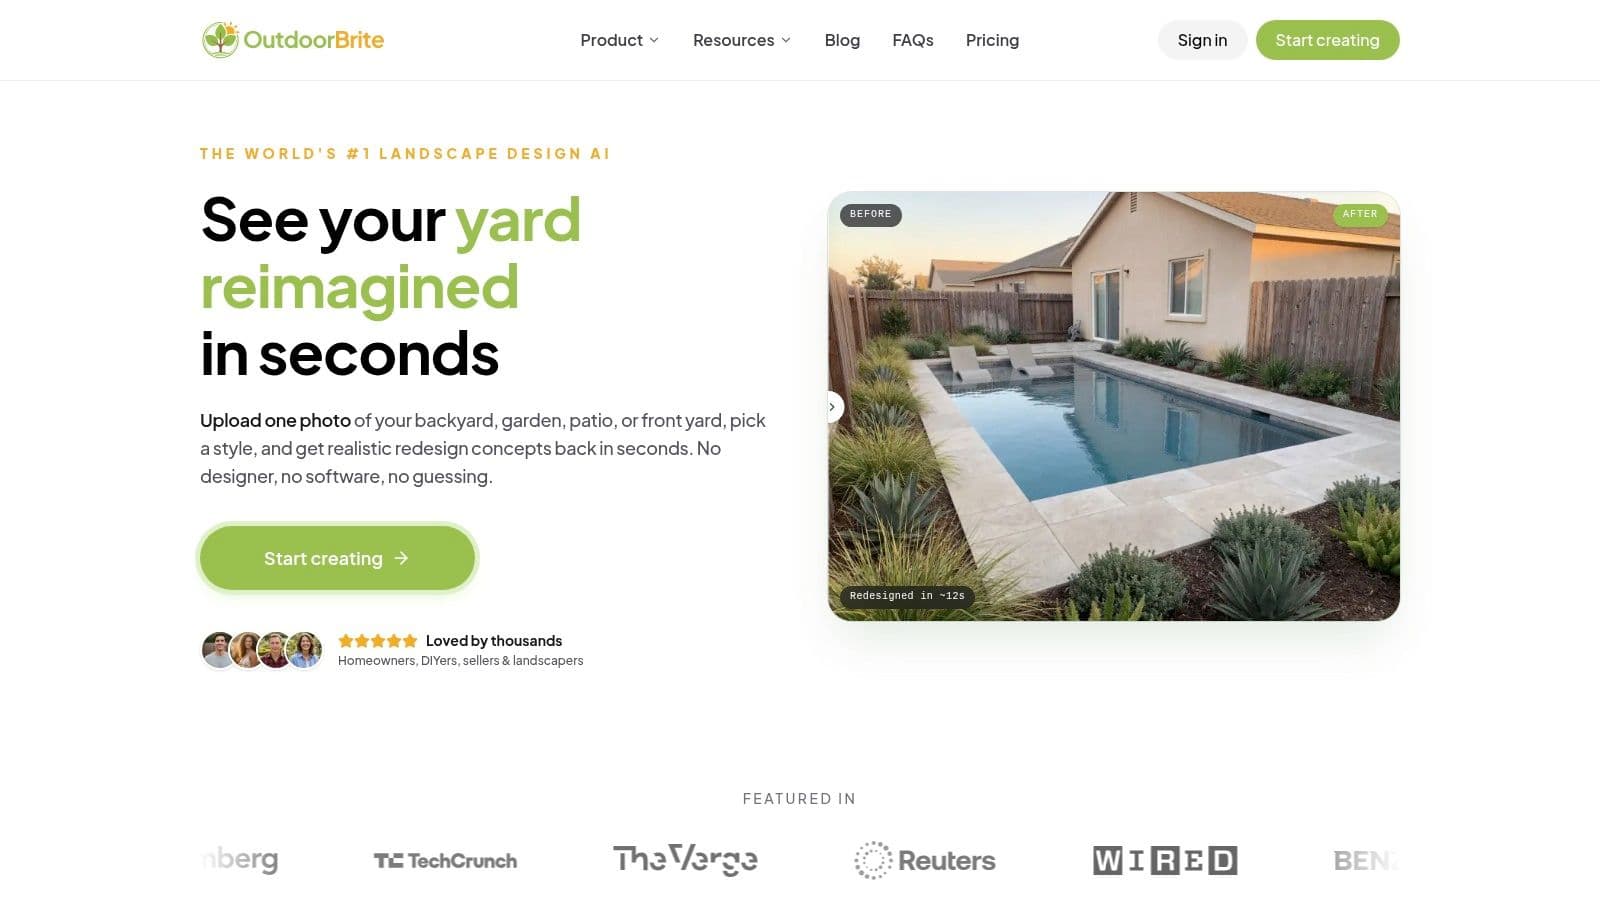
A front yard design planner works better when it uses your actual house as the starting point. Uploading a real photo immediately changes the quality of the decision-making because you stop judging abstract ideas and start judging your own façade, driveway, and entry sequence.
Tools in this category let you test broad directions quickly. You can compare a minimalist design against something softer and more layered. You can see whether a gravel-forward look fits the architecture or whether a greener, fuller approach feels more grounded. You can also spot problems early. A style that looked appealing in isolation may compete with the roofline, clash with the masonry color, or make the front elevation feel flatter.
One option in this space is OutdoorBrite Money, which turns uploaded yard photos into photorealistic redesign concepts and lets users explore different style directions and outdoor conditions.
How to test ideas without committing
The smartest way to use AI isn't to ask for one final answer. It's to run comparisons. Treat the tool like a fast design assistant that helps you narrow options before you spend on labor or materials.
A practical workflow looks like this:
- Start with three style directions. Don't pick twelve. Choose a restrained set, such as modern, cottage, and Mediterranean.
- Keep one variable steady. If you change style, don't also change everything else at the same time.
- Compare entry emphasis. Notice which option makes the path and front door read most clearly.
- Test material tone. Warm pavers, cool stone, dark mulch, light gravel, and wood edging all change how the house feels.
- Save versions side by side. Decisions get easier when you can compare rather than remember.
If you're researching platforms that do this kind of mockup and iteration, this review of the best ai garden design software is a practical place to compare features.
A quick demo helps make the workflow more concrete:
What matters most is the reduction in guesswork. A visual draft won't replace site analysis or construction details, but it will expose weak ideas before they become installed mistakes. That's especially useful for front yards because small changes in bed shape, focal placement, and material color have an outsized effect on curb appeal.
Choosing Your Palette Plants and Hardscape Materials
A front yard usually starts going off track here. Homeowners get excited, add five more plant types than the bed can hold, then pick pavers from a showroom board that looked nothing like the house in afternoon light. The result is rarely terrible on day one. It just feels unsettled, and a year later it often looks crowded, patchy, or harder to maintain than expected.
Good selection work stays tied to the plan. Every plant should have a job. Every hard material should solve a use problem and support the house, not compete with it.
Build planting layers from big to small
Start with the pieces that hold the yard together year-round. That means small trees, upright shrubs, mounded evergreen forms, or strong architectural plants that give the entry sequence and front elevation some order. After that, add mid-height shrubs to carry mass through the bed. Perennials, grasses, and seasonal color come last.
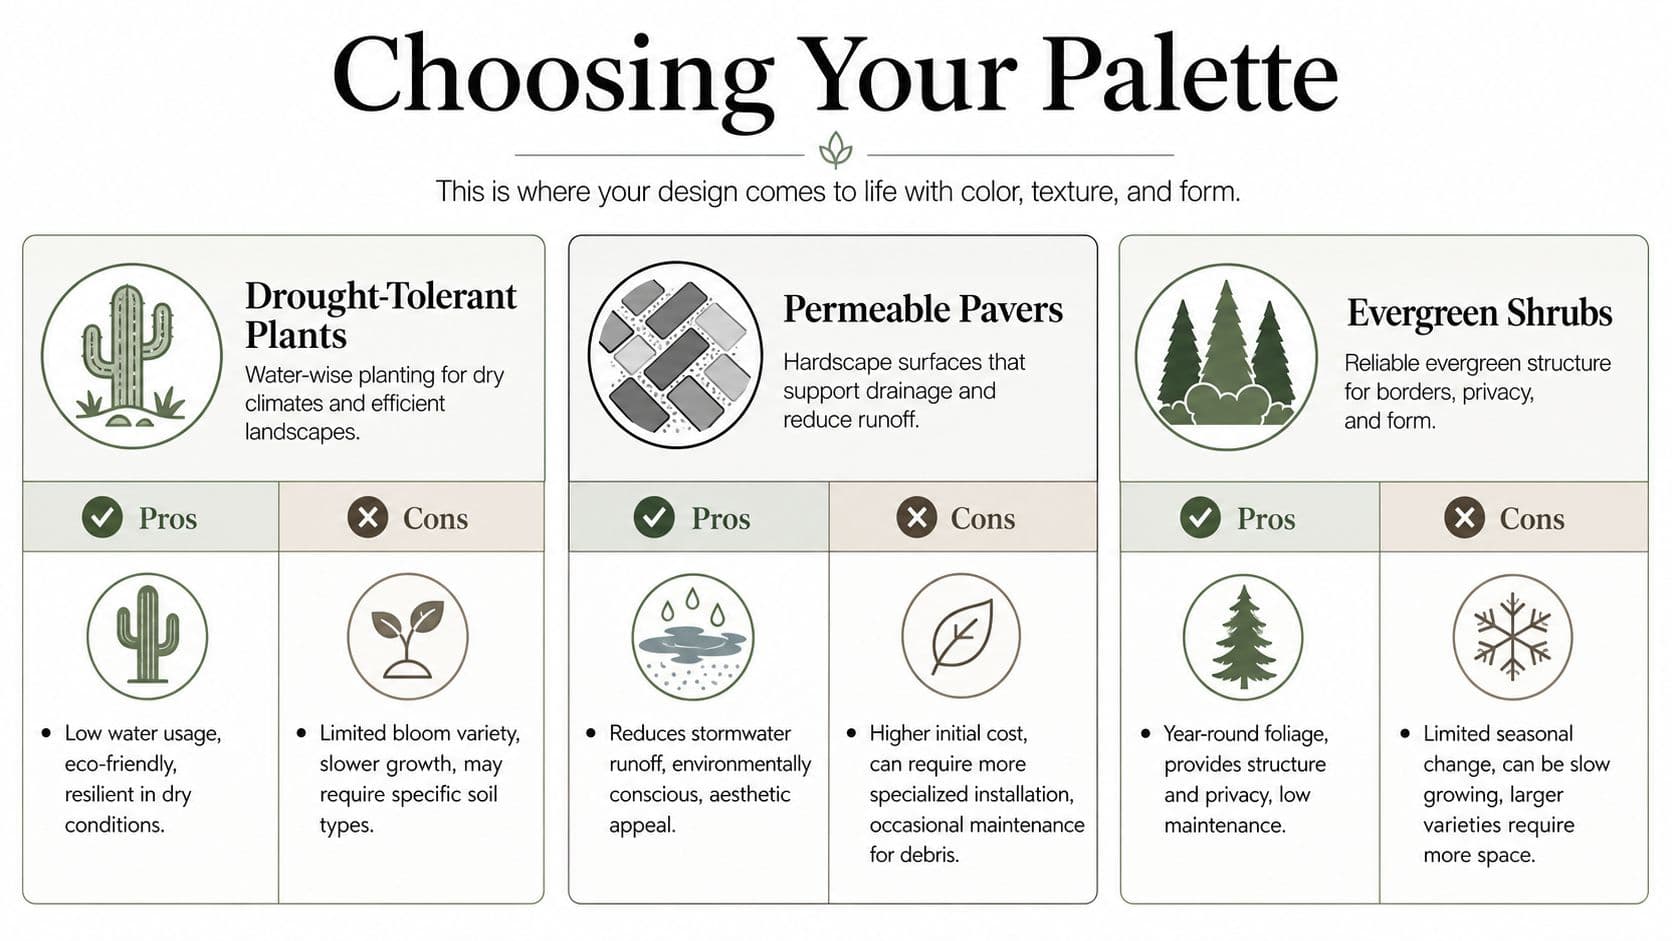
On smaller front yards, restraint matters more than variety. A limited palette repeated with intention almost always reads better from the street than a collector's mix of one-of-everything. I usually want clear hierarchy: anchor plants that catch the eye first, a middle layer that gives the bed body, and a lower layer that ties everything together without turning the foundation into a hedge line.
A simple selection sequence helps:
| Layer | What to look for |
|---|---|
| Structural anchors | Strong form, lasting presence, placement that frames the entry or balances the house |
| Mid-layer shrubs | Consistent mass, mature size that fits the space, form that does not require constant correction |
| Perennials and grasses | Repetition, seasonal change, texture, and enough discipline to unify the bed |
Plant for mature width. Buying the biggest pot in the nursery and spacing too tightly usually leads to heavy pruning, poor air flow, and plants fighting each other within a couple of seasons.
That trade-off gets ignored all the time. A fuller install looks good for photos, but if shrubs are shoulder to shoulder on day one, you are already designing the future pruning problem. As noted earlier, spacing by mature size prevents that cycle.
Choose hardscape for use first and appearance second
Hardscape sets the tone fast. It also locks in mistakes more permanently than plants do.
Walk the front approach and ask practical questions before choosing materials. Will the walkway stay comfortable in rain? Does the color make the house look warmer or colder? Does the texture fit the architecture, or does it pull attention away from the entry? A busy paver pattern can make a modest front yard feel smaller. A quiet material with good edge definition often gives better results.
Use this filter when comparing options:
- Walkways should feel stable, safe, and proportionate to how people actually approach the door.
- Edging should clarify bed lines and hold materials in place without becoming the main feature.
- Mulch and gravel should earn their spot by reducing maintenance, improving drainage, or handling foot traffic.
- Walls and steps should fit the scale of the house. Heavy block in a shallow front yard can overwhelm the façade quickly.
If you are defining the property edge or adding separation near the sidewalk, this guide on choosing perfect front yard fencing is worth reviewing for its practical discussion of proportion, visibility, and frontage appearance.
Make a shopping list that still works three years from now
A good plant and materials list is shorter than many homeowners expect. That is usually a strength, not a compromise. Repetition makes a yard look finished. Too many one-off choices make it feel improvised.
This is also where AI mockups are useful again. After you narrow the palette, run a few versions with different mulch tones, paving colors, or shrub masses before ordering anything. Digital iteration is cheap. Replacing the wrong stone or removing overplanted shrubs is not.
Use these questions before you buy:
- Will this plant keep its shape without constant shearing?
- Does this material match the house color, roof tone, and trim?
- Is this plant performing a clear role in the composition?
- Will the bed still look organized in winter or dormancy?
- Can this element repeat elsewhere without feeling forced?
For façade beds, porch corners, and entry-adjacent planting, this 2026 foundation planting design guide gives useful examples of how to layer against the house without making the front elevation feel boxed in.
Budgeting Phasing and Navigating the Rules
A front yard project usually gets expensive in two places. Homeowners spend too much too early on visible finishes, and they spend again later fixing work that should have been handled first.
The safer approach is to phase the job on purpose. Put money into the parts that are hard to change after installation, then fill in the cosmetic layers once the bones are right. On real projects, that usually means solving drainage, grading, access, and layout before buying extra plants or decorative materials.
Build the parts that are expensive to redo first
Phasing gives you control over both budget and decision quality. It also creates room to test ideas before committing. If you have been using AI mockups in OutdoorBrite, use them here too. Compare a full-install version against a phased version. You can see whether the yard still reads as finished after phase one, and that helps you cut costs without making the property look half-done for the next two years.
A practical phase order often looks like this:
- Site corrections such as drainage work, grading adjustments, removals, and soil repair
- Hardscape framework including walkways, edging, steps, retaining elements, and lighting conduit
- Structural planting such as trees, screening shrubs, and the main bed framework
- Finish layers including smaller perennials, mulch, containers, décor, and optional upgrades
Fast installation is not the goal. Correct installation is.
I have seen homeowners spend heavily on decorative planting, then tear it back out because the walkway width felt wrong or runoff kept cutting through a bed. A phased plan avoids that kind of waste. It also gives you a clean stopping point if budget, weather, or contractor scheduling changes mid-project.
One useful reference on how early planning affects installation decisions is this design consultation article. The main takeaway is simple. Projects run better when design decisions, approvals, and construction order are set before crews start improvising on site.
Treat HOA and local rules as part of the design, not paperwork at the end
Many front yard plans fail at the approval stage because the review process starts after the design is already emotionally locked in. That is where redraws get expensive.
Read the HOA guidelines and municipal rules while the plan is still flexible. Some communities restrict plant height near driveways, fence placement, edging materials, turf removal, tree species, lighting, or how much of the yard can be hard surface. Corner lots often have extra visibility requirements. Newer subdivisions may also review color, stone type, and maintenance expectations.
Use those limits early:
- Mark setbacks, easements, and sight-line restrictions on the base plan
- Check approval requirements before choosing fences, walls, trees, or major paving
- Confirm whether the HOA requires a plant list, irrigation notes, or maintenance details
- Review utility access so screening and structures do not block future service
If you want a practical overview of how these requirements are commonly interpreted, Prestonwood Commercial Landscape Services offers a useful breakdown.
Rules are easier to handle when they become design filters at the concept stage. That is another place AI visualization helps. Instead of redrawing from scratch after a rejection, you can test alternate layouts, lower hedge heights, or swap materials digitally before submitting the next version. That kind of iteration is cheap. Rebuilding installed work is not.
Bringing Your Front Yard Plan to Life
Once the planning is solid, the project stops feeling vague. You're no longer standing in the yard wondering what to do first. You know the site conditions, the layout, the visual direction, the plant structure, the hardscape priorities, and the rules that shape the final installation.
That clarity is what a front yard design planner should give you. Not just ideas. A buildable path from the current yard to the finished one.
Start with the irreversible decisions first. Mark bed lines in the yard. Confirm walkway dimensions. Set key plant locations before smaller material starts filling space. Then install in an order that protects the work you've already paid for. Front yards reward discipline because every shortcut shows.
If curb appeal is part of a broader home-improvement plan, it also helps to understand how outdoor design projects fit into resale preparation. This guide to adding value in Maple Ridge gives useful context for which exterior upgrades tend to support overall presentation before a sale.
The satisfying part comes later. A front yard that once felt exposed, empty, awkward, or high-maintenance starts to feel composed. The path makes sense. The house looks more grounded. The planting gains presence as it grows in. And instead of second-guessing every purchase, you're working from a plan that already answered the hard questions.
If you want to turn your ideas into realistic before-and-after concepts before buying materials, OutdoorBrite Money can help you upload a photo of your front yard, explore different design styles, and compare visual options while your plan is still flexible.
See your yard reimagined
Start creating