Your Guide on How to Create Privacy in Backyard in 2026
Discover how to create privacy in backyard with our 2026 guide. Explore plants, fences, and AI design tools for your perfect private oasis.
You step into your backyard, sit down with coffee, and immediately notice the problem. A neighbor's upstairs window looks straight at the patio. The fence helps at ground level, but it does nothing for overhead views, noise, or that exposed feeling around the spots where you spend time.
That's why most privacy projects miss. People pick a hedge, a fence, or a screen first, then try to force it into the yard. If you want to understand how to create privacy in backyard spaces in a way that is effective, start with sightlines, use the right mix of living and structural barriers, and test the layout before you install anything.
Assess Your Privacy Blind Spots and Goals
The most common mistake is simple. People say they want “more privacy,” then plant a hedge along the property line and hope it solves everything. Often it doesn't, because privacy problems are rarely uniform across the whole yard.
Start with a privacy audit
Walk the yard and stand in the places you use most. Patio chairs, dining table, grill zone, hot tub, play area, fire pit. Those are your privacy zones, and they matter more than the parts of the yard nobody occupies.
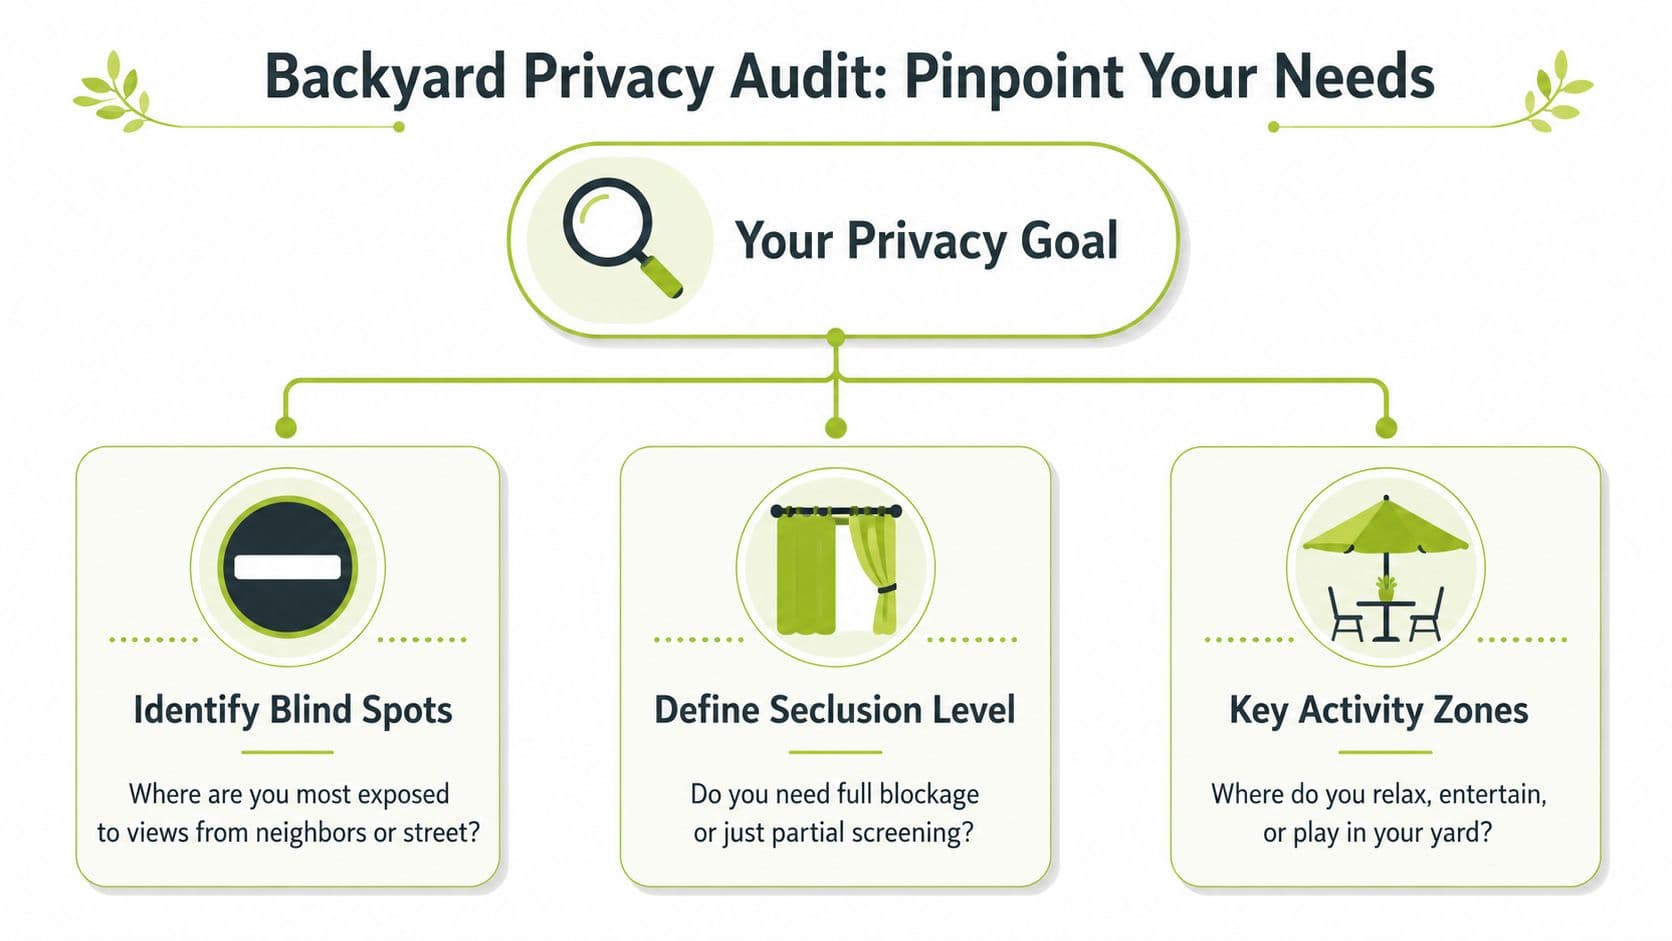
Use a quick checklist as you walk:
- Look outward from your seat: What can you see, and who can see back?
- Check higher viewpoints: Upstairs windows, second-story decks, and balconies often result in significant exposure.
- Notice seasonal changes: Deciduous cover can look great in summer and fail in winter.
- Listen as well as look: Road noise, pool equipment, and close neighbors affect privacy too.
In dense housing markets, the main threat often isn't the person next door at ground level. It's the person above you. A 2025 Urban Land Institute study found that 62% of new urban residential developments feature multi-story units where ground-level yards are directly overlooked by upper-floor windows (Urban Land Institute finding).
Practical rule: Don't measure privacy from the fence line first. Measure it from the chair, bench, or dining seat where you actually feel exposed.
Define what “private enough” means
Not every yard needs full visual blockage. Some spaces only need soft screening so the yard feels enclosed without becoming boxed in. Others need direct interception of sightlines, especially around hot tubs, lounge seating, or compact patios.
I usually separate goals into three levels:
| Privacy need | What it means in practice | Good fit |
|---|---|---|
| Soft screening | Filters views, keeps openness | Ornamental grasses, lattice, open slat screens |
| Focused blocking | Hides one problem angle | Trellis with vines, offset shrubs, targeted panels |
| Full enclosure | Strong year-round separation | Dense evergreens, stone wall, solid fence |
This is also where yard use matters. A family with a play lawn may want open visibility across the center and stronger screening at the edges. A couple using a small patio may need the opposite. If you need help thinking through layout basics beyond privacy, these DIY yard landscaping tips are a useful starting point.
Map the height and distance problem
Privacy design gets easier when you sketch instead of guessing. You don't need CAD. A phone photo and a simple overhead sketch are enough.
Mark these on paper:
- Exposure points where neighbors or the street can see in
- Activity zones where you want comfort
- Target heights needed to block each view
- Setback opportunities where planting or screens can sit closer to the use area
That last point is the one many homeowners miss. Barriers often work better when they sit closer to the patio or deck instead of all the way at the perimeter. A shorter, well-placed screen can outperform a taller barrier in the wrong spot.
A good privacy plan isn't one long line around the lot. It's a series of precise blocks placed where sightlines actually enter the space.
Explore Your Toolkit of Privacy Solutions
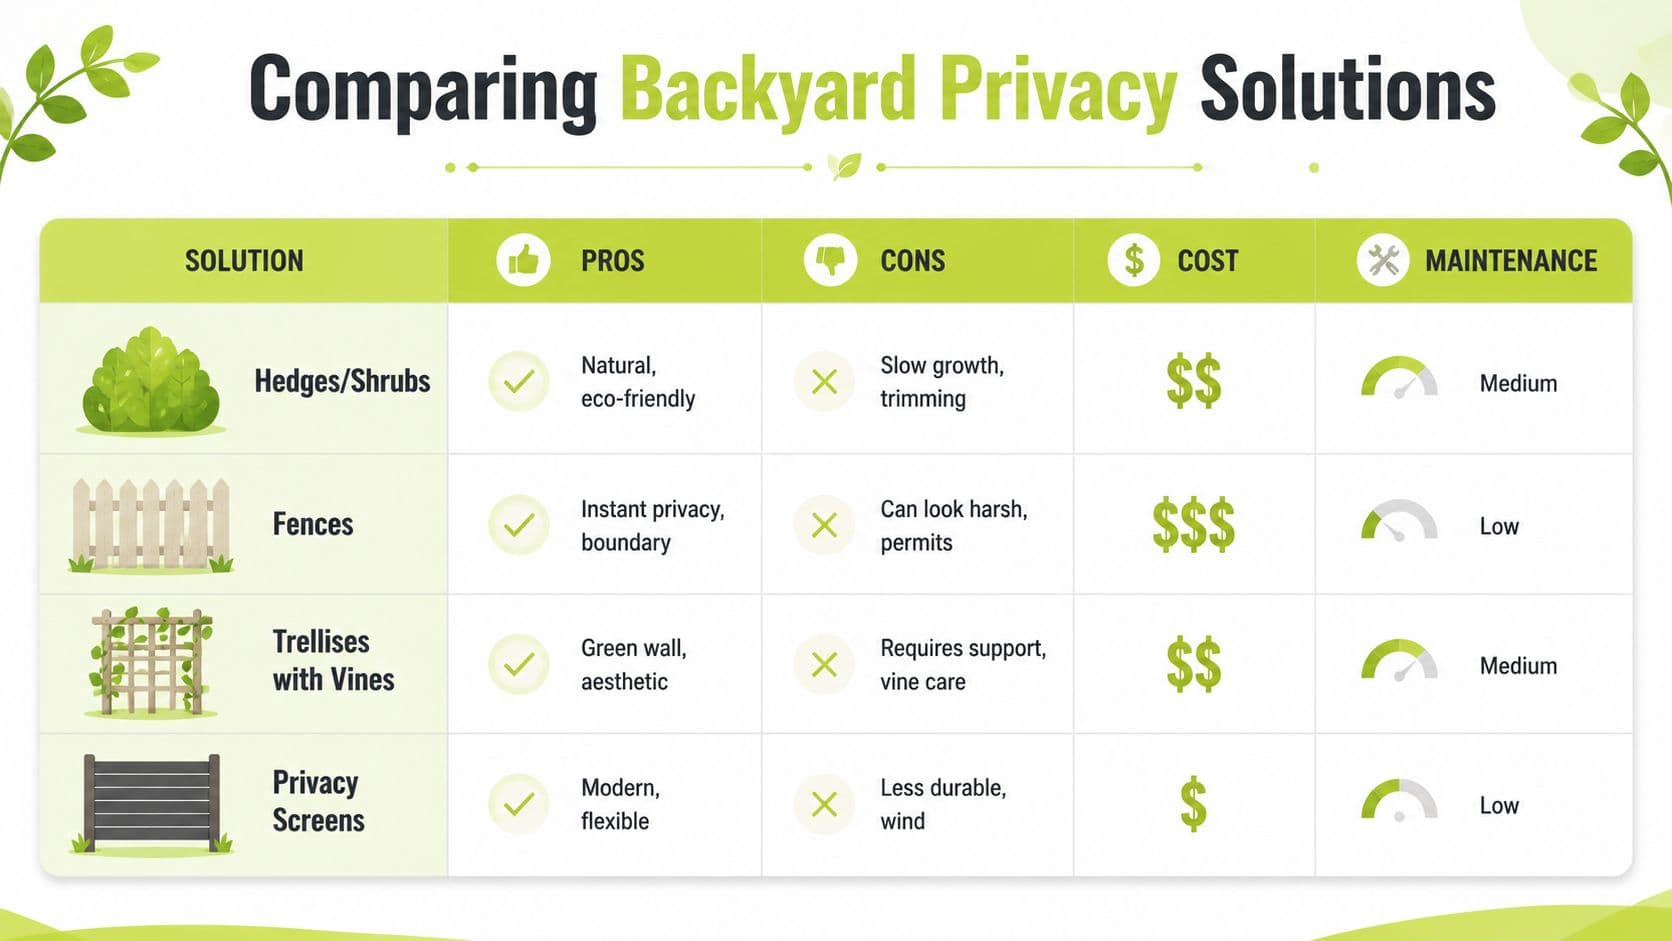
Once you know what you're blocking, the right tools become clearer. I group privacy solutions into living screens, structural screens, and hybrids. Each solves a different problem, and each comes with trade-offs in speed, maintenance, appearance, and flexibility.
Living screens
Planting works best when it's intentional, not crowded. A proven layout uses tall evergreens such as Arborvitae spaced at 4 to 5 feet intervals as the primary screen, with mid-height shrubs such as Boxwood filling the gaps. That layered approach can deliver 90% visual privacy year-round and reduce ambient noise by 6 to 8 dB. In contrast, planting too densely creates root competition and stunted growth, and fast-growing but short-lived options like bamboo near fences often bow and leak sound. Placing privacy barriers within 3 to 6 feet of key use areas can also reduce the height you need by up to 40% compared with pushing everything to the perimeter.
What works well:
- Evergreen backbone: Arborvitae, Spruce, Pine, Cypress
- Mid-level fill: Boxwood, Hydrangea
- Natural feel: Better visual texture than a single flat hedge
What often fails:
- Overtight spacing: Plants compete instead of filling in cleanly
- Single-species monotony: One layer rarely handles both lower and upper sightlines
- Wrong plant for the job: Fast growth isn't the same as durable screening
Structural screens
If you need immediate privacy, structures do what plants can't. Fences give instant separation, and stone walls go a step further.
Martha Stewart's roundup makes a blunt point: “few structures provide privacy like a stone wall” (stone wall privacy ideas). I agree. Stone walls are excellent in windy sites, exposed corners, and enclosed garden rooms where permanence matters more than flexibility.
A quick comparison:
- Solid wood fence: Fast visual block, clear property edge, can feel hard or flat
- Horizontal slat screen: Cleaner modern look, but not fully private unless spacing is tight
- Stone wall: Strongest visual mass, very stable, usually the most permanent choice
- Lattice panel: Better for filtered privacy than full screening
Hybrids and flexible fixes
Some of the best privacy solutions combine structure and planting. A screen panel with climbers softens hard lines. A pergola can define an outdoor room while vines or side panels intercept specific views. On decks and patios, large planters with trellises often solve problems without excavation.
For second-story visibility, I also look beyond the yard itself. If your house has windows that face neighboring windows at awkward angles, learning how to install window privacy film can complement outdoor screening without modifying the outdoor environment.
The right privacy tool isn't the prettiest one in isolation. It's the one that blocks the exact sightline you identified in the audit.
Designing a Layered and Effective Privacy Layout
A privacy screen works better when it has depth. One barrier handles one angle. A layered layout handles many.
Use layers, not a single line
A strong backyard composition usually has three bands. The back band creates the main screen. The middle band fills visual gaps and catches lower-angle views. The front band shapes the space closest to seating, dining, or circulation.
The mechanic matters. A YouTube outdoor area design transcript recommends strategically placing layered plantings using different heights of evergreens and deciduous shrubs to block sightlines, which is exactly how I approach tough yards (layered planting guidance).
Here's the simplest way to understand it:
-
Background screen
Use the tallest element here. That might be evergreens, a fence, or a wall. -
Middle buffer
Shrubs and medium plantings stop the “see under and through it” problem. -
Foreground softener
Lower plantings, planters, or a decorative screen make the privacy feature feel designed instead of defensive.
Build outdoor rooms
Privacy improves when the yard has edges and destinations. A dining area feels better when one side has enclosure. A lounge zone feels more relaxed when you're not visually connected to every adjoining lot.
This doesn't require a giant yard. Even a compact patio can become an outdoor room if you use a side screen, a backdrop planting, and a front edge of containers or low shrubs. The layout should also preserve what you want to keep, such as borrowed views, morning sun, or airflow.
Good layering doesn't just hide neighbors. It tells your eye where the space begins, where it ends, and where to settle.
Visualize Your Ideas with AI Before You Build
Most privacy mistakes happen before installation. The hedge is too far away. The fence feels too heavy. The tree canopy blocks your own light instead of the neighbor's window. These are design problems, not planting problems.
Test the view before you spend on materials
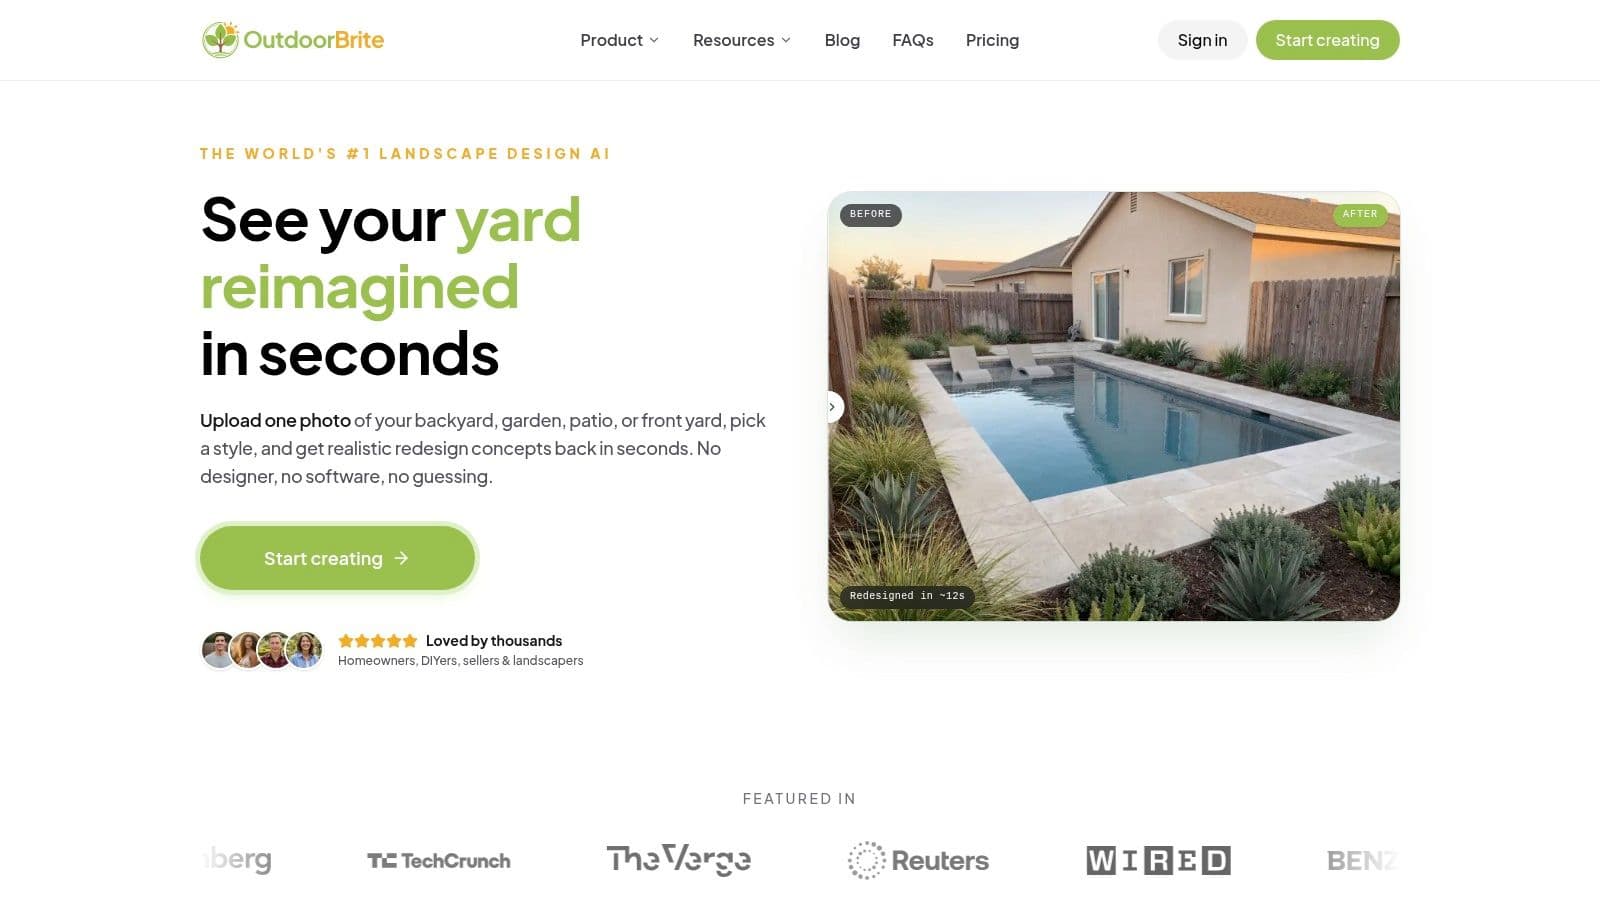
AI visualization is the closest thing homeowners have to a design test drive. Upload a photo of the actual backyard, then compare alternatives in the exact space instead of in your imagination. That matters for privacy, because scale is deceptive outdoors.
A row of Arborvitae may look balanced on a nursery tag and overpowering beside a small deck. A fence that seemed too plain on its own may become the right backdrop once shrubs and furniture are added around it.
Useful things to test:
- Screen height: Does the barrier block the upper window or only the lower fence line?
- Material feel: Does cedar warm up the yard or make it look busy?
- Seasonal appearance: Does the layout still work when deciduous layers thin out?
- Placement: Does moving a screen closer to the patio solve more with less bulk?
If you want to experiment with concepts on your own property photo, tools built around ai for backyard design make that process much faster than sketching multiple versions by hand.
Compare options side by side
The biggest advantage of AI isn't novelty. It's speed in decision-making. You can test a solid fence against a layered evergreen screen, or a pergola plus side planting against a freestanding slat panel, without committing labor or materials first.
That's especially helpful for second-story privacy, where vertical geometry is hard to judge from a flat plan. A visual mockup lets you see whether the canopy intercepts the angle you care about or leaves the problem untouched.
A short walkthrough makes the process easier to picture:
Plan Your Project Budget Timeline and Maintenance
A privacy design only succeeds if you can build it, maintain it, and live with it over time. The cleanest plan on paper can still fail if the install sequence is wrong or the maintenance burden is unrealistic.
Build a practical checklist
Before you buy a single plant or panel, check the constraints:
- Height rules: Fence and screen limits vary by municipality and HOA
- Utility marking: Always locate lines before digging
- Access path: Large materials and oversized plants need a route into the yard
- Water plan: Living screens fail quickly if irrigation is an afterthought
If you're hiring help for part of the work, it also helps to review local average landscaping prices so you know when labor quotes are reasonable and when they're inflated.
Phase the project if needed
You don't have to do everything at once. In fact, many successful privacy upgrades happen in layers over a season.
One practical sequence is:
- Install the structural element first if exposure is severe
- Add key evergreen screening next
- Fill in with shrubs, planters, or decorative panels
- Fine-tune furniture placement once the edges are established
That approach prevents a common mistake. People place furniture first, then discover the privacy wall should've been closer or offset to one side.
Don't overlook renter-friendly options
Not everyone can dig or build permanently. For renters and small-space homeowners, container-based privacy can work extremely well. Using oversized planters that are 18 to 24 inches wide with tall grasses or climbing vines on trellises can achieve 70 to 80% visual privacy in 2 to 3 years, with a 95% success rate in low-maintenance settings.
The details matter here. Drainage has to be right, and the species has to climb or grow upright enough to intercept the view you're trying to block. Weighted planters, removable trellis frames, and bracket-adjusted heights are often smarter than trying to imitate a fence with undersized pots.
A low-maintenance privacy plan isn't the one with the fewest elements. It's the one whose upkeep matches your actual time, water access, and authority to modify the property.
If you want to test privacy screens, hedges, walls, and planting layouts on a real photo of your yard before you build, try OutdoorBrite. It's a fast way to compare ideas, catch design mistakes early, and move from guesswork to a plan you'll feel confident installing.
See your yard reimagined
Start creating