How to Design Backyard Landscape: A Step-by-Step Plan
Learn how to design backyard landscape in order: survey the site, set a budget, zone the yard, test layouts, and plan irrigation.
You're standing at the back door with a phone full of saved patios, a patchy lawn in front of you, and no clear place to start. That's normal. Most yards fail not because the ideas were ugly, but because someone picked a style before checking drainage, sun, and how a trash bin gets to the gate. Learning how to design a backyard well means testing every pretty concept against water, movement, and maintenance first.
Table of Contents
- Survey Your Site Before Choosing a Style
- Set Goals, Budget and a Water Allowance
- Zone the Yard and Map Paths and Clearances
- Choose Hardscape and Plants for Your Hardiness Zone
- Test Layout Options on Your Own Photo
- Sequence Irrigation, Lighting and the Phased Build
Survey Your Site Before Choosing a Style
Work through six stages in order: survey the site, set goals and budget, zone the yard, choose hardscape and plants, test layouts, then plan irrigation, lighting, and phasing. Each stage depends on the one before it, and plant choices come before visual testing so you're not falling for a rendering full of plants that won't survive your winter.
A layout drawn before you know where water pools or how much sun hits the patio usually gets redrawn. That's expensive if pavers are already down. Spend one clear day measuring instead, and map sun exposure, prevailing wind, grades, drainage paths, utilities, views, access routes, buildings, and mature trees before you sketch anything decorative. Extension guidance on residential landscape design site analysis and soil testing treats soil quality as just as important to plant survival as climate suitability, which is why compaction, pH, structure, and organic matter belong on the same sheet as sun hours.
Six Tests That Drive Real Decisions
| Site factor | How to measure or test | Design decision it drives |
|---|---|---|
| Sun exposure | Count direct sun hours on a clear day at 9 am, noon and 3 pm | Plant placement and where seating goes |
| Drainage | Dig a 12-inch hole, fill with water, time how long it takes to empty | Bed location, permeable paving, rain garden |
| Soil pH | Home test kit, samples from at least three spots | Plant choice and amendments |
| Compaction | Push a screwdriver into soil; hard resistance in the top few inches points to compaction | Aeration and organic matter before planting |
| Grade | Level and string across slopes | Steps, retaining walls and path routes |
| Utilities and roots | Call 811 in the US before digging and mark mature tree root zones | Bed and tree setbacks |
Water still standing in that test hole after four hours signals poor drainage, not a spot for a patio foundation. For existing trees near any future slab or path, the Concrete Resurfacing Products tree root guide is worth reading before you pour, because roots and concrete planning problems are much cheaper to prevent than to cut out later.
Field note: A clay-heavy corner that stayed wet for two days after rain doesn't need more gravel thrown at it. Move the seating to the higher side and turn the low corner into a rain garden that wants that water.
Photograph the yard from the same spot in the morning, at midday, and in the evening. Keep the photos, test results, and measurements on one sheet you can hand to a contractor. That single sheet prevents most of the vague conversations that lead to change orders later.
Set Goals, Budget and a Water Allowance
A yard can look polished in a rendering and still fail at daily use: the dining area may sit too far from the house, or a thirsty lawn may exceed the water you can supply in a dry year. Start with no more than five ranked uses, noting the rough area and how often each will be used. Dining for six every weekend may matter more than a fire pit used a few times a year. A dog run or small play lawn can earn its space; a large lawn does not need to be the default.
Set a budget ceiling and divide it among hardscape, planting, irrigation and lighting, labor, and a 10 to 15 percent contingency for buried rock or drainage fixes. Give planting its own budget line. Plants can cost more than expected, and replacement planting in year one is normal, not a sign of failure. Use plan backyard spending with OutdoorBrite to check your totals. If funds are limited, refresh your garden in affordable stages rather than cutting every element until none works well.
Do the Water Math Before You Sketch
Set a water allowance using your utility bill, then estimate demand by area. One inch of water over 1,000 square feet equals about 620 gallons. For each irrigated area, multiply its square footage by the inches of water needed per week during peak season, divide by 1,000, then multiply by 620. Check plant needs against local extension guidance. Add the weekly amounts across zones, multiply by the number of watering weeks, and compare the result with your bill.
Use the estimate to test choices. A family might keep a small play lawn the children use daily, place the fire pit on gravel, and replace a thirsty lawn edge with native shrubs on drip irrigation. Compare each option's needs in a typical year and during water restrictions. Decide the fallback before planting: the turf irrigation shuts off first, while native and drip-only beds keep running.
Record four decisions before drawing:
- Ranked goals: Up to five uses, in priority order
- Budget ceiling: Include the contingency
- Weekly maintenance hours: Be realistic about the time available in August
- Water allowance: Estimate annual gallons and set a restriction-year fallback
A visual concept is a starting point, not proof that the yard will drain well or plants will survive. Keep the water allowance and everyday uses beside the budget as you compare designs.
Zone the Yard and Map Paths and Clearances
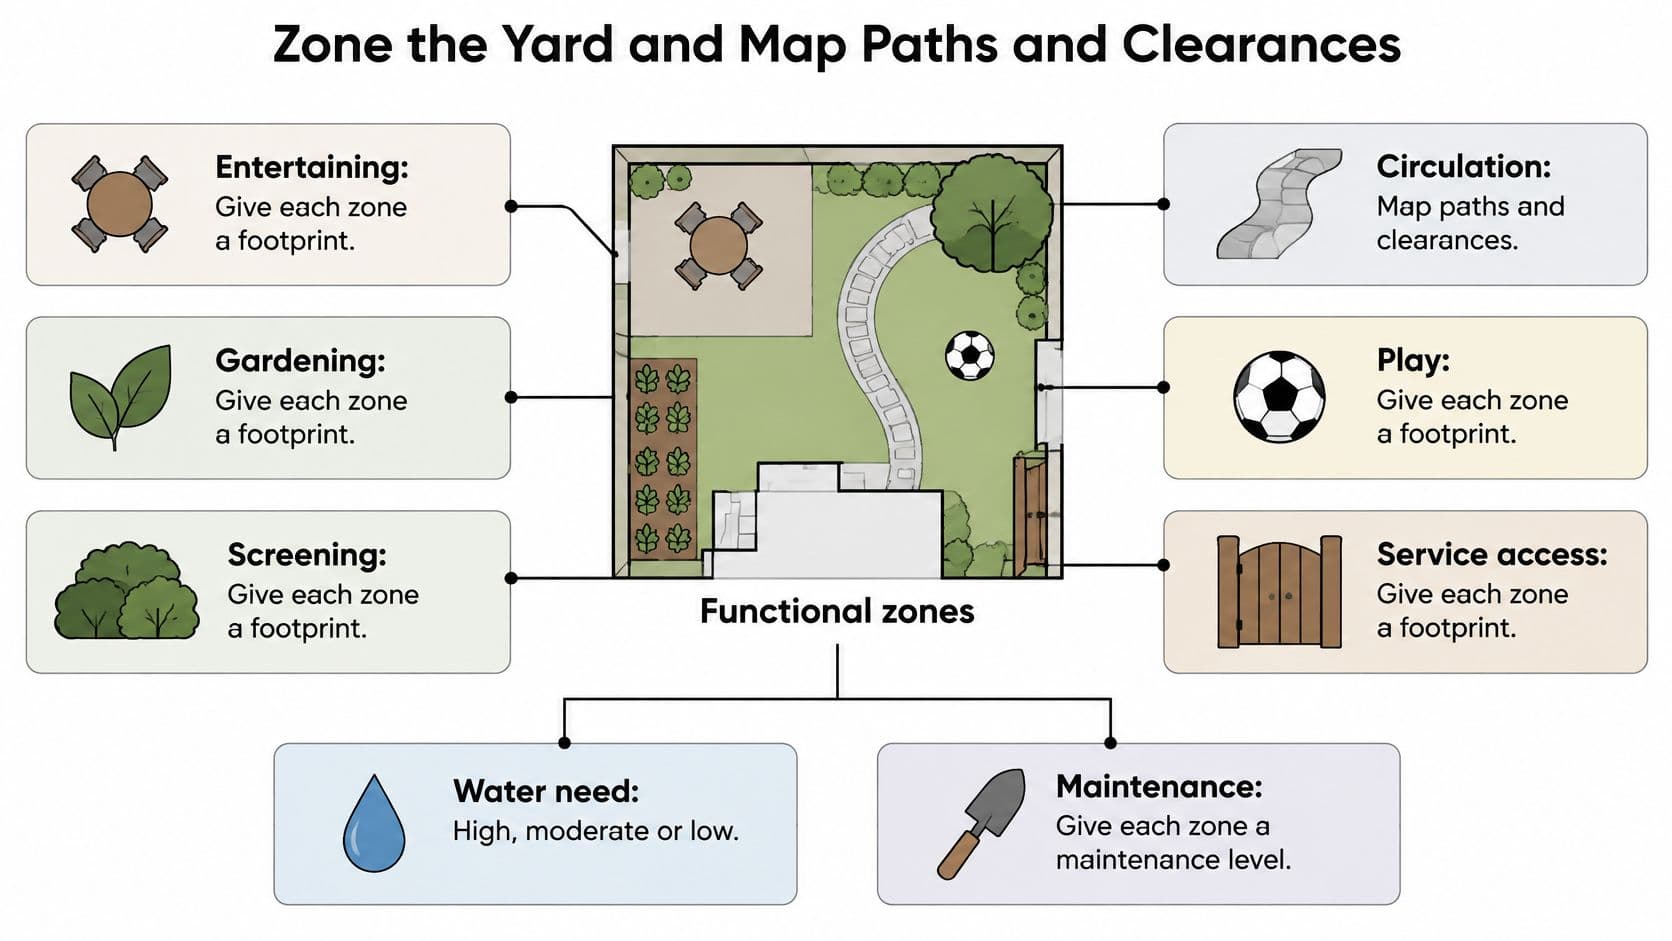
A yard can look generous on a sketch and still make daily tasks awkward. Start by marking entertaining, circulation, play, gardening, screening, and service access. Give each zone a footprint, a high, moderate, or low water need, and a maintenance level. Place thirsty zones near the hose bib or controller; put low-water areas farther away or on slopes where hoses and pipe runs are inconvenient.
Placement also affects the water budget. The EPA's WaterSense outdoor water use statistics report that outdoor use averages more than 30% of household water consumption, reaches 60% in arid regions, and totals nearly 8 billion gallons per day for residential use nationally. Keep water-demanding areas compact and group them where irrigation is easiest to manage.
The diagram shows how dining, gardening, and other functional areas can fit together before plants or furniture are added.
Check Clearances on Paper
| Element | Reference size or clearance | Note |
|---|---|---|
| Primary path | 4 ft minimum width | Lets a stroller, wheelchair or trash bin pass without crossing beds |
| Secondary garden path | 2 to 3 ft | Single file; keep edges mowable |
| Dining patio for six | About 12 x 12 ft | Leave about 3 ft clear behind chairs so they can be pulled out |
| Lounge group | About 8 x 10 ft | Allow 18 in (45 cm) between seats and tables |
| Fire pit | Check local code; commonly 10 ft (3 m) from structures | Confirm before placing near fences or pergolas |
| Planting bed reached from one side | 4 ft maximum depth | Deeper beds need access from both sides or a stepping path |
| Shade tree | At least 10 ft (3 m) from walls | Check mature spread on the plant tag, not the pot size |
Draw the route before filling in beds. A path that seems wide enough on paper may be difficult to use with a mower, bin, or mobility aid. Routes and planting space compete for the same area, so test both rather than leaving circulation to whatever space remains. Give service access its own route to bins, valves, and equipment. If a repair requires workers to trample planting beds, the layout needs revision.
This walkthrough can help you see how zones connect in an actual yard.
Use a hypothetical 30-foot-wide yard to test bed access. Suppose a fence-side bed is drawn 6 feet deep, with access only from the lawn side. Reaching plants along the fence would mean stepping into the bed, and the shrubs shown might not fit their mature spread. Reduce the bed to 4 feet deep, or add a stepping path that provides access farther in; check plant spacing before fixing the outline. The same paper test should account for future changes. Removable features and adaptable routes can serve a household as children grow or mobility needs change, without locking the yard into one life stage.
Choose Hardscape and Plants for Your Hardiness Zone
Filter plants by climate before you fall in love with any of them. The USDA's 2023 Plant Hardiness Zone Map update uses 30-year averages of the lowest annual winter temperatures, divides the country into 10-degree-Fahrenheit zones with 5-degree half-zones, and draws on 13,412 weather stations, compared with 7,983 stations for the 2012 map. The first USDA map appeared in 1960, building on Alfred Rehder's 1927 work based on winter minimums and plant survival.
A zone match doesn't guarantee success. Refine with sunlight, drainage, soil type, mature size, heat exposure, and your maintenance capacity. But ignoring the zone invites replacement costs. A Zone 5 yard that planted a Zone 7-rated shrub in an exposed corner lost it in the first hard winter, while a Zone 5 native in the same spot came through fine. That isn't bad luck. That's a filter that wasn't applied.
Build Planting in Layers
- Backbone: Climate-appropriate trees and large shrubs that carry the yard's structure year round
- Fill: Perennials and groundcovers grouped by similar moisture needs into hydrozones
- Focal spots: Delicate or high-maintenance plants only in protected areas near the house, where you'll notice problems early
Mixing drought-tolerant plants with high-water species in one bed forces you to overwater one group or stress the other. Group by thirst, improve compacted soil with organic matter before planting, and mulch beds to retain water, suppress weeds, and moderate soil temperature.
Compare Surfaces by What They Do With Rain
| Surface | Runoff | Maintenance | Best use |
|---|---|---|---|
| Poured concrete | High; little infiltration | Low; may crack over time | Main patios where grading handles water |
| Pavers on sand base | Moderate; joints let some water through | Low to moderate; weeds in joints | Patios and walkways |
| Permeable pavers | Low; water infiltrates | Moderate; vacuum joints and check base | Sites with drainage problems |
| Gravel or decomposed granite | Low; permeable | Moderate; rake and control weeds | Paths and dry-climate seating |
| Flagstone on mortar | Moderate | Low | Formal patios and steps |
| Artificial turf | High; needs drainage | Low for water, but cleaning is needed | Pet and play areas where heat is manageable |
A surface can be low-maintenance and still create heat and runoff problems, so choose materials after your drainage test, not from a photo. OutdoorBrite's guide to hardscape covers the terminology if you're comparing contractor quotes. Finally, draw every plant at its mature width on the plan. Nursery pot size is the single most common reason beds look crowded and paths disappear within three seasons.
Test Layout Options on Your Own Photo
Committing to a layout from a paper sketch alone is risky. It's hard to judge scale, sightlines from the kitchen window, or how a fire pit feels two steps from the back door. Testing concepts on a photo of your own yard catches awkward proportions while changes are still free.
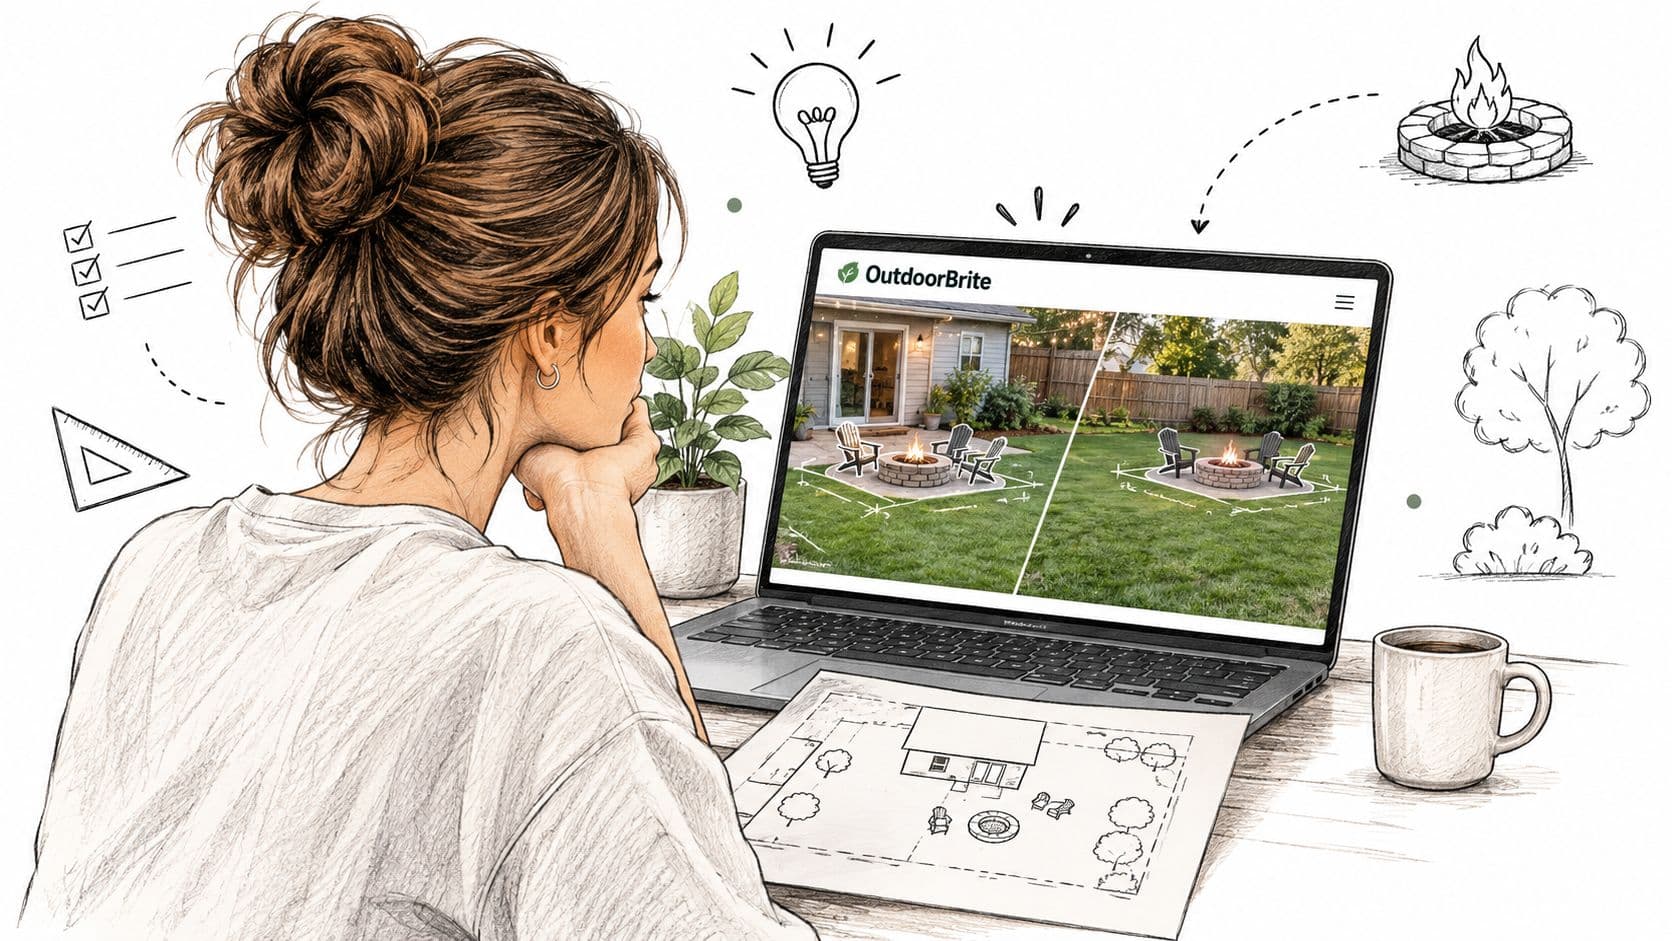
Use OutdoorBrite at outdoorbrite.com to run that test against the constraints you've already set:
- Photograph straight-on: Stand at a fixed spot at eye height with the full area in frame, plus one wide shot that includes the house.
- Upload and pick a climate-fit style: Choose xeriscape, Mediterranean, or another direction that suits your water allowance and maintenance tolerance, not only the look you like.
- Generate several concepts: Compare each against your zone map, not against each other's looks alone.
- Edit elements into planned zones: Drop in a fire pit, pergola, or beds where your zones say they belong, then check gaps against your path and clearance numbers.
- Make a drought-year version: Replace turf in the concept and see which features still work when that zone switches off.
- Shortlist two concepts: Download high-resolution versions and take them to a contractor for quotes.
If you want the detailed workflow, here's how to turn yard photos into landscape plans step by step.
A rendering shows appearance. It doesn't show dimensions, drainage, plant hardiness, or irrigation coverage.
That limit matters. Verify every shortlisted concept against your site survey and the hardiness and hydrozone rules before ordering plants or pavers. If a concept shows lush planting where your sun count says deep shade, the survey wins. If a patio lands where your drainage hole held water for hours, the test wins. The photo test is for comparing options quickly. Your measurements decide which option survives contact with your actual yard.
Sequence Irrigation, Lighting and the Phased Build
Build irrigation before anything is paved. Divide the plan into hydrozones and give each its own valve, schedule, and delivery method, as University of Nebraska extension guidance on matching irrigation to plant, season, and soil needs recommends. One timer for the whole yard is the common failure, and it's costly: the EPA estimates as much as 50% of outdoor water can be lost through inefficient irrigation, a poorly maintained automatic system can waste up to 25,000 gallons annually, a WaterSense-labeled controller can reduce irrigation use by up to 30% and save up to 15,000 gallons per year, and a Florida field study found soil-moisture-based controllers used 30% less water than clock-timed controllers.
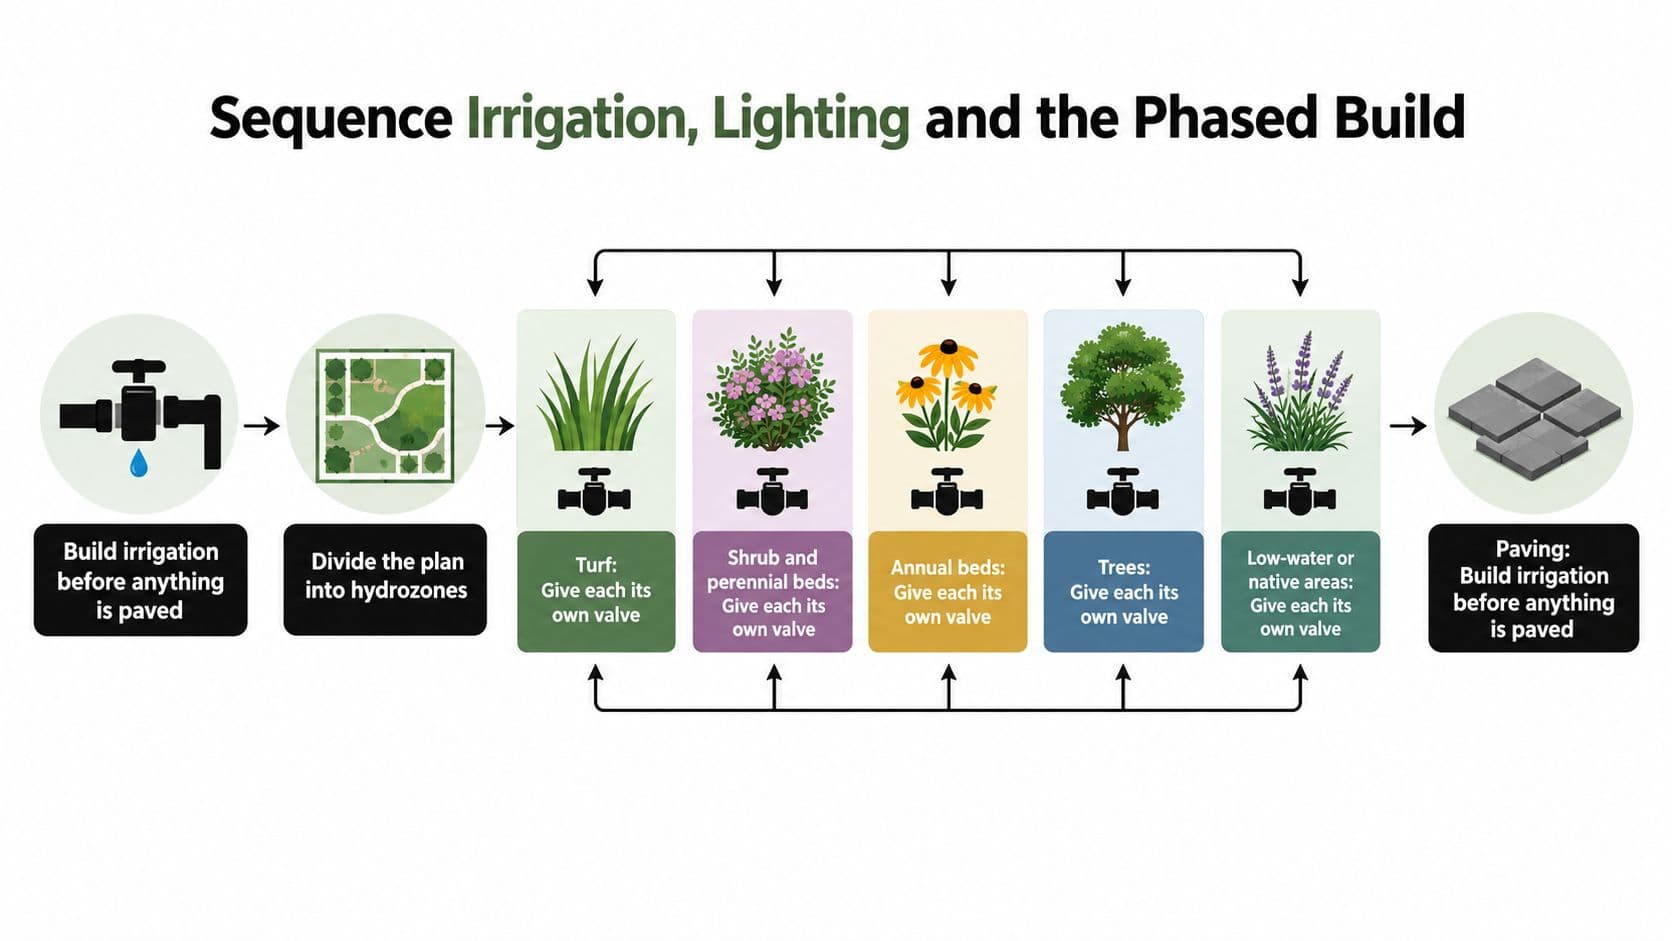
| Hydrozone | Delivery method | Schedule habit |
|---|---|---|
| Turf | Spray or rotor heads with matched precipitation rates | Separate zone, early morning runs |
| Shrub and perennial beds | Drip emitters or bubblers | Deeper, less frequent runs |
| Annual beds | Drip tape on short cycles | Adjust weekly as the season changes |
| Trees | Bubblers or deep-root watering around the drip line | Heavier watering in establishment years |
| Native or low-water areas | Drip only during establishment | Often off once plants are established |
Layer lighting: path lights roughly 6 to 8 feet apart, uplights on feature trees, and low-voltage fixtures on steps. Then phase the build. Fall one covers grading, drainage, utilities, irrigation rough-in, and lighting conduit. Spring is for hardscape and retaining walls. Fall two is for soil amendments, mulch, and planting, so roots establish before summer heat. Before calling planting finished, program the controller, run a night test of the lights, and do a first-week watering check emitter by emitter.
Upload a photo of your yard to OutdoorBrite, generate concepts in styles that fit your climate and water allowance, and test them against your zone map and clearance numbers before you spend on plants or pavers. Take your two best concepts, including a drought-year version, to a contractor for real quotes.
See your yard reimagined
Start creating