8 Inexpensive Drought Tolerant Landscaping Ideas for 2026
Create a beautiful, water-wise yard on a budget. Explore our guide to inexpensive drought tolerant landscaping, from native plants to smart hardscapes.
Tired of high water bills and a yard that still looks tired by midsummer? You're not alone. The classic green lawn still sells a dream, but in many places it now comes with too much watering, too much mowing, and too much money disappearing into maintenance. For a lot of homeowners, the underlying problem isn't just drought. It's paying for outdoor spaces that fight the climate every week.
The good news is that inexpensive drought-tolerant yard design doesn't mean settling for a yard full of bare gravel and a few struggling plants. Done well, it looks intentional, layered, and easier to live with than a traditional lawn. You can cut the thirst out of your outdoor areas, reduce maintenance, and build something that still has curb appeal.
The smartest way to do it is to treat the yard like a series of small upgrades instead of one massive renovation. Swap turf where it hurts the budget most. Improve irrigation before buying more plants. Test mulch colors, path layouts, and plant groupings in a mockup before you move a shovel. If you want the bigger picture before you start, this comprehensive building and landscaping guide is a useful companion.
Table of Contents
- 1. Native Plant Landscaping
- 2. Mulch and Ground Cover Installation
- 3. Hardscape and Xeriscaping Design
- 4. Ornamental Grasses and Sedums
- 5. Rainwater Harvesting and Smart Irrigation
- 6. Succulent Gardens and Alpine Plantings
- 7. Turf Grass Alternatives and No-Mow Options
- 8. Container and Vertical Garden Design
- 8-Option Comparison: Budget Drought-Tolerant Landscaping
- Start Your Water-Wise Transformation Today
1. Native Plant Landscaping
A common budget mistake shows up in the first nursery trip. Homeowners buy a cart full of drought-tolerant plants that look good on the bench, then spend the next two summers replacing half of them. Native planting cuts that risk because the plant choices already fit your climate, soil, and seasonal stress better than many imported ornamentals.
That does not mean every native is automatically cheap or carefree. Some are slow to fill in. Some look sparse in the first year. The savings usually come from lower water use, fewer losses, and a simpler plant list that you can repeat across the yard instead of chasing rare specimens.
Start with a tight plant palette
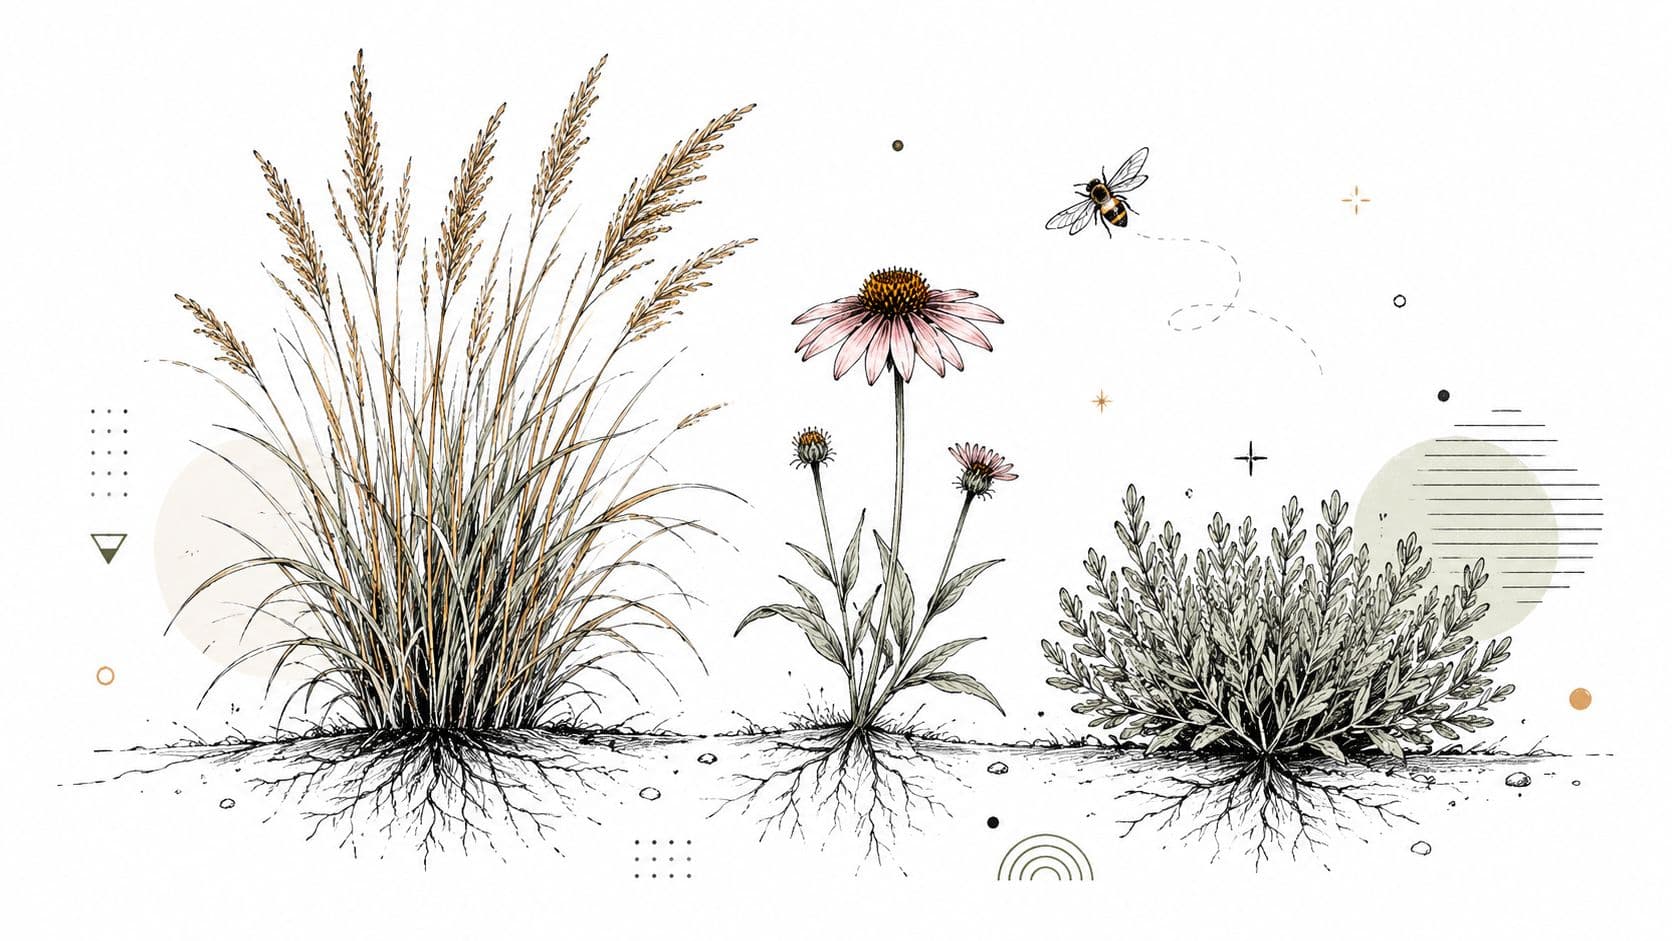
The cheapest native garden usually looks best when it stays disciplined. Pick three or four reliable plants for most of the space, then use one or two accents near the entry, walk, or patio where people notice detail. Repetition makes a small budget read as intentional design.
I use this approach on cost-conscious jobs because it fixes two problems at once. It keeps the plant order manageable, and it prevents the patchwork look that happens when every plant is different. A front yard in Southern California might repeat sages, deer grass, and a seasonal wildflower. In a prairie region, the backbone could be native grasses with a few sturdy flowering perennials.
Before buying, it helps to sketch spacing and massing so you do not overorder. Many homeowners now use visual planning tools to test combinations, compare bed shapes, and create a stunning low-water garden before spending money on plants that may not earn their spot.
Practical rule: Buy the repeaters first. Add specialty plants only after the structure of the yard is set.
A few habits keep native planting affordable from day one:
- Plant in fall or during the cooler season: Roots establish with less stress and often with less supplemental water.
- Buy smaller sizes when possible: A one-gallon native often catches up to a larger container plant faster than homeowners expect, at a much lower upfront cost.
- Group plants by irrigation need: Dry-climate species should not share watering zones with thirstier choices.
- Phase the install: Finish the most visible bed first, then expand once you see what performs well in your yard.
Native plants still need real establishment care. Good spacing, early weed control, and consistent watering in the first season matter. Handle that part well, and a modest planting can look settled and intentional much sooner.
2. Mulch and Ground Cover Installation
If your budget is tight, start with mulch before you start chasing more plants. It improves the whole site at once. Bare soil loses moisture, grows weeds, and makes a new planting bed look half-finished even when the plants are good.
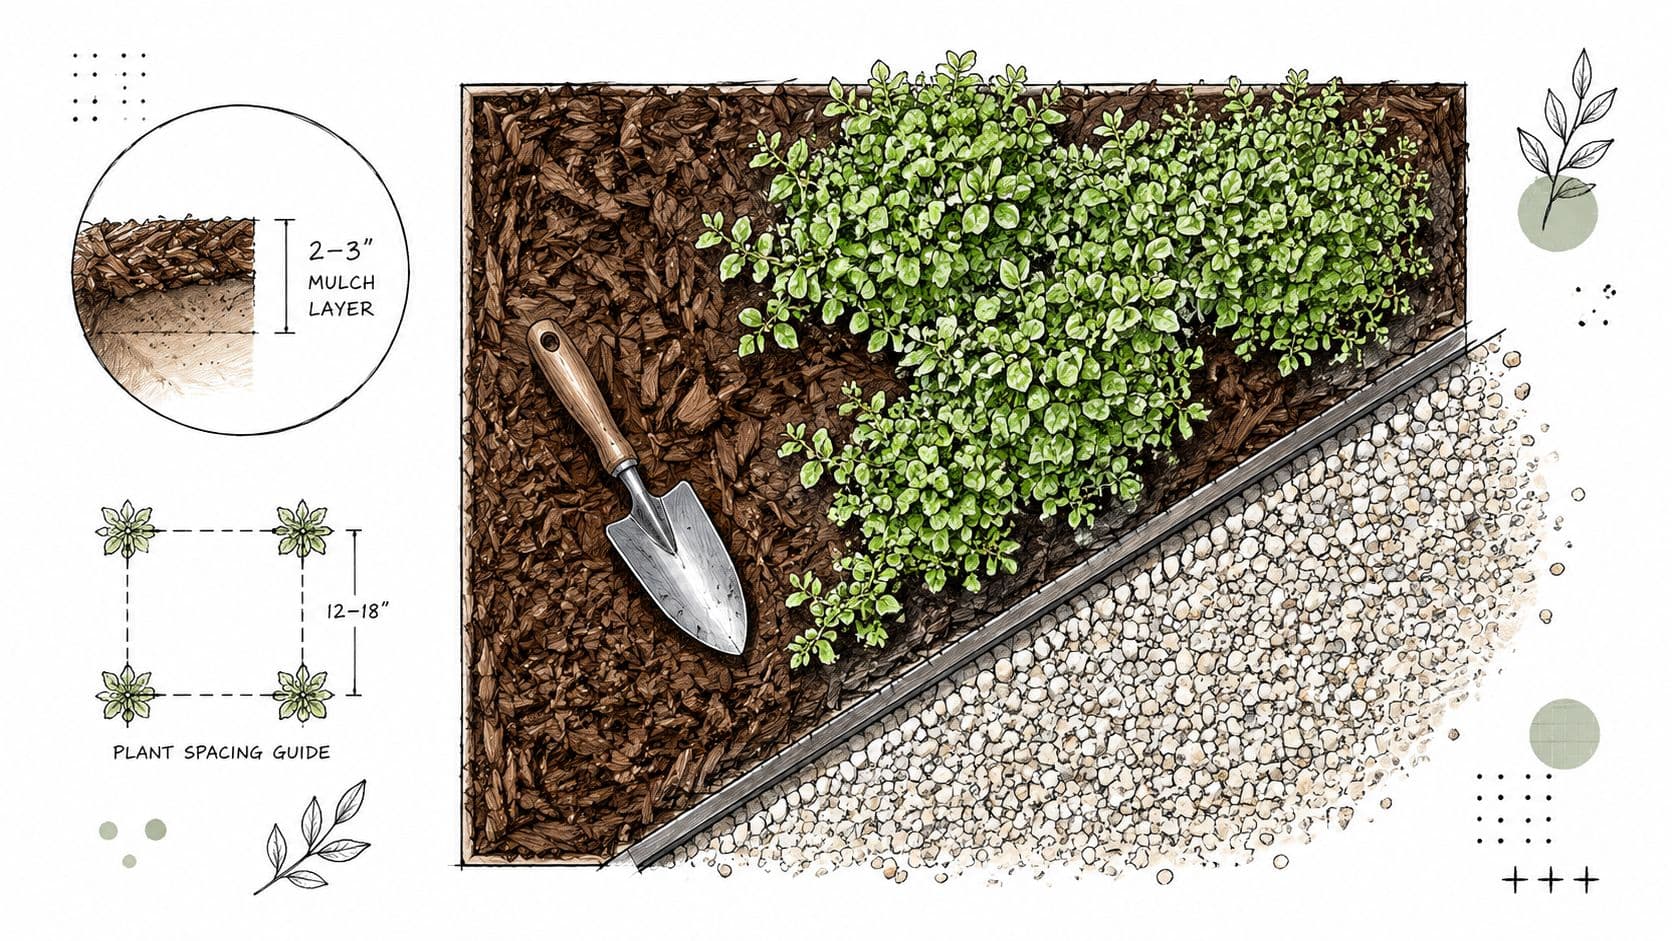
A 2 to 3 inch layer of organic mulch or inorganic gravel around plants helps suppress weed growth, regulate soil temperature, and retain soil moisture, according to this drought-resistant landscaping guidance from Proven Winners. That's one of the rare upgrades that changes both how the yard performs and how it looks on the same day.
Use mulch as a moisture tool, not just decoration
Organic mulch and gravel do different jobs. Wood chips and bark gradually improve soil. Gravel stays put, looks cleaner in modern or desert-style planting, and works especially well near paths and around plants that hate soggy crowns.
The cost-saving move is to match the mulch to the zone instead of forcing one material everywhere. Use bark or wood chips in shrub and perennial beds. Use gravel where you need durability and where splashing soil would make the area look messy.
A few practical choices keep this inexpensive:
- Keep mulch off stems and trunks: A small gap around the base prevents rot and pest issues.
- Mix textures by area: Fine mulch everywhere can look flat. Gravel near paths and organic mulch in planting beds usually reads better.
- Measure before ordering: A quick design mockup helps avoid buying far more material than the bed needs.
Mulch doesn't fix bad plant placement, but it gives good planting a real chance to establish.
What usually fails is the thin, decorative dusting people apply because they're trying to stretch a few bags too far. It looks finished for a week, then weeds push through and the soil dries out. Go deep enough to matter, and the bed will work.
3. Hardscape and Xeriscaping Design
A common budget mistake looks like this. The sprinklers run hardest on the strips of lawn nobody uses, while the patio still feels too small and the side yard stays muddy or bare. Those are the spots I convert first because they waste water, absorb maintenance time, and usually add the least day-to-day value.
Hardscape works best when it solves a job. A gravel path handles foot traffic. Stepping stones turn a worn shortcut into a usable route. A small permeable sitting area can replace thirsty turf and make the yard feel planned instead of patched together. The cheapest square foot to irrigate is often the one you stop irrigating.
Reduce lawn where it costs you most
Start with the problem areas that already struggle. Narrow side yards, parking strips, steep slopes, and the dead zone by the driveway are usually better candidates for gravel, pavers, decomposed granite, or planted pockets than for more grass.
Cost control comes from restraint. Keep the shapes simple, use one or two materials, and phase the work by zone. I usually recommend building the path or sitting area first, then filling planting pockets later if the budget is tight. That prevents the half-finished look you get when money runs out after demolition.
If you are unsure how much stone is enough, test it before ordering. You can mock up stepping-stone spacing, gravel coverage, and path widths with landscape design ai, which helps catch expensive layout mistakes before material shows up in the driveway.
Permitting and site constraints matter too. If your project touches setbacks, drainage changes, or access issues, this guide to navigating land use rules using BIM is a useful starting point.
A few rules keep xeriscaping affordable and livable:
- Use permeable surfaces where possible: Gravel, spaced pavers, and stepping stones usually handle runoff better than solid concrete.
- Break up stone with planting pockets: Too much bare rock can feel hot, glaring, and unfinished.
- Edge materials cleanly: Steel, brick, or concrete edging keeps gravel from drifting into walkways and reduces cleanup.
- Buy by measured area, not guesswork: A rough plan saves money on both over-ordering and second trips.
The trade-off is real. Stone and pavers can lower water use and upkeep, but they raise upfront installation cost and can reflect heat if overused. The best low-water yards use hard surfaces to organize space, then let plants soften the edges.
4. Ornamental Grasses and Sedums
Some plants do more visual work than others, and ornamental grasses and sedums are on that shortlist. They add motion, shape, and contrast without asking for much fuss. When a budget is tight, that matters because you need every plant to earn its space.
I like these two groups together because they solve opposite design problems. Grasses provide height and movement. Sedums cover the foreground, soften edges, and handle leaner conditions. In many yards, that pairing creates a fuller look than a long list of scattered flowering perennials.
Use contrast to make a simple planting look expensive
A small drift of upright grass behind a low mass of sedum can make a basic bed look layered instead of flat. That's a much cheaper effect than trying to force constant color with lots of separate plants. Creeping thyme, sedums, and blanket flowers are also highlighted in the verified technical benchmark data as native-friendly, low-water choices that can thrive with minimal supplemental water in the right conditions.
This approach works especially well in modern front yards, mailbox beds, and hot strips near driveways. Blue-toned grasses with green or bronze sedums can carry a clean look through much of the year without constant editing.
A good grass-and-sedum bed looks fuller over time. A bad one looks crowded on planting day.
A few practical guidelines help:
- Space for mature spread: Buying fewer plants and giving them room is usually smarter than cramming the bed.
- Cluster, don't dot: Repetition reads as design. Single isolated plants read as leftovers.
- Cut back grasses at the right time: Let them hold winter structure, then clean them before fresh growth starts.
What doesn't work is forcing sedums into wet, heavy soil or deep shade and hoping toughness will carry them through. Tough plants still have preferences. Respect those, and they're some of the best-value performers in a water-wise outdoor setting.
5. Rainwater Harvesting and Smart Irrigation
A common budget mistake happens after planting day. The beds look good, then the watering setup wastes money all summer. I see it all the time: spray heads throwing water onto sidewalks, one timer running everything at once, and new plants getting drowned while dry spots still struggle.
For a water-wise yard, irrigation usually deserves money before more plant purchases do. A simple drip or soaker-hose setup costs less than replacing stressed plants, and it gives you control from the start. If you're using AI yard planning tools to prototype ideas before buying materials, map irrigation zones there too. That step helps you catch expensive mistakes early, especially where containers, shrubs, and dry gravel beds need different schedules.
Make every gallon do a job
Drip lines and soaker hoses are often enough for a homeowner project. They water the root zone instead of the air, which is the whole point. Paired with mulch and decent soil structure, they stretch each watering cycle further and cut down on runoff.
Rain capture can be just as practical. Los Angeles County Public Works guidance supports basins and swales that slow runoff and let water soak in within about a day. On a sloped lot or under a roof downspout, that can turn a problem area into a planting zone that stays usable longer between waterings.
I usually recommend this order:
- Set irrigation first: It is cheaper to place plants around working zones than to redo tubing after the bed is filled.
- Capture roof runoff where it lands: A barrel, basin, or shallow swale can reduce how much tap water the garden needs.
- Schedule by zone: Trees, foundation beds, pots, and gravel areas should not share one timer program.
- Install in phases if money is tight: Start with the highest-visibility or fastest-drying areas, then expand later.
That phased approach matters on a budget. A homeowner can finish the front yard this season, test the watering schedule through real weather, then copy what worked in the back. That is usually smarter than installing a full system everywhere and guessing.
A short demonstration can help if you're planning a basic capture-and-irrigation setup:
If you're exploring broader household water reuse, review local greywater permits and rules before adding anything beyond simple rain capture.
6. Succulent Gardens and Alpine Plantings
Succulents are often the first thing people picture when they hear drought-tolerant landscaping. Sometimes that works beautifully. Sometimes it creates a costly mess. The difference is usually drainage, light, and restraint.
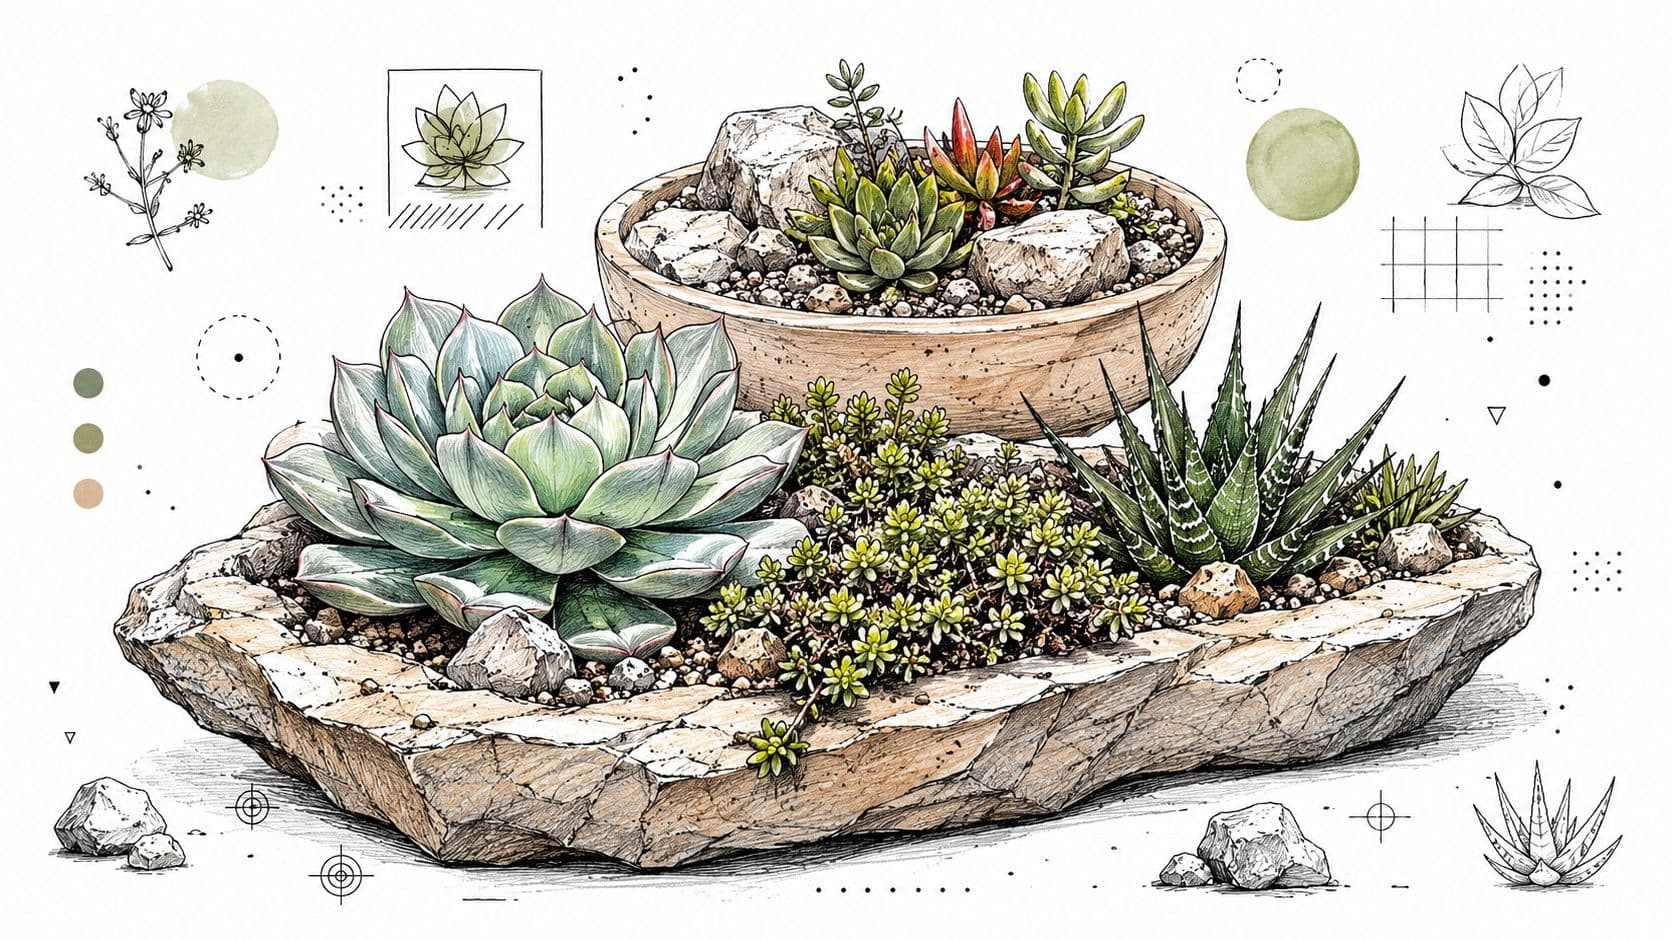
Used well, succulents and alpine-style plantings are excellent for small focal areas, pots, retaining-wall pockets, and hot beds near paving. Used badly, they become a random collection of mismatched shapes planted into soil that stays wet too long.
Watch the drainage before you buy the plants
If the bed holds water, fix that first. Gravelly topdressing can help surface appearance, but it won't rescue roots sitting in dense, soggy soil. In containers, a gritty mix and drainage holes matter more than the pot style.
One reason succulents fit an inexpensive plan is that many can be expanded gradually from healthy offsets or cuttings. That lets you build out a small planting over time rather than buying a large instant display. I'd still keep the palette tight. A few repeated forms usually look stronger than a collector's tray dumped into the yard.
A few places where this style works especially well:
- Entry courtyards: Architectural plants suit small, visible spaces.
- Raised beds near patios: Drainage is easier to control above grade.
- Rocky edge zones: Plants with bold forms stand out against stone and gravel.
What usually doesn't work is forcing sun-loving succulents into a shady side yard because the internet told you succulents are low-water. Low-water doesn't automatically mean low-light. Match the plant to the exposure, or the cheap option becomes the replacement option.
7. Turf Grass Alternatives and No-Mow Options
Traditional lawn is often the biggest water habit in the yard, so replacing even part of it can change the budget quickly. The key is choosing an alternative based on actual use. If kids play there daily, you need something different than you'd use in a decorative side strip or under a tree canopy.
One practical route is phased conversion. Verified cost benchmarks show small renovation areas under 500 square feet typically cost $200 to $800 for DIY work, while medium projects from 500 to 2,000 square feet range from $1,500 to $4,000 through the same market analysis already noted. That makes testing a section first a smart move if you're unsure what will thrive.
Shade changes the whole decision
This is the part many drought-tolerant guides skip. The verified underserved-angle data says over 40% of U.S. residential lots have significant shade, yet 92% of drought-tolerant landscaping guides focus on sun-exposed sites, based on this discussion of drought-tolerant gardening gaps. That's why homeowners so often fail when they swap turf for plants that need full sun.
For shady areas, think native sedges, bugleweed, or creeping thyme where conditions suit it, not a random succulent mix. In sunny, lower-traffic spaces, no-mow ground covers and native grass alternatives can work well if the soil drains decently and the use pattern isn't too rough.
A few ways to avoid expensive mistakes:
- Test one zone first: Convert the strip that annoys you most before tackling the whole lawn.
- Define edges clearly: Borders make lawn alternatives look intentional.
- Be honest about traffic: Decorative ground cover isn't a soccer field.
For planning, comparison images help a lot. Many homeowners use the OutdoorBrite ground cover guide to sort through visual options before removing existing turf.
8. Container and Vertical Garden Design
Not every yard needs a full ground-up renovation. Sometimes the cheapest drought-tolerant upgrade is concentrating effort where people tend to look. Containers and vertical accents do that well. They give you control over soil, drainage, and placement, and they're especially useful in patios, entry areas, balconies, and small courtyards.
This is also where a lot of homeowners save money by avoiding unnecessary bed expansion. Instead of reworking the whole perimeter, you can create impact with a few large containers planted well and grouped with purpose. The result often feels more finished than a scattered in-ground project.
Containers work best where they solve a problem
Use containers where in-ground planting is difficult or where a focal point is missing. A hot paved patio, a narrow front stoop, or a bare corner beside a garage can all improve quickly with drought-tolerant pots. Vertical systems make sense when floor space is limited, but they need careful watering and shouldn't be treated as a maintenance-free shortcut.
A few combinations consistently work:
- Tall plus trailing: One upright specimen with a lower spiller gives instant structure.
- Grouped by need: Pots with similar light and water requirements are easier to manage together.
- Mulched pot surfaces: Even a light top layer helps slow moisture loss.
Keep containers near where you'll actually see them and reach them. Plants that are easy to monitor get better care.
What doesn't work is using tiny pots for plants that want stable moisture and root space. Small containers dry out fast. If the goal is water-wise and low-hassle, bigger pots are usually the better investment.
8-Option Comparison: Budget Drought-Tolerant Landscaping
| Item | Complexity 🔄 | Resources & Cost ⚡ | Expected Outcomes 📊⭐ | Ideal Use Cases 💡 | Key Advantages |
|---|---|---|---|---|---|
| Native Plant Landscaping | Moderate, species research and establishment period | Low–moderate plant cost ($2–5/plant); minimal long‑term inputs | 📊 ~50–75% less water after establishment; ecosystem support; ⭐⭐⭐⭐ | Regional gardens, habitat restoration, low‑water curb appeal | Low maintenance; supports pollinators; long‑term water savings |
| Mulch & Ground Cover Installation | Low, straightforward installation and periodic refresh | Very affordable ($1–3/ft²); occasional replacement (organic) | 📊 Reduces soil evaporation 50–70% immediately; ⭐⭐⭐⭐ | Bed preparation, weed suppression, fast water savings | Immediate impact; suppresses weeds; inexpensive |
| Hardscape & Xeriscaping Design | High, design, grading and professional install often needed | Higher upfront ($5–15+/ft²; $2k–8k project); long‑term savings | 📊 50–80% landscape water reduction; durable; ⭐⭐⭐⭐ | Large yards, entertaining spaces, turf replacements | Dramatic water savings; increases property value; low upkeep |
| Ornamental Grasses & Sedums | Low–Moderate, planting and spacing for mass effect | Affordable per plant ($3–8) or $0.50–$1/ft² mass‑planted | 📊 70–90% less water vs. traditional perennials; seasonal interest; ⭐⭐⭐⭐ | Mass plantings, perennial borders, prairie or contemporary designs | Year‑round texture; low inputs; pollinator‑friendly |
| Rainwater Harvesting & Smart Irrigation | Moderate, system sizing, sensors, programming | Moderate investment ($200–5,000); rebates may apply | 📊 30–50% irrigation reduction; runoff reduction; ⭐⭐⭐⭐ | Areas with rainfall to capture; retrofits; tech‑savvy homeowners | Reduces bills; automates watering; scalable solutions |
| Succulent Gardens & Alpine Plantings | Low, simple planting, requires well‑draining soil | Very low plant cost ($0.25–1); possible soil amendment costs | 📊 Minimal irrigation (monthly or less); low inputs; ⭐⭐⭐⭐ | Containers, rock gardens, arid sites, beginners | Extremely water‑efficient; easy propagation; low maintenance |
| Turf Alternatives & No‑Mow Options | Moderate, establishment and initial weeding | Moderate ($0.50–2/ft²); phased conversion lowers costs | 📊 50–70% less water than turf; reduced mowing; ⭐⭐⭐⭐ | Residential lawns, shade areas, eco‑neighborhoods | Cuts mowing and input costs; supports biodiversity |
| Container & Vertical Garden Design | Low–Moderate, container selection and irrigation setup | Moderate ($15–200+/container; $200–1,500 system) | 📊 ~30–40% less water than in‑ground; flexible placement; ⭐⭐⭐ | Small spaces, rentals, patios, urban settings | Precise soil control; portable; ideal for small/temporary sites |
Start Your Water-Wise Transformation Today
Saturday morning is when this usually becomes real. The sprinkler has been running too long, the lawn still looks tired, and the water bill is sitting on the kitchen counter. That is the point to stop treating the whole yard as one giant project and start fixing the part that wastes the most water or labor first.
A good drought-tolerant yard is usually built in phases. I recommend that approach on budget jobs because it keeps mistakes small and decisions sharper. Start with one bed, one side yard, one irrigation repair, or one section of turf removal. Then watch how that area performs through a few weeks of heat before committing to the next phase.
That pacing also keeps costs under control.
DIY work can stay relatively affordable when homeowners handle demolition, sheet mulching, plant division, or basic drip installation themselves, while saving paid labor for grading, masonry, or larger irrigation changes. The trade-off is time. A phased plan asks for more patience up front, but it usually prevents expensive rework and impulse plant purchases that do not suit the site.
Good planning saves money before the first shovel hits the ground. Test gravel colors, patio shapes, mulch coverage, and plant groupings on a photo of your own yard before you buy materials. OutdoorBrite helps with that early decision-making by letting you preview water-wise options virtually, compare ideas, and make cleaner material lists. If you are spreading costs over time, OutdoorBrite Money is also one practical financing option to review through the same platform.
The strongest results usually come from boring choices done well. Fix the irrigation layout. Improve soil cover. Reduce unnecessary turf. Set plants where drainage and sun exposure match their needs. A simple yard with the right structure will outperform a more ambitious garden installed without a plan.
Start with the zone that annoys you every week or wastes the most water. Get that area working, learn from it, and use the same logic across the rest of the yard.
If you're planning a yard upgrade and want a clearer picture before spending on plants, gravel, or hardscape, OutdoorBrite Money connects you with the OutdoorBrite platform so you can visualize designs first and move into your project with a more defined plan.
See your yard reimagined
Start creating