Planted Retaining Walls: 2026 Planning & Design Guide
Build beautiful, living planted retaining walls. Our 2026 guide covers planning, drainage, materials, plant selection, and how to avoid costly mistakes.
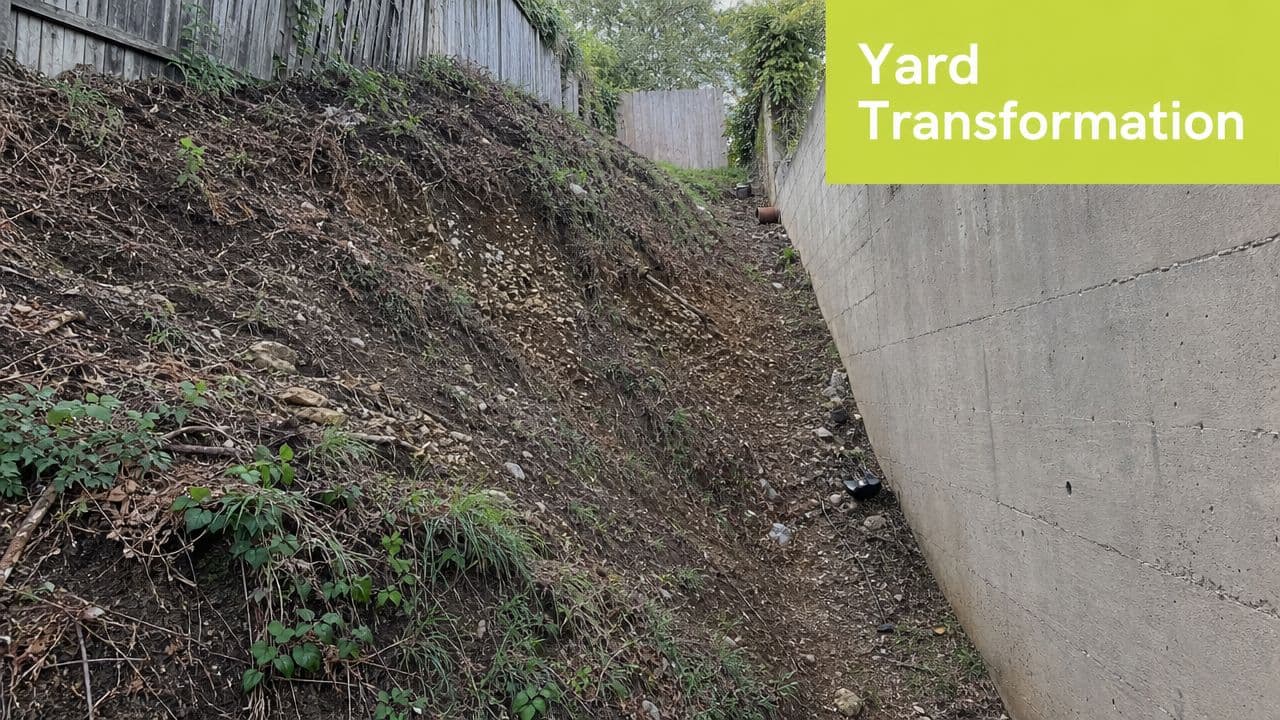
You're probably standing at a slope that feels wasted. Maybe it's a bare embankment that sheds mulch every time it rains. Maybe it's an old block wall that does its job but looks harsh, hot, and out of place next to the rest of the yard.
That's where most planted retaining walls start. Not as a design trend, but as a fix for an awkward grade problem. The mistake many homeowners make is treating the wall as one project and the planting as another. In practice, they're the same system. Roots, soil, drainage, and watering all affect whether the wall stays straight and stable.
Why Choose a Planted Retaining Wall
A standard retaining wall solves one problem. A planted one can solve several at once.
If you've got a steep side yard, a backyard drop, or a long run of exposed wall facing a patio, a planted wall turns dead space into usable tiers and softens the whole site. It can feel less like a barrier and more like part of the garden. That matters in residential work, because the wall is often what you see before you notice the plants around it.
Where the value shows up
The practical upside is bigger than appearance. Plantable retaining walls can reduce construction costs by up to 75% and halve build times compared to traditional, non-vegetated retaining wall systems, according to Tensar's overview of retaining wall types. That's one reason they've become attractive for homeowners trying to control both budget and disruption.
There's also a site comfort benefit. The same Tensar reference notes that planted green retaining walls in the United States Midwest showed cooler block surface temperatures for specific Sedum treatments than unplanted treatments, and identifies these walls as a useful tool for mitigating urban heat island effects.
Field reality: A planted wall doesn't just hide concrete. Done right, it changes how the wall handles heat, runoff, and the feel of the space around it.
What homeowners often miss
The beauty of planted retaining walls can fool people into thinking they're more forgiving than plain masonry. They aren't. The wall still has to resist soil pressure. The drainage still has to work. The planting still has to match the structure.
That's why I like these systems when the goal is both utility and finish. You can gain level ground, reduce the hard look of a tall wall, and build something that feels intentional. But it only works when the planting plan supports the engineering instead of fighting it.
Planning Your Project Before You Dig
Most wall failures start long before the first block goes down. They start with bad assumptions about water, soil, sunlight, and space.
Before you excavate anything, walk the site during and after rain if you can. Watch where water moves, where it pools, and where it exits the property. A planted retaining wall has to manage that water without saturating the area behind the face.
Read the site like a contractor
Start with the basics:
- Call for utility marking: Don't guess where gas, electric, irrigation, or communications lines run.
- Track sun and shade: Plant pockets that bake in afternoon sun need different material than shaded wall sections.
- Check access: A wall that looks simple on paper gets complicated fast if you can't get gravel, blocks, or compaction equipment into the yard.
- Study the slope above and below: The wall isn't just holding what touches it. The surrounding grade affects loading and drainage.
If you want a better framework for reading topography, drainage paths, and functional use zones, it helps to enhance your site analysis architecture skills before you lock in the layout.
Walk the whole area with paint or flags before you dig. Homeowners often focus on the wall line and ignore where runoff, stairs, edging, and planting beds need to go.
Decide the wall before you price the plants
A lot of DIY projects go sideways because the homeowner chooses finishes first. That's backwards. First decide how the wall will retain soil, where it will drain, and what planting zones it can safely support. Then choose the look.
Questions worth answering early:
| Decision point | Why it matters |
|---|---|
| Wall location | A small shift can improve drainage and reduce excavation headaches |
| Height and length | Taller walls move from garden feature to engineering structure fast |
| Water source | Hand watering, drip, and natural rainfall affect plant choices and soil moisture |
| Maintenance tolerance | A low-input wall needs tougher plants and simpler irrigation |
For early concepting, even homeowners with no drafting background can use ai landscape design software to test wall placement, planting massing, and how tiered spaces might look before committing to excavation.
Don't skip local rules
Permit triggers, setback rules, and inspection requirements vary. Some municipalities care about wall height. Others care about proximity to property lines, drainage discharge, or whether the wall supports a driveway or structure.
That's why the planning phase isn't busywork. It's where you avoid the expensive version of DIY, which is building twice.
Essential Structural Components for a Wall That Lasts
A planted retaining wall only looks simple from the front. The part that keeps it standing is mostly buried.
When a wall leans, cracks, or bulges, the problem usually isn't the face unit. It's what happened under it, behind it, or between courses during compaction. A living wall still obeys the same structural rules as any other retaining wall.
The hidden parts doing the real work
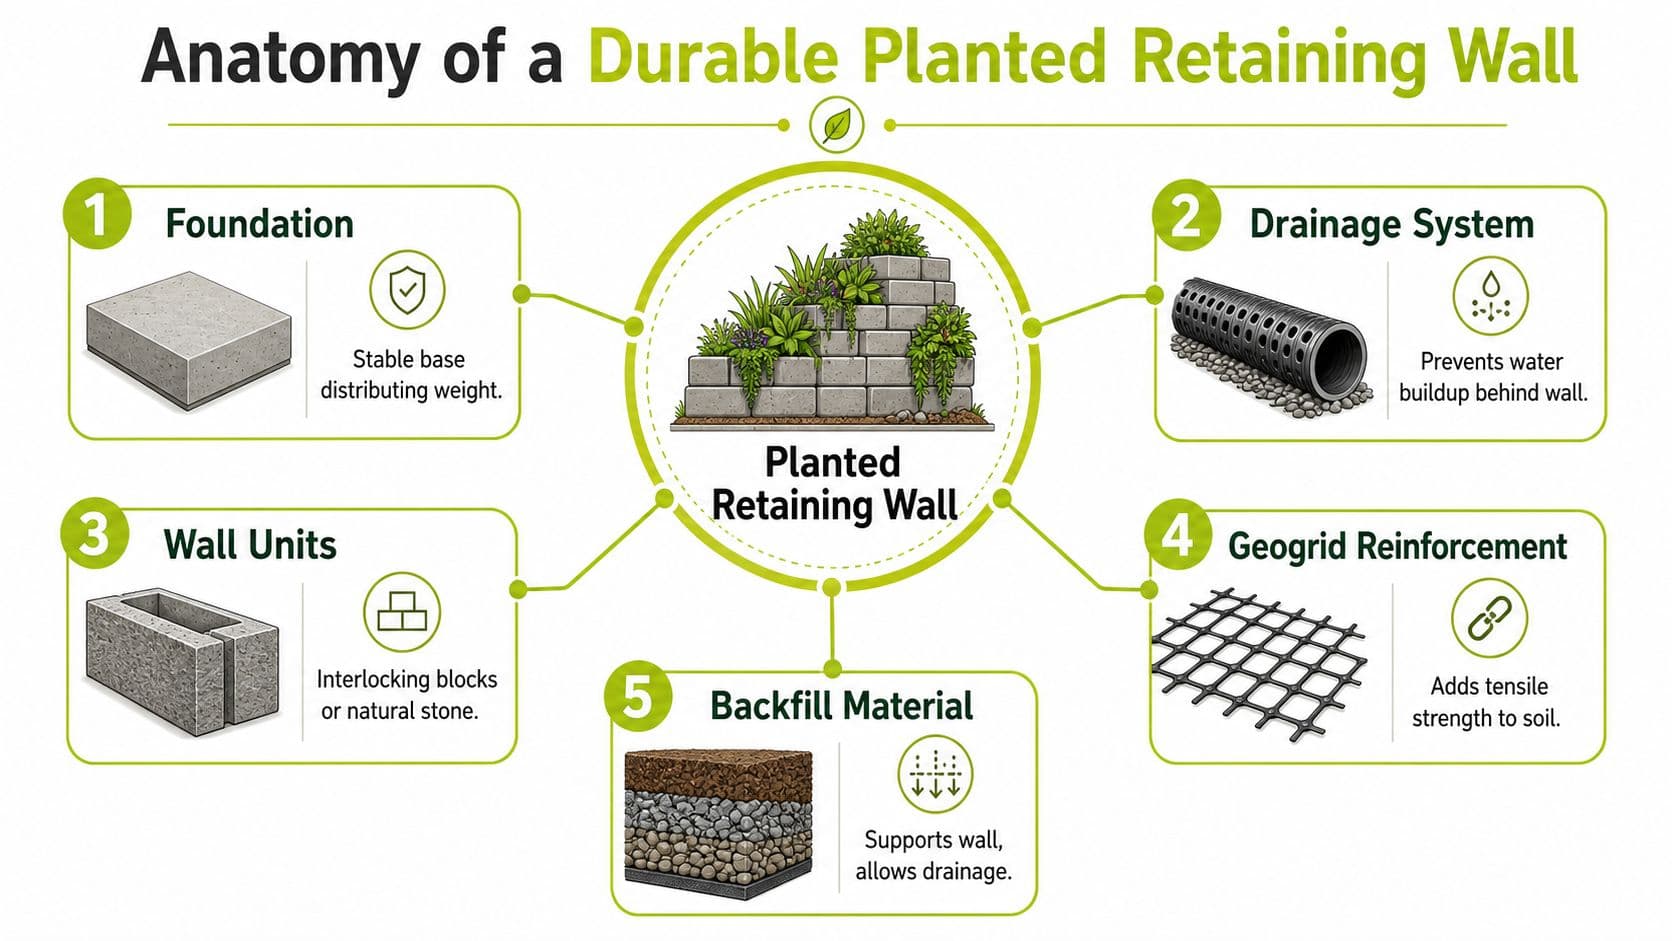
Think of the wall as five linked components:
- Foundation: The base spreads load and gives the first course a stable platform.
- Drainage system: Water must move out from behind the wall instead of building pressure.
- Wall units: The visible face holds alignment and creates planting opportunities.
- Geogrid reinforcement: This ties the wall face back into the retained soil mass.
- Backfill material: Clean, stable material supports drainage and compaction.
If one of those is weak, the planting won't save the wall. In some cases, planting can make the problem worse by adding moisture where the build was already marginal.
Compaction is where amateurs lose the wall
In mechanically stabilized earth systems, the method matters. Structural fill is compacted in 3 to 4 inch lifts to a minimum 95% Standard Proctor density before geogrid layers are placed, with geogrid typically spaced every 2 to 3 courses and extending back about three-quarters of the wall height, according to Ideal Concrete Block's contractor guidance.
That same guidance notes that walls built with sub-95% compaction can exhibit up to 40% higher lateral displacement under load. That's a useful number because it explains why a wall can look fine on day one and start moving later.
Non-negotiable standard: If the crew isn't compacting in controlled lifts, the wall is being asked to settle and resist pressure at the same time.
Drainage and planting have to agree
Here's the trade-off homeowners need to hear clearly. Plants need rooting media and moisture. Walls need drainage and stable backfill. Those needs overlap, but they aren't identical.
A few practical rules keep the two systems from fighting each other:
- Keep the drainage path clear: Don't let rich planting soil clog the free-draining zone behind the wall.
- Separate structural backfill from planting pockets: Use the system as designed instead of blending everything into one wet mass.
- Choose irrigation carefully: A wall that stays soggy behind the face is under constant stress.
For design ideas on making a wall feel more integrated with seating, screens, and outdoor rooms, homeowners sometimes pick up useful visual cues from expert advice for luxury homeowners. The style choices can be helpful, but the structure has to lead every decision.
The Construction Sequence From Ground Up
Good wall construction is repetitive in the best way. Excavate carefully. Build the base correctly. Set the first course perfectly. Repeat your backfill and compaction sequence without getting lazy.
That rhythm is what gives planted retaining walls their long-term stability.

Start with layout and excavation
Mark the wall line, then excavate wide enough to work safely and place base material correctly. Don't trench only for the face block. You need room for the base, drainage stone, and the reinforced zone if the system requires it.
The trench bottom must be level. If it isn't, every course above it will fight you.
Build the base like it matters, because it does
For modular segmental retaining walls, the base material must be compacted to 95% of the Standard Proctor density with moisture controlled to +1% to -3% of optimum to create a level, hard surface for the first course, according to Allan Block specifications. That's the benchmark that helps prevent differential settlement.
Use that as your standard, not a suggestion. A planted wall with a crooked first course rarely gets better as it goes up.
A simple build sequence looks like this:
- Excavate to design depth: Remove soft or disturbed material.
- Install and compact base material: Check level often.
- Set the first course slowly: This is the course that controls every course above.
- Add drainage aggregate and any specified pipe: Keep the drainage zone clean.
- Backfill in lifts and compact as you go: Don't dump everything in at once.
- Install geogrid where the system requires it: Keep it taut and properly embedded.
- Continue courses, checking setback and level: Small errors multiply fast.
- Finish the top and prepare planting areas: Only after the structure is right.
Don't rush the middle of the build
Most homeowners are patient at the start and careful at the end. The middle is where they speed up. That's where walls get into trouble.
For broader sloped yard planning tips, it helps to think beyond the wall itself and map how stairs, terraces, drainage routes, and access paths interact with the finished grade.
Here's a useful visual walkthrough of retaining wall installation details:
What not to improvise
- Don't substitute random fill: Structural zones need appropriate material.
- Don't bury problems: A block that rocks or sits out of level has to be reset.
- Don't overwater during establishment: The planting phase should never turn the backfill into a soaked sponge.
The strongest planted retaining walls come from discipline, not speed.
Planting for Stability Not Just Aesthetics
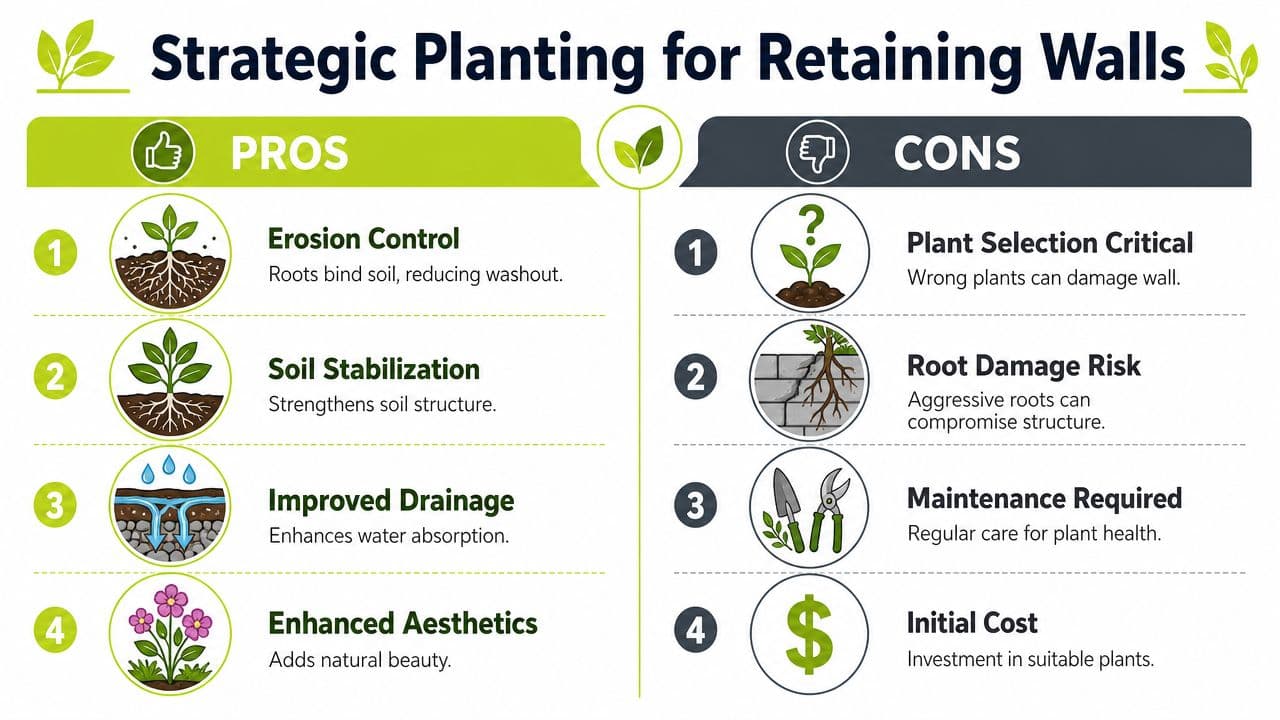
A planted retaining wall often looks fine for the first season, then starts showing the cost of poor plant choices a year or two later. The wall stays wet near the face, surface soil washes from pockets, or a shrub outgrows the space and starts pushing where it should not. That is why planting has to support the engineering, not compete with it.
Root placement affects the wall long after installation
The part homeowners see is the foliage. The part that affects stability is below grade.
Keep woody plants and anything with a substantial root ball well back from the wall face and away from the reinforced zone. A small shrub in a nursery pot does not stay small underground. As it matures, roots can disturb backfill, crowd drainage paths, and create pressure in places the wall system was not designed to handle.
The practical rule is simple. Use low, fibrous-rooted plants close to the face. Put larger shrubs farther back. Save trees for areas outside the wall influence unless the wall was specifically engineered with that load and root activity in mind.
Good planting makes the wall drier and the soil surface tighter. Bad planting adds weight, traps water, and puts roots in conflict with the structure.
Choose roots that bind surface soil, not roots that pry
For the face and upper slope, dense groundcovers, turf substitutes, and many herbaceous perennials do useful work because they knit the surface together. Their job is not to reinforce the wall itself. Their job is to reduce raveling, limit splash erosion, and keep bare soil from opening up after storms or irrigation.
The University of Minnesota Extension advises using vegetation with dense, fibrous root systems for slope protection because it helps hold soil in place and slows erosion on the surface, especially during establishment and storm events. That aligns with what we see in the field. Thin ornamental planting may look clean on day one, but open soil between plants rarely stays put on a slope.
Here is the trade-off:
| Planting choice | Structural effect |
|---|---|
| Dense groundcovers | Covers exposed soil and reduces surface erosion |
| Herbaceous perennials with fibrous roots | Helps hold planting pockets and upper slope soil together |
| Ornamental grasses used in the right size | Good root mass for surface stability without heavy woody growth |
| Large shrubs near the face | Can crowd drainage areas and create root pressure over time |
| Trees above or close to the wall | Added surcharge and root conflict if not planned by an engineer |
If you want texture without creating a root problem, these ornamental grasses for sun and shade are a good starting point. Choose compact varieties and keep them out of drainage stone and reinforced backfill zones.
Soil and water choices matter as much as plant selection
Planting soil belongs in designated pockets and surface zones, not mixed through the wall's drainage layer. Rich soil holds more water than clean aggregate. If that richer soil migrates into the wrong area, drainage slows down and the wall stays wetter than it should.
Watering needs the same discipline. The Federal Highway Administration notes in its roadside vegetation guidance that vegetation selection has to match site moisture conditions and slope performance, because poor species selection and irrigation practices can undermine erosion control efforts rather than improve them. On a retaining wall, frequent shallow watering creates the same problem. It keeps the face damp, encourages weak rooting near the surface, and adds water where the structure needs to drain freely.
Use plants that can establish with deep, occasional irrigation and then tolerate drier conditions. ABG Geosynthetics makes the same point in its green retaining wall guide. Free-draining soil and drought-tolerant species are standard practice because adding fine soil or keeping the wall saturated increases stress on the system, as explained in ABG's green retaining wall guide.
A planted wall should look settled, not lush at any cost. If a plant palette requires constant moisture to stay alive, it is usually the wrong palette for this application.
Avoiding Common Mistakes and Long-Term Care
A lot of homeowners assume the hard part ends when the wall is built. It doesn't. A planted wall is stable because the structure and the living material stay in balance over time.
The common failures are predictable. Bulging usually points back to poor compaction, bad backfill, or water pressure. Leaning often starts with a compromised base or movement in the retained soil. Clogged drainage can turn an otherwise solid wall into a wet pressure vessel.
Mistakes that keep showing up
Three problems come up again and again:
- Using the wrong soil in the wrong place: Rich garden soil belongs in planting zones, not in the structural drainage layer.
- Watering like it's a flower bed: Frequent shallow irrigation can keep the face wet without encouraging resilient rooting.
- Planting oversized material too soon: Big root balls create immediate conflict with wall geometry and future maintenance.
Watch for early warning signs instead of waiting for obvious movement. If blocks start stepping out of alignment, if water is seeping where it shouldn't, or if parts of the wall stay saturated long after rain, investigate.
Maintenance rule: If a planted retaining wall looks wetter every season, don't just replace plants. Find out where the water is being trapped.
Keep the wall dry enough and the plants tough enough
Long-term care should be simple. Choose drought-tolerant plants, prune to keep growth from becoming woody and overbearing near the face, and replace weak plants before bare soil opens up erosion channels.
A good routine includes:
- Seasonal inspection: Check outlets, face alignment, and any settlement around the top of wall.
- Targeted pruning: Keep plants from becoming too heavy or invasive in small pockets.
- Measured feeding: Use fertilizer lightly. You want healthy growth, not explosive growth.
- Smart irrigation changes: Reduce watering once roots establish. The wall should not stay constantly wet.
Don't baby these walls. Support them, yes. Saturate them, no.
Your Living Wall A Lasting Feature
The best planted retaining walls succeed because they're treated as one system. You plan the site carefully, build the structure correctly, and plant with the wall's stability in mind.
That means reading drainage before digging, taking compaction seriously, and choosing roots that help rather than harm. It also means resisting the urge to force thirsty or oversized plants into places where they don't belong.
If your site leans dry and exposed, browsing practical cacti and succulent landscape tips can help you think more clearly about low-water planting character, even if you end up using a broader plant palette.
A planted wall should feel settled into its surroundings, not pasted onto it. When the engineering and the planting work together, the result is stronger, cooler, easier to live with, and far better looking than a bare wall ever was.
If you want to test retaining wall layouts, planting combinations, and slope treatments before you commit to materials, OutdoorBrite makes that process much easier. Upload a photo of your yard, generate photorealistic concepts fast, and compare ideas while it's still cheap to change direction.
See your yard reimagined
Start creating