Raised Bed Garden Layout: Plan Your 2026 Dream Garden
Plan your raised bed garden layout with our guide. Get ideal dimensions, spacing, sun, and crop placement to maximize your 2026 harvest.
You're probably looking at a patch of yard that doesn't behave like the diagrams in most gardening books. Maybe it's a side yard squeezed between a fence and the house. Maybe the back corner jogs around a shed. Maybe the only sunny ground is an awkward L-shape that seems too messy to plan well.
That's exactly where raised beds shine, but only if the layout is handled like a working system instead of a few boxes dropped wherever they fit. A good raised bed garden layout controls reach, light, drainage, movement, watering, and crop placement before you buy lumber or soil. A bad one looks tidy for a week and becomes annoying every time you weed, harvest, or drag a hose through a too-tight path.
I've seen the same pattern over and over. People overbuild the bed width, underbuild the pathways, ignore the sun angle, and then blame the crops. The yard usually isn't the problem. The layout is. If you want a garden that produces well and still feels easy in July, the plan matters as much as the soil.
Table of Contents
- From Blank Yard to Bountiful Harvest
- Finding the Perfect Spot with Sun and Water
- Designing Bed Dimensions and Pathways
- Planning for Soil and Irrigation Systems
- Arranging Crops for Maximum Yield and Health
- Three Ready-to-Use Layout Templates to Steal
From Blank Yard to Bountiful Harvest
Most raised bed plans start too late. People shop for cedar, corner brackets, and compost first. Then they walk outside with a tape measure and realize the gate swing, downspout, air conditioner, fence line, and afternoon shade all matter more than the bed kit they almost ordered.
A better approach starts with the yard you have. I've laid out productive gardens in clean rectangles, but I've also planned them in side passages, behind garages, around patios, and in corners where nothing looked square. The gardens that work best aren't the most symmetrical. They're the ones that respect how a person moves, where the light falls, and what maintenance will feel like in the middle of the season.
That practical lens changes everything. A narrow side yard might be perfect for a single run of beds with one service path. An L-shaped yard can become two linked growing zones, one for trellised crops and one for herbs and quick harvests. A dead corner can hold a compact bed if you stop forcing a standard template and start designing around reach.
Practical rule: A raised bed garden layout should reduce friction. If harvesting, watering, or weeding feels awkward on paper, it will feel worse in real life.
This is also the moment to decide how intensive you want the garden to be. If you're building a soil system from scratch, layered approaches can save effort and make use of what you already have. For readers exploring sustainable gardening methods, lasagna-style bed building is worth studying before you fill every box the same way.
The goal isn't perfection. It's a garden you can reach, water, and harvest without fighting your own layout.
Finding the Perfect Spot with Sun and Water
A raised bed garden layout succeeds or fails at the site-selection stage. You can fix soil later. You can add trellises later. You can even widen a path later, though it's annoying. You can't easily fix a bed that sits in the wrong light.
Read the sun before you place a single board
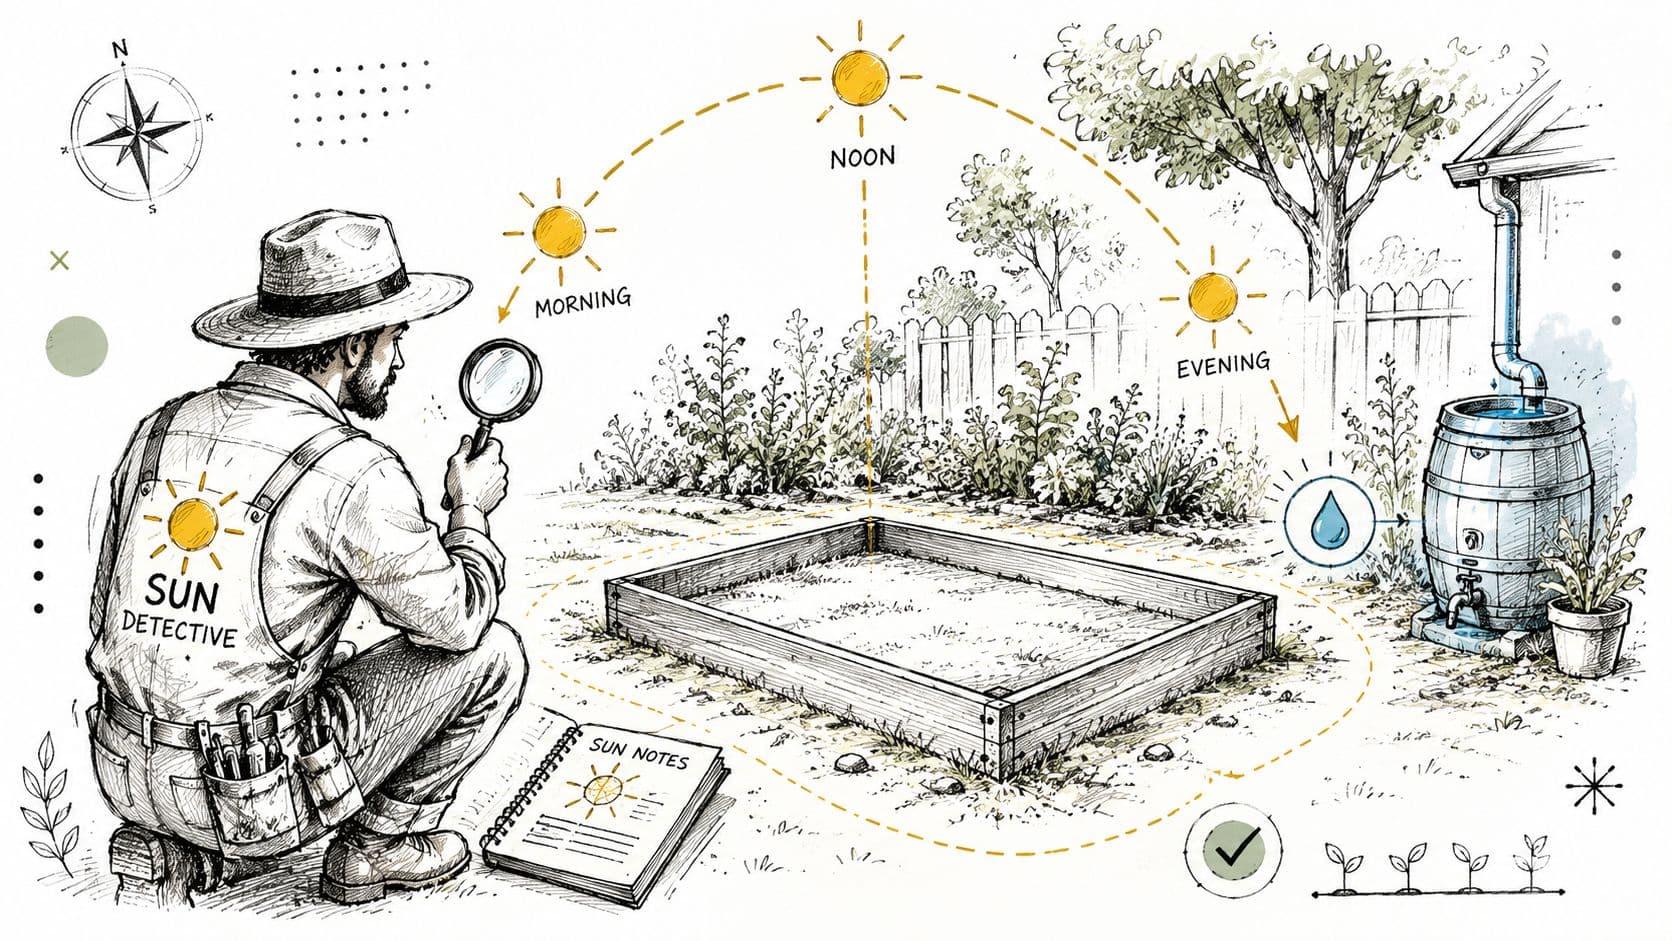
Vegetable gardens need real sunlight, not bright shade. For productivity, most vegetable crops require a minimum of 8 hours of full sun daily, and beds should be oriented from North to South to maximize exposure and reduce shading from taller plants, according to Growing The Home Garden's raised bed layout guidance.
That North-South orientation matters because the sun moves across the sky, and tall crops can ruin a bed if they're placed carelessly. In practice, I treat the north edge as the place for height. Trellised cucumbers, indeterminate tomatoes, corn, and sunflowers belong where they won't cast long shadows over lower crops.
If your yard won't allow a clean North-South setup, don't force the beds into a bad position just to match a drawing. Adjust the planting instead. Put your tallest crops on the north edge of the bed and reserve the sunnier open zones for lower crops, herbs, lettuce, peppers, and bush varieties.
Here's the site-check sequence I use before marking anything:
- Watch the light across the growing season, not just at one hour of the day.
- Flag permanent shade sources like fences, sheds, HVAC screens, and neighboring trees.
- Notice reflected heat from walls, gravel, and pavement. Some crops love it. Some struggle.
- Check grade and runoff so water doesn't pool against one side of the bed.
- Stand where you'll work and picture hose routes, harvest trips, and wheelbarrow turns.
A sketch on graph paper helps because it makes shade and obstruction visible in a way mental planning doesn't.
Choose convenience on purpose
Water access deserves as much attention as sun. If the spigot is inconvenient, people water less consistently. If the hose has to snake across a patio or under furniture, the garden becomes a chore. Beds close to a reliable water source are easier to keep productive.
Level ground is the next quiet deal-breaker. A slight slope can be managed. A strong slope turns one side of the bed into a dry ridge and the other into a wet pocket. If you're building in an irregular yard, especially beside a house, check grade before finalizing shape because side yards often look flatter than they are.
Video walkthroughs can help if you're still training your eye for this kind of planning:
Beds don't need the prettiest spot. They need the spot that gets dependable sun, easy water access, and workable footing after rain.
In tight or awkward spaces, I'd rather choose a slightly less elegant layout in a better microclimate than a perfect geometric arrangement in weak light. Plants care about conditions first. Design comes second.
Designing Bed Dimensions and Pathways
Many promising gardens often fail at this point. The bed dimensions look efficient on paper, but the person who has to weed them can't reach the middle, turn a cart, or kneel without blocking the whole path. Good raised bed garden layout work is half horticulture and half ergonomics.
The width rule that prevents most layout mistakes
The most reliable measurement in raised bed design is 4 feet wide for adult gardeners. That width allows you to reach the center from either side without stepping into the soil, which protects soil structure and root health, according to the University of Georgia CAES raised bed dimensions guide.
That's why I treat 4 feet as a hard limit, not a suggestion. Once a bed gets wider, people start leaning, then stretching, then stepping in. Soil compaction follows, and the bed loses one of its biggest advantages.
For children or gardeners with a shorter reach, 3 feet is the more comfortable width. If a bed sits against a fence or wall and can only be accessed from one side, think in terms of single-sided reach, not what looks balanced from the patio.
Pathways decide whether the garden feels easy or cramped
Paths are usually the first thing people steal space from. That's a mistake. A productive garden still needs room for feet, knees, buckets, hoses, pruners, and harvest baskets.
The same University of Georgia guidance sets these pathway thresholds:
| Use case | Working width |
|---|---|
| Tight-space minimum | 12 inches |
| Comfortable human access | 18 to 24 inches |
| Carts, wheelbarrows, and wheelchairs | 4 feet |
I use the tight minimum only when a short connector path has no better option. For daily working paths, the comfortable range is far more realistic. If you use a wheelbarrow, garden cart, or need accessible circulation, plan for the full width from the start. Retrofitting wider paths usually means tearing out a bed you already filled.
Two trade-offs show up often:
- More bed area, narrower paths: This looks efficient but feels cramped during harvest and cleanup.
- Fewer beds, wider paths: This feels generous and works better for tools, turning radius, and accessibility.
Most homeowners are happier with one less bed and movement that feels smooth.
Sketch first and build second
I still prefer a scale sketch before materials are ordered. It forces discipline. You can test bed lengths, path spacing, and gate clearances without moving a shovel of soil.
For irregular spaces, I start with the fixed constraints and work inward:
- Outline the property edges exactly as they are, including jogs and angles.
- Mark obstacles such as hose bibs, vents, trees, condensers, and steps.
- Lay in pathways first because circulation controls everything else.
- Fit bed widths second so you don't accidentally create a bed you can't reach.
- Reserve service space where trellises, compost bins, or water lines need access.
If you want a faster way to test different configurations before committing to lumber, some of the best garden design software can help you compare layouts visually.
Key takeaway: Beds grow crops, but paths make the garden usable. If a layout only works when nothing is overgrown and no tools are in the way, it's not finished.
Length is more flexible than width, so don't obsess over matching standard kits. In an odd yard, a slightly shorter bed that preserves a clean path is usually the smarter move.
Planning for Soil and Irrigation Systems
A raised bed garden layout isn't finished when the footprint is drawn. The interior of the bed and the watering plan shape how the whole system performs through the season. Practical planning saves money, labor, and a lot of annoyance.
Get the fill plan right before delivery day
Soil buying goes sideways when people estimate by eye. Beds look modest when they're empty, then swallow bag after bag. Before ordering anything, list every bed, note its dimensions, and calculate the volume needed for each one. Even if you're buying in bulk, that worksheet keeps the project grounded.
I like to separate the fill plan into layers and functions rather than treat all bed soil as identical. A bed for root crops needs a looser, stone-free profile than a bed for tomatoes on drip lines. A shallow herb bed can tolerate a leaner blend than a bed expected to feed heavy summer crops for months.
You have two broad options:
- Bagged or bulk raised bed mix: Convenient and consistent. Best when speed matters or access for blending materials is poor.
- Custom layered fill: Better when you want to use compost, yard waste, and amendments intentionally.
If you're building from scratch and want a deeper soil strategy, this guide to healthy planting soil is a useful reference point for thinking through texture, fertility, and drainage.
A layered fill approach works especially well in larger beds. Coarser organic matter lower down, richer planting mix in the root zone, and compost worked into the upper layer gives you a bed that settles more predictably and holds moisture more evenly than random fill.
Match the watering system to the layout
Watering should follow the geometry of the garden. Long straight beds are ideal for drip lines or soaker hoses because the runs stay clean and predictable. Short, scattered beds often tempt people into hand-watering forever, which usually means uneven moisture once summer gets busy.
Here's the simple decision framework I use:
- Hand-watering fits small gardens where you enjoy daily observation and the beds are close to the faucet.
- Soaker hoses are a decent middle ground for straightforward rectangular beds.
- Drip irrigation is the best long-term choice when you have several beds, mixed crops, or want precise control.
For gardeners comparing systems and parts, this resource on efficient garden watering gives a helpful overview of the main irrigation options.
The biggest layout mistake is forgetting where the water lines will travel. If your main supply has to cross a primary walking path, you've created a trip hazard and a maintenance hassle. I prefer to route supply lines along the outer edge of the garden or behind beds, then branch inward only where needed.
Plain planning beats improvisation here. Decide where the hose connects, where the manifold sits, how each bed is fed, and whether you need room to kneel beside a valve or fitting. A bed that's easy to plant but awkward to irrigate won't stay productive for long.
Arranging Crops for Maximum Yield and Health
The physical layout only becomes a real garden when the plants are arranged with intent. The geometry then starts paying you back. A thoughtful raised bed garden layout makes dense planting possible without turning the bed into a tangled, diseased mess.
Build plant layers instead of random rows
Rows make sense in field agriculture. Raised beds work better when you think in layers and zones. Tall plants go where supports won't shade lower crops. Medium plants fill the central production area. Low, quick crops occupy the edges and gaps.
That structure gives each crop enough breathing room while still using the bed intensely. It also makes harvest easier because you can reach what you need without disturbing neighboring plants.
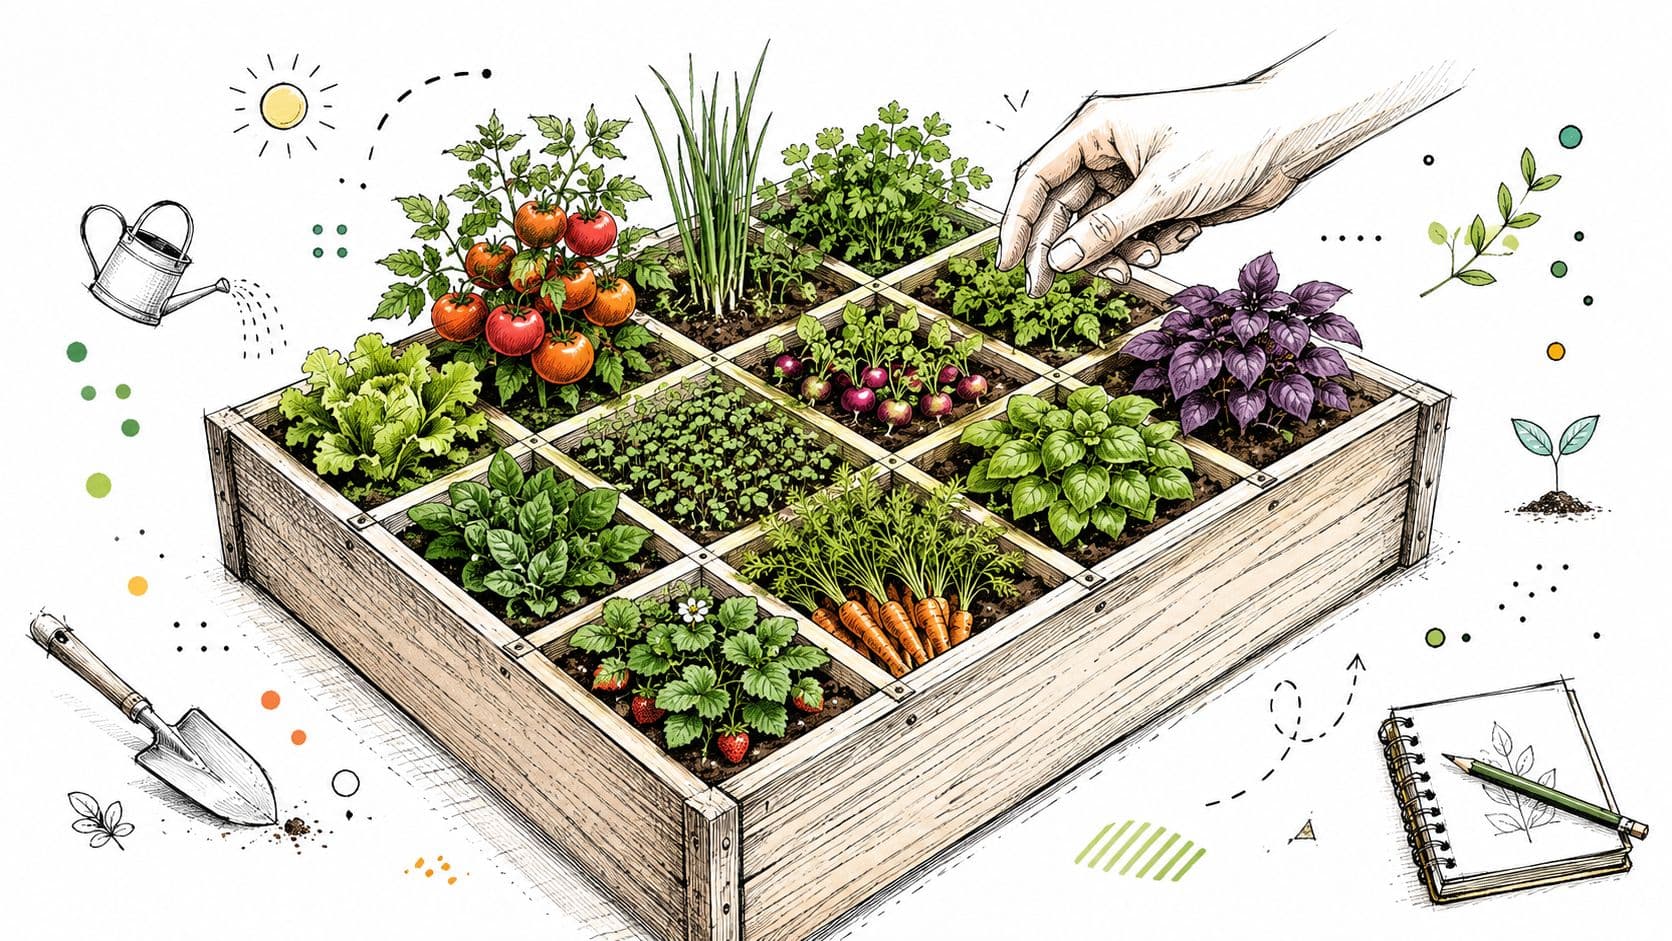
A practical arrangement often looks like this:
- Back or north edge: Trellised tomatoes, cucumbers, beans, or other vertical crops.
- Middle band: Peppers, basil, bush beans, chard, kale, or similar medium growers.
- Front edge and pockets: Lettuce, onions, radishes, parsley, cilantro, or other quick crops.
This is also why I prefer sturdy trellises built into the plan instead of added later. Once vines and indeterminate plants get moving, you want the support already in place. Retrofitting cages into a crowded bed usually damages roots and turns maintenance into a wrestling match.
A bed can be productive and still look clean if each crop has a role. The messiest raised beds usually weren't overplanted. They were underplanned.
Use rotation and companions without making it complicated
Crop rotation sounds complicated until you reduce it to movement by plant family. Don't put the same family in the same bed year after year if you can avoid it. Move heavy feeders, pest-prone crops, and disease-prone crops to a different bed next season. Even a simple rotation helps interrupt recurring problems.
I keep it practical:
| Bed this year | Move next year |
|---|---|
| Tomatoes and peppers | Leafy greens or roots |
| Beans and peas | Fruiting crops |
| Roots and onions | Herbs or greens |
That level of planning is enough for most home gardens. You don't need a giant spreadsheet. A notebook sketch works fine.
Companion planting is useful when it serves layout and plant health, not when it becomes folklore. Basil near tomatoes is a sensible pairing because their care needs align and they're harvested on a similar rhythm. Marigolds can be scattered through beds where you want visual markers and extra diversity. Herbs near path edges make harvesting easier and keep fragrant foliage where you'll brush past it.
Put plants together because their size, support needs, harvest timing, and water use make sense together. That's the version of companion planting that holds up in real gardens.
One more trade-off matters here. Dense planting suppresses weeds and makes good use of bed space, but only if airflow is preserved. If leaves overlap so heavily that the center never dries well after watering, the bed becomes harder to manage. Productive doesn't mean packed at any cost.
Three Ready-to-Use Layout Templates to Steal
Awkward spaces stop feeling like a disadvantage. Standard bed plans often assume a clean rectangle, but gardeners with odd lots, corner plots, and side yards know that's not real life. One major gap in common advice is layout planning for non-standard, irregular yard shapes such as triangles, L-shapes, and narrow corridors, where people often waste 20 to 30 percent of usable area, as discussed in this raised bed layout conversation about non-square spaces.
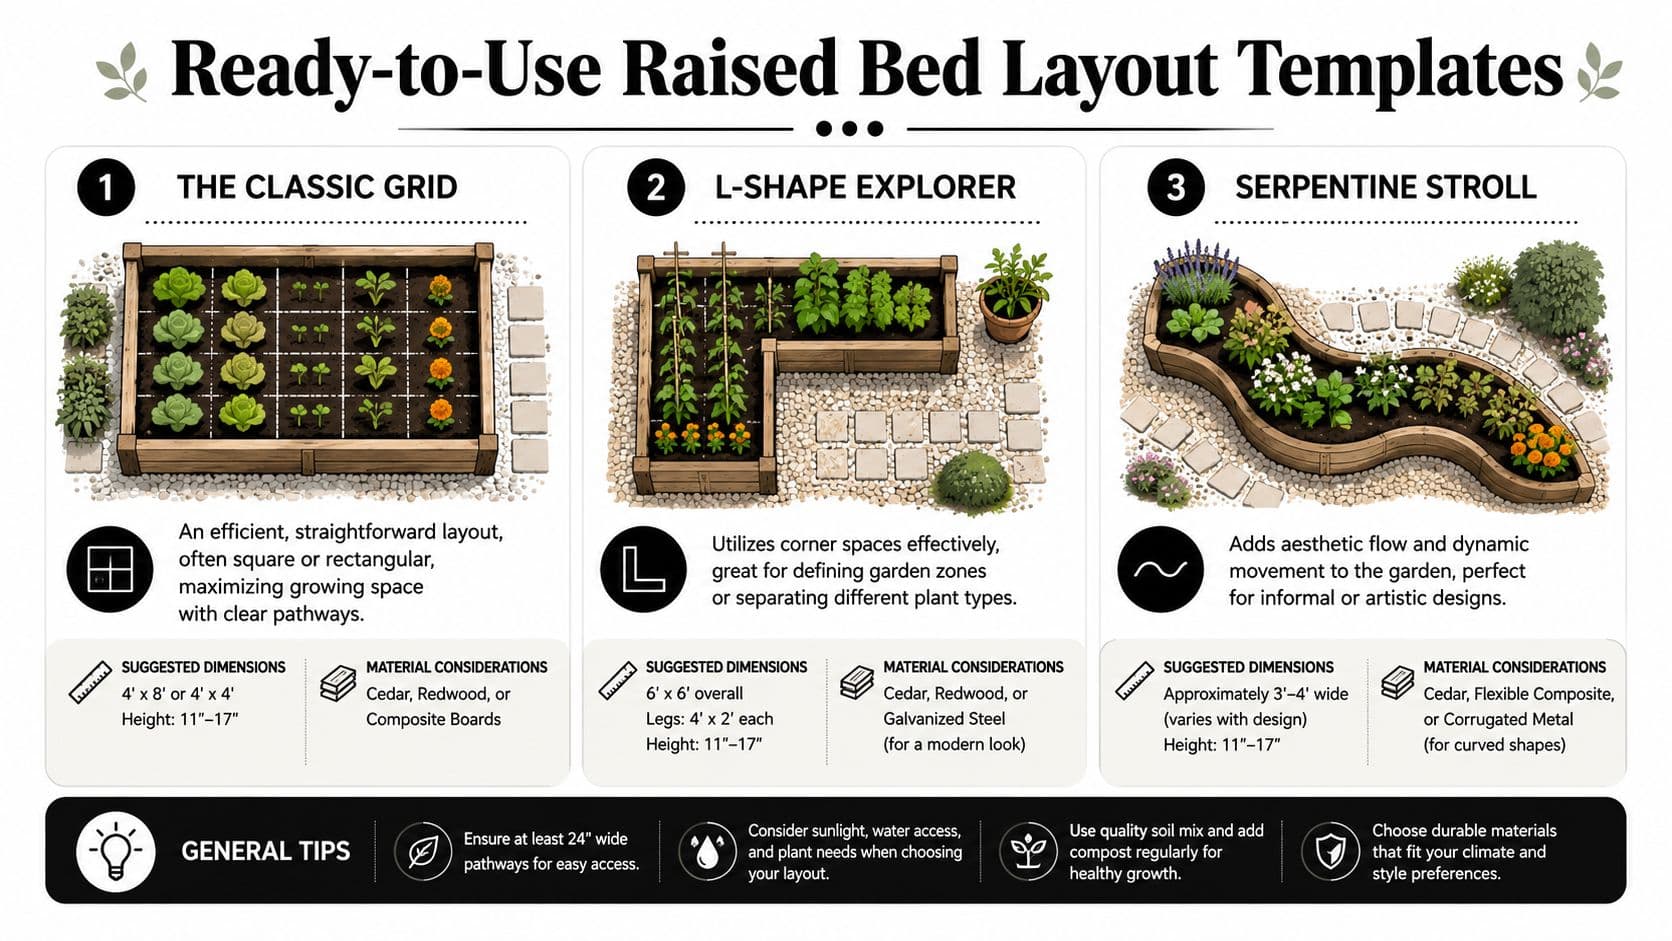
The Classic Duo
This is the dependable starter layout for a rectangular sunny zone. Use two beds, each kept within the standard reach-friendly width, with one main working path between them and outer access where possible.
Why it works: it's easy to irrigate, easy to net, and simple to rotate crops through. One bed can carry tall summer crops while the other handles lower, faster plantings.
The Efficient U-Shape
This layout suits a corner yard or fenced nook. Three beds form a U around a central work area, leaving the open side as the main entry. The middle space becomes your turning and staging zone for a bucket, stool, or cart.
Why it works: it creates strong access without wasting the corner. It also gives you natural zones, with one side for trellised crops, one for kitchen herbs and greens, and one for rotating seasonal vegetables.
The Puzzle Solver
This is the template I reach for in L-shaped yards, narrow side passages, or odd leftover strips along fences. Instead of forcing matching beds, break the space into linked segments. Use straight runs where access is clean, then smaller connector beds where the shape turns.
Why it works: it respects the footprint instead of fighting it. In awkward spaces, that usually beats any standard kit layout. If you're looking for inspiration beyond basic rectangles, this article on planning your dream yard with templates can help you think in modular zones rather than one rigid shape.
The best template is the one that makes the yard easier to use, not the one that looks most formal from above.
If you want to test raised bed layouts in a photo of your actual yard before buying materials, OutdoorBrite Money makes that process much easier. You can visualize different bed arrangements, styles, and planting zones quickly, which is especially useful when your space isn't a simple rectangle and you want to avoid expensive layout mistakes.
See your yard reimagined
Start creating