Redesign My Backyard How to Plan and Visualize It
Want to redesign my backyard without costly mistakes? Follow this step-by-step guide to plan, budget, visualize and build your ideal outdoor space.
You're probably standing at the back door looking at a yard that isn't awful, but also isn't working. Maybe the patio feels too small, the grass turns to mud near the downspout, the kids cut through planting beds, or you've saved twenty screenshots and still can't tell what would fit your space.
That's the point where many folks type redesign my backyard into a search bar and start shopping too early. They price pavers, compare pergolas, or buy shrubs because they looked good in someone else's photo. Then the genuine problems show up later. The dining set blocks the path from the kitchen. Water drains toward the new patio. The yard looks styled in pictures but feels awkward on a Tuesday night.
A backyard redesign works better when you treat it like a layout problem first, a materials problem second, and a shopping problem last. The fastest way to get clarity is to test ideas on your own yard before you commit to plants, hardscape, or a contractor.
Table of Contents
- Why Most Backyard Redesigns Go Off Track Before They Start
- Take Stock of What You Already Have
- Map Your Layout Into Zones That Actually Get Used
- Choose a Style and Materials That Fit Your Climate and Lifestyle
- Visualize Your Ideas and Build a Realistic Budget and Timeline
- Final Checks and Tips to Keep Your Redesign on Track
Why Most Backyard Redesigns Go Off Track Before They Start
Saturday morning starts with good intentions. By Sunday night, there is a fire pit kit in the cart, two paver samples on the counter, and a saved photo of a pergola that would swallow half the yard.
That is how backyard projects drift off course. The problem usually is not bad taste. It is buying pieces before the layout is tested against the yard you have.
I see it on real lots all the time. A homeowner wants dining near the kitchen, a small lounge area, a patch of grass for the dog, some screening from the neighbor, and better lighting. All reasonable. But once those ideas land in a small or average backyard, the trade-offs show up fast. Circulation gets pinched. Drainage gets ignored. The patio grows by a few feet and suddenly there is no room left for planting that softens the edges.
Inspiration is not the same as fit
Photos are useful for taste. They are weak at showing scale, slope, and how people move through a space.
A clean modern patio from one image, loose cottage planting from another, and a tropical privacy screen from a third can all look great on their own. Put them into a yard with afternoon shade, a wet low corner, and a narrow side access path, and the design starts fighting itself. The mistakes are usually small. A bench blocks the natural route to the gate. Gravel ends up where runoff collects. A hedge goes in where it cuts off the only pleasant evening light.
A backyard can look polished in a photo and still be awkward to use every day.
The fix is simple in principle and often skipped in practice. Test ideas on photos of your own yard before you price materials or call in installers. Photo-based AI concepts can help you compare a wider patio against a planting bed, see whether a pergola makes the space feel grounded or crowded, and show a contractor what you mean without relying on vague inspiration shots. If you need help sorting out the basic framework first, these tips for planning a landscape layout are a useful starting point.
Early planning protects your budget
Backyard work gets expensive when corrections happen after installation starts.
The common cost problems are not dramatic design failures. They are revisions that could have been caught earlier. Moving a patio because water drains toward the house. Regrading for a sitting area that was placed in the low spot. Replacing plants that looked right in a photo but outgrow the space or struggle in the available light. None of that feels ambitious when you buy it. It feels expensive when you redo it.
Good planning does not mean freezing every detail on day one. It means getting the big decisions right first. How the yard will be used. Where people will walk. Which areas need shade, screening, or drainage work. What can stay. What has to move.
What a solid start looks like
The best redesigns feel settled before anything is ordered. The layout makes sense. The style has a clear direction. The hardscape and planting choices fit the site instead of borrowing ideas from yards with different conditions.
That is the point of slowing down at the beginning. A clear visual plan for your actual yard prevents impulse purchases, exposes trade-offs early, and gives contractors something concrete to price and build.
Take Stock of What You Already Have
A lot of backyard projects get more expensive because the yard was never read correctly in the first place. Homeowners buy a patio set, fall for a fire pit placement in a saved photo, then find out that spot stays wet after every storm or bakes in late afternoon sun. Start with the site you have and document it before you price materials or call for bids.
A phone, a notebook, and one careful walk-through will do more for the plan than another hour scrolling inspiration galleries. The useful step is to photograph your own yard from several angles and mark what those photos show. That gives you something concrete to test with photo-based AI concepts later, so you can compare layouts and material directions on your real lot instead of guessing from someone else's backyard.
Walk it at different times of day
One visit is not enough. Check the yard in the morning, late afternoon, and again after a rain if you can.
Light, heat, glare, and water movement change more than people expect. I have seen plenty of good-looking patio locations fail because dinner hour sun was too harsh, or because the low corner of the yard held water for two days after a storm.
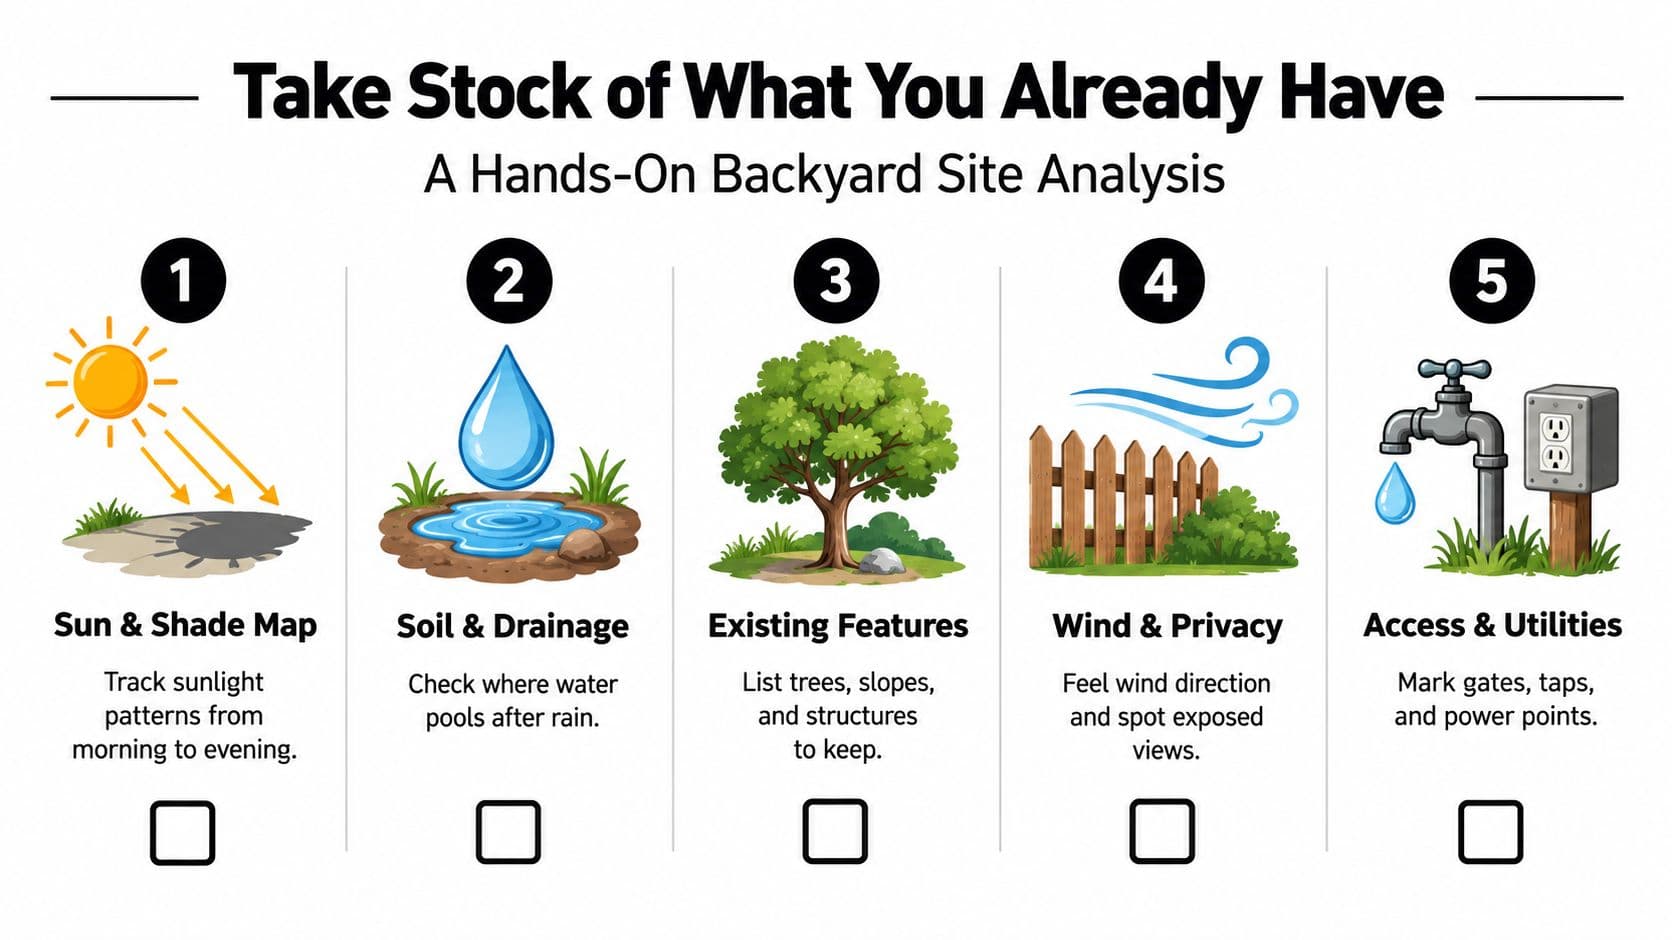
Make a rough sketch and note what the site is doing:
- Sun and shade: Mark where you get full sun, where heat builds in the afternoon, and where trees or fences create consistent shade.
- Wet spots: Note pooling, runoff paths, soggy beds, and any place water sits near the house or crosses a walkway.
- Slope: Even a mild grade affects drainage, furniture stability, and whether steps or retaining edges will be needed.
- Views in and out: Stand at the back door and at any place you might sit. Mark what deserves screening and what should stay open.
- Noise and wind: Fence corners and side yards often look usable on paper but feel exposed once wind or street noise is part of the picture.
Take photos from the house looking out, then from the back fence and corners looking back. Those reverse views are especially helpful when you start testing ideas with AI mockups, because circulation problems and awkward patio proportions show up fast in a real photo.
Mark what stays and what goes
Do not assume a redesign means clearing everything out. In average lots, the best budget move is often keeping the pieces that already work.
A healthy shade tree, a fence with years of life left, a slab that is structurally sound, or a hose bib in the right location can save real money. Demolition feels decisive, but it usually creates extra cost in hauling, grading, replacement materials, and irrigation changes.
Use a simple keep, move, remove list:
| Existing feature | Keep | Move | Remove |
|---|---|---|---|
| Mature trees | If healthy and well placed | Rarely practical | Only if unsafe or in direct conflict with the plan |
| Patio or slab | If sound and usable | Not realistic | If poorly located or failing |
| Raised beds | If they get enough sun | Sometimes | If they block circulation |
| Lawn area | If it serves play or pets | No | If it's decorative but high maintenance |
| Storage items | If needed | Often | If they dominate prime space |
One rule holds up on real projects. If an existing feature already solves a job well, shade, privacy, access, drainage separation, keep it unless replacement gives you a clear payoff.
Look at water and irrigation early
Drainage work is cheap before installation and expensive after. Check where downspouts empty, where runoff leaves the roof, whether paving pitches toward the house, and which areas stay soggy or dry too fast.
Irrigation needs the same attention. A technically sound review starts by mapping each station, checking for leaks or obvious faults, measuring precipitation rate and distribution uniformity, and building a water budget by hydrozone before setting the schedule, as outlined in this extension guidance. That same guidance notes that grouping plants by similar water needs and separating irrigation zones has the biggest impact.
This is also where your yard photos become useful beyond note-taking. A photo set that shows wet areas, slope, sunny walls, and existing utilities makes it much easier to test concepts, explain priorities to a contractor, and avoid paying for a layout that fights the site.
Map Your Layout Into Zones That Actually Get Used
Once you know the site, start organizing it by use. A backyard goes from vague wish list to something people can live in.
Houzz reports that 72% of homeowners are making outdoor feature projects in 2026, with 83% of renovated outdoor spaces including a lounge or seating area and 55% including a dining area. The same report notes that system projects rose to 36% since 2024, which helps explain why more backyards are being planned as coordinated zones instead of one open lawn in Houzz's 2026 outdoor remodeling trends coverage.
Stop designing one surface for every activity
A lot of average-size yards get overbuilt because people try to make one big patio do everything. Dining, lounging, kids' play, grill storage, container plants, and circulation all land on the same slab. It feels crowded fast.
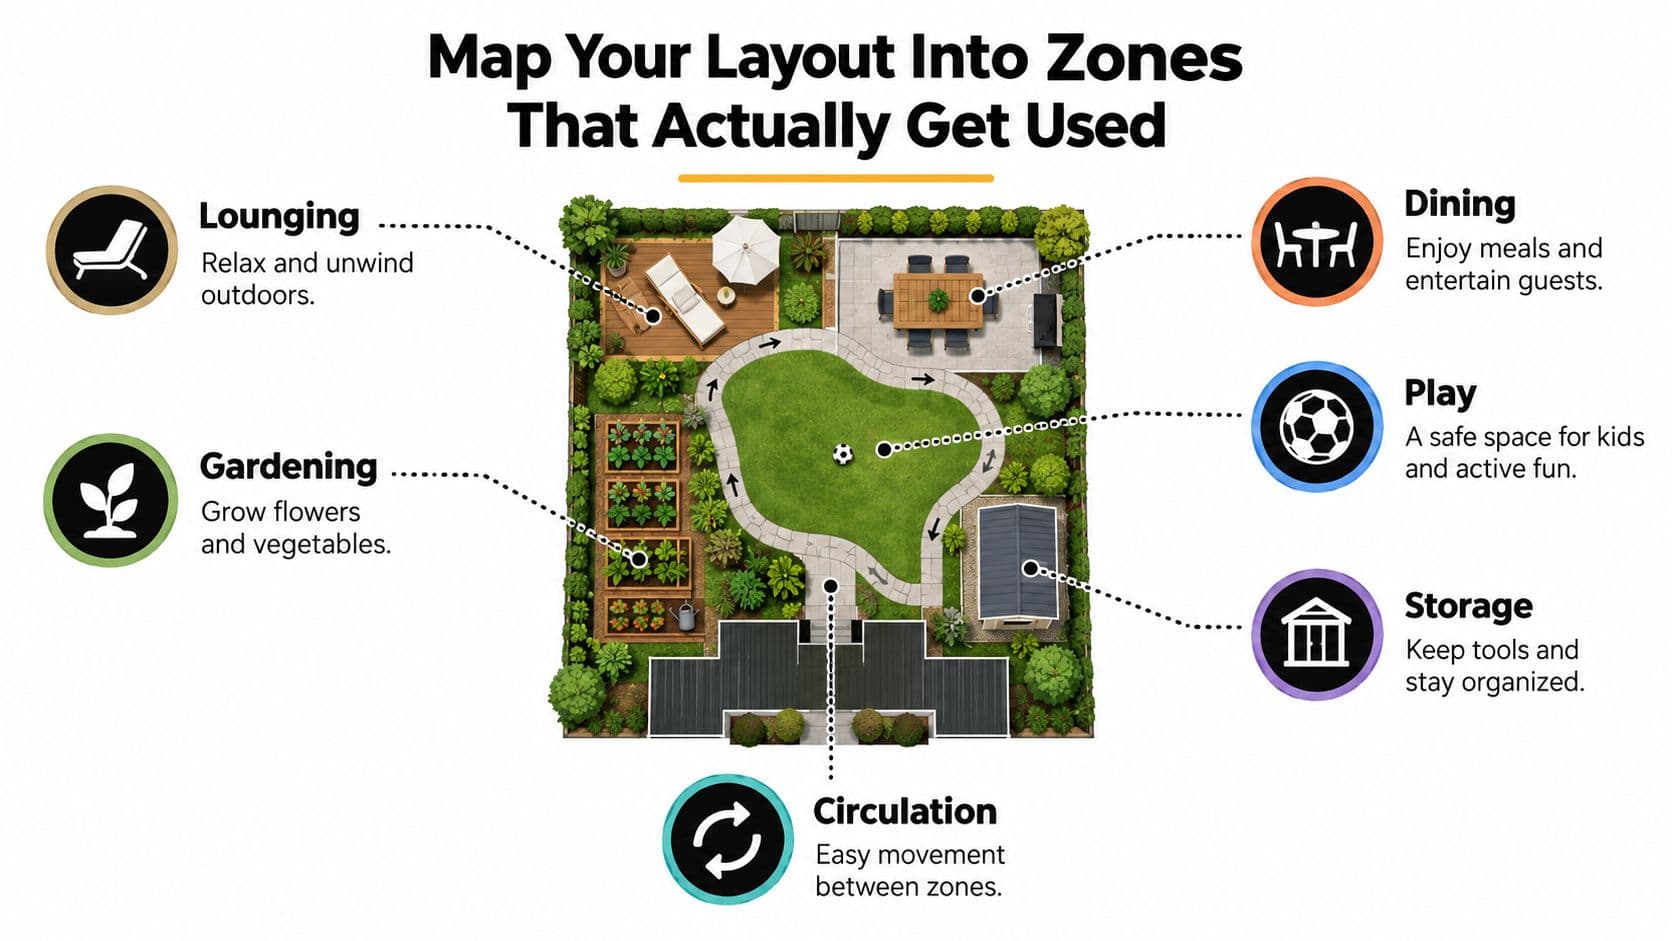
Most yards work better when divided into a few clear zones:
- A near-house zone for dining, grilling, and easy access from the kitchen.
- A comfort zone for lounging, shade, and evening use.
- A flexible zone for kids, pets, lawn, or open movement.
- A service edge for storage, bins, tools, and utility access.
- A planting buffer that softens boundaries and creates privacy.
The trick isn't adding more things. It's separating uses enough that they stop competing.
Size zones for real furniture and movement
People often sketch a patio rectangle and assume furniture will fit. Then the chairs need more room, the grill lid opens into the path, and every route to the yard cuts through the table.
A quick reality check helps. Tape out furniture sizes on the patio or lawn with a hose or chalk. Then walk through it while carrying a tray, opening an umbrella, or pretending two people are passing each other. Awkward circulation usually shows up immediately.
For entertaining layouts, it helps to think like an event planner for a minute. If you host often and want help picturing how guests circulate around seating and dining, this guide on how to arrange tables for a party gives practical spacing ideas you can adapt to everyday backyard use.
If you want more planting-specific ideas while refining the layout, these effective garden design strategies can help tie bed shapes to circulation and views.
Put comfort where it matters most
Privacy and shade usually matter more than one extra decorative bed.
Yardzen reported year-over-year growth in privacy-focused elements and shade or cooling features, which lines up with what homeowners ask for in real projects. People want a yard that works in heat, for family life, and for evening use. They're less interested in empty decorative lawn than they were a few years ago.
A few placement rules usually hold up well:
- Dining wants convenience: Keep it close to the house and grill access.
- Lounging wants comfort: Place it where afternoon sun can be filtered or blocked.
- Play wants visibility: Parents usually prefer it within easy sight from seating or kitchen windows.
- Privacy wants targeting: Screen only the views that matter. Don't wall off the whole yard unless you want it to feel smaller.
Here's a helpful walkthrough before you commit to the final arrangement:
Run the circulation test
Before calling the layout done, walk these routes on your sketch or in the yard itself:
- Back door to dining
- Back door to storage or trash access
- House to play space
- Seating area to garden or side yard
- Any path used after dark
If any route forces people through furniture, across muddy lawn, or around sharp hardscape corners, adjust it now. Good circulation is what makes a backyard feel bigger than it is.
Choose a Style and Materials That Fit Your Climate and Lifestyle
Style should change how the yard feels, not fight how it needs to function. A backyard can be modern, cottage, Mediterranean, tropical, Japanese-inspired, or xeriscape-leaning. What matters is whether the materials, planting, and upkeep match your climate and your tolerance for maintenance.
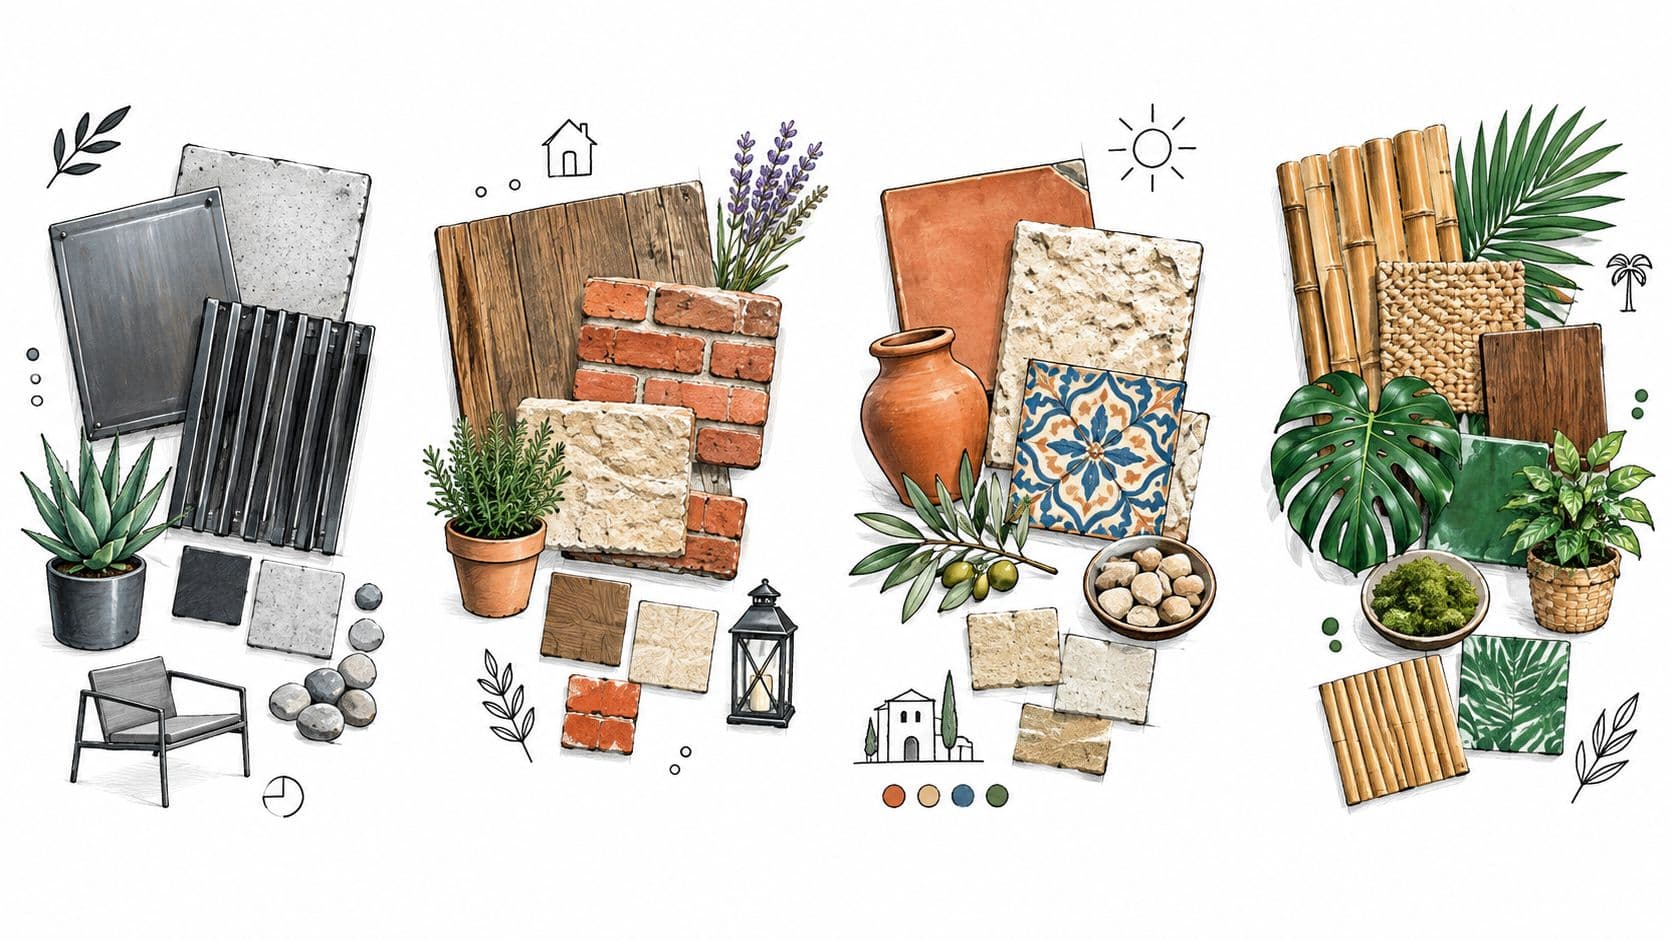
Style choices look different once maintenance enters the conversation
Some styles are forgiving. Others only look good when regularly maintained.
Here's the practical version:
| Style direction | Usually works well when | Common weak point |
|---|---|---|
| Modern | You want clean lines, fewer plant varieties, and crisp hardscape | Looks stark if planting is too thin |
| Cottage | You like softer edges and layered planting | Can look messy fast without editing |
| Mediterranean | You need heat tolerance and textured materials | Wants the right plant palette to feel authentic |
| Tropical | You have warmth, shelter, and enough water | Struggles in exposed or dry sites |
| Japanese-inspired | You want calm structure and restraint | Every material choice becomes highly visible |
| Xeriscape | You want lower water use and durability | Can feel bare if not layered carefully |
The mistake isn't choosing any one of these. The mistake is copying the look without the plant logic and material logic behind it.
Planting versus hardscape is the real trade-off
Many redesigns either become easy to live with or expensive to maintain.
Houzz found that in 2026 the share of homeowners replacing original lawns with natural grass fell to 63%, down 9 percentage points since 2024, while Yardzen reported a 23% year-over-year increase in requests for native planting, pollinator gardens, and climate-adapted species in Houzz's 2026 outdoor trends report. That lines up with what many homeowners want now. Less thirsty lawn, fewer fussy beds, and more planting that can handle heat and busy schedules.
Some useful trade-offs to weigh:
- More lawn: Softer for play, simpler visually, but often higher water and mowing demands.
- More planted area: Better habitat and softer appearance, but it needs smart grouping and editing.
- More hardscape: Cleaner year-round use and less mud, but it can intensify heat and runoff.
- More mulch: Flexible and budget-friendly, though too much of it can look unfinished if not anchored by structure.
A polished low-maintenance yard doesn't come from removing plants. It comes from using fewer plant types, larger repeated groupings, and stronger edges.
Be careful with impermeable surfaces
Patios, paths, and pads are useful. Too much directly connected hardscape creates drainage problems quickly.
A stormwater report citing a Perris Valley, California study found that increasing impervious cover from 9% to 22% caused peak flow to rise by over 100% and runoff volume by up to 130% according to this technical stormwater report. The same report recommends minimizing directly connected impervious area, routing runoff onto permeable receiving areas, and using depressed lawn or infiltration zones where safe. It also notes that a disconnected pervious area should be at least one-half the area of the impervious area it drains, and depressed lawn areas should generally not exceed 6 inches in depth for safety.
That's the technical basis for a very practical rule. Don't pave more area than your site can absorb.
Material choices should match local weather
Material failure is usually predictable. Slick stone in shade, scorching dark pavers in full sun, loose gravel where chairs need stability, wood where moisture stays trapped. Those aren't bad materials. They're bad fits.
If you're deciding between raised and ground-level outdoor surfaces in a colder region, this breakdown of a deck or patio for PA climate is a helpful example of how freeze-thaw, drainage, and maintenance can shift the choice.
A few material habits tend to age well:
- Use permeable or semi-permeable surfaces where runoff is a concern.
- Choose one main hardscape material and one accent. Too many finishes make small yards feel busy.
- Repeat plant masses instead of collecting one of everything.
- Use mulch as background, not the whole design language.
Visualize Your Ideas and Build a Realistic Budget and Timeline
A backyard project usually gets expensive the moment the homeowner, designer, and installer are each picturing a different yard.
Words are too loose for layout decisions. “A patio, some privacy planting, maybe a fire pit” leaves too much room for interpretation. A photo of your actual yard gives you something real to react to before money starts going out. You can see the fence line, the house windows, the slope, the cramped corner by the gate, and the spots that only look usable on paper.
Use visual concepts to test the hard choices
Photo-based concepts are useful because they answer the questions that inspiration galleries cannot.
- Does the patio fit the yard, or does it eat the whole middle?
- Does a pergola give the space structure, or make it feel boxed in?
- How much screening do you need before it feels private?
- Does the new style belong with the house, or look dropped in from somewhere else?
- What happens to the yard's feel if lawn area shrinks?
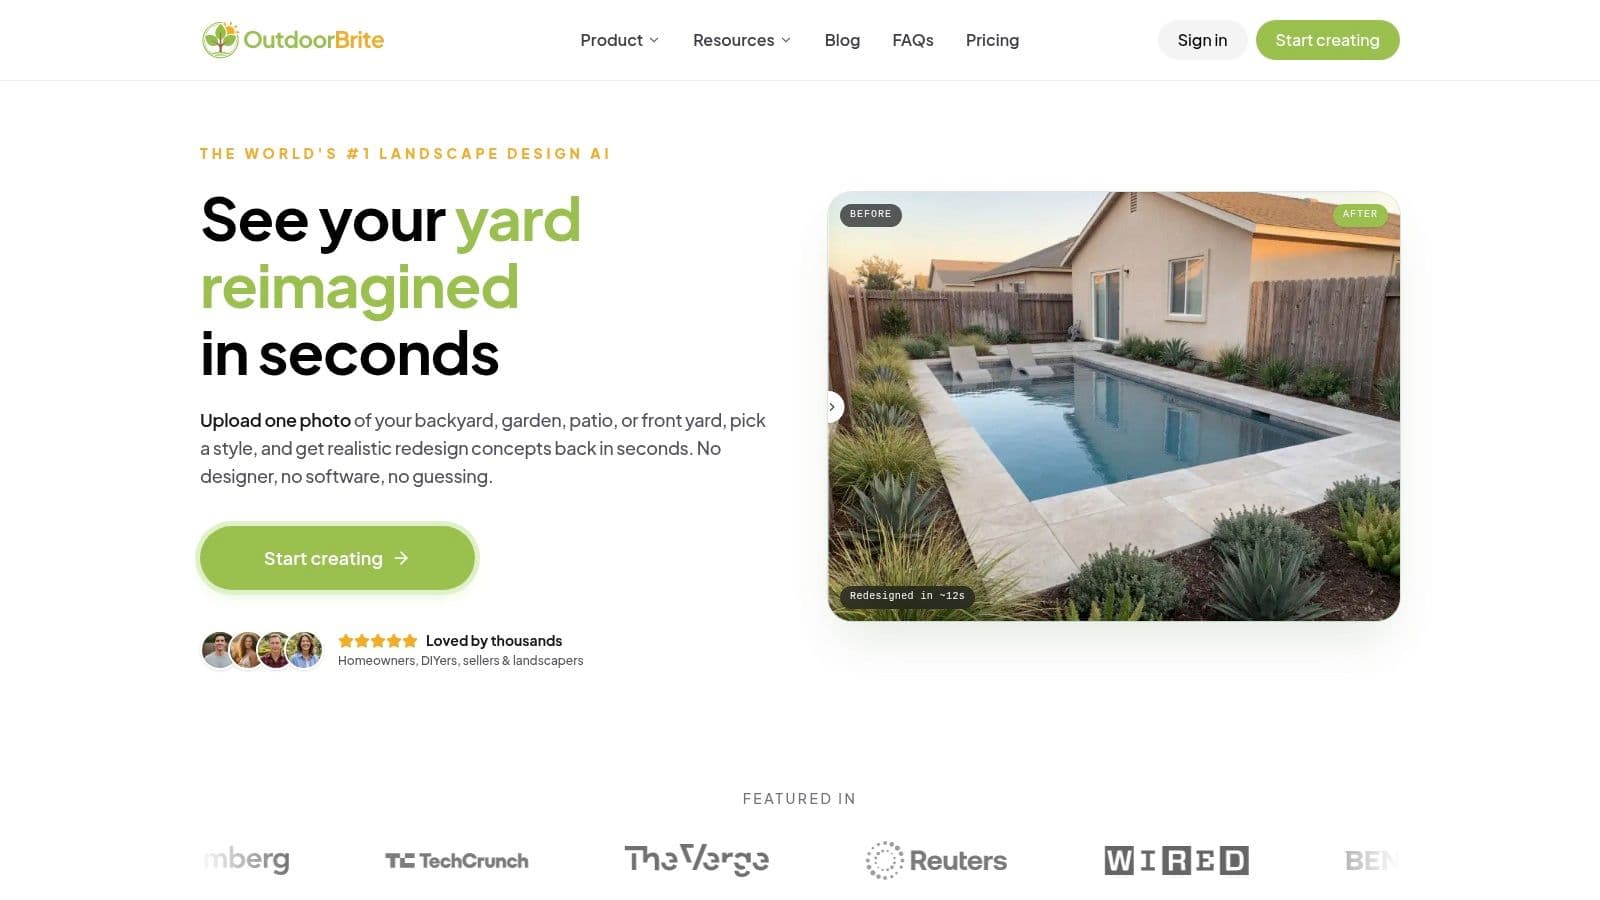
One practical option is OutdoorBrite, which lets you upload a photo of your yard, choose a style such as modern, cottage, Mediterranean, tropical, Japanese zen, or xeriscape, and generate redesign concepts of that same space. It also includes an elements editor for adding features like fire pits, pergolas, and planting beds so you can compare different directions before buying materials or requesting bids.
If you want to compare tool types before choosing one, this guide to the best free garden design software is a useful starting point.
Translate the image into a buildable scope
A concept image only helps if you turn it into decisions. I usually tell homeowners to mark up the version they like most and label what stays, what goes, and what must be built now versus later.
Create a one-page scope sheet with four parts:
-
Hardscape list
Patio expansion, paths, edging, steps, retaining pieces, gravel areas, pergola footing area. -
Planting list by zone
Privacy screen, foundation planting, focal plants, low border beds, lawn or lawn alternative. -
Systems list
Irrigation changes, drainage corrections, lighting, electrical needs. -
Furniture and accessory list
Dining table, lounge seating, umbrellas, storage, containers.
That shift matters. Contractors can price defined work. They cannot price “make the yard nicer” without filling in blanks their own way.
Budget for the yard you can build
Backyard budgets usually go sideways because the visible items get counted first and the hidden work gets ignored. Base preparation, demolition, hauling, drainage corrections, irrigation changes, and electrical runs often decide whether the project still feels affordable once bids come in.
The cost spread can be wide, as noted earlier in the article. A light refresh stays in one bracket. A full redesign with new hardscape, grading, planting, lighting, and utility work sits in another. The gap between those two is where many plans stall.
A simple framework helps:
| Budget approach | What it usually means |
|---|---|
| Light refresh | Paint, containers, mulch, furniture edits, selective planting |
| Mid-scope upgrade | Patio adjustment, focused planting, privacy work, lighting, irrigation corrections |
| Full redesign | Layout change, new hardscape, drainage work, systems, planting overhaul, major features |
Keep a contingency line for site surprises. In older yards, those surprises are common. Buried roots, shallow utility lines, broken sprinkler pipe, poor base under an old patio, and extra hauling all show up after work starts, not before.
Bring a contractor one clear concept, one dimensioned sketch, and one written scope. That cuts down confusion and reduces change orders.
Build a timeline that respects sequencing
Good projects follow the order the yard requires, not the order the finished materials are easiest to shop for.
Drainage and grading happen first. Then come demolition and rough layout work. Irrigation sleeves, lighting conduit, and any underground runs should be in before final surfaces and planting go in. Furniture and decorative pieces come last.
If the project needs phasing, use this order:
- First phase: Drainage correction, grading, demolition, core hardscape footprint
- Second phase: Irrigation, lighting, major planting beds
- Third phase: Furnishings, decorative containers, optional extras
That sequence avoids paying twice for the same labor and keeps each phase usable on its own.
Final Checks and Tips to Keep Your Redesign on Track
Projects usually drift at the handoff between planning and work. The concept looks settled on paper, then one missing measurement, one vague instruction, or one skipped drainage note turns into a change order, a delay, or a result that never felt right in the first place.
I see this often in small and average backyards. Homeowners make solid decisions on style and budget, but they do not pressure-test the plan against the actual yard before materials are ordered. A photo-based concept helps here because it forces clear choices early. You can see whether the patio is too dominant, whether the bed lines feel cramped, or whether a privacy screen steals more usable width than expected.
Review the essentials before work starts
Do one final yard walk with a short checklist in hand, not from memory.
- Drainage check: Confirm where runoff goes once new paving, edging, or raised beds are added. If water gets trapped against the house or a fence line, correct that first.
- Irrigation check: Match watering zones to actual plant needs. Turf, shrubs, and pots rarely perform well on the same schedule.
- Measurement check: Recheck patio depth, path width, gate swing, step spacing, and furniture clearance.
- Protection check: Mark roots, trunks, drain inlets, utility runs, and any area that should stay out of heavy equipment traffic.
- Phasing check: Decide what gets built now and what can wait, so the yard still looks finished enough at each stopping point.
Work with contractors in a way that reduces surprises
Clear documents beat loose descriptions every time. “Low maintenance” can mean gravel and sparse planting to one contractor, or dense evergreen screening with drip irrigation to another.
Bring the same set of materials to every quote meeting:
- A photo-based concept of your actual yard
- A simple sketch with key dimensions
- A written priority list
- Material choices you already know you want
- A note showing what stays and what goes
That package makes pricing tighter and scope gaps easier to spot. It also helps contractors tell you where the trade-offs are, such as choosing between a larger patio and enough planting depth to soften the edges.
If part of the yard includes a play or sports area, sizing matters more than people expect. The Backyard Hoop Reviews guides are useful for checking clearances before you commit part of the yard to a pad, court corner, or recreation zone.
Protect the first season after installation
A new backyard needs observation. Plants settle in, irrigation needs tuning, and foot traffic reveals whether the layout works the way it looked in the concept.
Watch for three things. Where people sit and gather. Where water still lingers after rain or irrigation. Which spots take more upkeep than the budget or schedule supports.
Early corrections are usually manageable. Reworking settled pavers, mature planting, or finished edging is where costs climb fast.
If you want to test ideas on your own yard before committing to plants, pavers, or bids, OutdoorBrite lets you upload a backyard photo and generate realistic redesign concepts in different styles. That makes it easier to compare layout options, hardscape balance, and feature choices before you hand a contractor a scope.
See your yard reimagined
Start creating